
ネクロバインダー
Necrobinder
ネクロマスタリーコンボビルド

Necromastery Combo Build
Build Overview
A combo build centered on Necromastery (Osti's HP Loss is converted into equal damage dealt to all enemies). Deliberately raise Osti to high HP, trigger a large HP Loss, and detonate it across the board through Necromastery for massive AoE damage. Right after Resurrect restores Osti to 25 max HP, Bone Shards or Sacrifice consumes Osti and Necromastery fires off up to 25 AoE damage. Paired with Sacrifice, you get a 50 Block + 25 AoE combo in a single efficient line. A management-style build that loops "Resurrect, combo, Resurrect" rather than relying on single big hits.
Tier: A
The core combo — Necromastery plus Resurrect plus Bone Shards or Sacrifice — is easy to assemble and extremely cost-efficient. Gaining up to 50 Block while dealing 25 AoE for a cost-1 Sacrifice is an ideal offense-and-defense play. Resurrect's Exhaust (once per combat) limits its reuse, but Pyre lets you copy the Exhausted card, and Scavenge pulls it back from discard — so you effectively use it multiple times. Easy to transition into the Doom or Osti-attack plan, making this a flexible backbone build.
Key Cards (Essential)
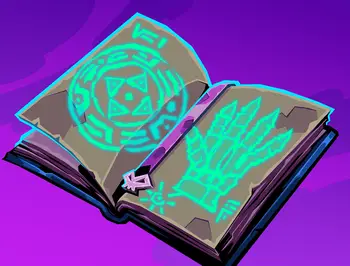
- Necromastery: Cost 2 Power. Once placed, every time Osti loses HP, all enemies lose the same amount (ignores Block). The core of the build and an inventive way to turn Osti HP management into offense
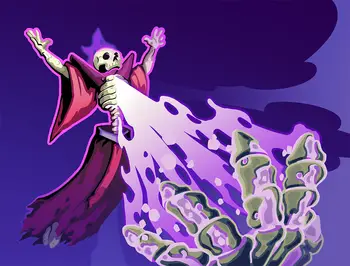
- Resurrect: Cost 3. Exude to grant 20-25 summon in one burst. After placing Necromastery, top Osti up and then trigger HP Loss through Bone Shards or Sacrifice to burst 25 AoE damage
- Sacrifice: Cost 1 Retain. Spends Osti for Block equal to 2x Osti's max HP. With Necromastery, it becomes Block + AoE damage in one card — 50 Block plus 25 AoE after a Resurrect is the signature line
Candidate Cards
- Bone Shards: Cost 1. Spends Osti for 9 AoE damage and 9 Block. With Necromastery placed, the Osti HP Loss adds to the AoE damage, so 9 damage plus Osti HP is the real total
- Bodyguard: Cost 1 for 5-7 summon. An emergency re-summon after Resurrect or Osti consumption, quickly refilling Osti HP
- Cheer: Cost 1 Retain summon 3 plus heal 5. Stable Osti HP maintenance — always keeps the HP pool high for Necromastery plays
- Unleash: Cost 1 attack dealing extra damage equal to Osti's current HP. Use right after Resurrect for explosive output. A strong secondary damage source for a Necromastery deck
- Protector: Cost 1 attack dealing extra damage equal to Osti's max HP. Chain after Resurrect alongside Unleash for high sustained damage
- Scavenge: Skill that pulls 3 cards from discard. Pair with Grave Explosion or Scavenge itself to reclaim Resurrect from discard, improving the combo's reusability
- Bone Legion: Immediate 6 summon. Fills the role of emergency re-summon after Osti is consumed
- Ghost Ritual: Cost 2 skill that Exudes your entire hand. Thins the deck hard so the next draw likely contains the combo pieces
- Wring Out: A cost-heavy finisher dealing 5 damage per Osti attack card in the deck. After Necromastery's HP-Loss hit, add Wring Out for another spike
Relic Synergies
- Freed Ghost Box: Necrobinder-exclusive relic granting 5 summon at combat start and 2 summon each turn start. Osti's HP rebuilds automatically even without Resurrect — the strongest relic for stabilizing this combo cycle
- Sealed Ghost Box: Necrobinder-exclusive relic granting 1 summon at turn start. Keeps Osti topped up after Resurrect Exudes and bridges to the next Resurrect
- Lantern: +1 energy at combat start. Plays Resurrect (cost 3) on turn 1, starting the combo a turn earlier
- Pyre: The first time a skill is Exuded this combat, add a copy to your hand. The moment Resurrect (Exuded skill) goes, you get a copy back — now usable twice in the same fight
- Gambling Chip: Mulligan at the start of combat. Massively improves odds of getting Necromastery, Resurrect, and Sacrifice in your opening hand
- Intimidation Helm: Gain 4 Block each time a cost-2+ card is played. Both Resurrect (3) and Necromastery (2) add Block on the way in, covering setup turns
- Meaty Bone: Heal 12 HP at the end of combat if HP is 50% or lower. Necromastery setup often costs HP, so this contributes to long-term stability
Play Plan
Act 1
Prioritize Necromastery and Resurrect as top picks. Early on, keep Osti HP stable with Bodyguard and Cheer, and grind through easy fights with a simple Necromastery + Bone Shards plan. Sacrifice is strong even without Necromastery thanks to the 2x max HP Block number. Resurrect is Exuded (one use), so build the habit of spotting the right turn for maximum impact.
Act 2
Pyre essentially cancels Resurrect's Exude drawback — the moment Resurrect Exudes, a copy appears in hand and you can use it twice per combat. Grave Explosion also recovers Resurrect from discard. Unleash and Protector lock in additional damage while Osti HP is high. Doombringer adds a path into Doom stacking, widening the build's flexibility.
Act 3
The full combo — Necromastery placed, Resurrect (25 summon), Sacrifice (50 Block + 25 AoE), Bodyguard re-summon, second Resurrect (Pyre copy), Bone Shards (9 damage + 25 damage) — is enough to dominate bosses. With Pyre active, two Resurrects per combat means multiple Necromastery HP-Loss bursts, realistically pushing 50+ AoE damage. Friendship provides the +1 energy each turn to comfortably cover Resurrect's cost 3.
Strengths and Weaknesses
Strengths
- Sacrifice's "50 Block + 25 AoE" combo costs only 1 + 3 energy total — absurd efficiency
- The combo handles offense and defense in one play, so even low-HP turns can flip the board with a single combo
- Pyre enables two Resurrects per combat, giving the combo strong repeatability
- Slots into Doom and Osti-attack elements flexibly, so the build adapts to whatever the pick pool offers
Weaknesses
- Consuming Osti before Necromastery is placed is pure loss, so failing to place Necromastery early kills the plan
- Resurrect's cost 3 is heavy — without Prayer, Wisp, or other energy cards it's awkward in Act 1 and early Act 2
- Resurrect is Exude (one-use without Pyre), so burning it in a weak fight leaves bosses without the combo
- Total AoE damage scales with Osti's max HP, so low Osti HP during a combo produces weak output
コミュニティ投票
コメント (0)
不適切なコメントは管理者が削除します