:::ja
ビルドガイドについて
このガイドでは各キャラクターの主要ビルドと、それを動かすためのキーカード・レリック・弱点と対策を解説する。ビルドはあくまで「方向性の目安」であり、ランごとに提示されるカードが違うため、柔軟に変化させることが重要。どのビルドも「こういうカードが来たらこの方向で組む」という意識で臨むのが攻略の基本だ。
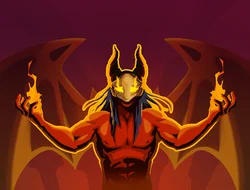
アイアンクラッド

高HPと自然回復を持つ近接戦士。最も扱いやすく初心者向け。主なビルドは3種類。どのビルドも序盤から形が見えやすく、初めてのキャラクターとして選ぶなら間違いなくこのキャラだ。
ビルド1: 筋力スケールビルド — Sランク

最も安定している主流ビルド。ターンごとに筋力を積み上げ、後半に強力な多段攻撃で圧倒する。
コンセプト: 悪魔の形態や限界突破で毎ターン筋力を増やし、旋風刃や多段アタックでダメージを爆発的に増加させる。筋力10以上に達したあとに限界突破を1回使うだけで、大半のボスを大剣2〜3発で仕留められる。序盤は地味に見えるが、後半の爆発力はアイアンクラッドビルドのなかでも随一だ。
キーカード:
| カード | 役割 |
|---|---|
| 悪魔の形態 | 毎ターン筋力+2(強化後+3)の永続パワー。このカードがあるとダメージが雪だるま式に増える |
| 限界突破 | 筋力を2倍にする。強化すると消耗しなくなり毎ターン使えるようになる |
| 旋風刃 | Xコスト×全体攻撃。筋力が高いほど総ダメージが跳ね上がる |
| 大剣 | 基本ダメージ+筋力×3の強力な単体アタック |
| 燃焼 | 筋力+2のパワー。手軽に筋力を積める |
おすすめレリック:
- Vajra: 毎ターン開始時に筋力+1。無条件の永続強化
- Ruined Helmet: 毎ターンカード1枚を無料でドロー
- Paper Phrog: 脆弱付与時のダメージ倍率増加
立ち回り: Act1は旋風刃や攻撃カードを集め不要カードを除去する。Act2で悪魔の形態を入手したら限界突破と組み合わせる。Act3ではHPを節約しつつ悪魔の形態で毎ターン筋力を積んで一気にボスを倒す。
弱点と対策: 序盤の筋力が乗る前は火力不足になりやすい。燃焼を2〜3枚採用するか、Angerで攻撃回数を確保することで補う。限界突破が引けないターンは旋風刃を節約して次のターンに備えるのが賢明だ。
ビルド2: バリケードブロックビルド — Aランク

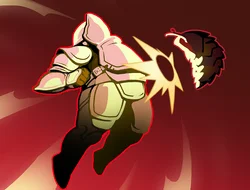
ブロックを溜め続けてボディスラムで大ダメージを与える防御型ビルド。守りながら攻めるスタイルが好きなプレイヤーに刺さるビルドだ。
コンセプト: バリケードでブロックがターン終了時に消えなくなり、毎ターンのブロックが積み重なる。ボディスラムは「現在のブロック量=ダメージ」で攻撃するため、ブロックが攻撃になる。ブロック50を超えてから打つボディスラムは壮快の一言だ。
キーカード:
| カード | 役割 |
|---|---|
| バリケード | ブロックがターン終了時に消えなくなる。このビルドのコア |
| ボディスラム | 現在のブロック値と同量のダメージを与える。強化で消耗しなくなる |
| ジャガーノート | ブロックを得るたびに敵に5ダメージ。ブロック行動が直接攻撃になる |
| 塁壁 | 現在のブロックを2倍にする。スパイクターンを作れる |
| 受け流す | 低コストで手軽なブロック源 |
おすすめレリック:
- Anchor: ターン1に10ブロック。序盤から機能する
- Horn Cleat: 第2ターンに14ブロック。Anchorと重ねると序盤が固い
- Calipers: 毎ターン終了時に25ブロックを残す(バリケードが不要になることも)
立ち回り: バリケードを早期に入手することが最優先。その後ブロック源を集め、ボディスラムでフィニッシュできる体制を整える。ジャガーノートが複数枚あるとブロック行動だけで削り切れるケースも出てくる。
弱点と対策: バリケード未入手時はただのブロックデッキになる。Act1〜2のショップでの購入も視野に入れる。ブロック貫通攻撃には無力なため、旋風刃やアタックも1〜2枚残しておこう。
ビルド3: エグゾーストビルド — Sランク

腐敗でスキルをExhaustさせ、痛みを感じないと暗黒の抱擁で爆発的なドロー&ブロックを生み出すビルド。動き出したときの爽快感はアイアンクラッド最強クラスだ。
コンセプト: 腐敗はすべてのスキルカードのコストをゼロにするが、使用時にExhaustさせる。痛みを感じないはExhaust毎にブロックを獲得し、暗黒の抱擁はExhaust毎に1ドロー。この3点セットが揃うと、スキルが次々と消費されながらブロックとドローが爆発的に積み重なる。腐敗を置く前に必ず受け皿を用意するのが鉄則だ。
キーカード:
| カード | 役割 |
|---|---|
| 腐敗 | スキルコストを0にする代わりにExhaustさせる。このビルドの核心 |
| 痛みを感じない | Exhaust時にブロック+4(強化後+6)。防御の要 |
| 暗黒の抱擁 | Exhaust時に1ドロー。手札が途切れなくなる |
| 真の勇気 | カードを1枚Exhaustして4ブロック。腐敗前でも単独で機能する |
| 燃焼の契約 | カードを1枚Exhaustして2ドロー。エンジンの潤滑油 |
おすすめレリック:
- Dead Branch: Exhaustするたびにランダムなカードを1枚追加。無限のカード供給源になる
- Charon's Ashes: Exhaust時に全敵に3ダメージ。攻撃を兼ねられる
- Strange Spoon: Exhaustのカードが50%の確率で捨て札に戻る。デッキを枯らさない
立ち回り: Act1で痛みを感じないと真の勇気を集めておく。腐敗を入手するまでは単独でも機能する。腐敗はAct2のショップ・エリート報酬を積極的に狙う。腐敗を置く前に必ず痛みを感じないか暗黒の抱擁のどちらかを確保すること。
弱点と対策: 腐敗単体では機能しない。痛みを感じない/暗黒の抱擁なしに腐敗を使うとスキルが全消滅するだけ。序盤にExhaust受け皿を整えてから腐敗を起動しよう。
サイレント

毒とシブを軸にした戦術系キャラ。3つの主要ビルドがある。コンボが決まったときの爽快感は全キャラ随一だが、デッキの組み方に繊細さが求められる。
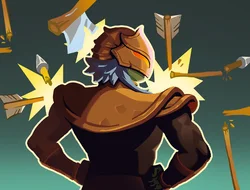
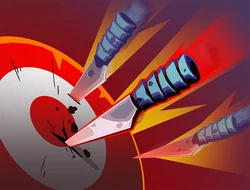
ビルド1: シブビルド — Aランク

0コストの連続攻撃で圧倒するビルド。Act1から機能する速度型。
コンセプト: シブ(0コスト小型アタック)を大量に生成し、正確さで各シブのダメージを増幅。正確さを3〜4枚積むとシブ1枚で16ダメージ以上になる。0コストなのでデッキが薄いほど毎ターン大量のシブを打てる。無限の刃が早期に手に入るとAct1中盤から別格の安定感を発揮する。
キーカード:
| カード | 役割 |
|---|---|
| 無限の刃 | 毎ターンシブ1枚を手札に追加するパワー |
| 刃の舞 | シブ3枚を手札に追加 |
| 正確さ | シブのダメージ+4。複数枚積むほど爆発的に強くなる |
| 残像 | カードを使うたびにブロック+1。シブスパムで防御も兼ねる |
| 鋼鉄の嵐 | 手札のカードをすべてシブに変換し1ドロー |
おすすめレリック:
- Shuriken: ターン中にアタック3回でこちらの筋力+1
- Kunai: ターン中にアタック3回でこちらの敏捷性+1
- Ornamental Fan: ターン中にアタック3回で4ブロック獲得
立ち回り: デッキはとにかく薄くして毎ターンシブが大量に来る状態を目指す。正確さを優先的に集め、無限の刃や刃の舞でシブの枚数を確保する。
弱点と対策: 単体攻撃に偏るため複数の敵を相手にするときは効率が落ちる。刃の舞を優先して全体ダメージを確保しよう。
ビルド2: 毒ビルド — Aランク


毒を積み重ねて触媒で爆発させる長期戦型ビルド。
コンセプト: 毒を大量に積み、触媒(毒を2倍にする)でワンターンキルを狙う。爆発と組み合わせることで同ターン内に2枚スキルを使え、触媒2枚発動でとんでもない毒量になる。有毒の煙が場に出ると毎ターン自動で毒が増えていき、相手が勝手に削れていく感覚が心地よい。
キーカード:
| カード | 役割 |
|---|---|
| 猛毒 | 毒を5スタック付与(強化で7) |
| 有毒の煙 | ターン開始時に毒+2を自動付与するパワー |
| 触媒 | 敵の毒スタックを2倍にする。このビルドの切り札 |
| 爆発 | 次のスキル2回発動。触媒を2枚打てるようになる |
| Poisoned Stab | ダメージ+毒付与のシンプルなコンボ要員 |
おすすめレリック:
- Snecko Skull: 毒付与時に追加+1スタック。毎ターンの毒ダメージが継続的に増える
- Spiral Darts: 毒スタックに比例してダメージ増加
立ち回り: 序盤は猛毒と有毒の煙で毒を積み上げ、中盤以降に触媒で爆発させる。爆発がある場合は触媒を手札で保持してから一気に使う。
弱点と対策: 序盤の毒が積み上がるまでに受けるダメージが多い。ブロックカードを序盤から優先的に採用し、毒が機能するまでの被ダメを抑える。免疫持ちの敵には効かないため、毒以外の攻撃手段を1〜2枚残しておこう。
ビルド3: スライディスカードビルド — Aランク
手札から捨てると自動発動する「Sly」キーワードを活用する上級ビルド。
コンセプト: SlyはSTS2固有の新キーワード。「手番中に手札から捨てられたとき、無料で発動する」という効果。貿易の道具や曲芸でドローしつつ捨てることでSlyカードが連鎖する。戦術家(捨てると+1エナジー)とUntouchable(捨てるとブロック獲得)が特に強力。Slyカードが揃ったデッキでの1ターンはまるで無限コンボのような動きになる。
キーカード:
| カード | 役割 |
|---|---|
| 貿易の道具 | 毎ターン1ドロー+1捨て。Slyカードの毎ターン保証トリガー |
| 戦術家 | 捨てられると+1エナジー獲得。エナジー源になる |
| 曲芸 | 3枚捨てて1ドロー。複数のSlyを同時トリガー |
| 賭け | 手札を全部捨てて引き直し。大量のSlyを一気にトリガー |
| 研磨 | 捨てると敏捷+1と棘4付与。防御と受動ダメージを同時に確保 |
おすすめレリック:
- Tingsha: 捨てるたびに敵に3ダメージ。捨て毎に受動ダメージ
- Tough Bandages: 捨てるたびにブロック+3。受動防御の主要源
立ち回り: デッキをとにかく薄くしてサイクルを速める。Act1でStrikeを優先除去。Act2で貿易の道具を入手できると安定する。戦術家2〜3枚でほぼ無限エナジーになる。
弱点と対策: 特定のSlyカードがなければ捨て行動がただの手札消費になる。Slyカードを5〜6枚以上確保するまでは捨てを強要する動きを控えよう。
ディフェクト

オーブを操る魔法使い系。フォーカスを上げることがすべてのビルドで重要。STS2ではフォーカスは永続ではなく一時的な上昇になった点に注意。オーブを使いこなすには少し慣れが必要だが、回転率を上げることで化ける。
ビルド1: クロウビルド — Sランク


オーブを完全に無視し、0コストのアタックを連打してクロウのダメージを積み上げるビルド。現環境で最強のディフェクト型。オーブと混ぜると中途半端になるため、クロウと決めたら一切オーブは無視する。
コンセプト: クロウ(0コスト、3ダメ)を使うたびにデッキ内すべてのクロウのダメージが+2される。FTL・Beam Cell・Go for the Eyes・Hologram+など0コストアタックでデッキを埋め、All for One(捨て札の0コストカードを全部プレイ)でフィニッシュ。クロウが4〜5枚揃ったAct2のAll for One1発は敵が信じられない速度で消える。
キーカード:
| カード | 役割 |
|---|---|
| クロウ | 0コスト3ダメ、使うたびに全クロウが+2。デッキに4〜6枚積む |
| All for One(みんなのために) | 捨て札の0コストカードをすべてプレイ。1ターンで大量のクロウを打てる |
| FTL | 0コストアタック。1枚目のカードなら3枚ドロー |
| Hologram+(強化済み) | 0コストで捨て札から1枚回収+ドロー |
| Go for the Eyes | 0コストアタック+弱体付与 |
おすすめレリック:
- Frozen Eye: 山札の順番が見える。All for Oneのタイミングを最適化できる
- Inserter: 2ターンに1回オーブを自動追加。クロウに集中しながら受動オーブ効果も得られる
- Data Disk: 最初のフォーカス+1。クロウと無関係だが汎用的に強い
立ち回り: Act1から0コストアタックを優先採用。オーブカードは一切取らない。クロウが3〜4枚揃えばAct2で加速する。All for Oneは1枚で十分。
弱点と対策: オーブが完全にないため受動ブロックがゼロ。FrostまたはスキルのブロックカードをAct1から数枚残す必要がある。特にAct2のElite戦で被ダメが大きくなりやすいので注意しよう。
ビルド2: ライトニングオーブビルド — Aランク

Lightningオーブを連鎖させてダメージを出す攻撃型ビルド。
キーカード:
| カード | 役割 |
|---|---|
| 最適化 | フォーカス+1(強化後+2)。全オーブの効果を底上げ |
| Voltaic(電流) | ターン中のLightningチャネル数と同量のLightningを追加チャネル |
| 一斉放電 | オーブを複数回発動。Lightningビルドの最大火力源 |
| Electrodynamics | Lightningオーブが全体に当たるようになる。複数敵に最強 |
| 同期 | 4種類すべてのオーブが揃っているターンにフォーカス+8(一時的) |
おすすめレリック:
- Inserter: 2ターンに1回オーブを自動追加
- Runic Capacitor: オーブスロット+3。一度に多くのLightningを保持できる
弱点と対策: 単体火力が安定しない。EliteやボスにはElectrodynamicsの全体攻撃が逆に非効率になることがある。一斉放電を保険として常に手札に維持しよう。
ビルド3: ダークオーブ執行ビルド — Aランク
Darkオーブにエナジーを蓄積させてワンショットを狙うビルド。
キーカード:
| カード | 役割 |
|---|---|
| Dark Shackles | ダークオーブをEvoke。スロットにいる間蓄積したエナジー分のダメージを単体に与える |
| 暗鬱 | Darkオーブをチャネルしつつ全体にダメージ |
| ルーンドーム | 敵のインテントが見えなくなるが毎ターン+1エナジー。Darkビルドで特に強力 |
| Creative AI | 毎ターンランダムなパワーカードを手札に追加。コンボの拡張性が広がる |
弱点と対策: Darkオーブが溜まるまで攻撃手段が少ない。序盤はFrostでブロックを積みながら時間を稼ぐ。Darkが1つしかスロットにないと蓄積が遅いため、オーブスロットを増やすレリックが刺さる。
ネクロバインダー

ミニオンを召喚・犠牲にする独自スタイル。2つの固有システム(DoomとSoul)を活用する。慣れるまでは独特のシステムに戸惑うかもしれないが、理解した瞬間に戦略の幅が大きく広がる。
ビルド1: ソウルスケールビルド — Sランク


Soulカードでドローを爆発させ、憑依で大量ダメージを積み上げる最速ビルド。
コンセプト: SoulはネクロバインダーのExhaustカードで、プレイすると2ドローする。憑依(Soulをプレイするたびにランダムな敵に6ダメージ)と組み合わせると、1ターンに4〜6枚のSoulを連鎖させてドロー+大量ダメージを同時に生む。ターン5〜6には1ターン100ダメージ超えが現実的だ。
キーカード:
| カード | 役割 |
|---|---|
| 霊魂捕獲 | 1コストでSoul3枚生成。最も効率の良いSoul生産源 |
| 墓守 | 1コストでSoul1枚+ブロック。ブロックも兼ねる |
| Dirge(悲歌) | Xコスト分のSoulを生成+OstyのHP増加 |
| 憑依 | Soulをプレイするたびにランダムな敵に6ダメージ。このビルドの勝利条件 |
| 霊魂嵐 | 捨て札のSoul数×2ダメージ。フィニッシュ補助 |
おすすめレリック:
- Undying Sigil(不死の印): ショップで必ず購入推奨。HPが10以下になると1度だけHP1で生き残る
- Bone Flute(骨の笛): Ostyが攻撃するたびにブロック+2
- Bookmark: Retain持ちのカードのコストを-1。手札管理を助ける
立ち回り: Act1はSoul生産カードと憑依を最優先で取る。憑依なしにはただのドローデッキになるため、憑依が引けないランは次点のDoomビルドに切り替える。OstyのHPをDirgeで確保しながらSoulサイクルを回す。
弱点と対策: 憑依未入手時は完全に機能不全になる。憑依が見つかるまでは後述のDoomビルドと並走できる形でデッキを組もう。ダメージが遅れがちなため序盤はブロック源を厚めに確保する。
ビルド2: Doom処刑ビルド — Aランク
DoomスタックでHPを参照した即死を狙う独特なキルメカニクス。
コンセプト: 敵にDoomを積み上げ、Doomが残HP以上になるとターン終了時に即死。ボスにも適用されるため、Doom発動時の残HPを調整しながら一気に処刑する。End of Daysがある場面は「相手のHPをDoomスタック以下まで削る」計算ゲームが楽しい。
キーカード:
| カード | 役割 |
|---|---|
| Scourge(鞭打ち) | Doom付与+ドロー |
| No Escape(逃げ場なし) | Doom+10、さらに10Doom毎に+5追加。Doomの主要スタッカー |
| End of Days(世界の終わり) | Doom29付与+「Doom以上のHPの敵を即死」。単体フィニッシャー |
| Borrowed Time(借りた時間) | 自分にDoom+3、+1エナジー獲得。コストほぼゼロでエナジーを稼ぐ |
| Blight Strike | Doomを積みながらブロックも稼ぐ |
おすすめレリック:
- Ivory Tile(象牙のタイル): Osty関連を強化(Annihilationエポック報酬)
- Bone Flute(骨の笛): Ostyが攻撃するたびにブロック+2
立ち回り: Borrowed TimeはDoom3を自分に付与するが、自分へのDoomは容易に管理できる。No EscapeとEnd of Daysが揃えばボスも瞬殺できる。ただしEnd of Daysを打つ前に敵のHPをDoom以下に削っておく必要がある点に注意。
弱点と対策: Doomを積むだけでは即死しないため、「敵HPをDoomスタック以下まで削る」か「End of Daysで一発逆転」かのどちらかの詰め方が必要。Act2以降の雑魚はDoomが溜まる前に処理できるため、通常攻撃との両立が重要。
ビルド3: リーパーフォームビルド — Sランク

リーパーフォームでアタックカードをすべてDoom量産機に変え、毎ターン全アタックにDoomを付与する高火力ビルド。
コンセプト: リーパーフォーム(3コスト)を発動すると、以降のアタックが与えるダメージと同量のDoomをそのまま敵に積む。例えばアタックが40ダメージを与えれば同時にDoom40も蓄積する。肉体の技(デバフ付与のたびに敵にダメージ)と組み合わせると1つのアタックで複数回ヒットできる。最終的にImmortal Crest(Doom超過HPの敵からのダメージ50%減)で防御面も安定する。
キーカード:
| カード | 役割 |
|---|---|
| リーパーフォーム | アタックのダメージ分だけDoomを付与。このビルドの核 |
| 審判の日 | 全敵にDoom29付与+Doom超過HPの敵を即死。全体フィニッシャー |
| 時の刻 | 現在のDoomスタック分のダメージを単体に与える。フィニッシャー補助 |
| 肉体の技 | デバフ付与のたびに敵にダメージ。DoomはデバフのためAct毎に複数回ヒット |
| 覆い | Doom付与のたびにブロック獲得。攻撃しながら防御も同時に積める |
おすすめレリック:
- Immortal Crest(不死の紋章): DoomがHPを超えている敵からのダメージ50%減。リーパーフォームでフラッド状態になった後の生存率を大幅に上げる
- Lantern(提灯): 戦闘開始時エナジー+1。リーパーフォーム(3コスト)をFriendshipレリックと合わせれば初手発動も可能
- Funerary Mask(葬儀の仮面): Futilityエポック(Act2クリア)で獲得。Doom系全般を強化
立ち回り: リーパーフォーム発動前は通常のDoomビルドとして機能する。リーパーフォーム入手後はできるだけ早く出すことが最優先。リーパーフォーム展開後はアタックを打つだけでDoomが積まれるため、アタックカード多めのデッキと相性が良い。覆いで毎Doom付与ごとにブロックを稼ぎながら生存しつつ、審判の日か時の刻でフィニッシュする。
弱点と対策: リーパーフォーム(3コスト)は重いため、初手で出せないとターンが遅れる。Lanternレリックや低コストアタックを序盤に並べてリーパーフォーム展開のターンを早める。リーパーフォーム未入手時はDoomビルドとして機能する構成を保とう。
リージェント

スターリソースを管理しながら大技を繰り出す上級キャラ。2つのフォームを使い分ける。初期決断(StarかForgeか)が最後まで響くため、最も戦略的思考が求められるキャラクターといえる。
ビルド1: ソブリンブレードビルド — Sランク

フォージでソブリンブレードを強化し、単体への超火力を叩き込むビルド。
コンセプト: ソブリンブレードはフォージを重ねるたびにダメージが増え続けるアタックカード。デッキをできる限り薄くして毎ターンソブリンブレードを引き込み、1枚で敵を一撃で仕留める。傑作がフォージ効率最高(+8ダメージ、強化後+11)。回収で毎ターン必ず手元に戻ってくる状態を作れれば、ボスも一撃圏内になる。
キーカード:
| カード | 役割 |
|---|---|
| ソブリンブレード | フォージ毎にダメージ増加。このビルドの核心 |
| 傑作 | フォージ+8ダメージ(強化後+11)。最高効率のフォージカード |
| 回収 | ソブリンブレードを捨て札から手札に戻す。毎ターン引ける状態を作る |
| ブロックカード数枚 | 攻撃に偏りやすいためブロック源を必ず確保 |
おすすめレリック:
- Crown of Stars: スタート時Stars+3。フォームの最初の動きを加速
- Astrolabe(渾天儀): デッキのカードをアップグレード。ソブリンブレードの品質を上げる
立ち回り: Stars生成かForgeの二択をAct1中に決める。ソブリンブレードビルドはForge優先。デッキを薄くすることがソブリンブレードを毎ターン引ける唯一の方法。不要カードを積極的に除去する。
弱点と対策: デッキが薄すぎると防御が脆くなる。ブロックカードを最低2〜3枚は確保する。AoEが完全にないため複数敵には別途対応手段が必要だ。
ビルド2: スターエンジンビルド — Aランク


Stars生成カードを連射してStar消費の大技を連発するビルド。
コンセプト: Stars(第2のエナジープール)を大量に生成し、消費型大技で一撃必殺を狙う。Starsを蓄積するフェーズと放出するフェーズを明確に切り替えることが重要。星脈波動の一発が決まる瞬間は、このビルド最大の醍醐味だ。
キーカード:
| カード | 役割 |
|---|---|
| 太陽の一撃 | Stars生成+攻撃。Stars生産源として優秀 |
| 光を集める | Stars+2生成。低コストで効率よく貯められる |
| Lunar Pastry(月のお菓子) | 毎ターン自動Stars+1。受動生成源として強力 |
| 星脈波動 | 大量のStarsを消費してボスを一撃 |
| 粒子の壁 | Starsを消費してブロックに変換。防御にも使える |
おすすめレリック:
- Crown of Stars: スタート時Stars+3で最初のターンから大技が狙える
- Meteor Strike: 一定数のStars消費で追加ダメージ
立ち回り: Stars生成とStars消費の比率を常に意識する。Stars消費カードを使うターンを事前にプランニングし、そのターンまでに十分なStarsを確保しておく。Act2以降は両フォームの切り替えタイミングを計画的に管理する。
弱点と対策: Stars蓄積中のターンは攻撃が手薄になる。粒子の壁などでブロックに転用できる選択肢を持っておく。Stars生成源なしにStars消費カードだけ取ると完全機能不全になるため、生成と消費の比率は3:1を目安にしよう。
キャラクター別難易度と向いているプレイヤー
| キャラクター | 推奨ビルド | 難易度 | 向いている人 |
|---|---|---|---|
| アイアンクラッド | 筋力 / エグゾースト | ★☆☆☆☆ | すべての人、特に初心者 |
| サイレント | シブ / 毒 | ★★★☆☆ | コンボを楽しみたい人 |
| ディフェクト | クロウ / ライトニング | ★★★☆☆ | リソース管理が好きな人 |
| ネクロバインダー | ソウル / Doom / リーパーフォーム | ★★★★☆ | ユニークなメカニクスを楽しみたい人 |
| リージェント | ソブリンブレード | ★★★★★ | 上級者・マルチリソース管理が得意な人 |
キャラクター共通の強力なレリック
どのキャラでも価値が高い汎用レリック。
| レリック | 効果 | コメント |
|---|---|---|
| Philosopher's Stone | 毎ターン+1エナジー、全敵に+1筋力デバフ | エナジー増加は最強クラス |
| Runic Pyramid | ターン終了時に手札を捨てない | コンボデッキに革命的 |
| Snecko Eye | 毎ターン2枚追加ドロー、カードコストがランダム化 | ハイリスクハイリターン |
| Black Star | エリートが通常報酬に加えてレリックを追加ドロップ | エリートを積極的に狙えるようになる |
| Odd Mushroom | 最大HP+14、筋力-1 | HP増加で生存率大幅向上 |
最新パッチでカードのバランスが変わっている可能性があります。アップデート情報はパッチノートを参照してください。 :::
:::en
About This Guide
This guide covers the main build archetypes for each character — key cards, relics, weaknesses, and how to play around them. Builds are directional starting points. Every run offers different cards, so flexibility is essential. Don't force a build; build around what the run offers.
Ironclad
High HP, built-in self-healing. The most forgiving character. Three primary builds.
Build 1: Strength Scaling — S-Tier
The most consistent Ironclad archetype. Stack Strength every turn, then close with multi-hit attacks that scale with each point.
Core Concept: Use Demon Form and Limit Break to build Strength exponentially. Heavy Blade and Whirlwind multiply every Strength point across each hit. The win condition is 10+ Strength with one or two Limit Break activations — most bosses fold in two to three Heavy Blade swings after that.
Key Cards:
| Card | Role |
|---|---|
| Demon Form | +2 Strength per turn (+3 upgraded). Alone, this wins games given enough time |
| Limit Break | Double current Strength. Upgraded: no longer Exhausts — repeat every turn |
| Whirlwind | X-cost, hits all enemies X times. Devastates with high Strength |
| Heavy Blade | Single target with Strength ×3 multiplier — primary finisher once scaling is up |
| Inflame | Easy Power that gives +2 Strength immediately |
Key Relics:
- Vajra: +1 Strength at the start of each combat — unconditional permanent value
- Ruined Helmet: Draw 1 extra card each turn for free
- Paper Phrog: Increases the Vulnerable damage multiplier
Gameplan: Act 1 — collect attacks and prioritize card removal. Act 2 — find Demon Form and pair it with Limit Break. Act 3 — let Demon Form snowball; close before the boss can respond.
Weaknesses: Low damage before Strength is established. Add 2–3 Inflame early or use Anger for extra attack volume to bridge the gap.
Build 2: Barricade Block — A-Tier
A defensive build where your Block becomes your damage source.
Core Concept: Barricade prevents Block from expiring at turn end. Each turn you stack more. Body Slam converts current Block into damage — defense and offense in a single card.
Key Cards:
| Card | Role |
|---|---|
| Barricade | Block no longer expires. The engine |
| Body Slam | Deals damage equal to current Block. Upgraded: no longer Exhausts |
| Juggernaut | Deals 5 damage whenever you gain Block |
| Entrench | Doubles your current Block — creates spike turns |
| Shrug It Off | Cheap, reliable Block source |
Key Relics:
- Anchor: 10 Block on turn 1 — immediate value
- Horn Cleat: 14 Block on turn 2 — stacks with Anchor for an early wall
- Calipers: Retains 25 Block at turn end — partially replaces Barricade if found first
Weaknesses: Without Barricade the build is just a slow Block deck. Prioritize finding it in Act 1–2 Shops. Block-piercing attacks bypass the defense entirely — keep 1–2 attacks to deal with those threats.
Build 3: Exhaust — S-Tier
Use Corruption to make all Skills free (but they Exhaust), then feed Feel No Pain and Dark Embrace for explosive Block and draw.
Core Concept: Corruption zeros out all Skill costs but forces them to Exhaust on play. Feel No Pain generates Block per Exhaust, Dark Embrace draws per Exhaust. Together these three cards turn every Skill in your hand into simultaneous Block and card draw — the turn loops until hand and deck run dry.
Key Cards:
| Card | Role |
|---|---|
| Corruption | Skills cost 0 but Exhaust. The engine's core — do not play without support in hand |
| Feel No Pain | +4 Block per Exhaust (+6 upgraded) — the defensive payoff |
| Dark Embrace | Draw 1 per Exhaust — the draw engine |
| True Grit | Exhaust 1 card, gain 4 Block — works independently before Corruption |
| Burning Pact | Exhaust 1 card, draw 2 — lubricates the engine |
Key Relics:
- Dead Branch: Gain a random card whenever you Exhaust — infinite supply through the loop
- Charon's Ashes: Deal 3 damage to all enemies per Exhaust — turns every loop tick into offense
- Strange Spoon: 50% chance Exhausted cards return to discard instead — prevents deck death
Gameplan: In Act 1, pick up Feel No Pain and True Grit early — they work independently. Find Corruption in Act 2 from Shops or Elite rewards. Never activate Corruption without at least one payoff piece already in hand.
Weaknesses: Corruption alone does nothing. Playing it without Feel No Pain or Dark Embrace just burns all your Skills for zero value. Set up the payoff cards first.
Silent
Tactical character built around Poison, Shivs, and the STS2-exclusive Sly discard archetype.
Build 1: Shiv — A-Tier
0-cost attack spam that comes online immediately in Act 1.
Core Concept: Generate large numbers of 0-cost Shivs each turn. Stack 3–4 Accuracy and each Shiv deals 16+ damage before Strength. The thinner the deck, the more Shivs you see per turn.
Key Cards:
| Card | Role |
|---|---|
| Infinite Blades | Power: add 1 Shiv to hand each turn — passive generation |
| Blade Dance | Add 3 Shivs to hand |
| Accuracy | +4 damage to every Shiv — the damage multiplier |
| After Image | Gain 1 Block per card played — Shiv spam becomes a defensive engine |
| Storm of Steel | Convert entire hand to Shivs + draw 1 |
Key Relics:
- Shuriken: 3 attacks in a turn → +1 Strength permanently
- Kunai: 3 attacks in a turn → +1 Dexterity permanently
- Ornamental Fan: 3 attacks in a turn → 4 Block
Weaknesses: Weak AoE against multi-enemy encounters. Prioritize Blade Dance for wider Shiv spread. Against enemies with Block-scaling abilities, raw Shiv spam can stall.
Build 2: Poison — A-Tier
Stacking damage-over-time that culminates in a Catalyst detonation.
Core Concept: Stack Poison heavily over multiple turns, then detonate with Catalyst (doubles all Poison stacks). Combine with Burst to fire two Catalysts in the same turn for exponential scaling.
Key Cards:
| Card | Role |
|---|---|
| Deadly Poison | Apply 5 Poison (+7 upgraded) — primary stacker |
| Noxious Fumes | Power: apply +2 Poison at turn start automatically |
| Catalyst | Double all Poison on target. The win condition |
| Burst | Next Skill plays twice — enables double-Catalyst in one turn |
| Poisoned Stab | Damage + Poison in one card — efficient filler |
Key Relics:
- Snecko Skull: Applying Poison adds +1 extra stack — all Poison sources scale up
- Spiral Darts: Damage scales with enemy's Poison stacks
Weaknesses: Takes time to set up — you take damage while Poison stacks accumulate. Include block cards early to bridge the gap. Immune enemies make this build useless; keep 1–2 non-Poison attacks for those cases.
Build 3: Sly Discard — A-Tier
An STS2-exclusive archetype based on the Sly keyword — cards that play for free when discarded from hand during your turn.
Core Concept: Sly cards trigger for free when discarded. Tactician generates Energy on discard, Untouchable generates Block, and Abrasive gives Dexterity plus Thorns. Tools of the Trade forces one draw + one discard every turn, guaranteeing a Sly trigger each turn. A mature Sly deck generates 8–10+ free card plays per turn.
Key Cards:
| Card | Role |
|---|---|
| Tools of the Trade | Power: draw 1, discard 1 per turn — the primary Sly enabler |
| Tactician | Sly: gain +1 Energy — the Energy source that funds further plays |
| Acrobatics | Discard 3, draw 1 — triggers multiple Sly cards simultaneously |
| Calculated Gamble | Discard entire hand, redraw — mass Sly trigger |
| Abrasive | Sly: +1 Dexterity + 4 Thorns — passive defense and damage |
Key Relics:
- Tingsha: Deal 3 damage to all enemies per discard — passive offense from every trigger
- Tough Bandages: +3 Block per discard — the primary passive defense source
Gameplan: Thin the deck aggressively — remove Strikes at the first available opportunity. Find Tools of the Trade in Act 2 for consistent triggers. Stack 2–3 Tactician copies for near-infinite Energy.
Weaknesses: Without enough Sly cards, discarding just wastes cards. Don't force mass-discard plays until you have 5–6 Sly cards in the deck. Cycling too fast without Sly density generates nothing.
Defect
Orb-channeling character. In STS2, Focus is temporary rather than permanent — spike turns rather than permanent stacking. Stacking orb cycling speed matters more than raw Focus.
Build 1: Claw — S-Tier
Ignores Orbs entirely and is the Defect's strongest current archetype. Commit fully — mixing Claw and Orbs kills both.
Core Concept: Claw (0-cost, 3 damage) permanently increases the damage of all Claws in your deck by 2 every time you play it. Fill the deck with 0-cost Attacks, then use All for One to replay everything in your discard for a kill turn.
Key Cards:
| Card | Role |
|---|---|
| Claw | 0-cost, 3 damage — every play permanently buffs all Claws by 2. Run 4–6 copies |
| All for One | Play all 0-cost cards from discard pile — the finisher turn |
| FTL | 0-cost attack; first card played draws 3 — massive cycle |
| Hologram+ (upgraded) | 0-cost: retrieve a card from discard + draw — enables consistent All for One setup |
| Go for the Eyes | 0-cost attack + Weak debuff — passive offense |
Key Relics:
- Frozen Eye: See the deck's order — optimize All for One timing precisely
- Inserter: Auto-channel one Orb every 2 turns — passive effect without needing Orb cards
- Data Disk: +1 Focus at combat start — generic value
Gameplan: Prioritize 0-cost Attacks from Act 1. Take zero Orb cards. With 3–4 Claws assembled, the deck accelerates in Act 2. One All for One copy is sufficient.
Weaknesses: No Orbs means zero passive Block. Keep a few Frost or Skill-based Block cards. Act 2 Elites can be punishing without a defensive floor.
Build 2: Lightning Orb — A-Tier
Chain Lightning Orbs for consistent, scalable damage.
Key Cards:
| Card | Role |
|---|---|
| Defragment | +1 Focus (+2 upgraded) — amplifies all Orbs; top priority in any Defect run |
| Voltaic | Channel Lightning equal to Lightning channeled this combat |
| Multi-Cast | Evoke Orbs multiple times — damage ceiling for this build |
| Electrodynamics | Lightning Orbs hit all enemies — game-ending on multi-enemy fights |
| Synchronize | +8 temporary Focus when all four Orb types are active |
Key Relics:
- Inserter: Auto-channel 1 Orb per 2 turns
- Runic Capacitor: +3 Orb slots — hold more Lightning simultaneously
Weaknesses: Inconsistent single-target damage. Electrodynamics can be inefficient against solo bosses. Keep Multi-Cast in hand as a burst option when needed.
Build 3: Dark Orb Execute — A-Tier
Charge Dark Orbs over multiple turns, then Evoke for massive single-target burst.
Key Cards:
| Card | Role |
|---|---|
| Dark Shackles | Evoke Dark Orb — deals damage equal to all Energy it stored in the slot |
| Doom and Gloom | Channel Dark + deal damage to all enemies |
| Runic Dome | +1 Energy per turn (drawback: enemy intents hidden) — exceptional Dark fuel |
| Creative AI | Add a random Power to hand each turn — flexible combo extension |
Weaknesses: Slow start — little offense until Dark charges. Use Frost Orbs to stall while charging. Without extra Orb slots, a single Dark slot charges slowly; prioritize Orb-expanding relics.
Necrobinder
Minion-driven playstyle with two primary mechanics: Souls and Doom.
Build 1: Soul Scaling — S-Tier
The fastest and most powerful Necrobinder archetype. Generate Souls to chain-draw, then Haunt converts every Soul play into direct damage.
Core Concept: Souls are 0-cost Exhaust cards that draw 2 cards when played. Haunt deals 6 damage to a random enemy per Soul played. Combine Capture Spirit and Dirge to flood your hand with Souls, then chain 4–6 Souls per turn for 24–36 damage while drawing into more Souls. By turns 5–6 against bosses, this routinely deals 100+ damage per turn.
Key Cards:
| Card | Role |
|---|---|
| Capture Spirit | 1 energy, create 3 Souls — the highest-efficiency Soul generator |
| Grave Warden | 1 energy, create 1 Soul + gain Block — dual-purpose filler |
| Dirge | X energy, create X Souls + increase Osty's HP |
| Haunt | When you play a Soul, deal 6 damage to a random enemy — the win condition |
| Soul Storm | Deal damage equal to 2× Souls in exhaust — finisher supplement |
Key Relics:
- Undying Sigil: Near-mandatory Shop purchase — survive to 1 HP once per combat
- Bone Flute: +2 Block whenever Osty attacks
- Bookmark: Retained cards cost 1 less — hand management support
Gameplan: Prioritize Soul generation cards and Haunt above all else in Act 1. Haunt without Souls is useless; Souls without Haunt are just a draw engine. If Haunt doesn't appear, pivot to the Doom build. Use Dirge to grow Osty's HP while churning Souls.
Weaknesses: Without Haunt the build is entirely non-functional as a damage source. Until Haunt is secured, build in parallel toward Doom so the run isn't lost. Early combats can be slow — take extra Block sources to survive until the engine is online.
Build 2: Doom Execution — A-Tier
Stack Doom on enemies and trigger instant kills when their HP reaches or falls below their Doom count.
Core Concept: Doom is a death mark — when an enemy's HP is at or below their Doom stacks at end of their turn, they die immediately. Stack Doom rapidly and sync the execution timing. Effective on bosses.
Key Cards:
| Card | Role |
|---|---|
| Scourge | Apply Doom + draw — efficient setup |
| No Escape | Apply Doom 10; +5 per 10 existing Doom — escalating stacker |
| End of Days | Apply Doom 29, instantly kill any enemy at or below their Doom count |
| Borrowed Time | Apply Doom 3 to yourself, gain +1 Energy — near-free Energy source |
| Blight Strike | Apply Doom while gaining Block — multifunctional filler |
Key Relics:
- Ivory Tile: Core Osty-enhancing relic (Annihilation Epoch reward)
- Bone Flute: +2 Block per Osty attack
Gameplan: Borrowed Time applies Doom 3 to yourself — self-Doom is easily managed and the Energy gain is worth it. The ideal close is No Escape → End of Days to execute most bosses. Before End of Days, damage the enemy down close to your current Doom stack.
Weaknesses: Doom stacking alone doesn't kill — you must either damage the enemy below Doom count or use End of Days for the direct execute. In Act 2 standard enemies die before Doom stacks matter; keep direct attack cards alongside the Doom package.
Build 3: Reaper Form — S-Tier
The high-ceiling burst archetype. Reaper Form converts every Attack into a Doom pump, flooding enemies with Doom equal to the damage dealt in a single hit.
Core Concept: Reaper Form (3 energy) is a Power card that makes every Attack also apply Doom equal to its damage. A 40-damage hit simultaneously stacks Doom 40. Sleight of Flesh deals bonus damage for every debuff applied — because Doom is a debuff, each Attack hits multiple times through Sleight. Immortal Crest halves incoming damage from any enemy whose Doom already exceeds their HP, solving the build's defensive weakness once Reaper Form is live.
Key Cards:
| Card | Role |
|---|---|
| Reaper Form | Power: Attacks apply Doom equal to damage dealt — the entire build's foundation |
| Day of Reckoning | Apply Doom 29 to all enemies; instantly kill any enemy at or below their Doom — AoE finisher |
| The Hour | Deal damage equal to current Doom stacks on target — single-target execute |
| Sleight of Flesh | Each time a debuff is applied to the enemy this combat, deal damage — chains off every Doom application |
| Shroud | Gain Block whenever you apply Doom — turns every Reaper Form attack into simultaneous offense and defense |
Key Relics:
- Immortal Crest: Enemies whose Doom exceeds their HP deal 50% reduced damage — the defensive backbone once Reaper Form is active
- Lantern: +1 Energy at combat start; lets you play Reaper Form on turn 1 alongside Friendship or a low-cost attack
- Funerary Mask (Futility Epoch, Act 2 clear): Strengthens all Doom mechanics across the build
Gameplan: Before Reaper Form, play as a standard Doom deck. Once Reaper Form arrives, deploying it as early as possible each combat is the top priority. After it's live, every Attack card simultaneously deals damage, stacks Doom, and through Shroud generates Block. Close with Day of Reckoning for AoE or The Hour for single-target. Lean toward Attack-dense card picks over Skills to maximize Reaper Form's triggers.
Weaknesses: Reaper Form costs 3 energy — missing it on turn 1 costs tempo. Address this with Lantern, Friendship, or cheap 0-cost attacks that let you save up. Before Reaper Form is found, the deck should function as a pure Doom deck so the run doesn't fall apart.
Regent
Dual-resource management character. Balance Energy and Stars across two form mini-decks. Core decision: choose Stars or Forge at the start of the run — mixing both kills the run.
Build 1: Sovereign Blade — S-Tier
Forge the Sovereign Blade repeatedly, then use it as the run's single win condition.
Core Concept: Sovereign Blade gains permanent damage every time it's Forged. Trim the deck to its minimum, Retrieve the Blade back to hand each turn, and delete enemies in one swing. Masterwork is the highest-value single Forge card (+8 damage, +11 upgraded).
Key Cards:
| Card | Role |
|---|---|
| Sovereign Blade | The win condition — gains damage permanently per Forge |
| Masterwork | +8 damage per Forge (+11 upgraded) — highest Forge efficiency |
| Retrieval | Return Sovereign Blade from discard to hand — ensures every-turn access |
| Block cards (2–3) | The deck skews attack-heavy — Block is mandatory to survive |
Key Relics:
- Crown of Stars: Start combat with 3 Stars — accelerates form transitions
- Astrolabe: Upgrade cards in deck — improves Sovereign Blade quality directly
Gameplan: Decide Forge over Stars by the end of Act 1. Remove cards aggressively — a thin deck is the only way to guarantee Sovereign Blade in hand every turn. Never split focus between Forge and Stars.
Weaknesses: Extremely thin deck means brittle defense. Always maintain 2–3 Block cards minimum. No AoE means multi-enemy rooms require a separate plan.
Build 2: Star Engine — A-Tier
Generate Stars continuously with low-cost generation cards, then spend on devastating big-cost abilities.
Core Concept: Stars are Regent's second resource, generated by specific cards and spent by others. Lunar Pastry provides free passive Star generation each turn. The win condition is aligning a high-Energy turn with a high-Stars turn to fire Astral Pulse or equivalent finishers.
Key Cards:
| Card | Role |
|---|---|
| Solar Strike | Generate Stars + deal damage — combines offense and generation |
| Gather Light | Generate 2 Stars at low cost — the primary accumulation card |
| Lunar Pastry | Passive +1 Stars per turn — free generation that compounds over time |
| Astral Pulse | Spend large Stars for devastating damage — the finisher |
| Particle Wall | Convert Stars into Block — dual-purpose resource use |
Key Relics:
- Crown of Stars: Start combat with 3 Stars — immediately threatening from turn 1
- Meteor Strike: Additional damage from Stars expenditure
Gameplan: Always think in terms of Stars budget — know how many Stars you need for your finisher and plan generation accordingly. Maintain roughly a 3:1 generation-to-spending ratio until the finisher turn.
Weaknesses: Accumulation turns leave offense light — use Particle Wall to convert Stars into Block defensively during those turns. Stars generation without spending cards (or vice versa) is completely non-functional; balance both sides of the equation.
Character Overview and Difficulty
| Character | Recommended Build | Complexity | Best For |
|---|---|---|---|
| Ironclad | Strength / Exhaust | Low | Everyone, especially new players |
| Silent | Shiv / Poison | Medium | Players who enjoy combos |
| Defect | Claw / Lightning | Medium | Players who like resource management |
| Necrobinder | Soul / Doom / Reaper Form | High | Players who want unique mechanics |
| Regent | Sovereign Blade | Highest | Advanced players; multi-resource management |
Universal High-Value Relics
Relics that are strong across all characters:
| Relic | Effect | Notes |
|---|---|---|
| Philosopher's Stone | +1 Energy per turn; all enemies gain +1 Strength | Energy is the game's most valuable resource |
| Runic Pyramid | Cards in hand are not discarded at turn end | Enables hand-building combos across turns |
| Snecko Eye | Draw 2 extra cards; card costs become random | High-ceiling if your deck has many cheap cards |
| Black Star | Elites drop an extra Relic on top of normal reward | Doubles Elite value — take the Elite branches |
| Odd Mushroom | Max HP +14; Strength −1 | HP increase compounds across the entire run |
Card balance changes with each patch. Check the Patch Notes page for the latest updates. :::
:::zh
关于本攻略
本攻略介绍各角色的主要构筑方向,以及驱动构筑运转的关键卡牌、遗物和弱点对策。构筑只是"方向性参考",由于每局游戏提供的卡牌不同,灵活应变至关重要。
铁甲侠
高HP且自带回血的近战战士。最易上手,适合初学者。主要有3种构筑。
构筑1:力量叠加流 — S级
最为稳定的主流构筑。每回合叠加力量,后期用强力的多段攻击压制敌人。
核心思路:通过Demon Form和Limit Break每回合提升力量,用Heavy Blade等多段攻击使伤害爆炸式增长。力量达到10以上时,大多数Boss都能在2到3次重击内被消灭。
关键卡牌:
| 卡牌 | 作用 |
|---|---|
| Demon Form(恶魔形态) | 每回合永久获得力量+2(升级后+3)。有此卡伤害会滚雪球式增长 |
| Limit Break(极限突破) | 将当前力量翻倍。升级后不再消耗,每回合均可使用 |
| Whirlwind(旋风刃) | X费全体攻击。力量越高总伤害越高 |
| Heavy Blade(大剑) | 基础伤害+力量×3的强力单体攻击 |
| Inflame(燃烧) | 立即获得力量+2的能力牌 |
推荐遗物:
- Vajra:每回合开始时力量+1,无条件的永久强化
- Ruined Helmet:每回合免费多摸1张牌
- Paper Phrog:附加易伤时的伤害倍率提升
运营思路:第1幕以收集攻击牌和移除不必要牌为主。第2幕获得Demon Form后与Limit Break搭配使用。第3幕节约HP,每回合用Demon Form积累力量后一举击倒Boss。
弱点与对策:力量上升前输出不足。提前采用2~3张Inflame,或用Anger增加攻击次数来弥补。
构筑2:路障格挡流 — A级
持续积累格挡并用Body Slam造成大量伤害的防御型构筑。
核心思路:Barricade使格挡在回合结束时不再消失,每回合的格挡持续叠加。Body Slam以"当前格挡量=伤害"的形式攻击,使防御行为本身成为伤害来源。
关键卡牌:
| 卡牌 | 作用 |
|---|---|
| Barricade(路障) | 格挡在回合结束时不再消失。该构筑的核心 |
| Body Slam(体摔) | 造成等同于当前格挡值的伤害。升级后不再消耗 |
| Juggernaut(主宰者) | 每次获得格挡时对敌人造成5点伤害 |
| Entrench(加固) | 将当前格挡翻倍 |
| Shrug It Off(一笑而过) | 低费的便捷格挡来源 |
推荐遗物:
- Anchor:第1回合获得10格挡,从一开始就能发挥作用
- Horn Cleat:第2回合获得14格挡,与Anchor叠加后初期防御极为稳固
- Calipers:回合结束时保留25格挡(有时可替代Barricade的作用)
运营思路:尽早获得Barricade是最高优先级。之后积累格挡来源,整备好用Body Slam收尾的体制。
弱点与对策:未获得Barricade时,只是一个缓慢的格挡牌组。在第1-2幕的商店中积极寻找。穿透格挡的攻击会让此构筑无效,保留1~2张攻击牌作为应对。
构筑3:消耗流 — S级
用Corruption使技能牌消耗,Feel No Pain和Dark Embrace从中获得爆炸性格挡和摸牌。
核心思路:Corruption使所有技能牌费用变为0但使用后消耗。Feel No Pain在每次消耗时获得格挡,Dark Embrace在每次消耗时摸1张牌。三者配合后,每张技能牌的消耗都会同时带来格挡和摸牌。
关键卡牌:
| 卡牌 | 作用 |
|---|---|
| Corruption(腐败) | 技能牌费用变为0但会消耗。核心引擎,不准备好收益牌不要使用 |
| Feel No Pain(无痛感) | 消耗时获得格挡+4(升级后+6)。防御核心 |
| Dark Embrace(黑暗拥抱) | 消耗时摸1张牌。摸牌引擎 |
| True Grit(真实勇气) | 消耗1张牌,获得4点格挡。在Corruption前独立运作 |
| Burning Pact(燃烧契约) | 消耗1张牌,摸2张牌 |
推荐遗物:
- Dead Branch:每次消耗时添加1张随机牌。无限供应来源
- Charon's Ashes:消耗时对所有敌人造成3点伤害
- Strange Spoon:被消耗的牌有50%概率进入弃牌堆而非消失
运营思路:第1幕收集Feel No Pain和True Grit,单独运作也没有问题。第2幕在商店或精英奖励中积极寻找Corruption。激活Corruption之前务必确保至少1张收益牌在手。
弱点与对策:Corruption单独毫无用处。在没有Feel No Pain或Dark Embrace的情况下使用Corruption,只会白白消耗所有技能牌。务必先准备好收益牌再激活Corruption。
沉默者
以中毒、单检和STS2独有的教活弃牌为核心的战术型角色。
构筑1:单检流 — A级
使用0费连续攻击压制的构筑。从第1幕起即可发挥作用。
关键卡牌:
| 卡牌 | 作用 |
|---|---|
| Infinite Blades(无限刀刃) | 每回合将1张单检加入手牌 |
| Blade Dance(刀刃之舞) | 将3张单检加入手牌 |
| Accuracy(精准) | 单检伤害+4。叠加3~4张后每张单检伤害超过16 |
| After Image(残像) | 每使用1张牌获得格挡+1 |
| Storm of Steel(钢铁风暴) | 将手牌全部转换为单检并摸1张牌 |
弱点与对策:群体攻击效率低。优先取Blade Dance扩大覆盖范围。
构筑2:中毒流 — A级
积累中毒后用Catalyst引爆的持久战型构筑。
关键卡牌:
| 卡牌 | 作用 |
|---|---|
| Deadly Poison(剧毒) | 附加中毒5层(升级后7层) |
| Noxious Fumes(毒雾) | 回合开始时自动附加中毒+2 |
| Catalyst(催化剂) | 将敌人的中毒层数翻倍。决定性一击 |
| Burst(爆发) | 下一张技能牌触发2次。可在同一回合打出双Catalyst |
| Poisoned Stab | 伤害+附加中毒 |
弱点与对策:中毒积累期间会持续受到伤害。早期确保格挡来源。对免疫中毒的敌人完全无效,保留1~2张非中毒攻击牌。
构筑3:教活弃牌流 — A级
利用STS2独有的"教活"关键字的高级构筑。
核心思路:教活卡牌在己方回合被弃置时免费触发。Tactician被弃置时获得+1能量,Untouchable获得格挡,Abrasive获得敏捷和荆棘。Tools of the Trade每回合强制摸弃各1张,保证每回合至少触发1次教活。
关键卡牌:
| 卡牌 | 作用 |
|---|---|
| Tools of the Trade | 每回合摸1张+弃1张。教活的核心触发来源 |
| Tactician(战术家) | 教活:获得+1能量 |
| Acrobatics(杂技) | 弃3张牌,摸1张牌。同时触发多张教活 |
| Calculated Gamble(豪赌) | 弃全部手牌并重新摸牌。大量触发教活 |
| Abrasive(研磨) | 教活:+1敏捷+荆棘4 |
推荐遗物:
- Tingsha:每次弃牌对所有敌人造成3点伤害
- Tough Bandages:每次弃牌获得格挡+3
运营思路:尽量精简牌组加快循环速度。第1幕优先移除Strike。第2幕获得Tools of the Trade后弃牌节奏趋于稳定。叠加2~3张Tactician后能量接近无限。
弱点与对策:教活牌数量不足时,弃牌只是浪费手牌。在拥有5~6张教活牌之前,不要强行大量弃牌。
残机
操纵法球的魔法师型角色。STS2中集中是临时的而非永久的,注重法球循环速度。
构筑1:爪击流 — S级
完全忽略法球,通过连打0费攻击牌累积Claw伤害的最强构筑。不可混合Claw和法球流。
核心思路:Claw(0费3伤害)每次使用后所有Claw永久+2伤害。用FTL、Beam Cell等0费攻击填充牌组,再用All for One打出弃牌堆中所有0费牌收尾。
关键卡牌:
| 卡牌 | 作用 |
|---|---|
| Claw(爪击) | 0费3伤害,使用后所有Claw+2伤害。放4~6张 |
| All for One | 打出弃牌堆中所有0费牌。收尾利器 |
| FTL | 0费攻击;第1张打出时摸3张 |
| Hologram+(升级后) | 0费:从弃牌堆取回1张牌并摸牌 |
| Go for the Eyes | 0费攻击+附加虚弱 |
运营思路:从第1幕起优先采用0费攻击牌,完全不取法球牌。凑齐3~4张Claw后第2幕加速。All for One只需1张。
弱点与对策:无法球意味着没有被动格挡。保留几张冰霜或技能格挡牌。第2幕精英战可能因防御不足而受创。
构筑2:闪电法球流 — A级
通过连锁闪电球造成伤害的攻击型构筑。
关键卡牌:
| 卡牌 | 作用 |
|---|---|
| Defragment(碎片整理) | 集中+1(升级后+2),提升所有法球效果 |
| Voltaic(电流) | 追加与本场战斗引导闪电数量相同的闪电 |
| Multi-Cast(群发) | 多次发动法球。最大火力来源 |
| Electrodynamics | 使闪电球变为全体攻击 |
| Synchronize(同步) | 全部4种法球齐聚时临时+8集中 |
弱点与对策:单体伤害不稳定。对单体Boss时,Electrodynamics效率下降。保持Multi-Cast在手作为爆发选项。
构筑3:暗黑法球执行流 — A级
在暗黑球中蓄积能量,一击必杀的构筑。
关键卡牌:
| 卡牌 | 作用 |
|---|---|
| Dark Shackles | 发动暗黑球。造成其驻留期间蓄积能量量的伤害 |
| Doom and Gloom(黑暗末日) | 引导暗黑球+对所有敌人造成伤害 |
| Runic Dome(符文穹顶) | 无法看到敌人意图,但每回合+1能量 |
| Creative AI(创意AI) | 每回合向手牌添加随机能力牌 |
弱点与对策:暗黑蓄积前攻击手段很少。用冰霜球拖延时间。法球槽不足时蓄积速度慢,优先寻找扩展法球槽的遗物。
死灵缚者
召唤随从的独特风格。以灵魂和末日诅咒两大机制为核心。
构筑1:灵魂叠加流 — S级
生成灵魂连锁摸牌,用Haunt积累大量伤害的最快构筑。
核心思路:灵魂是0费消耗牌,打出后摸2张。Haunt使每打出1张灵魂对随机敌人造成6伤害。组合Capture Spirit和Dirge大量生成灵魂,每回合连打46张灵魂可造成2436伤害同时摸到更多灵魂。对Boss战到第5~6回合时,每回合伤害超过100并不罕见。
关键卡牌:
| 卡牌 | 作用 |
|---|---|
| Capture Spirit(捕获灵魂) | 1费生成3个灵魂。效率最高的灵魂产生来源 |
| Grave Warden(墓地守护者) | 1费生成1个灵魂+获得格挡 |
| Dirge(悲歌) | X费生成X个灵魂+增加奥斯蒂HP |
| Haunt(纠缠) | 每打出1张灵魂对随机敌人造成6伤害。胜利条件 |
| Soul Storm(灵魂风暴) | 造成弃牌堆中灵魂数量×2的伤害 |
推荐遗物:
- Undying Sigil(不死印记):在商店必买。HP低于10时有一次免死机会
- Bone Flute(骨笛):奥斯蒂攻击时获得格挡+2
- Bookmark:保留牌费用-1
运营思路:第1幕将灵魂生产牌和Haunt列为最高优先级。没有Haunt只是摸牌引擎,找不到Haunt时切换到末日诅咒流。用Dirge增加奥斯蒂HP的同时循环灵魂。
弱点与对策:没有Haunt时构筑完全无法输出伤害。未找到Haunt时,与末日诅咒流并行构筑以防不测。初期伤害缓慢,多准备格挡来源。
构筑2:末日诅咒处决流 — A级
对敌人叠加末日诅咒,当HP满足条件时触发即死。
关键卡牌:
| 卡牌 | 作用 |
|---|---|
| Scourge(鞭打) | 附加末日诅咒+摸牌 |
| No Escape(无处可逃) | 附加末日诅咒+10,此后每10层再+5 |
| End of Days(世界末日) | 附加末日诅咒29+使HP不超过末日诅咒的敌人即死 |
| Borrowed Time(借来的时间) | 对自己附加末日诅咒+3,获得+1能量。近乎免费的能量来源 |
| Blight Strike | 叠加末日诅咒的同时获得格挡 |
运营思路:Borrowed Time对自己施加末日诅咒3,但自身的末日诅咒容易管理,换来的能量很合算。理想的收尾是No Escape → End of Days击杀大多数Boss。使用End of Days之前将敌人HP削至接近末日诅咒数。
弱点与对策:单纯叠加末日诅咒无法杀死敌人,必须将敌人HP削至末日诅咒数以下或使用End of Days。第2幕普通敌人在末日诅咒发挥作用前就死亡,保留直接攻击牌。
构筑3:收割者之形流 — S级
高上限爆发型构筑。Reaper Form使所有攻击牌变为末日诅咒量产机,每次攻击附加等同于伤害量的末日诅咒。
核心思路:Reaper Form(3费)是一张能力牌,发动后使所有攻击同时附加等同于伤害量的末日诅咒。例如造成40伤害的攻击同时叠加40层末日诅咒。Sleight of Flesh在对敌人附加减益效果时造成额外伤害——由于末日诅咒是减益,每次攻击会通过Sleight多次命中。Immortal Crest将末日诅咒超过HP的敌人的伤害减半,解决了构筑的防御弱点。
关键卡牌:
| 卡牌 | 作用 |
|---|---|
| Reaper Form(收割者之形) | 能力牌:攻击附加等同于伤害量的末日诅咒。整个构筑的核心 |
| Day of Reckoning(审判日) | 对所有敌人附加末日诅咒29+即死末日诅咒超过HP的敌人。群体终结技 |
| The Hour(时刻) | 造成等同于当前末日诅咒数的伤害。单体终结技 |
| Sleight of Flesh(肉体的技巧) | 对敌人施加减益时造成额外伤害。每次Doom附加都会触发 |
| Shroud(覆盖) | 附加末日诅咒时获得格挡。攻击的同时积累防御 |
推荐遗物:
- Immortal Crest(不死纹章):末日诅咒超过HP的敌人伤害减少50%。Reaper Form发动后大幅提升生存率
- Lantern(提灯):战斗开始时+1能量。配合Friendship可以第1回合发动Reaper Form(3费)
- Funerary Mask(葬礼面具)(Futility纪元,第2幕通关奖励):强化所有末日诅咒机制
运营思路:找到Reaper Form之前按普通末日诅咒流运作。获得后每场战斗尽早发动是最高优先级。发动后每张攻击牌同时造成伤害、叠加末日诅咒,通过Shroud获得格挡。用Day of Reckoning收尾群体或The Hour收尾单体。倾向于拿攻击牌而非技能牌以最大化Reaper Form触发次数。
弱点与对策:Reaper Form费用为3,第1回合打不出会失去节奏。通过Lantern、Friendship或低费0费攻击来解决。找到Reaper Form之前,牌组应以纯末日诅咒流运作以防止跑废。
摄政者
在管理星力资源的同时发动大招的高级角色。核心决策:在游戏开始时选择星力或锻造,混合两者会导致失败。
构筑1:君主之刃流 — S级
不断锻造Sovereign Blade,一击必杀的构筑。
核心思路:Sovereign Blade每次被锻造时永久增加伤害。将牌组精简到最少,用Retrieval每回合取回利刃,一击删除敌人。Masterwork是效率最高的锻造牌(+8伤害,升级后+11)。
关键卡牌:
| 卡牌 | 作用 |
|---|---|
| Sovereign Blade(君主之刃) | 每次锻造永久增加伤害。胜利条件 |
| Masterwork(杰作) | 锻造+8伤害(升级后+11)。最高效率锻造牌 |
| Retrieval(取回) | 从弃牌堆取回Sovereign Blade。确保每回合可用 |
| 2~3张格挡牌 | 牌组偏向攻击,必须确保防御 |
运营思路:在第1幕结束前决定锻造路线而非星力路线。积极移除牌组——精简牌组是每回合都能摸到Sovereign Blade的唯一方法。绝不同时分散到锻造和星力两条路线。
弱点与对策:牌组过薄导致防御脆弱。始终保留最少2~3张格挡牌。没有群体攻击,多敌房间需要另外应对手段。
构筑2:星力引擎流 — A级
持续生成星力,用消耗型大招一击必杀的构筑。
关键卡牌:
| 卡牌 | 作用 |
|---|---|
| Solar Strike(太阳一击) | 生成星力+攻击。同时兼顾输出和生产 |
| Gather Light(聚光) | 低费生成2星力。主要积累来源 |
| Lunar Pastry(月饼) | 每回合被动生成+1星力。复利式增长 |
| Astral Pulse(星脉波动) | 消耗大量星力造成毁灭性伤害 |
| Particle Wall(粒子墙) | 将星力转换为格挡。攻防两用 |
运营思路:始终以星力预算为基础思考——了解终结技所需星力,提前规划生成量。在终结技回合到来之前,保持生产与消耗比例约为3:1。
弱点与对策:积累星力的回合攻击手段匮乏,用Particle Wall将星力转为格挡。生产和消耗比例维持3:1左右,消耗来源不足时全面崩溃。
各角色难度与适合的玩家
| 角色 | 推荐构筑 | 复杂度 | 适合的人 |
|---|---|---|---|
| 铁甲侠 | 力量 / 消耗 | ★☆☆☆☆ | 所有人,尤其是初学者 |
| 沉默者 | 单检 / 中毒 | ★★★☆☆ | 喜欢连击的人 |
| 残机 | 爪击 / 闪电 | ★★★☆☆ | 喜欢资源管理的人 |
| 死灵缚者 | 灵魂 / 末日诅咒 / 收割者之形 | ★★★★☆ | 喜欢独特机制的人 |
| 摄政者 | 君主之刃 | ★★★★★ | 高级玩家·擅长多资源管理的人 |
各角色通用强力遗物
对所有角色都有价值的通用遗物。
| 遗物 | 效果 | 备注 |
|---|---|---|
| Philosopher's Stone | 每回合+1能量,所有敌人获得力量+1减益 | 能量增加属于最强级别 |
| Runic Pyramid | 回合结束时不弃置手牌 | 对连击牌组具有革命性意义 |
| Snecko Eye | 每回合额外摸2张牌,卡牌费用随机化 | 高风险高回报 |
| Black Star | 精英除普通奖励外额外掉落遗物 | 可积极追求精英路线 |
| Odd Mushroom | 最大HP+14,力量-1 | HP增加大幅提升生存率 |
最新补丁可能改变卡牌平衡。请参考补丁说明获取最新信息。 :::
:::zh-tw
關於本攻略
本攻略介紹各角色的主要構築方向,以及驅動構築運轉的關鍵卡牌、遺物和弱點對策。構築只是"方向性參考",由於每局遊戲提供的卡牌不同,靈活應變至關重要。
鐵甲俠
高HP且自帶回血的近戰戰士。最易上手,適合初學者。主要有3種構築。
構築1:力量疊加流 — S級
最為穩定的主流構築。每回合疊加力量,後期用強力的多段攻擊壓制敵人。
核心思路:透過Demon Form和Limit Break每回合提升力量,用Heavy Blade等多段攻擊使傷害爆炸式增長。力量達到10以上時,大多數Boss都能在2到3次重擊內被消滅。
關鍵卡牌:
| 卡牌 | 作用 |
|---|---|
| Demon Form(惡魔形態) | 每回合永久獲得力量+2(升級後+3)。有此卡傷害會滾雪球式增長 |
| Limit Break(極限突破) | 將當前力量翻倍。升級後不再消耗,每回合均可使用 |
| Whirlwind(旋風刃) | X費全體攻擊。力量越高總傷害越高 |
| Heavy Blade(大劍) | 基礎傷害+力量×3的強力單體攻擊 |
| Inflame(燃燒) | 立即獲得力量+2的能力牌 |
推薦遺物:
- Vajra:每回合開始時力量+1,無條件的永久強化
- Ruined Helmet:每回合免費多摸1張牌
- Paper Phrog:附加易傷時的傷害倍率提升
運營思路:第1幕以收集攻擊牌和移除不必要牌為主。第2幕獲得Demon Form後與Limit Break搭配使用。第3幕節約HP,每回合用Demon Form積累力量後一舉擊倒Boss。
弱點與對策:力量上升前輸出不足。提前採用2~3張Inflame,或用Anger增加攻擊次數來彌補。
構築2:路障格擋流 — A級
持續積累格擋並用Body Slam造成大量傷害的防禦型構築。
核心思路:Barricade使格擋在回合結束時不再消失,每回合的格擋持續疊加。Body Slam以"當前格擋量=傷害"的形式攻擊,使防禦行為本身成為傷害來源。
關鍵卡牌:
| 卡牌 | 作用 |
|---|---|
| Barricade(路障) | 格擋在回合結束時不再消失。該構築的核心 |
| Body Slam(體摔) | 造成等同於當前格擋值的傷害。升級後不再消耗 |
| Juggernaut(主宰者) | 每次獲得格擋時對敵人造成5點傷害 |
| Entrench(加固) | 將當前格擋翻倍 |
| Shrug It Off(一笑而過) | 低費的便捷格擋來源 |
推薦遺物:
- Anchor:第1回合獲得10格擋,從一開始就能發揮作用
- Horn Cleat:第2回合獲得14格擋,與Anchor疊加後初期防禦極為穩固
- Calipers:回合結束時保留25格擋(有時可替代Barricade的作用)
運營思路:儘早獲得Barricade是最高優先順序。之後積累格擋來源,整備好用Body Slam收尾的體制。
弱點與對策:未獲得Barricade時,只是一個緩慢的格擋牌組。在第1-2幕的商店中積極尋找。穿透格擋的攻擊會讓此構築無效,保留1~2張攻擊牌作為應對。
構築3:消耗流 — S級
用Corruption使技能牌消耗,Feel No Pain和Dark Embrace從中獲得爆炸性格擋和摸牌。
核心思路:Corruption使所有技能牌費用變為0但使用後消耗。Feel No Pain在每次消耗時獲得格擋,Dark Embrace在每次消耗時摸1張牌。三者配合後,每張技能牌的消耗都會同時帶來格擋和摸牌。
關鍵卡牌:
| 卡牌 | 作用 |
|---|---|
| Corruption(腐敗) | 技能牌費用變為0但會消耗。核心引擎,不準備好收益牌不要使用 |
| Feel No Pain(無痛感) | 消耗時獲得格擋+4(升級後+6)。防禦核心 |
| Dark Embrace(黑暗擁抱) | 消耗時摸1張牌。摸牌引擎 |
| True Grit(真實勇氣) | 消耗1張牌,獲得4點格擋。在Corruption前獨立運作 |
| Burning Pact(燃燒契約) | 消耗1張牌,摸2張牌 |
推薦遺物:
- Dead Branch:每次消耗時新增1張隨機牌。無限供應來源
- Charon's Ashes:消耗時對所有敵人造成3點傷害
- Strange Spoon:被消耗的牌有50%機率進入棄牌堆而非消失
運營思路:第1幕收集Feel No Pain和True Grit,單獨運作也沒有問題。第2幕在商店或精英獎勵中積極尋找Corruption。啟用Corruption之前務必確保至少1張收益牌在手。
弱點與對策:Corruption單獨毫無用處。在沒有Feel No Pain或Dark Embrace的情況下使用Corruption,只會白白消耗所有技能牌。務必先準備好收益牌再啟用Corruption。
沉默者
以中毒、單檢和STS2獨有的教活棄牌為核心的戰術型角色。
構築1:單檢流 — A級
使用0費連續攻擊壓制的構築。從第1幕起即可發揮作用。
關鍵卡牌:
| 卡牌 | 作用 |
|---|---|
| Infinite Blades(無限刀刃) | 每回合將1張單檢加入手牌 |
| Blade Dance(刀刃之舞) | 將3張單檢加入手牌 |
| Accuracy(精準) | 單檢傷害+4。疊加3~4張後每張單檢傷害超過16 |
| After Image(殘像) | 每使用1張牌獲得格擋+1 |
| Storm of Steel(鋼鐵風暴) | 將手牌全部轉換為單檢並摸1張牌 |
弱點與對策:群體攻擊效率低。優先取Blade Dance擴大覆蓋範圍。
構築2:中毒流 — A級
積累中毒後用Catalyst引爆的持久戰型構築。
關鍵卡牌:
| 卡牌 | 作用 |
|---|---|
| Deadly Poison(劇毒) | 附加中毒5層(升級後7層) |
| Noxious Fumes(毒霧) | 回合開始時自動附加中毒+2 |
| Catalyst(催化劑) | 將敵人的中毒層數翻倍。決定性一擊 |
| Burst(爆發) | 下一張技能牌觸發2次。可在同一回合打出雙Catalyst |
| Poisoned Stab | 傷害+附加中毒 |
弱點與對策:中毒積累期間會持續受到傷害。早期確保格擋來源。對免疫中毒的敵人完全無效,保留1~2張非中毒攻擊牌。
構築3:教活棄牌流 — A級
利用STS2獨有的"教活"關鍵字的高階構築。
核心思路:教活卡牌在己方回合被棄置時免費觸發。Tactician被棄置時獲得+1能量,Untouchable獲得格擋,Abrasive獲得敏捷和荊棘。Tools of the Trade每回合強制摸棄各1張,保證每回合至少觸發1次教活。
關鍵卡牌:
| 卡牌 | 作用 |
|---|---|
| Tools of the Trade | 每回合摸1張+棄1張。教活的核心觸發來源 |
| Tactician(戰術家) | 教活:獲得+1能量 |
| Acrobatics(雜技) | 棄3張牌,摸1張牌。同時觸發多張教活 |
| Calculated Gamble(豪賭) | 棄全部手牌並重新摸牌。大量觸發教活 |
| Abrasive(研磨) | 教活:+1敏捷+荊棘4 |
推薦遺物:
- Tingsha:每次棄牌對所有敵人造成3點傷害
- Tough Bandages:每次棄牌獲得格擋+3
運營思路:儘量精簡牌組加快迴圈速度。第1幕優先移除Strike。第2幕獲得Tools of the Trade後棄牌節奏趨於穩定。疊加2~3張Tactician後能量接近無限。
弱點與對策:教活牌數量不足時,棄牌只是浪費手牌。在擁有5~6張教活牌之前,不要強行大量棄牌。
殘機
操縱法球的魔法師型角色。STS2中集中是臨時的而非永久的,注重法球迴圈速度。
構築1:爪擊流 — S級
完全忽略法球,透過連打0費攻擊牌累積Claw傷害的最強構築。不可混合Claw和法球流。
核心思路:Claw(0費3傷害)每次使用後所有Claw永久+2傷害。用FTL、Beam Cell等0費攻擊填充牌組,再用All for One打出棄牌堆中所有0費牌收尾。
關鍵卡牌:
| 卡牌 | 作用 |
|---|---|
| Claw(爪擊) | 0費3傷害,使用後所有Claw+2傷害。放4~6張 |
| All for One | 打出棄牌堆中所有0費牌。收尾利器 |
| FTL | 0費攻擊;第1張打出時摸3張 |
| Hologram+(升級後) | 0費:從棄牌堆取回1張牌並摸牌 |
| Go for the Eyes | 0費攻擊+附加虛弱 |
運營思路:從第1幕起優先採用0費攻擊牌,完全不取法球牌。湊齊3~4張Claw後第2幕加速。All for One只需1張。
弱點與對策:無法球意味著沒有被動格擋。保留幾張冰霜或技能格擋牌。第2幕精英戰可能因防禦不足而受創。
構築2:閃電法球流 — A級
透過連鎖閃電球造成傷害的攻擊型構築。
關鍵卡牌:
| 卡牌 | 作用 |
|---|---|
| Defragment(碎片整理) | 集中+1(升級後+2),提升所有法球效果 |
| Voltaic(電流) | 追加與本場戰鬥引導閃電數量相同的閃電 |
| Multi-Cast(群發) | 多次發動法球。最大火力來源 |
| Electrodynamics | 使閃電球變為全體攻擊 |
| Synchronize(同步) | 全部4種法球齊聚時臨時+8集中 |
弱點與對策:單體傷害不穩定。對單體Boss時,Electrodynamics效率下降。保持Multi-Cast在手作為爆發選項。
構築3:暗黑法球執行流 — A級
在暗黑球中蓄積能量,一擊必殺的構築。
關鍵卡牌:
| 卡牌 | 作用 |
|---|---|
| Dark Shackles | 發動暗黑球。造成其駐留期間蓄積能量量的傷害 |
| Doom and Gloom(黑暗末日) | 引導暗黑球+對所有敵人造成傷害 |
| Runic Dome(符文穹頂) | 無法看到敵人意圖,但每回合+1能量 |
| Creative AI(創意AI) | 每回合向手牌新增隨機能力牌 |
弱點與對策:暗黑蓄積前攻擊手段很少。用冰霜球拖延時間。法球槽不足時蓄積速度慢,優先尋找擴充套件法球槽的遺物。
死靈縛者
召喚隨從的獨特風格。以靈魂和末日詛咒兩大機制為核心。
構築1:靈魂疊加流 — S級
生成靈魂連鎖摸牌,用Haunt積累大量傷害的最快構築。
核心思路:靈魂是0費消耗牌,打出後摸2張。Haunt使每打出1張靈魂對隨機敵人造成6傷害。組合Capture Spirit和Dirge大量生成靈魂,每回合連打46張靈魂可造成2436傷害同時摸到更多靈魂。對Boss戰到第5~6回合時,每回合傷害超過100並不罕見。
關鍵卡牌:
| 卡牌 | 作用 |
|---|---|
| Capture Spirit(捕獲靈魂) | 1費生成3個靈魂。效率最高的靈魂產生來源 |
| Grave Warden(墓地守護者) | 1費生成1個靈魂+獲得格擋 |
| Dirge(悲歌) | X費生成X個靈魂+增加奧斯蒂HP |
| Haunt(糾纏) | 每打出1張靈魂對隨機敵人造成6傷害。勝利條件 |
| Soul Storm(靈魂風暴) | 造成棄牌堆中靈魂數量×2的傷害 |
推薦遺物:
- Undying Sigil(不死印記):在商店必買。HP低於10時有一次免宕機會
- Bone Flute(骨笛):奧斯蒂攻擊時獲得格擋+2
- Bookmark:保留牌費用-1
運營思路:第1幕將靈魂生產牌和Haunt列為最高優先順序。沒有Haunt只是摸牌引擎,找不到Haunt時切換到末日詛咒流。用Dirge增加奧斯蒂HP的同時迴圈靈魂。
弱點與對策:沒有Haunt時構築完全無法輸出傷害。未找到Haunt時,與末日詛咒流並行構築以防不測。初期傷害緩慢,多準備格擋來源。
構築2:末日詛咒處決流 — A級
對敵人疊加末日詛咒,當HP滿足條件時觸發即死。
關鍵卡牌:
| 卡牌 | 作用 |
|---|---|
| Scourge(鞭打) | 附加末日詛咒+摸牌 |
| No Escape(無處可逃) | 附加末日詛咒+10,此後每10層再+5 |
| End of Days(世界末日) | 附加末日詛咒29+使HP不超過末日詛咒的敵人即死 |
| Borrowed Time(借來的時間) | 對自己附加末日詛咒+3,獲得+1能量。近乎免費的能量來源 |
| Blight Strike | 疊加末日詛咒的同時獲得格擋 |
運營思路:Borrowed Time對自己施加末日詛咒3,但自身的末日詛咒容易管理,換來的能量很合算。理想的收尾是No Escape → End of Days擊殺大多數Boss。使用End of Days之前將敵人HP削至接近末日詛咒數。
弱點與對策:單純疊加末日詛咒無法殺死敵人,必須將敵人HP削至末日詛咒數以下或使用End of Days。第2幕普通敵人在末日詛咒發揮作用前就死亡,保留直接攻擊牌。
構築3:收割者之形流 — S級
高上限爆發型構築。Reaper Form使所有攻擊牌變為末日詛咒量產機,每次攻擊附加等同於傷害量的末日詛咒。
核心思路:Reaper Form(3費)是一張能力牌,發動後使所有攻擊同時附加等同於傷害量的末日詛咒。例如造成40傷害的攻擊同時疊加40層末日詛咒。Sleight of Flesh在對敵人附加減益效果時造成額外傷害——由於末日詛咒是減益,每次攻擊會透過Sleight多次命中。Immortal Crest將末日詛咒超過HP的敵人的傷害減半,解決了構築的防禦弱點。
關鍵卡牌:
| 卡牌 | 作用 |
|---|---|
| Reaper Form(收割者之形) | 能力牌:攻擊附加等同於傷害量的末日詛咒。整個構築的核心 |
| Day of Reckoning(審判日) | 對所有敵人附加末日詛咒29+即死末日詛咒超過HP的敵人。群體終結技 |
| The Hour(時刻) | 造成等同於當前末日詛咒數的傷害。單體終結技 |
| Sleight of Flesh(肉體的技巧) | 對敵人施加減益時造成額外傷害。每次Doom附加都會觸發 |
| Shroud(覆蓋) | 附加末日詛咒時獲得格擋。攻擊的同時積累防禦 |
推薦遺物:
- Immortal Crest(不死紋章):末日詛咒超過HP的敵人傷害減少50%。Reaper Form發動後大幅提升生存率
- Lantern(提燈):戰鬥開始時+1能量。配合Friendship可以第1回合發動Reaper Form(3費)
- Funerary Mask(葬禮面具)(Futility紀元,第2幕通關獎勵):強化所有末日詛咒機制
運營思路:找到Reaper Form之前按普通末日詛咒流運作。獲得後每場戰鬥儘早發動是最高優先順序。發動後每張攻擊牌同時造成傷害、疊加末日詛咒,透過Shroud獲得格擋。用Day of Reckoning收尾群體或The Hour收尾單體。傾向於拿攻擊牌而非技能牌以最大化Reaper Form觸發次數。
弱點與對策:Reaper Form費用為3,第1回合打不出會失去節奏。透過Lantern、Friendship或低費0費攻擊來解決。找到Reaper Form之前,牌組應以純末日詛咒流運作以防止跑廢。
攝政者
在管理星力資源的同時發動大招的高階角色。核心決策:在遊戲開始時選擇星力或鍛造,混合兩者會導致失敗。
構築1:君主之刃流 — S級
不斷鍛造Sovereign Blade,一擊必殺的構築。
核心思路:Sovereign Blade每次被鍛造時永久增加傷害。將牌組精簡到最少,用Retrieval每回合取回利刃,一擊刪除敵人。Masterwork是效率最高的鍛造牌(+8傷害,升級後+11)。
關鍵卡牌:
| 卡牌 | 作用 |
|---|---|
| Sovereign Blade(君主之刃) | 每次鍛造永久增加傷害。勝利條件 |
| Masterwork(傑作) | 鍛造+8傷害(升級後+11)。最高效率鍛造牌 |
| Retrieval(取回) | 從棄牌堆取回Sovereign Blade。確保每回合可用 |
| 2~3張格擋牌 | 牌組偏向攻擊,必須確保防禦 |
運營思路:在第1幕結束前決定鍛造路線而非星力路線。積極移除牌組——精簡牌組是每回合都能摸到Sovereign Blade的唯一方法。絕不同時分散到鍛造和星力兩條路線。
弱點與對策:牌組過薄導致防禦脆弱。始終保留最少2~3張格擋牌。沒有群體攻擊,多敵房間需要另外應對手段。
構築2:星力引擎流 — A級
持續生成星力,用消耗型大招一擊必殺的構築。
關鍵卡牌:
| 卡牌 | 作用 |
|---|---|
| Solar Strike(太陽一擊) | 生成星力+攻擊。同時兼顧輸出和生產 |
| Gather Light(聚光) | 低費生成2星力。主要積累來源 |
| Lunar Pastry(月餅) | 每回合被動生成+1星力。複利式增長 |
| Astral Pulse(星脈波動) | 消耗大量星力造成毀滅性傷害 |
| Particle Wall(粒子牆) | 將星力轉換為格擋。攻防兩用 |
運營思路:始終以星力預算為基礎思考——瞭解終結技所需星力,提前規劃生成量。在終結技回合到來之前,保持生產與消耗比例約為3:1。
弱點與對策:積累星力的回合攻擊手段匱乏,用Particle Wall將星力轉為格擋。生產和消耗比例維持3:1左右,消耗來源不足時全面崩潰。
各角色難度與適合的玩家
| 角色 | 推薦構築 | 複雜度 | 適合的人 |
|---|---|---|---|
| 鐵甲俠 | 力量 / 消耗 | ★☆☆☆☆ | 所有人,尤其是初學者 |
| 沉默者 | 單檢 / 中毒 | ★★★☆☆ | 喜歡連擊的人 |
| 殘機 | 爪擊 / 閃電 | ★★★☆☆ | 喜歡資源管理的人 |
| 死靈縛者 | 靈魂 / 末日詛咒 / 收割者之形 | ★★★★☆ | 喜歡獨特機制的人 |
| 攝政者 | 君主之刃 | ★★★★★ | 高階玩家·擅長多資源管理的人 |
各角色通用強力遺物
對所有角色都有價值的通用遺物。
| 遺物 | 效果 | 備註 |
|---|---|---|
| Philosopher's Stone | 每回合+1能量,所有敵人獲得力量+1減益 | 能量增加屬於最強級別 |
| Runic Pyramid | 回合結束時不棄置手牌 | 對連擊牌組具有革命性意義 |
| Snecko Eye | 每回合額外摸2張牌,卡牌費用隨機化 | 高風險高回報 |
| Black Star | 精英除普通獎勵外額外掉落遺物 | 可積極追求精英路線 |
| Odd Mushroom | 最大HP+14,力量-1 | HP增加大幅提升生存率 |
最新補丁可能改變卡牌平衡。請參考補丁說明獲取最新資訊。 :::
:::ko
빌드 가이드에 대해
이 가이드에서는 각 캐릭터의 주요 빌드와 그것을 작동시키기 위한 핵심 카드, 유물, 약점과 대책을 해설한다. 빌드는 "방향성의 기준"이며, 게임마다 제시되는 카드가 다르기 때문에 유연하게 변화시키는 것이 중요하다.
아이언클래드(Ironclad)
높은 HP와 자연 회복을 지닌 근접 전사. 가장 다루기 쉬워 초보자에게 적합하다. 주요 빌드는 3가지.
빌드 1: 근력(Strength) 스케일 빌드 — S티어
가장 안정적인 주류 빌드. 매 턴 근력을 쌓아 후반에 강력한 다단 공격으로 압도한다.
핵심 개념: Demon Form과 Limit Break으로 매 턴 근력을 늘리고, Heavy Blade와 Whirlwind로 피해를 폭발적으로 증가시킨다. 근력 10 이상에서 Limit Break를 1회 사용하면 대부분의 보스를 2~3번의 Heavy Blade로 처치할 수 있다.
핵심 카드:
| 카드 | 역할 |
|---|---|
| Demon Form (악마의 형태) | 매 턴 근력+2(업그레이드 후 +3)의 영구 파워 |
| Limit Break (한계 돌파) | 근력을 2배로 만든다. 업그레이드 후 소진되지 않아 매 턴 사용 가능 |
| Whirlwind (선풍검) | X 에너지×전체 공격 |
| Heavy Blade (대검) | 기본 피해+근력×3의 강력한 단체 공격 |
| Inflame (인플레임) | 근력+2를 주는 파워 |
추천 유물:
- Vajra: 매 턴 시작 시 근력+1
- Ruined Helmet: 매 턴 카드 1장을 무료로 드로우
- Paper Phrog: 취약 부여 시 피해 배율 증가
운영: 1막은 공격 카드 수집과 불필요한 카드 제거에 집중한다. 2막에서 Demon Form을 획득하면 Limit Break와 조합한다. 3막은 HP를 아끼면서 Demon Form으로 매 턴 근력을 쌓다가 한 번에 보스를 처치한다.
약점과 대책: 근력이 오르기 전에는 화력이 부족하다. Inflame을 2~3장 미리 채용하거나 Anger로 공격 횟수를 확보해 보완한다.
빌드 2: 바리케이드(Barricade) 방어막 빌드 — A티어
방어막을 계속 쌓아 Body Slam으로 대미지를 주는 방어형 빌드.
핵심 개념: Barricade로 방어막이 턴 종료 시 사라지지 않게 되고, 매 턴 방어막이 누적된다. Body Slam은 "현재 방어막 량=피해"로 공격하기 때문에, 방어 행동 자체가 피해가 된다.
핵심 카드:
| 카드 | 역할 |
|---|---|
| Barricade (바리케이드) | 방어막이 턴 종료 시 사라지지 않는다. 핵심 카드 |
| Body Slam (보디 슬램) | 현재 방어막 값과 동일한 피해를 준다 |
| Juggernaut (저거넛) | 방어막 획득 시마다 적에게 5 피해 |
| Entrench (참호전) | 현재 방어막을 2배로 만든다 |
| Shrug It Off (흘려내기) | 저비용의 편리한 방어막 원천 |
추천 유물:
- Anchor: 1턴에 방어막 10. 처음부터 바로 효과를 발휘
- Horn Cleat: 2턴에 방어막 14. Anchor와 중첩하면 초반 방어가 두터워짐
- Calipers: 턴 종료 시 방어막 25를 유지 (Barricade가 없어도 일부 역할을 대체)
운영: Barricade를 최대한 빨리 획득하는 것이 최우선이다. 이후 방어막 원천을 모아 Body Slam으로 마무리할 수 있는 체제를 갖춘다.
약점과 대책: Barricade 없이는 단순한 방어막 덱이 된다. 12막 상점에서 적극적으로 탐색한다. 방어막 관통 공격에는 무력하므로 공격 카드도 12장 남겨둔다.
빌드 3: 소진(Exhaust) 빌드 — S티어
Corruption으로 기술 카드를 소진시키고, Feel No Pain과 Dark Embrace로 폭발적인 방어막과 드로우를 생성하는 빌드.
핵심 개념: Corruption은 모든 기술 카드의 비용을 0으로 만들지만 사용 시 소진시킨다. Feel No Pain은 소진 시마다 방어막을 얻고, Dark Embrace는 소진 시마다 1장을 드로우한다. 이 세 카드가 갖춰지면 기술 카드들이 순식간에 방어막과 드로우를 함께 만들어낸다.
핵심 카드:
| 카드 | 역할 |
|---|---|
| Corruption (부패) | 기술 카드 비용을 0으로, 사용 시 소진. 핵심 엔진 |
| Feel No Pain (고통 불감) | 소진 시 방어막+4(업그레이드 후 +6). 방어의 핵심 |
| Dark Embrace (어둠의 포옹) | 소진 시 1드로우. 드로우 엔진 |
| True Grit (진정한 의지) | 카드 1장을 소진하고 4 방어막 획득 |
| Burning Pact (연소 계약) | 카드 1장을 소진하고 2장 드로우 |
추천 유물:
- Dead Branch: 소진 시마다 무작위 카드 1장을 덱에 추가
- Charon's Ashes: 소진 시 모든 적에게 3 피해
- Strange Spoon: 소진된 카드가 50% 확률로 버린 카드 더미로 돌아감
운영: 1막에서 Feel No Pain과 True Grit를 먼저 모은다. 단독으로도 작동한다. 2막 상점이나 정예 보상에서 Corruption을 적극적으로 찾는다. Corruption을 내기 전에 반드시 수혜 카드 1장 이상을 손패에 확보한다.
약점과 대책: Corruption 단독으로는 아무 의미가 없다. Feel No Pain이나 Dark Embrace 없이 Corruption을 사용하면 기술 카드가 전부 소진될 뿐이다. 반드시 수혜 카드를 먼저 확보한 뒤 Corruption을 활성화한다.
사일런트(Silent)
독, 단검, STS2 고유의 교활(Sly) 버리기 빌드를 축으로 한 전술형 캐릭터.
빌드 1: 단검(Shiv) 빌드 — A티어
0 에너지 연속 공격으로 압도하는 빌드. 1막부터 작동하는 속공형.
핵심 카드:
| 카드 | 역할 |
|---|---|
| Infinite Blades (무한의 검날) | 매 턴 단검 1장을 손패에 추가하는 파워 |
| Blade Dance (검날의 춤) | 단검 3장을 손패에 추가 |
| Accuracy (정확성) | 단검 피해+4. 3~4장 쌓으면 단검 1장이 16+ 피해 |
| After Image (잔상) | 카드를 사용할 때마다 방어막+1 |
| Storm of Steel (강철의 폭풍) | 손패 카드 전부를 단검으로 변환하고 1장 드로우 |
약점과 대책: 다수 적 전투에서 효율이 떨어진다. Blade Dance를 우선 취득해 범위를 넓힌다.
빌드 2: 독(Poison) 빌드 — A티어
독을 쌓아 Catalyst로 폭발시키는 장기전형 빌드.
핵심 카드:
| 카드 | 역할 |
|---|---|
| Deadly Poison (맹독) | 독 5스택 부여(업그레이드 후 7) |
| Noxious Fumes (유독 연기) | 턴 시작 시 독+2를 자동 부여하는 파워 |
| Catalyst (촉매) | 적의 독 스택을 2배로 만든다. 핵심 |
| Burst (폭발) | 다음 기술 카드를 2회 발동. 같은 턴에 Catalyst 2번 사용 가능 |
| Poisoned Stab | 피해+독 부여 |
약점과 대책: 독 적층 중 받는 피해가 많다. 초반부터 방어막 카드를 확보한다. 독 면역 적에게는 무력하므로 비독 공격 카드를 1~2장 남긴다.
빌드 3: 교활(Sly) 버리기 빌드 — A티어
STS2 고유의 교활 키워드를 활용하는 상급 빌드.
핵심 개념: 교활 카드는 자신의 턴에 손패에서 버려질 때 무료로 발동된다. Tactician은 버려질 때 +1 에너지, Untouchable은 방어막, Abrasive는 민첩+가시를 준다. Tools of the Trade로 매 턴 1드로우+1버리기를 보장해 교활을 안정적으로 트리거한다.
핵심 카드:
| 카드 | 역할 |
|---|---|
| Tools of the Trade (무역의 도구) | 매 턴 1드로우+1버리기. 교활의 핵심 트리거 |
| Tactician (전술가) | 교활: +1 에너지 획득 |
| Acrobatics (곡예) | 3장 버리고 1장 드로우. 여러 교활 카드를 동시 트리거 |
| Calculated Gamble (내기) | 손패 전부를 버리고 다시 드로우. 대량 트리거 |
| Abrasive (연마) | 교활: +1 민첩+가시 4 |
추천 유물:
- Tingsha: 버릴 때마다 모든 적에게 3 피해
- Tough Bandages: 버릴 때마다 방어막+3
운영: 덱을 최대한 얇게 만들어 사이클을 빠르게 한다. 1막에서 Strike를 최우선으로 제거한다. 2막에서 Tools of the Trade를 획득하면 안정적이다. Tactician 2~3장으로 에너지가 거의 무한에 가까워진다.
약점과 대책: 교활 카드가 부족하면 버리기는 그냥 카드 낭비다. 교활 카드가 5~6장 이상 확보될 때까지 대량 버리기를 강요하는 플레이를 자제한다.
디펙트(Defect)
오브를 조종하는 마법사형 캐릭터. STS2에서 집중(Focus)은 일시적이며 영구적이지 않다. 오브 순환 속도가 핵심.
빌드 1: 발톱(Claw) 빌드 — S티어
오브를 완전히 무시하고 0 에너지 공격 카드를 연타해 Claw 피해를 쌓는 최강 구성. Claw와 오브를 혼합하면 두 방향 모두 망가진다.
핵심 개념: Claw(0 에너지, 3 피해)를 사용할 때마다 덱의 모든 Claw가 영구적으로 +2 피해를 얻는다. FTL, Beam Cell 등 0 에너지 공격으로 덱을 채우고 All for One으로 버린 카드 더미의 0 에너지 카드를 전부 재사용해 마무리한다.
핵심 카드:
| 카드 | 역할 |
|---|---|
| Claw (발톱) | 0 에너지 3 피해, 사용 시 모든 Claw +2 피해. 4~6장 채용 |
| All for One | 버린 카드 더미의 0 에너지 카드를 전부 사용. 마무리 수단 |
| FTL | 0 에너지 공격; 첫 번째 카드라면 3장 드로우 |
| Hologram+ (강화 후) | 0 에너지: 버린 카드 더미에서 1장 회수+드로우 |
| Go for the Eyes | 0 에너지 공격+약화 부여 |
운영: 1막부터 0 에너지 공격 카드를 우선 채용한다. 오브 카드는 전혀 취득하지 않는다. Claw 3~4장이 갖춰지면 2막에서 가속한다. All for One은 1장으로 충분하다.
약점과 대책: 오브 없이는 피동 방어막이 전무하다. 냉기 또는 기술 방어막 카드를 몇 장 남긴다. 2막 정예 전투에서 방어가 취약해지기 쉽다.
빌드 2: 번개(Lightning) 오브 빌드 — A티어
번개 오브를 연쇄시켜 피해를 내는 공격형 빌드.
핵심 카드:
| 카드 | 역할 |
|---|---|
| Defragment (최적화) | 집중+1(업그레이드 후 +2). 모든 오브 효과를 향상 |
| Voltaic (전류) | 해당 전투 중 번개 채널 수와 같은 양의 번개를 추가 채널 |
| Multi-Cast (일제 방전) | 오브를 여러 번 발동. 최대 화력원 |
| Electrodynamics | 번개 오브가 전체 공격이 된다 |
| Synchronize (동기화) | 4종 오브가 모두 활성화된 턴에 집중 일시+8 |
약점과 대책: 단체 피해가 불안정하다. 단일 보스에게는 Electrodynamics 효율이 떨어진다. Multi-Cast를 항상 손패에 보험으로 유지한다.
빌드 3: 어둠(Dark) 오브 처형 빌드 — A티어
어둠 오브에 에너지를 축적시켜 원샷을 노리는 빌드.
핵심 카드:
| 카드 | 역할 |
|---|---|
| Dark Shackles | 어둠 오브 발동. 슬롯 체류 중 축적된 에너지 량만큼 단일 피해 |
| Doom and Gloom (암울) | 어둠 오브 채널+모든 적에게 피해 |
| Runic Dome (룬 반구) | 적의 의도가 안 보이지만 매 턴 +1 에너지 |
| Creative AI (창의적 AI) | 매 턴 손패에 무작위 파워 카드 추가 |
약점과 대책: 어둠 충전 전에는 공격 수단이 적다. 냉기 오브로 시간을 번다. 오브 슬롯이 하나뿐이면 축적이 느리므로 오브 슬롯 확장 유물을 우선시한다.
네크로바인더(Necrobinder)
소환수를 활용하는 독자적인 스타일. 2가지 핵심 메커니즘인 소울(Soul)과 둠(Doom)을 활용한다.
빌드 1: 소울(Soul) 스케일 빌드 — S티어
소울 카드로 드로우를 폭발시키고 Haunt로 대량 피해를 쌓는 가장 빠른 빌드.
핵심 개념: 소울은 0 에너지 소진 카드로, 사용 시 2장을 드로우한다. Haunt는 소울을 사용할 때마다 무작위 적에게 6 피해를 준다. Capture Spirit와 Dirge로 소울을 대량 생성해 한 턴에 46장을 연쇄 사용하면 2436 피해와 함께 더 많은 소울을 드로우한다. 보스 전투 5~6턴 차에는 한 턴에 100+ 피해도 현실적이다.
핵심 카드:
| 카드 | 역할 |
|---|---|
| Capture Spirit (영혼 포획) | 1 에너지로 소울 3장 생성. 가장 효율적인 소울 생산원 |
| Grave Warden (묘지 수호자) | 1 에너지로 소울 1장+방어막 획득 |
| Dirge (조가) | X 에너지로 소울 X장 생성+오스티 HP 증가 |
| Haunt (홀림) | 소울 사용 시마다 무작위 적에게 6 피해. 승리 조건 |
| Soul Storm (소울 폭풍) | 버린 카드 더미의 소울 수×2 피해 |
추천 유물:
- Undying Sigil (불사 인장): 상점 필수 구매. HP가 10 이하일 때 한 번 죽음을 면함
- Bone Flute (뼈 피리): 오스티 공격 시마다 방어막+2
- Bookmark: 보류 카드 비용 -1
운영: 1막에서 소울 생성 카드와 Haunt를 최우선으로 취득한다. Haunt 없이는 단순한 드로우 엔진에 불과하므로, Haunt가 나오지 않으면 둠 빌드로 전환한다. Dirge로 오스티 HP를 확보하면서 소울 사이클을 돌린다.
약점과 대책: Haunt 없이는 피해 출처가 전무하다. Haunt를 찾을 때까지 둠 빌드와 병행 구성한다. 초반 피해가 느리므로 방어막 원천을 넉넉히 확보한다.
빌드 2: 둠(Doom) 처형 빌드 — A티어
적에게 둠을 쌓아 HP 조건을 만족하면 즉사시키는 독특한 처치 메커니즘.
핵심 카드:
| 카드 | 역할 |
|---|---|
| Scourge (채찍질) | 둠 부여+드로우 |
| No Escape (도망칠 곳 없음) | 둠+10, 이후 10둠마다 +5 추가 |
| End of Days (세상의 끝) | 둠 29 부여+둠 이하 HP 적 즉사 |
| Borrowed Time (빌린 시간) | 자신에게 둠+3, +1 에너지 획득. 거의 무료 에너지 원천 |
| Blight Strike | 둠을 쌓으면서 방어막도 획득 |
운영: Borrowed Time은 자신에게 둠 3을 부여하지만 자신의 둠은 쉽게 관리할 수 있으며 에너지 획득이 이득이다. 이상적인 마무리는 No Escape → End of Days로 대부분의 보스를 처치하는 것이다. End of Days 전에 적 HP를 현재 둠 스택에 가깝게 깎아두어야 한다.
약점과 대책: 둠만 쌓아서는 적이 죽지 않는다. 적 HP를 둠 스택 이하로 깎거나 End of Days로 즉사시켜야 한다. 2막 이후 일반 적은 둠이 쌓이기 전에 죽으므로 직접 공격 카드도 함께 채용한다.
빌드 3: 리퍼 폼(Reaper Form) 빌드 — S티어
고상한 폭발형 빌드. Reaper Form은 모든 공격 카드를 둠 량산 기계로 바꿔 매 공격마다 피해량과 동일한 둠을 적에게 적용한다.
핵심 개념: Reaper Form(3 에너지)은 능력 카드로, 발동 후 모든 공격이 피해량과 같은 양의 둠을 동시에 부여한다. 예를 들어 40 피해를 주는 공격은 둠 40도 함께 쌓는다. Sleight of Flesh는 적에게 디버프를 부여할 때마다 피해를 준다—둠은 디버프이므로 하나의 공격으로 여러 번 히트한다. Immortal Crest는 둠이 HP를 초과한 적의 공격 피해를 절반으로 줄여 방어 약점을 해결한다.
핵심 카드:
| 카드 | 역할 |
|---|---|
| Reaper Form (리퍼 폼) | 능력 카드: 공격이 피해량만큼 둠을 부여. 빌드의 핵심 |
| Day of Reckoning (심판의 날) | 모든 적에게 둠 29 부여+둠 이하 HP 적 즉사. 광역 마무리 |
| The Hour (시각) | 현재 둠 스택 분량의 피해를 단일 대상에게. 단일 마무리 |
| Sleight of Flesh (육체의 기술) | 디버프 부여 시마다 피해. 둠은 디버프이므로 공격마다 여러 번 히트 |
| Shroud (덮개) | 둠 부여 시마다 방어막 획득. 공격과 방어를 동시에 |
추천 유물:
- Immortal Crest (불사 문장): 둠이 HP를 초과한 적의 피해를 50% 감소. Reaper Form 발동 후 생존율을 크게 향상
- Lantern (제등): 전투 시작 시 에너지+1. Friendship과 함께라면 첫 턴에 Reaper Form(3 에너지) 발동 가능
- Funerary Mask (장례 가면)(Futility 에포크, 2막 클리어 보상): 둠 관련 전체를 강화
운영 방법: Reaper Form을 찾기 전까지는 일반 둠 빌드로 운영한다. 획득 후에는 매 전투에서 최대한 빨리 발동하는 것이 최우선 과제다. 발동 후에는 공격 카드를 사용하는 것만으로 피해+둠 적층+Shroud를 통한 방어막을 동시에 얻는다. Day of Reckoning으로 광역 마무리, The Hour로 단일 마무리한다. 공격 카드 위주로 덱을 구성해 Reaper Form 트리거를 극대화한다.
약점과 대책: Reaper Form의 비용은 3 에너지—첫 턴에 못 내면 템포가 뒤처진다. Lantern, Friendship, 또는 0 에너지 저비용 공격 카드로 해결한다. Reaper Form 획득 전에는 순수 둠 빌드로 운영해 런이 무너지지 않도록 한다.
리전트(Regent)
별력(Stars) 리소스를 관리하면서 강력한 기술을 발동하는 상급 캐릭터. 핵심 결정: 게임 시작 시 별력 또는 단조 중 하나를 선택한다. 혼합하면 런이 망한다.
빌드 1: 군주의 검(Sovereign Blade) 빌드 — S티어
Sovereign Blade를 반복 단조하고 일격으로 적을 처치하는 빌드.
핵심 개념: Sovereign Blade는 단조할 때마다 영구적으로 피해가 증가한다. 덱을 최소화하고 Retrieval로 매 턴 검을 손패로 가져와 한 방에 삭제한다. Masterwork가 최고 효율 단조 카드(+8 피해, 강화 후 +11).
핵심 카드:
| 카드 | 역할 |
|---|---|
| Sovereign Blade (군주의 검) | 단조마다 피해 영구 증가. 승리 조건 |
| Masterwork (걸작) | 단조+8 피해(강화 후 +11). 최고 효율 단조 카드 |
| Retrieval (회수) | 버린 카드 더미에서 Sovereign Blade를 손패로. 매 턴 접근 보장 |
| 방어막 카드 2~3장 | 공격 편중 덱을 보완하는 필수 방어 |
운영: 1막이 끝나기 전에 별력이 아닌 단조 노선을 결정한다. 카드를 적극적으로 제거해 덱을 얇게 만드는 것이 매 턴 Sovereign Blade를 드로우할 수 있는 유일한 방법이다. 단조와 별력을 동시에 병행하지 않는다.
약점과 대책: 덱이 얇아지면 방어가 취약해진다. 방어막 카드를 최소 2~3장 유지한다. AoE가 없어 다수 적 방에 별도 대응 수단이 필요하다.
빌드 2: 별력 엔진(Star Engine) 빌드 — A티어
별력을 지속적으로 생성하고 소비형 대기술로 일격을 노리는 빌드.
핵심 카드:
| 카드 | 역할 |
|---|---|
| Solar Strike (태양 일격) | 별력 생성+공격. 공격과 생산을 동시에 |
| Gather Light (빛 모으기) | 저비용으로 별력 2 생성. 주요 축적 원천 |
| Lunar Pastry (달 과자) | 매 턴 피동으로 별력+1. 복리 방식으로 증가 |
| Astral Pulse (성맥 파동) | 다량의 별력을 소비해 괴멸적 피해 |
| Particle Wall (입자 벽) | 별력을 방어막으로 변환. 공수 겸용 |
운영: 항상 별력 예산을 기준으로 생각한다—마무리 기술에 필요한 별력을 파악하고 그에 맞게 생성 계획을 세운다. 마무리 턴이 오기 전까지 생산과 소비 비율을 약 3:1로 유지한다.
약점과 대책: 별력 축적 턴에 공격 수단이 부족하다. Particle Wall로 별력을 방어막으로 전환해 대비한다. 생산과 소비 비율을 3:1 정도로 유지한다.
캐릭터별 난이도와 적합한 플레이어
| 캐릭터 | 추천 빌드 | 복잡도 | 적합한 사람 |
|---|---|---|---|
| 아이언클래드 | 근력 / 소진 | ★☆☆☆☆ | 모든 사람, 특히 초보자 |
| 사일런트 | 단검 / 독 | ★★★☆☆ | 콤보를 즐기고 싶은 사람 |
| 디펙트 | 발톱 / 번개 | ★★★☆☆ | 리소스 관리를 좋아하는 사람 |
| 네크로바인더 | 소울 / 둠 / 리퍼 폼 | ★★★★☆ | 독특한 메커니즘을 즐기고 싶은 사람 |
| 리전트 | 군주의 검 | ★★★★★ | 상급자, 다중 리소스 관리에 능한 사람 |
캐릭터 공통 강력 유물
어떤 캐릭터에서도 가치가 높은 범용 유물.
| 유물 | 효과 | 비고 |
|---|---|---|
| Philosopher's Stone | 매 턴 +1 에너지, 모든 적에게 근력+1 디버프 | 에너지 증가는 최강급 |
| Runic Pyramid | 턴 종료 시 손패를 버리지 않는다 | 콤보 덱에 혁명적 |
| Snecko Eye | 매 턴 추가 2드로우, 카드 비용이 무작위화 | 하이 리스크 하이 리턴 |
| Black Star | 정예가 일반 보상 외에 유물 추가 드롭 | 정예를 적극적으로 노릴 수 있게 됨 |
| Odd Mushroom | 최대 HP+14, 근력-1 | HP 증가로 생존율 대폭 향상 |
최신 패치에서 카드 밸런스가 변경되어 있을 수 있습니다. 업데이트 정보는 패치 노트를 참조하세요. :::