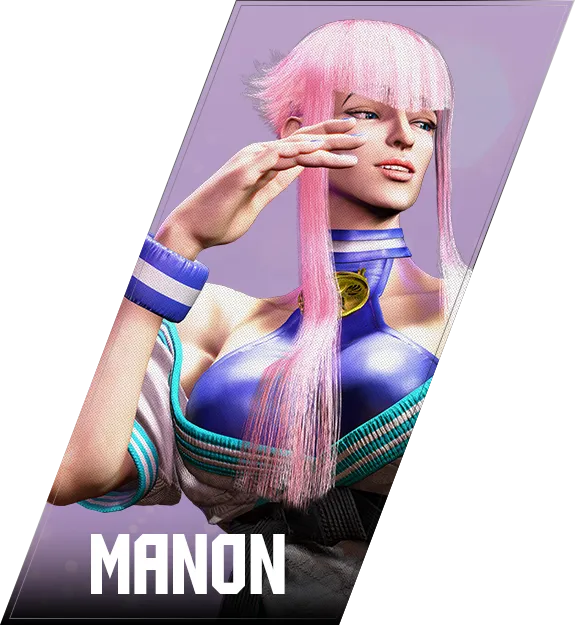

マノン
Manon — 角色使用
前方ステップ
Use the forward dash to close the gap after knockdowns and to extend wake-up pressure. It is also an essential tool for spacing into command grab range during neutral. Because Manon has no projectile, the forward step is her main way of advancing against zoning characters — use it in combination with Drive Parry to approach safely.
後方ステップ
Use the back dash to escape command grab pressure at close range. The 15F throw invincibility window covers the startup of all versions of Manège Doré, making it a reliable escape from her command grab mix-up. However, be aware that SA2 Étoile (214214K) can catch back dashes due to its wide horizontal hitbox, so back dashing is not always safe when Manon has SA2 stocked.
Jumping Heavy Punch
Use this as your main jump-in button when going for a hard knockdown setup or crossing up the opponent. Its large hitbox allows you to land combos even from somewhat ambiguous angles. On hit, follow up with Manon's ground combo routes to build meter and rack up damage.
Jumping Light Punch
Use this button in air-to-air situations where you need a quick hitbox. It can also serve as a tick-throw setup: jump forward with the light punch, land, and immediately go for Manège Doré if the opponent hesitates. Its speed makes it difficult to react to at close range.
Jumping Medium Punch
A solid all-purpose jump-in button. Use it when you want a better hitbox than the light punch but need to confirm into a full combo more reliably than the heavy punch allows. On hit, cancel into your ground pressure and command grab mix-up.
Jumping Heavy Kick
This is your primary jump-in for maximum damage. Land this and immediately go into Manon's highest-damage ground combo. The downward angle also makes it effective for beating out anti-air attempts. Use it to start corner carry sequences that lead into command grab mix-ups.
Jumping Light Kick
Use this primarily in air-to-air situations where speed is more important than damage. When you anticipate an opponent jump, this button can win the air trade cleanly. On landing you can follow up with a light string into command grab.
Jumping Medium Kick
Use this when you want an ambiguous crossup angle. Its active frames stay out long enough that the opponent must guess the correct block direction. On hit, confirm into a ground combo and then run your command grab mix-up from the advantage.
CA Pas de Deux
Save this for the decisive close-out moment. When the opponent is at 25% or less health and you land a combo starter, confirm into CA Pas de Deux to end the round in style. Because the CA version requires both a close-range condition and the health threshold, you need to manage positioning and SA3 gauge together throughout the round.
SA3 Pas de Deux
Use SA3 Pas de Deux as your primary damage option at the end of a long combo or in a safejump setup. Because it is a grab, it is especially dangerous in corner pressure where the opponent has fewer escape options. Manage your SA3 meter throughout the round so it is available for big punish opportunities or when you have the opponent cornered.
SA2 Étoile
Use SA2 Étoile as a reversal to blow through projectiles and aggressive rushdowns. The 7F startup means you need to react quickly, but once activated it covers a huge area. It can punish opponents who try to escape via back dash or vertical jump, so use it when the opponent is being overly defensive.
Dégagé
A ballet-inspired thrusting kick with three strengths that serve different roles. Use 214LK as a low gap-closer to catch opponents off-guard, 214MK as a reliable combo ender, and 214HK as an overhead mid-screen poke. The OD version (214KK) is a safe overhead that forces a 50/50 on block. Combine all four strengths to keep opponents guessing about attack height.
SA1 Arabesque
Use SA1 Arabesque primarily as a combo ender or as a side-switch tool to escape the corner. Because it has no projectile invincibility, do not throw it out against fireball characters. Its side-swapping property on hit lets you quickly turn the tables on corner pressure.
Rond-point
Notes on how Manon uses Rond-point — combo routes, pressure, whiff punishes — to be added.
Renversé
Notes on how Manon uses Renversé — combo routes, pressure, whiff punishes — to be added.
Grand Fouetté
Notes on how Manon uses Grand Fouetté — combo routes, pressure, whiff punishes — to be added.
Croisee
Use Croisee as a footsie poke at mid-range to catch opponents who are walking forward. On hit, the knockdown gives you time to set up drive rush pressure. The sweep angle makes it hard to see coming, so mixing it into your neutral game keeps the opponent honest about standing range.
Allongé
Use this as your primary anti-air button when you read an opponent jump-in. On anti-air hit the launch allows you to follow up with special moves for solid damage. In ground combos it acts as a launcher after a counter-hit, extending your combo before finishing with Rond-point or Renversé.
Crouching Light Kick
Use 2LK as your go-to reversal attempt button and as the start of low-hit pressure. Link it into crouching light punch or medium attacks to build into her command grab mix-up. It is also useful after blocking an unsafe move when you want a quick confirm before committing to a full punish.
Crouching Light Punch
Chain this after 2LK to build light confirm strings leading into command grab mix-ups. Use it as a tick throw setup: press 2LP then immediately input Manège Doré to catch opponents who freeze after blocking. Its 4F startup also makes it reliable as a frame-trap or counter-hit tool in tight pressure sequences.
Crouching Medium Kick
This is Manon's primary drive rush low. After cancel drive rush, 2MK reaches far enough to threaten the opponent with a real low that leads into her command grab pressure. Use it to enforce the low option in the strike/throw mix-up after drive rush. On counter-hit it can also link into further combo damage.
Crouching Medium Punch
Use 2MP after cancel drive rush → MP to build consecutive guard pressure. The string MP → 2MP is a cornerstone of Manon's offense: it keeps the opponent blocking while you mix in Manège Doré. On counter-hit it extends into further combo routes toward Rond-point or Renversé for solid damage.
Tomoe Derrière
Use Tomoe Derrière to advance on the opponent from mid-range while threatening with a hitting button. It can be worked into combo routes for corner carry, and its range allows you to poke at distances most of Manon's standing normals cannot reach. Be mindful of the recovery, as it can be punished on whiff.
Révérence
Use Révérence as a frametrap or combo piece following blocked normal attacks. In the 4HP → 236P sequence it threatens opponents who hesitate after blocking. Because the 236P input can be buffered during 4HP, Manon players often input the sequence together — be aware of this when defending. It is also a key part of fuzzy grab setups.
Uchi Mata
Use Uchi Mata as the throw option in Manon's close-range mix-ups. When the opponent is blocking your pressure strings, mix in Uchi Mata to punish stand/crouch blocking. After the knockdown, advance with drive rush to continue wake-up pressure. Its presence forces the opponent to consider jumping or back dashing, which in turn opens them up to Manon's anti-air and mid-range tools.
アン・オー
Use the second hit of En Haut to push the opponent deep into disadvantage or, more commonly, cancel into drive rush immediately after to convert the situation into ongoing pressure. On counter-hit it can link into further combo damage. Because the cancel window is tight, buffering cancel drive rush during the second hit is the standard execution.
中 マネージュ・ドレ
Notes on how Manon uses Manège Doré — combo routes, pressure, whiff punishes — to be added.
Standing Heavy Kick
Use this as your primary long-range neutral tool. At the right distance it is difficult to counter, and the +1F on hit gives you a small offensive opportunity. Against opponents who are walking forward, HK can stop their approach while maintaining safe range. Avoid using it at close range where the -6F on block becomes punishable by medium attacks.
Standing Heavy Punch
Use this as a combo starter when you have a counter-hit confirm or a high-advantage situation. It links into Temps Lié (HP→HP) for corner carry, and from there into special moves. At mid-range it can also be a whiff-punish tool due to its reach.
Temps Lié
Use Temps Lié as a combo extension after a counter-hit or high-advantage starter. The pull-in effect on the second hit keeps the opponent close for follow-up specials, making it an excellent corner carry tool. On hit (+3F) you can continue pressure with specials or drive rush.
Standing Light Kick
Chain this into light punch strings to build block pressure and create tick-throw opportunities. Its fast startup also makes it useful as a reversal attempt button in close-range exchanges. Mix it into your drive rush strings to vary the rhythm and catch opponents off-guard with a command grab.
Standing Light Punch
Use this as the first button in light confirm strings (LP → LK → command grab) and as a quick poke to catch reversal-happy opponents. On counter-hit it links into further damage. Its fast startup is also useful for stuffing opponent mashing during Manon's close-range pressure.
Ouchi Gari
Use Ouchi Gari to send the opponent into the corner. After the knockdown, advance with drive rush to maintain pressure. The corner carry property makes it more valuable than a standard forward throw when the opponent is already in a corner-favorable position. Incorporate it into your strike/throw mix-ups alongside Manège Doré.
Standing Medium Kick
Use this as a mid-range poke to check opponents who are approaching or whiffing moves at mid-distance. It fits into her neutral game alongside Standing Medium Punch and can be used to zone opponents at ranges where Manon's drive rush threat is still relevant. On hit it can link into further damage depending on the range.
Standing Medium Punch
Hit-confirming
To improve your ranked stability, focus on landing consistent hit-confirms off MP. Confirming into 236LP on counter-hit is the key skill to develop.
When the confirm feels difficult, two techniques can help:
- MP→MK target combo buffer with 236 input MP can be cancelled into the target combo, and the cancel window into 236MK is generously long. As shown below, on punish counter the window extends even further — use it to cancel into the higher-reward 236MK.
You can also buffer 236236 for super-art confirms.
- MP→236LP input-buffer confirm Input 236LP and hold the button — while 236LP is active, use the button-hold window to confirm the hit. On block, keep holding to cancel 236LP into 63214HP (command grab bait). On counter-hit, release to combo instead.
When you have Drive gauge
The basic plan is to confirm the hit, but when Drive is available, cancel into Drive Rush and go into MP → 2MP — Manon's foundational consecutive guard string — to enforce the command grab vs. strike mix-up.
À Terre
Use À Terre as a combo extension after a counter-hit starter or within drive rush strings. The pull-in effect keeps the opponent close for command grab follow-ups. On hit (+2F) you maintain slight advantage to continue pressure.