
ルーク
Luke — 对策
Key Info
- Sustained overhead — no combo on hit
- 6MP
- On wakeup, watch for OD Avenger (→K follow-up)
- Allows Eraser (214214P) follow-up on hit — be careful at low health
- Defence
- OD Rising Upper (623PP): 6F startup, fully invincible
- If you play Luke or Kimberly, avoid Drive Rush after throws
- Rising Upper LP (623LP): 5F startup, anti-air invincible
- SA1 (236236P): 6F startup, no projectile invincibility
- SA2 Eraser (214214P): 5F startup, projectile invincible
- SA3 Pale Rider (236236K): 10F startup
- OD Rising Upper (623PP): 6F startup, fully invincible
- Advantage on block
- 2MP: +1F
- Flash Knuckle HP hold (214HP hold): +4F
Neutral Game (Focus Points)
- Drive Gauge management
- Luke has few confirm-into-knockdown combos without Drive Rush, making him dependent on Cancel Rush
- His Drive Gauge recovery options are limited, putting him at high risk of Burnout
- Sandblast (236P) can recover some gauge but cannot be thrown out safely, making it riskier than other characters' fireballs
- During okizeme, lean toward strikes to chip his Drive Gauge
- Do not force-stop his Drive Rush
- Luke's Drive Rush has excellent reach and speed — create at least one deliberate window per round to watch for it
- If you do try to stop it, do so at a range where Suppressor (4HP) cannot reach
- Use anti-air invincible moves to counter his jumps
- Jumping HP stuffs most standing anti-air normals — use moves with anti-air invincibility instead
- His jumping HK also has a broken hitbox — research how your character's anti-air options hold up
- Accept throws from LPLK in the center
- After he guards c.MK cancel and forces close-range advantage, accepting the throw is the right answer
- Luke's post-LPLK situation is poor away from the corner, so just take it
- Trying to tech carelessly and eating his delayed tech punish 4HP is one of the most common loss patterns
- Favour meaty jump-in routes on offence
- Luke's LP has 7F startup, so he cannot fuzzy-guard a safe-jump whiff bait
- Use attacks that require a standing 4F response as your offence entry points
- Kimberly: forward HK
- Dhalsim: Float → Yoga Teleport
- The universal option for every character that requires a 4F standing response is a meaty jump-in — use it aggressively on oki
- Drive Rush
- Hard to stop if you are not watching for it. Do not force-stop if you missed the visual cue.
- When not watching: Parry is the safe option.
- If stopping, use c.LP at close range.
- Trying to stop Drive Rush from long range will get you hit by Suppressor — stay quiet instead.
- Maintain a position where Suppressor and HP Flash Knuckle cannot reach.
- Keep the spacing closer than starting distance.
Aerial Flash Knuckle(垂直或前跳中)



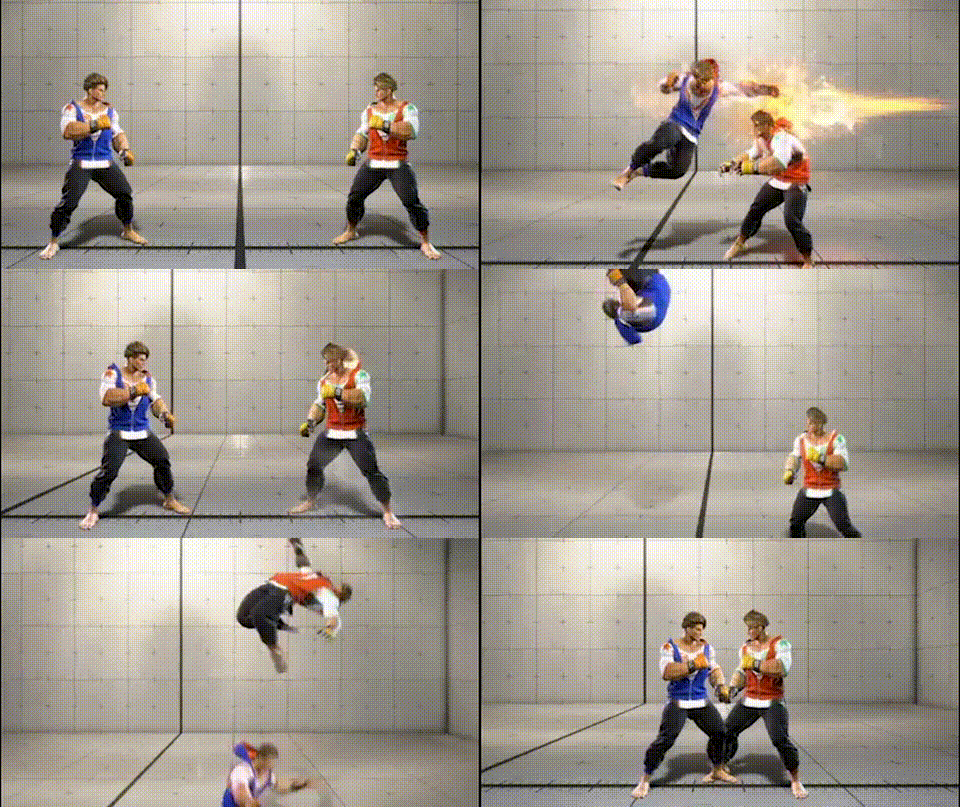
Anti-air the moment you see Luke jump
It's 14F startup from the air, so the cleanest defense is reacting to the jump itself.
- Anti-air with an invul reversal / SA: An air-invul move beats it cleanly.
- 5HP / 5HK normal anti-airs: Luke's jump HK has an absurd hitbox and tends to beat normal anti-airs. Invul-based anti-air is more reliable.
- Walk-back anti-air: If he shifts to a crossup arc, walk back and anti-air with 5HP / 2HP.
Luke's jump HK is genuinely strong — verify whether your character's regular anti-air actually works against him.
When fireball escape catches you
- Right after you throw a fireball, Aerial Flash Knuckle clears the projectile and lands a strike.
- Characters with slow / high-recovery fireballs (Guile, JP, Jamie) need extra care.
- Fix: Tighten your fireball spacing. Don't throw them raw inside Luke's forward-jump range.
OD Aerial Flash Knuckle yomi
- OD is 14F startup, almost identical to the regular version, but damage is +600.
- Damage on jump-in is heavy, so a missed anti-air really hurts.
- On-block punish window matches the regular version (15F land recovery).
After block / hit
- Air-hit gives a non-techable knockdown. Drive Rush wakeup pressure is possible, but it's nothing like the oki off ground Light Flash Knuckle.
- On block, check the 13F-15F landing recovery and punish or throw.
If the Luke leans on empty-jump throws and this move during safe-jumps, committing to your fastest light button immediately eats the safe-jump hit but beats both of those options — keep it in your pocket:


The most important counter. The mental model for fully defending Luke's LP→MP→HP cancel into Heavy Flash Knuckle (Hold).
Basic: see it, Drive Impact
- See the 214HP animation, throw DI.
- HP cancel → Heavy Flash Knuckle is a true block string, so DI rarely whiffs.
- Heavy Flash Knuckle (Hold) is 33F startup; the 22F-33F gap is wide enough to slot DI in.
Advanced: fuzzy back-jump when Luke has SA2
Luke's answers to your DI bait are 236PP and Heavy Flash Knuckle → SA2 (236236K). The SA2 cancel especially does heavy damage. When Luke has SA2 stocked, drop the DI bait and use a fuzzy back-jump instead.
- Use the 214HP startup gap: 23F (raw) vs 33F (Hold).
- Inputting back-jump in the 23F-33F window blocks the raw version while jumping over the Hold version for a confirmed punish (timing-dependent).
If the fuzzy back-jump is too hard, default to pressing parry — fish for just-parry while buffering Drive Reversal. If you can't Drive Reversal, you end up at +4 for Luke inside throw range (shimmy possible):
Luke can read the fuzzy back-jump and slightly delay the Heavy Flash Knuckle to catch you, in which case you switch back to DI bait — that's the yomi.
A perfect-timing fuzzy back-jump covers everything, but in match conditions it's hard — earliest back-jump is fine. Trading 1000 damage from 214HP hit for 3000 from a back-jump punish is still a clear win.
Burnout lockdown
- 2LP → 2MP → 214HP is the standard burnout string:
- After blocking 214HP the situation is around ±0F — don't fire SA there, parry overrides it
- MP → 214HP has a 1F gap, so that is where SA connects:

After 214LP hit, Luke is at roughly +32F.
- Quick rise: removes Luke's shimmy walk option (because of Drive Rush range).
- Back roll: if Luke skipped Drive Rush, no oki at all.
Luke usually keeps Drive Rush for the meaty, so quick rise is the default at midscreen — kill the shimmy and either call OD reversal or delay-tech.
However, Luke can stop the rush short with 2LP to regain the walk-shimmy. In that case a back roll creates enough distance to erase the oki entirely — remember this layer of the read:

2HP → 214MP (Just) is hard to land consistently. Missing the Just-frame leaves -8 and a punish window. Get into the habit of buffering DI on a 2HP read — failed Just-frame turns into your DI punish.
214MP raw is -8 on block, so any 8F-or-faster normal punishes.
Watch out: 236PP counter to your DI bait
Luke can answer your "2HP-read DI buffer" with 236PP (OD Sand Blast), turning your DI bait into a clean punish on you. Drive cost is heavy though, so it's rare in practice — mostly safe to ignore.
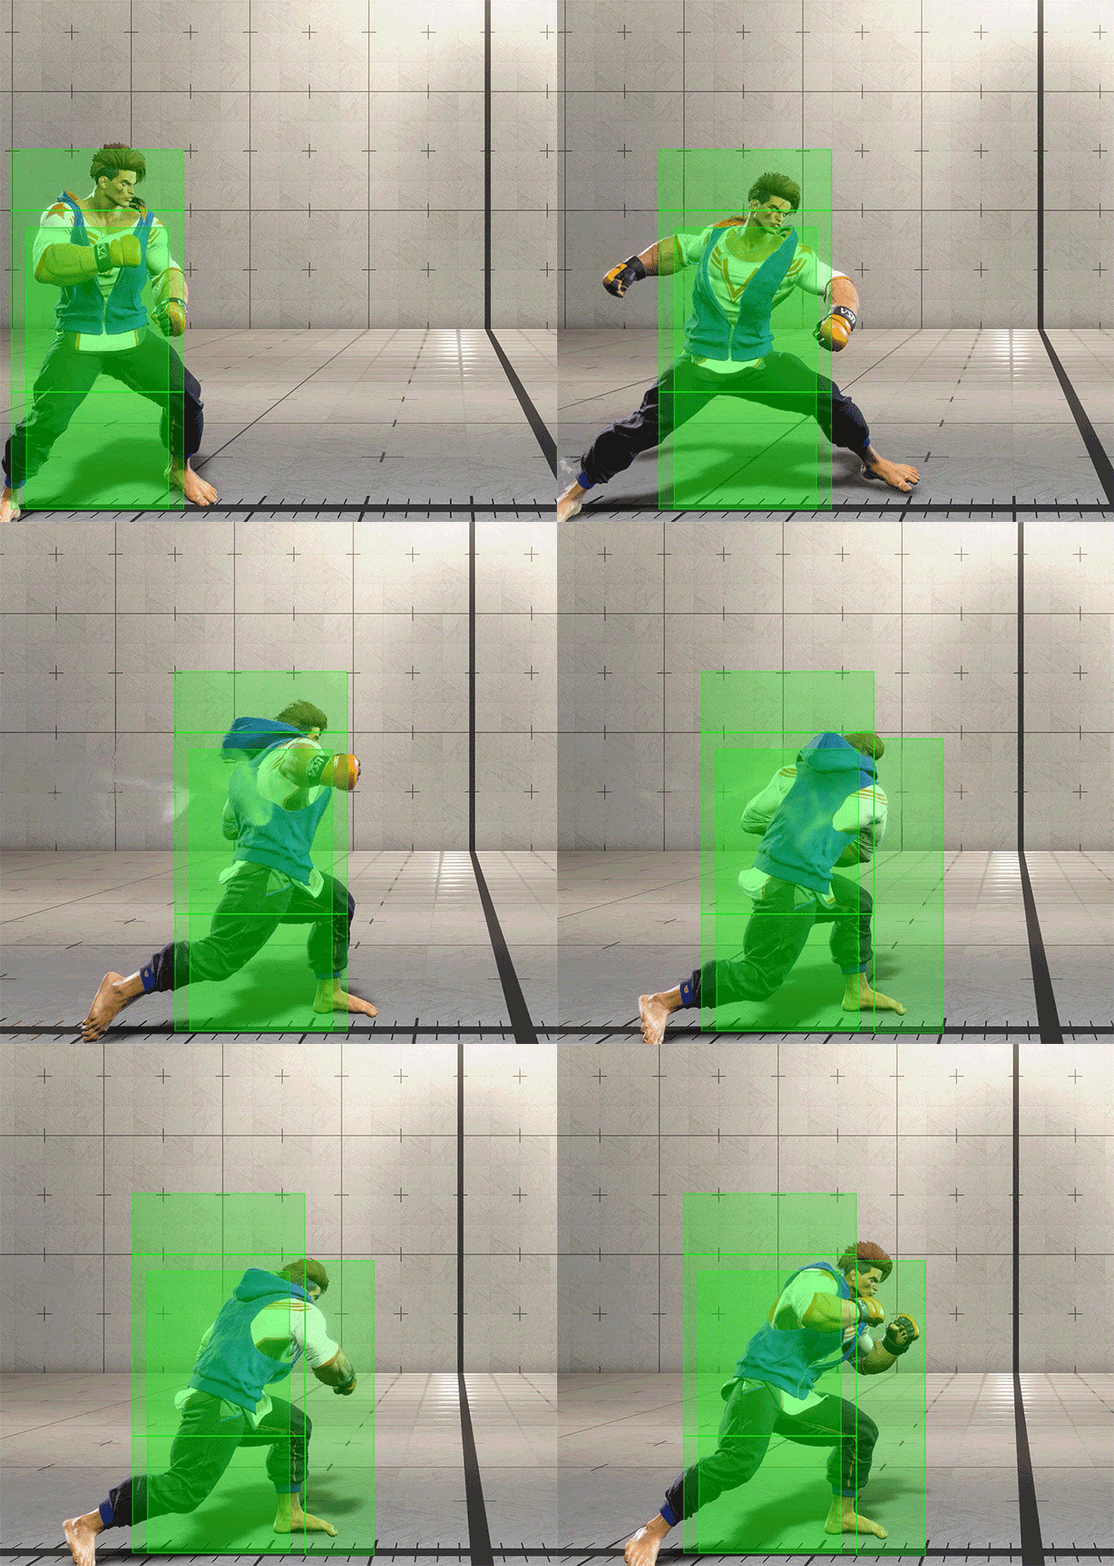
- OD Flash Knuckle alone (no DDT) is -22 on hit 1, extremely punishable, but you'll almost never see it raw outside of combos.
- DDT is a combo piece, so the rule is just "don't get hit" — there's no wakeup defense angle here.
After the DDT ender Luke is only +12, and the oki allows a walk-shimmy — so a bold reversal read, or a reversal with a plus-on-block move, is worth keeping as an option:




Punishes
The raw Avenger followups are punishable on block.
- No Chaser -16F: 5MP-starter combo for big damage.
- Impaler -22F: 5HP-starter max punish. It's an overhead, so block standing.
OD Avenger followups have very small punish windows:
- OD No Chaser -6F: only fast 4F starters can punish, otherwise no.
- OD Impaler -3F: basically no punish; what comes next is the abare yomi.
Defending the mix
Impaler is an overhead, so the default is "block standing" until you confirm a low. Impaler is 13F startup (around 20F if you count the armor frames), giving you a surprising amount of reaction time on wakeup.
No Chaser is a high, blockable crouching. You can also stuff the meaty with stand-tech option-selects.
- Default: block standing on wakeup, switch to crouch if you read a low.
- At range: crouch-block on No Chaser read (Impaler has shorter reach than No Chaser).
- After blocking both: Luke usually goes for throw — backdash / invul / tech yomi.
Beating OD Avenger armor
- Multi-hits break it: armor only soaks one hit, so chained moves cleanly punish.
- Throw: armor doesn't block throws.
- Just block: the followups (-6 / -3 OD) are barely punishable, but if you blocked, Luke's pressure ends.
You almost never see raw OD Avenger at neutral, so this isn't a high-priority concern.
Judge by Drive Gauge
When Avenger comes in after a knockdown, the strength is hard to read visually.
- Raw Avenger → followup is punishable on block.
- OD Avenger → followup is essentially safe.
Read his Drive Gauge — if he's out of OD bars, it's the raw version, and you should commit to the punish.

Distance-based decisions
At light/medium Sand Blast range, the spacing tends to favor Luke. Mashing parry just bleeds your Drive Gauge.
- 0 to mid: Parry → Drive Rush to close the gap.
- Mid range: Neutral jump to whiff over it, then poke after landing.
- Far range: Forward jump. Luke can't make his projectile safe, so jump-ins are easy to land.
- Raw Heavy Sand Blast: 20F startup with long recovery — at Drive Rush range you can punish him outright.
Bait DI on HP-cancel 236P
Luke's most common pressure string is "HP → 236P." A tip-hit HP is unpunishable even with the cancel, so Luke players spam this as their go-to safe option.
- See HP, buffer DI: If the cancel comes out, it converts into DI. The block string is tight enough that DI rarely whiffs.
- Some characters can break it with a fireball-invuln OD reversal — clean win if you have one.
- Look for Perfect Parry: At close range, buffer a Drive-Rush attack to maximize reward.
Luke's counters to your DI bait are OD Sand Blast (236PP) and Heavy Flash Knuckle → SA2 (236236K), but both are Drive-heavy and rare.
OD Sand Blast / Fatal Shot read
- OD Sand Blast alone: -2 on block, no real punish window.
- Fatal Shot: -21 on block — full punish if you read it. But it costs 2 Drive bars, so it's rare.
There's a yomi where Luke uses OD Sand Blast to beat your DI bait, but Drive-cost makes it a bad option for him to spam — you can mostly ignore it.
In the corner, hold forward-jump on HP-cancel 236P
When pinned in the corner, holding forward jump against HP-cancel 236P means the projectile catches you in the air, often giving you a confirmed punish from the air-hit recovery state.
- "HP → ?" in the corner — feel free to mash forward jump.
- If HP just lands clean, crouch block.
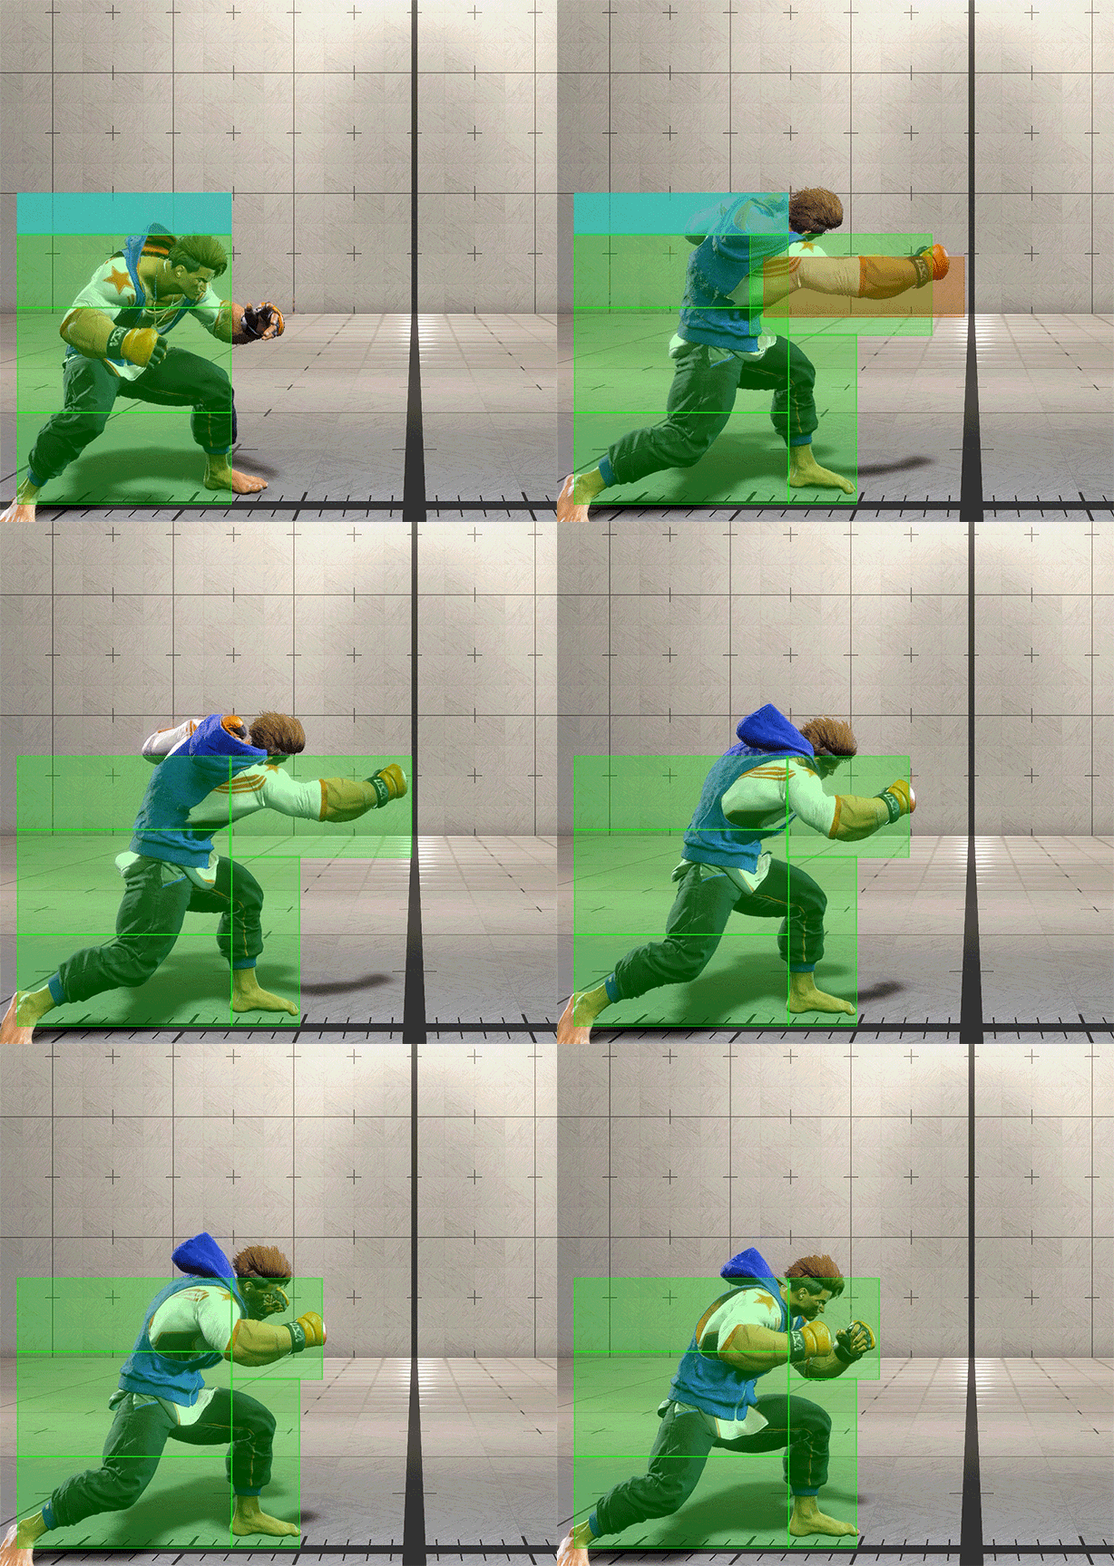
+1 on block. Luke's common follow-up strings from 2MP:
- 2MP → 2LP → 2MP → 236P
- 2MP → 2MP → 2MK → 236P
- 2MP → 2LP → 236P
Counter Tips
For players unsure when to reversal attempt:
- After blocking two normals in a row, mash a light button
- A 4F–5F normal placed against any of the three strings above will Counter Hit and convert into a combo
- Confirm the counter hit and convert to a punish
The video below records all three strings:
- 2MP → 2LP → 2MP → 236P
- 2MP → 2MP → 2MK → 236P
- 2MP → 2LP → 236P
Advanced Counter
2MP has large pushback on block, so after being blocked Luke's follow-ups lose strength if you back-walk. Luke compensates with 2MK to threaten. There is a 7F window to back-walk after blocking 2MP — doing so lets you stuff Luke's walk-up throw while still blocking any 2MK follow-up.
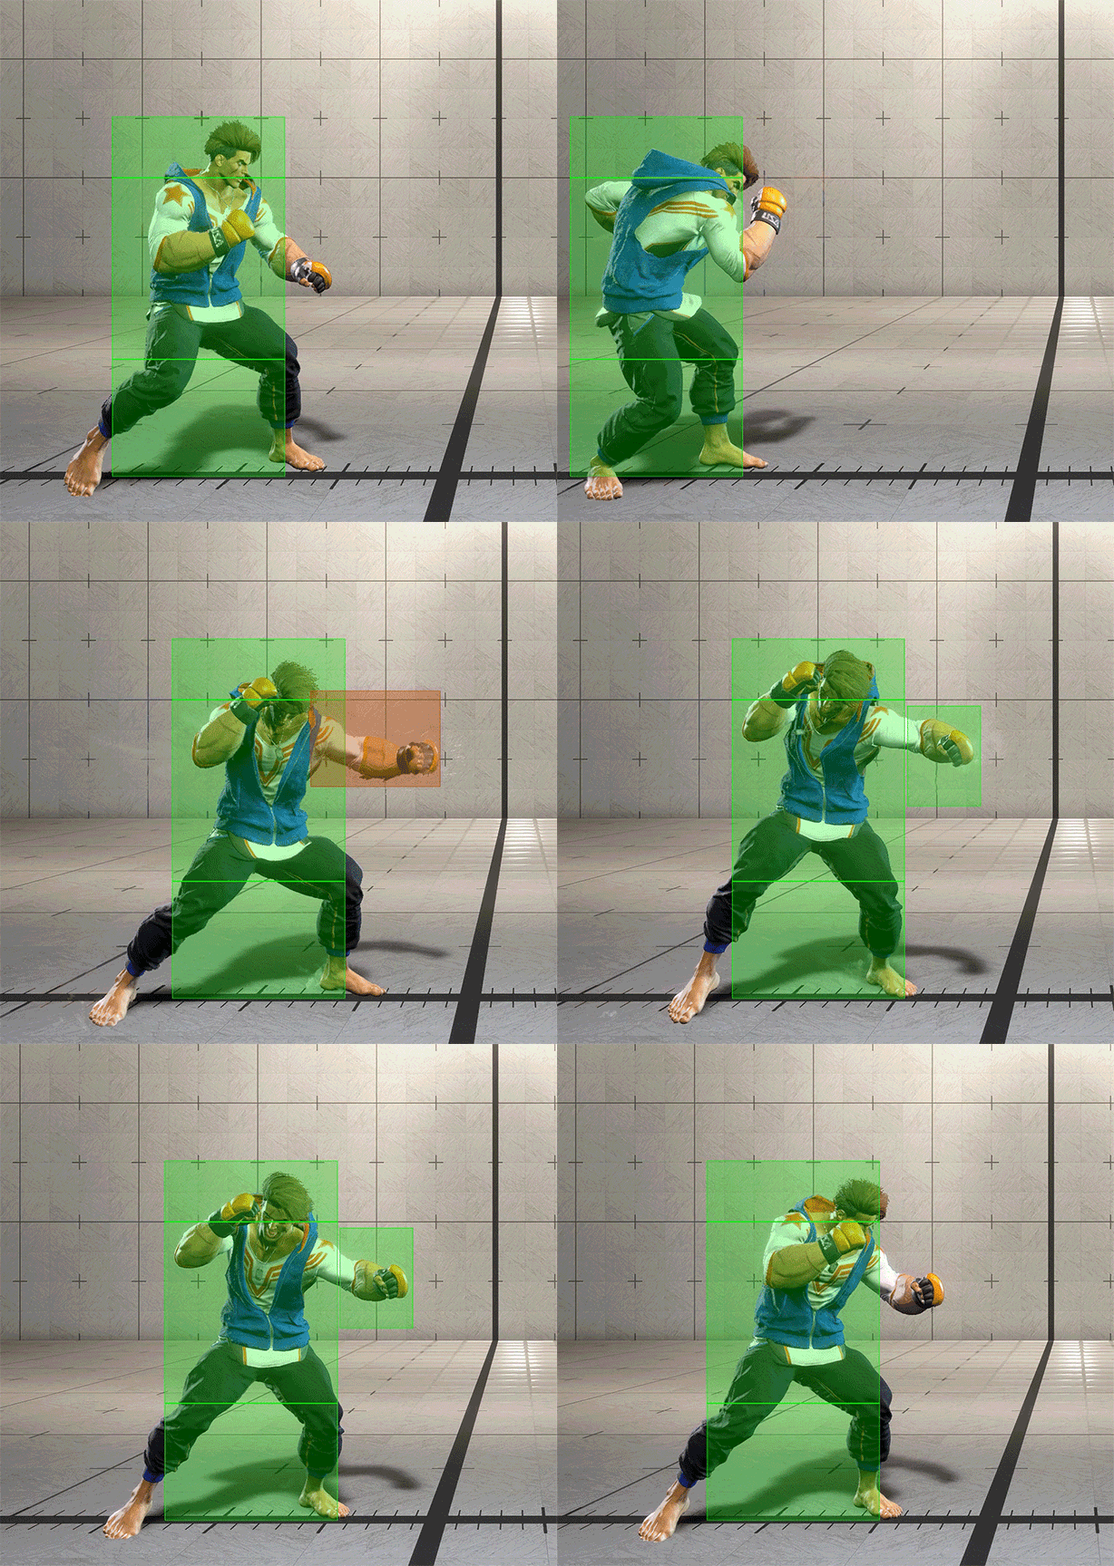
Counter Tips
When you see Luke clearly adjusting his spacing after a Drive Rush, place a neutral jump to punish.
After blocking a move with large pushback, resist the urge to counter-poke immediately — wait and whiff-punish Suppressor instead. LP and MP strings in particular should trigger this awareness. If you can't read and react to Suppressor here, you can't put risk on it.


- Midscreen: back roll is the default.
- Even without a tech, only around HP range is meaty enough to threaten.
- Quick rise without tech: if Luke Drive Rushes, OD reversal is guaranteed.
Counter Tips
- Back roll is the safe default.
- Distance is too far for serious oki — but note that OD reversals get thrown on wakeup.
- Quick rise is also fine.
- A strike meaty lands but throw doesn't — think of it as trading Drive Gauge for screen position.
- React to Drive Rush and throw out your OD reversal.
- In the corner, HK hits with a late active frame for +1F on block.
- Good opportunity to attempt a Perfect Parry.
Counter Tips
- Fastest light button (LP/LK)
- Beats the 6HP→HP followup
- Follow up with LP→MP for maximum return
Watch Out
More Luke players are going for Perfect Parry against your fastest light.
Mix in throw as well. Throwing immediately loses to the second-hit followup, so use a fuzzy throw instead.
- Fuzzy throw
- Beats parry-pressing opponents
- Input the throw at the timing you would block the 6HP→HP followup
The video below records both:
- 6HP→HP→236MP
- 6HP→Parry

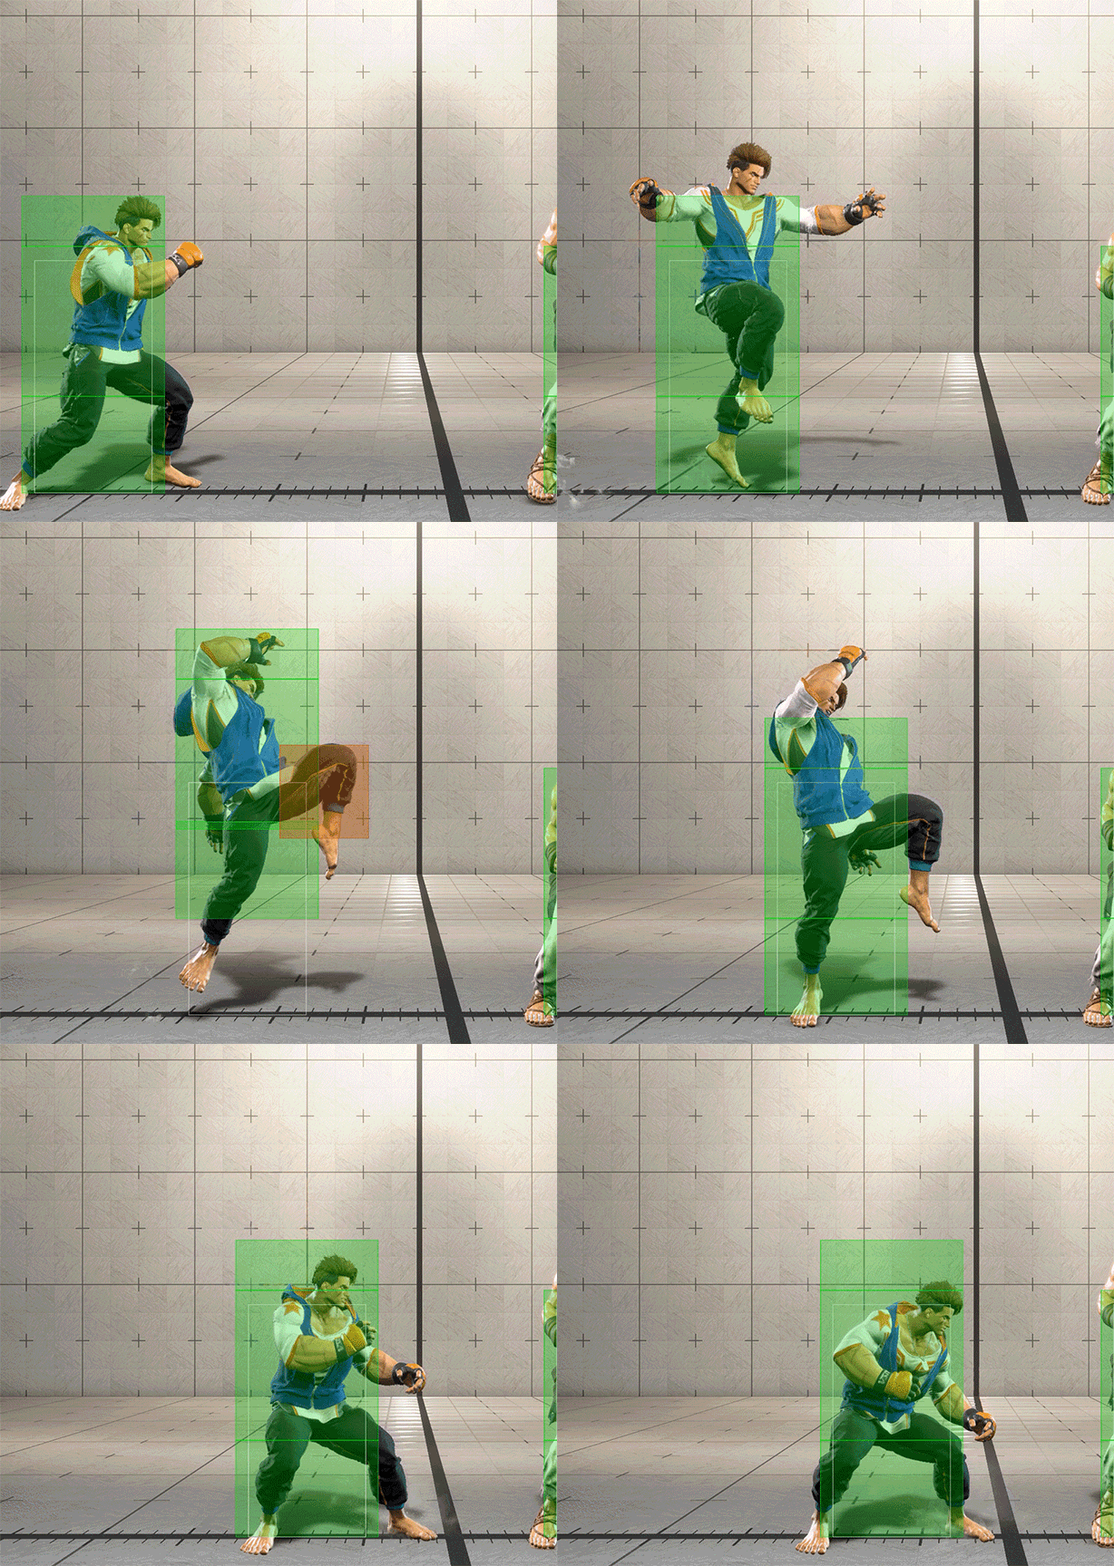
Counter Tips
- Hitting the final active frame is impossible without a setup
- If you got hit with late active and see the screen shake, you've been put at +1F. If the screen does NOT shake, mash your fastest normal immediately.
- If you block it at close range, go for a strong punish.

- Quick rise: Luke can walk up and apply wake-up pressure (LPLK meaty is possible). However, if Luke Drive Rushes, OD reversal is guaranteed.
- Back roll: Luke can pressure with Drive Rush. Even if you react to the Rush, he can cancel with Heavy Flash Knuckle or LPLK.
- Super Art reversal: risks a super-flash counter. For safety, use a fast OD reversal instead.
Counter Tips
- Be aware this is a guessing game — don't autopilot back roll every time.
- Start with quick rise to hold your position, then OD reversal when you see Drive Rush.
- Any reversal with 7F or faster startup is guaranteed (unless Luke lands a super-flash counter).
- Even on back roll, a long-range SA confirms — Luke's own SA1 or Manon's SA2 can be used as "back roll → SA" and nearly always wins.
Luke's SA1:
Manon's SA2:
Watch Out
- On back roll, OD reversal is not guaranteed.
- Reversals with 8F or slower startup do not confirm.


Counter Tips
- Drive Impact is effective, but watch out — if Luke has 236PP or Heavy Flash Knuckle → SA2 (236236K) ready, DI gets beaten.
- When you see LP→MP→HP, buffer a projectile-invul SA or a wide-range OD reversal.
- If the buffer succeeds but no SA comes out, Luke chose 236LP — punish with an 8F normal.
- Note: projectile-invul is required — a non-projectile-invul reversal will be hit by 236P.
- Some characters may have their OD reversal whiff against Heavy Flash Knuckle due to its backward retreat; verify for your character.

Counter Tips
- When you see the second hit of the Snapback Combo, mash any normal with 8F or faster startup
- It's a true blockstring so your button won't whiff or lose