Street Fighter 6
📋 对战更新 / 补丁说明
平衡调整与补丁说明
Overall Concept
This update focuses primarily on adjusting throw interactions and bug fixes.
With this update we've limited the amount of gauge gained from a successful throw escape. In previous updates we made adjustments so that both Drive and Super Art gauge gain was increased when successfully escaping a throw, due to the amount of Drive gained on a throw escape, the amount of situations where the upside of going for a normal throw was becoming too small.
The adjustment we made primarily addresses situations where the defender has low Drive or is in Burnout. The amount of Drive gained from escaping a throw in those situations could help completely turn around the situation, giving the attacker less reason to attempt a normal throw when they should be at an advantage. While we did expect some shift in the nature of the mind games, we felt that the frequency of the momentum shifts was more than expected, so we've increased the amount of gauge gained on a successful throw escape, along with adjustments to the Recovery Drive Reversal explained below.
With Recovery Drive Reversal, avoiding a throw during its invincibility will now grant 10000 to the Drive Gauge. On the defending side, the timing for Recovery Drive Reversal differs from throw escapes, and the situations when you can use them are also different, along with requiring resources. We decided to increase the return on this technique when you make a good read and successfully avoid an opponent's throw.
Along with this, we've changed the amount of Super Art gain for the opponent on a punish counter normal throw so that it matches the gain from a normal hit. The player who lands the throw will still gain twice the amount of Super Art gauge as before, giving you a big reward for correctly reading defensive options like Drive Parry when the opponent tries to counter a strike attack.
In addition to these situations, you can use normal throws where the opponent is left open after missing a big attack, letting you limit their Super Art gauge gain and dealing good damage at the same time. We expect that this will be a solid option for closing out a round.
Other changes we've made are primarily to fix bugs. For more details on battle adjustments, please refer to each character's section.
With this update we've limited the amount of gauge gained from a successful throw escape. In previous updates we made adjustments so that both Drive and Super Art gauge gain was increased when successfully escaping a throw, due to the amount of Drive gained on a throw escape, the amount of situations where the upside of going for a normal throw was becoming too small.
The adjustment we made primarily addresses situations where the defender has low Drive or is in Burnout. The amount of Drive gained from escaping a throw in those situations could help completely turn around the situation, giving the attacker less reason to attempt a normal throw when they should be at an advantage. While we did expect some shift in the nature of the mind games, we felt that the frequency of the momentum shifts was more than expected, so we've increased the amount of gauge gained on a successful throw escape, along with adjustments to the Recovery Drive Reversal explained below.
With Recovery Drive Reversal, avoiding a throw during its invincibility will now grant 10000 to the Drive Gauge. On the defending side, the timing for Recovery Drive Reversal differs from throw escapes, and the situations when you can use them are also different, along with requiring resources. We decided to increase the return on this technique when you make a good read and successfully avoid an opponent's throw.
Along with this, we've changed the amount of Super Art gain for the opponent on a punish counter normal throw so that it matches the gain from a normal hit. The player who lands the throw will still gain twice the amount of Super Art gauge as before, giving you a big reward for correctly reading defensive options like Drive Parry when the opponent tries to counter a strike attack.
In addition to these situations, you can use normal throws where the opponent is left open after missing a big attack, letting you limit their Super Art gauge gain and dealing good damage at the same time. We expect that this will be a solid option for closing out a round.
Other changes we've made are primarily to fix bugs. For more details on battle adjustments, please refer to each character's section.
Recovery Drive Reversal
- 調整 If you escape a throw during the invincibility period that occurs before an attack startup, your Drive Gauge will increase by 10,000
Normal Throws
- 調整 Updated opponent's Super Art gauge increase when a normal throw lands as a punish counter to match the increase on normal hit.
On Normal Hit
Attacker: 2000
Opponent: 1400
On Punish Counter
Attacker: 4000
Opponent: changed from 2800 to 1400
Throw Escapes
- 調整 Updated the gauge increase on a successful throw escape
1. Drive Gauge increase changed from 10000 to 5000
2. Super Art gauge increase changed from 1000 to 0
Projectile Clashes
- 調整・不具合修正 When multi-hit projectile Super Arts canceled each other out, there were certain combinations where under limited conditions involving specific timing and distance, the outcome after the first hit clash was inconsistent. To fix this inconsistency, adjustments have been made so that the result is now stable.
Due to this change, the handling of multi-hit projectile clashes involving Super Arts has been modified, and clashes may differ from earlier updates.
Super Art command inputs
- 不具合修正 Fixed an issue where Super Arts would not be performed with certain characters and control types if the attack button was pressed with a specific direction after the Super Art input
The characters affected by this fix are as follows:
Classic
Ed: Pressing ← with Super Art 3 (only during Super cancel)
Modern (Manual input)
Ryu: Pressing ↑ or ↓ with Super Art 2
Chun-Li: Pressing ↑ with Super Arts 1, 2 and 3
Akuma: Pressing ↑ with Super Art 2
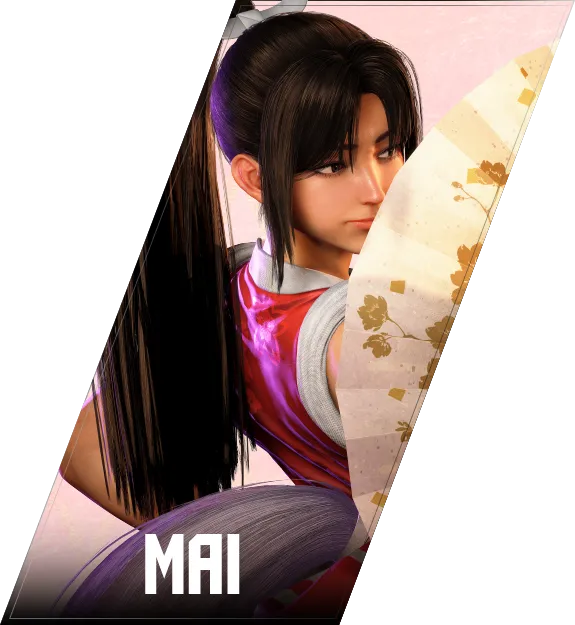
Mai: Pressing ↑ with Super Arts 1, 2, 3
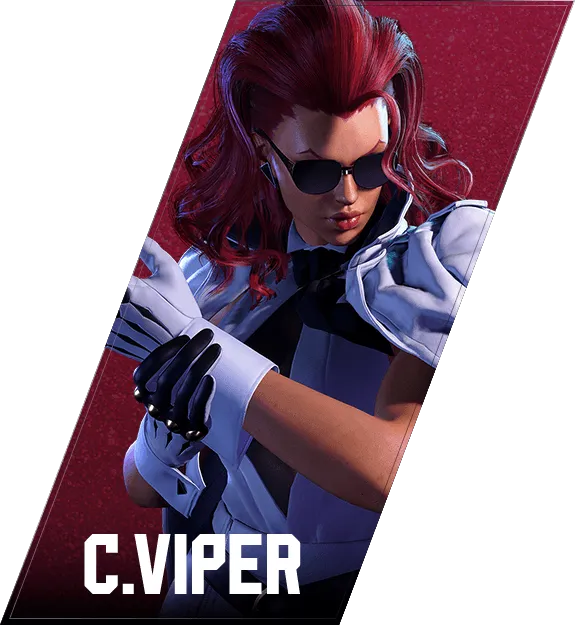
C. Viper: Pressing ↓ or ← with Super Art 1
Full Moon Kick<br>(→+Medium Kick>Medium K>Punch)
调整 1. Expanded the attack and proximity block hitbox of the second attack forward, and increased the forward movement before the attack start-up. This will make it easier for the 2nd attack and on to connect when the 1st attack is blocked or hits.
2. Adjusted the hit/block pushback of the second hit so that it pulls the opponent closer to Jamie’s side.
2. Adjusted the hit/block pushback of the second hit so that it pulls the opponent closer to Jamie’s side.
Super Art Level 1 Bushin Beats<br>(↓↘→↓↘→+Kick)
修复问题 Fixed an issue which made it difficult to recover backwards when Shuriken Bomb stock was empty.
Malleus Breaker<br>(↘+Heavy Punch >↘+Heavy Punch)
调整 1. Expanded the attack and proximity block hitbox of the second attack forward, and increased the forward movement before the attack start-up. This will make it easier for the 2nd attack and on to connect when the 1st attack is blocked or hits.
2. Expanded the hurtbox after the 2nd attack to match the attack hurtbox adjustment listed in #1.
2. Expanded the hurtbox after the 2nd attack to match the attack hurtbox adjustment listed in #1.
Interdiction<br>(↓↘→↓↘→+Kick)
修复问题 Mitigated an issue where against techniques with strong forward movement, JP could not properly track the opponent.
Senkai Kick<br>(→+Medium Kick)
调整 Slightly expanded the pushback on block as there were some cases where a normal throw could connect depending on when the attack was performed coming out of Drive Rush.
Overdrive Sonic Blade<br>(↓↙←+Two Punches)
修复问题 Fixed an issue where the Light/Medium and Medium/Heavy versions did not respond using the button release method.
Snake Strike (Modern)<br>(↓↙←+Attack > Medium Attack)
修复问题 Fixed an issue where the punish counter state would be extended by 1 frame if you continued to hold Up after being perfect parried by the opponent.
Aerial Yoga Teleport<br>(→ or ←+PPP or KKK during a jump)
修复问题 Mitigated an issue where Dhalsim could appear behind the opponent while facing in the opposite direction when performing the → + PPP version while both players were in the corner.
Overdrive Psycho Shot<br>(↓↘→+2 Punches > Punch)
修复问题 Fixed an issue where the Overdrive Psycho Spark's projectile clash hitbox would remain after performing the attack.
Low Smash Combination
调整 Changed the startup for the 2nd attack from 12 to 10 frames, and updated so that the 2nd attack is blocked automatically even on a delay if the 1st attack is blocked.
Hien Ren Kyaku (Modern)<br>(Light > Light > Light)<br>Hoshi Kujaku<br>(←+Heavy > Heavy)
修复问题 Fixed an issue where the attacks after the 2nd attack would not be performed while holding down the Assist button.
Starling Beak (Modern)<br>(Medium > Medium)
修复问题 Fixed an issue where the 2nd attack would not be performed while holding down the Assist button.
Low Tiger Shot<br>(↓↘→+Light & Medium Punches or Light & Heavy Punches)
修复问题 Fixed an issue where Medium Tiger Shot would be performed instead of Overdrive Low Tiger Shot when inputting ↓↘→+Light/Medium Punch while holding down Heavy Punch.
Assisted Combo 3
修复问题 Fixed an issue where the input buffer for the 2nd attack during the 1st attack was faster than expected.
Assisted Combo 2
修复问题 1. Fixed an issue that occurred immediately after the 2nd attack of Assisted Combo 2 was blocked, where the input buffer would not be active during recovery if Assisted Combo 2 was performed again.
2. Updated the starting frame of the 2nd attack input buffer from frame 2 of the 1st attack to frame 7.
2. Updated the starting frame of the 2nd attack input buffer from frame 2 of the 1st attack to frame 7.
Twisted Drop (Modern)<br>(↓+Light>↓+Heavy)<br>Palm Strikes (Modern)<br>(Medium > Medium)
修复问题 Fixed an issue where the 2nd attack would not be performed while holding down the Assist button.
Dangerous Armbar (Modern)<br>(↓+Medium & Heavy > ↓+Light & Medium or Throw button)
修复问题 Fixed an issue where scaling was accidentally applied when performing the attack with the throw button.
Hyper Lift<br>(↓+2 Punches > Light Punch & Light Kick)
修复问题 All normal throws did not have immediate scaling added like other normal throws, so 20% immediate scaling was added to this attack to make it in line with other throws.
Drive Parry
- 不具合修正 Fixed an issue where after stopping an attack with Drive Parry and block stun ends, there was some period of time where Drive Rush couldn't be performed.
Input buffers when a Drive Rush overlaps with getting up from a knockdown
- 調整・不具合修正 With the last update, we added an adjustment where the buffer input on wake-up was increased by 3 frames, but this allowed a situation where if the opponent performs a Drive Rush on specific frames during wake-up, the timing when buffer input was active occurred sooner than expected.
To take care of this issue, if Drive Rush overlaps with a wake-up, the buffer input will be decreased by 3 frames so that the buffer input active time is the same as it was pre-Alex release.
Certain airborne inputs with Modern controls
- 不具合修正 Fixed an issue with Modern controls where during certain mid-air techniques that can be used after jumping attacks (Dhalsim's Yoga Float or Rashid's Wing Stroke, etc), if the opponent activates Drive Rush, attempting to perform a jumping attack (assisted) with Auto+Attack during the screen flash would result in attacks not coming out for a certain period of time.
Departure: Shadow<br>(↓↙←+Heavy Punch when Departure is set)
修复问题 Fixed an issue where the attack startup was 1 frame faster when canceled from standing medium punch, standing heavy kick, crouching light kick, or crouching medium kick compared to other attacks.
M. Bison
Normal Devil Reverse (with Psycho Mine embedded)<br>(Charge↓ then ↑+Kick > Punch)
修复问题 Fixed an issue where Psycho Mine would stay embedded in the opponent whether it was detonated or not if a Drive Reversal is performed after blocking the 2nd attack.
Normal/Overdrive Devil Reverse (with Psycho Mine embedded)<br>(Charge↓ then ↑+Kick > Punch or Two Punches)<br>Somersault Skull Diver<br>(Charge↓ then ↑+Kick > Kick > Punch)
修复问题 Fixed an issue where the attack would not hit the opponent from behind under certain situations.
Overall Concept
We've made adjustments to all characters this time, mainly by making more attacks viable in the neutral and expanding combo options. However, as with previous balance adjustments, we've made changes to moves with high returns that were difficult to deal with, as well as moves that were overly oppressive in order to improve the overall balance of the game. Please refer to each individual character's change list for details.
In addition, we've made overall adjustments to standardize the use of Drive Rush into overhead attacks between characters, as those differences could make the effectiveness of this technique vary widely. There are also changes to improve the responsiveness of controls, such as during the screen freeze when a Drive Rush is performed. This section will go over the overall adjustments.
Overhead Attacks that can Combo from a Drive Rush
All such moves have been standardized to be -3 on block, and the situation after blocking has also been standardized to an extent.
Unique Attacks that hit overhead and result in a normal, grounded knockback on hit are designed so that during a Drive Rush they will combo on hit and also leave you at advantage on block, letting you continue your offense. These moves differed in block stun and pushback on block, but after taking into consideration their usefulness as a tool to break the opponent's guard and the return for doing so, we've adjusted them to mostly follow the following two rules:
1. They are now -3 frames on block (so +1 with a Drive Rush)
2. When blocked after a Drive Rush, the pushback (on standing guard) will be far enough so that Normal Throws or chaining Light Attacks with a Low Attack like crouching Light Kick > Light Punch will no longer connect.
Adjustments were made with the goal of the above two rules in mind, but because the reach of Light Attacks and effectiveness when being blocked varies between characters, there are some differences in the distance after guarding depending on the character in regards to rule 2.
Also, while its effectiveness as an attempt to break guards has diminished, the added distance from rule 2 means that it remains an easy-to-use and low-risk option.
Pressing Up During a Drive Rush Screen Freeze
A jump will now occur when Up is input during a Drive Rush screen freeze.
This adjustment only affects when a Drive Rush is used in neutral, not when canceling into Drive Rush during a hit or while blocking.
This change saves the Up input during the screen freeze, which should reduce cases where the screen freeze prevented you from jumping and left you on the ground, as well as make it easier to use aerial Special Moves right after jumping like Cammy's Cannon Strike or Akuma's Zanku Hadoken even when the inputs clash with a Drive Rush's screen freeze.
However, there is still a set priority for when multiple inputs are performed during this screen freeze, so there are cases such as where a grounded Special Move will still take priority over a jump input, and canceling the start-up of a jump into a grounded Special Move will still occur as before. These behaviors are intentional.
Finally, a neutral jump input can be overwritten by a forward or backward jump input. Inputting a neutral jump and then holding forward or back will cause the appropriate directional jump to occur. Please understand that this is also the intended behavior.
In addition, we've made overall adjustments to standardize the use of Drive Rush into overhead attacks between characters, as those differences could make the effectiveness of this technique vary widely. There are also changes to improve the responsiveness of controls, such as during the screen freeze when a Drive Rush is performed. This section will go over the overall adjustments.
Overhead Attacks that can Combo from a Drive Rush
All such moves have been standardized to be -3 on block, and the situation after blocking has also been standardized to an extent.
Unique Attacks that hit overhead and result in a normal, grounded knockback on hit are designed so that during a Drive Rush they will combo on hit and also leave you at advantage on block, letting you continue your offense. These moves differed in block stun and pushback on block, but after taking into consideration their usefulness as a tool to break the opponent's guard and the return for doing so, we've adjusted them to mostly follow the following two rules:
1. They are now -3 frames on block (so +1 with a Drive Rush)
2. When blocked after a Drive Rush, the pushback (on standing guard) will be far enough so that Normal Throws or chaining Light Attacks with a Low Attack like crouching Light Kick > Light Punch will no longer connect.
Adjustments were made with the goal of the above two rules in mind, but because the reach of Light Attacks and effectiveness when being blocked varies between characters, there are some differences in the distance after guarding depending on the character in regards to rule 2.
Also, while its effectiveness as an attempt to break guards has diminished, the added distance from rule 2 means that it remains an easy-to-use and low-risk option.
Pressing Up During a Drive Rush Screen Freeze
A jump will now occur when Up is input during a Drive Rush screen freeze.
This adjustment only affects when a Drive Rush is used in neutral, not when canceling into Drive Rush during a hit or while blocking.
This change saves the Up input during the screen freeze, which should reduce cases where the screen freeze prevented you from jumping and left you on the ground, as well as make it easier to use aerial Special Moves right after jumping like Cammy's Cannon Strike or Akuma's Zanku Hadoken even when the inputs clash with a Drive Rush's screen freeze.
However, there is still a set priority for when multiple inputs are performed during this screen freeze, so there are cases such as where a grounded Special Move will still take priority over a jump input, and canceling the start-up of a jump into a grounded Special Move will still occur as before. These behaviors are intentional.
Finally, a neutral jump input can be overwritten by a forward or backward jump input. Inputting a neutral jump and then holding forward or back will cause the appropriate directional jump to occur. Please understand that this is also the intended behavior.
luke
Keeping in line with Luke's strengths as a character, we've focused mainly on his ability to keep pressure up while advancing on opponents and the utility of Flash Knuckle.
Double Impact (→+Heavy Punch > Heavy Punch)
By changing the effect of the final hit from a blowback to a standing tailspin, we made it possible to follow-up this attack with a charged Medium Flash Knuckle for a high-damage combo. This is possible only when the first hit lands as a Punish Counter.
Perfect/Held Heavy Flash Knuckle (↓↙←+hold Heavy Punch)
We made it so Luke will be closer to his opponent when the move is blocked, which creates an opening that can be taken advantage of to string in more attacks.
Light Flash Knuckle (↓↙←+Light Punch)
By changing the recovery time and advantage on block gained by opponents, we made it possible for Luke to cancel out of a successful hit with a Super Art, which gives him the opportunity to go for a follow-up attack in the corner. It will now be easier after a hit mid-screen to cover an opponent getting up with something like a Crouching Medium Punch, and in the corner, a grounded hit can now be followed up with a Light Rising Uppercut or Super Art 2. The adjustment to blowback on airborne opponents was made to ensure his anti-air combo remained unchanged.
Double Impact (→+Heavy Punch > Heavy Punch)
By changing the effect of the final hit from a blowback to a standing tailspin, we made it possible to follow-up this attack with a charged Medium Flash Knuckle for a high-damage combo. This is possible only when the first hit lands as a Punish Counter.
Perfect/Held Heavy Flash Knuckle (↓↙←+hold Heavy Punch)
We made it so Luke will be closer to his opponent when the move is blocked, which creates an opening that can be taken advantage of to string in more attacks.
Light Flash Knuckle (↓↙←+Light Punch)
By changing the recovery time and advantage on block gained by opponents, we made it possible for Luke to cancel out of a successful hit with a Super Art, which gives him the opportunity to go for a follow-up attack in the corner. It will now be easier after a hit mid-screen to cover an opponent getting up with something like a Crouching Medium Punch, and in the corner, a grounded hit can now be followed up with a Light Rising Uppercut or Super Art 2. The adjustment to blowback on airborne opponents was made to ensure his anti-air combo remained unchanged.
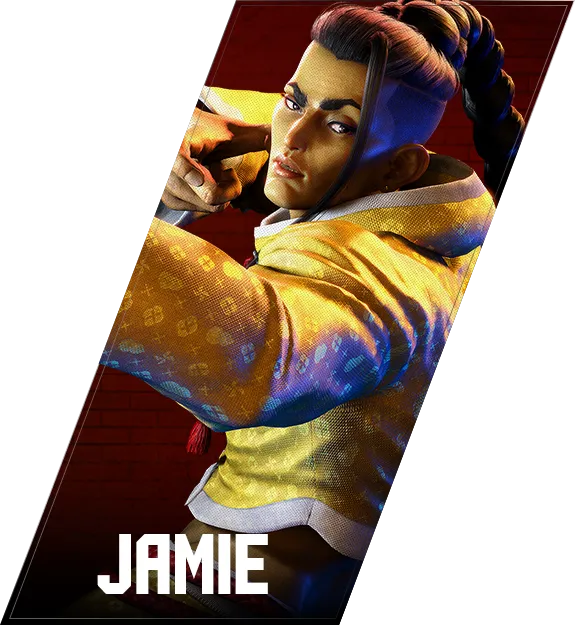
jamie
We wanted to give Jamie more offensive options at lower Drink Levels and make it easier for him to use moves that become available to him at higher Drink Levels.
Crouching Light Kick, Crouching Medium Kick
Now, if you hit an opponent with a Crouching Light Kick out of a Drive Rush, you will be able to follow up with Crouching Medium Kick. Combined with Crouching Medium Kick's extended reach, Jamie can now also put on more pressure with low attacks, whereas before he often needed to use mid-hitting attacks like Swagger Step and Drive Rush into Heavy Punch.
Standing Heavy Punch
We made it less challenging to perform combos when this hits an airborne opponent by widening the window for the third hit to connect. This makes moves like Crouching Heavy Kick and Arrow Kick easier to throw into the mix.
Ransui Haze (Fastest Follow-Up) (→+Heavy Kick > ←+Heavy Kick > Punch)
The headbutt follow-up has been sped up so that you can counter an opponent's 4 frame move after they block the first hit of Ransui Haze. The sliding punch has also been strengthened, providing more incentive to raise Jamie's Drink Level.
Normal/Overdrive Freeflow Strikes (Drink level 4) (↓↘→+Punch or Two punches > →+Punch > →+Punch)
Now, when the first follow-up attack connects with an opponent, they will be drawn closer to Jamie instead of pushed away. We made this adjustment to prevent an issue in which hitting an opponent with the edge of the furthest hitbox would result in whiffs on consecutive hits.
Crouching Light Kick, Crouching Medium Kick
Now, if you hit an opponent with a Crouching Light Kick out of a Drive Rush, you will be able to follow up with Crouching Medium Kick. Combined with Crouching Medium Kick's extended reach, Jamie can now also put on more pressure with low attacks, whereas before he often needed to use mid-hitting attacks like Swagger Step and Drive Rush into Heavy Punch.
Standing Heavy Punch
We made it less challenging to perform combos when this hits an airborne opponent by widening the window for the third hit to connect. This makes moves like Crouching Heavy Kick and Arrow Kick easier to throw into the mix.
Ransui Haze (Fastest Follow-Up) (→+Heavy Kick > ←+Heavy Kick > Punch)
The headbutt follow-up has been sped up so that you can counter an opponent's 4 frame move after they block the first hit of Ransui Haze. The sliding punch has also been strengthened, providing more incentive to raise Jamie's Drink Level.
Normal/Overdrive Freeflow Strikes (Drink level 4) (↓↘→+Punch or Two punches > →+Punch > →+Punch)
Now, when the first follow-up attack connects with an opponent, they will be drawn closer to Jamie instead of pushed away. We made this adjustment to prevent an issue in which hitting an opponent with the edge of the furthest hitbox would result in whiffs on consecutive hits.
manon
Manon's changes to the
On the other hand, her Normal Moves have infamously long reach, so it seemed there was little risk to Manon for using Standing Heavy Kick. Its standby block timing has been changed to make it less oppressive in the ground game.
En Haut (← + Medium Kick > Medium Kick)
The Counter and Punish Counter effects will now carry on from the first to second hit, so now where it was previously difficult to follow-up at certain distances, a Counter Hit should now allow you to follow with a Light Renversé, and a Punish Counter with things like Overdrive Dégagé, increasing the returns.
Temps Lié (Heavy Punch > Heavy Punch)
The first hit also benefits from the increased
combo count
limit of her Standing Heavy Punch and less pushback on hit for Heavy Dégagé makes her strikes stronger, which in turn should give her more opportunities to force her opponent to guess between her strikes and throws.On the other hand, her Normal Moves have infamously long reach, so it seemed there was little risk to Manon for using Standing Heavy Kick. Its standby block timing has been changed to make it less oppressive in the ground game.
En Haut (← + Medium Kick > Medium Kick)
The Counter and Punish Counter effects will now carry on from the first to second hit, so now where it was previously difficult to follow-up at certain distances, a Counter Hit should now allow you to follow with a Light Renversé, and a Punish Counter with things like Overdrive Dégagé, increasing the returns.
Temps Lié (Heavy Punch > Heavy Punch)
The first hit also benefits from the increased
combo count
upper limit of Standing Heavy Punch so now you have more chances to use this in combos, and the extra active frames should make it harder to whiff the rest of the combo when your opponent is high up.kimberly
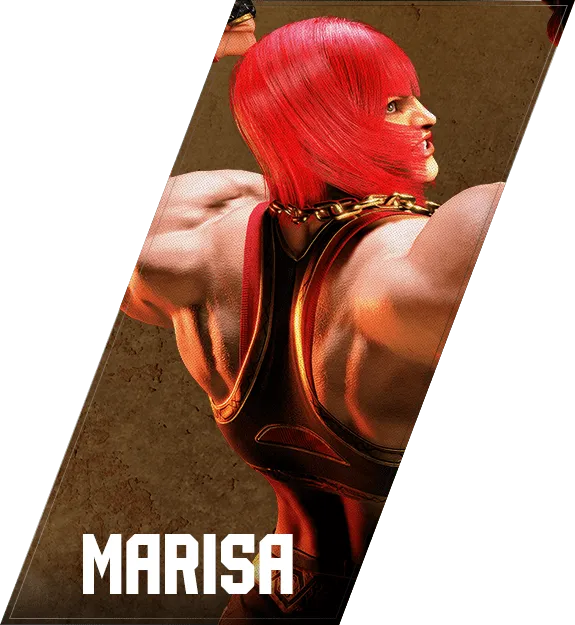
For Kimberly, we’ve changed the way all normal moves, except crouching heavy kick, work when performed after a normal Hidden Variable (↓↙←+P).
We’ve brought these moves closer in line to normal moves performed after a Drive Rush by increasing the
When Hidden Variable connects with a jumping opponent, you can now hit them with a follow-up and then extend that into a combo without expending any Drive Gauge by utilizing a series of attacks like Shuriken Bombs and so on. Try to find situations where you can use this effectively.
We’ve brought these moves closer in line to normal moves performed after a Drive Rush by increasing the
combo count
limit and changing the effect of hitting an airborne opponent to a knockdown.When Hidden Variable connects with a jumping opponent, you can now hit them with a follow-up and then extend that into a combo without expending any Drive Gauge by utilizing a series of attacks like Shuriken Bombs and so on. Try to find situations where you can use this effectively.
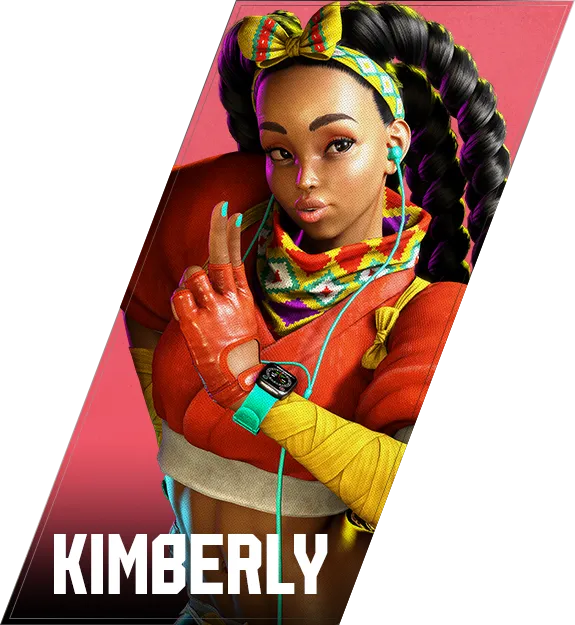
marisa
Marisa's Standing Heavy Kick is now riskier, but her other moves used in her neutral game have been made stronger.
Standing Heavy Kick has long reach and huge return on Punish Counter, but compared to similar moves from other characters the window to punish it is small. We were finding many match-ups were becoming too linear due to this move being hard for many characters to check when Marisa whiffs.
We are hoping to improve match interaction by expanding the hurtbox in the later part of the move to make it riskier when whiffed, as well as strengthen Marisa's other moves used in the neutral game to make them more appealing.
Crouching Medium Kick
You now have more options to combo from this on Punish Counter or Drive Rush. For example, you can connect the now faster Forward Medium Punch, letting you combo into Novacula Thrust and Novacula Swipe. This gives you a knockdown to keep on the pressure as well as the option to cancel into Super Arts for big damage. As one of your core pokes that hit low, it's now more rewarding both as opening offense and as a counter-poke.
Phalanx (Normal/Overdrive)
The advantage and pushback on block as been adjusted, improving its strength as a poke and approaching tool. The medium and higher versions will now allow you to counter a potential counter attack with Light Two Hitter, and the heavy and Overdrive versions leave you close enough to land Enfold if you hit at close enough range.
Standing Heavy Kick has long reach and huge return on Punish Counter, but compared to similar moves from other characters the window to punish it is small. We were finding many match-ups were becoming too linear due to this move being hard for many characters to check when Marisa whiffs.
We are hoping to improve match interaction by expanding the hurtbox in the later part of the move to make it riskier when whiffed, as well as strengthen Marisa's other moves used in the neutral game to make them more appealing.
Crouching Medium Kick
You now have more options to combo from this on Punish Counter or Drive Rush. For example, you can connect the now faster Forward Medium Punch, letting you combo into Novacula Thrust and Novacula Swipe. This gives you a knockdown to keep on the pressure as well as the option to cancel into Super Arts for big damage. As one of your core pokes that hit low, it's now more rewarding both as opening offense and as a counter-poke.
Phalanx (Normal/Overdrive)
The advantage and pushback on block as been adjusted, improving its strength as a poke and approaching tool. The medium and higher versions will now allow you to counter a potential counter attack with Light Two Hitter, and the heavy and Overdrive versions leave you close enough to land Enfold if you hit at close enough range.
lily
Lily’s rush-in attacks Condor Spire and Condor Dive were adjusted, making it possible to unleash combos and movements that weren’t possible before.
Overdrive Normal/Windclad Condor Spire (↓↘→+K or KK)
By pressing either Light and Medium or Light and Heavy Kicks when performing the normal or Windclad version, you can shorten the distance traveled, creating new movement possibilities not available in the existing version.
For the normal version, you can either choose to rush in for combos from a closer distance, or, because recovery has been reduced, go for strikes and throws instead.
For the Windclad version, there are more changes than just the shorter distance. Blowback after a hit, the advantage of hitting mid-screen, and the time given for a follow-up attack after hitting in the corner have all been adjusted.
The advantage and distance on block are uniform across both versions, so use the best version for the situation.
Normal/Overdrive Windclad Condor Dive (PP or PPP during a neutral jump or a forward jump)
When Windclad, you can now expend Windclad stock to perform another Condor Dive when rebounding from a hit or block. It can be used to increase damage on an attack, or to stop an opponent’s attempt to counterattack after blocking.
Since it’s now possible to go from an Overdrive Tomahawk Buster to an Overdrive Condor Dive and then another Condor Dive, you can use your resources all at once and deal massive damage.
Re-performing a Condor Dive can only be executed once, regardless of whether it is the normal or Overdrive version. The additional Overdrive Condor Dive’s drive gauge consumption is 10,000.
Also, the damage and hit effects differ from the normal version.
Overdrive Normal/Windclad Condor Spire (↓↘→+K or KK)
By pressing either Light and Medium or Light and Heavy Kicks when performing the normal or Windclad version, you can shorten the distance traveled, creating new movement possibilities not available in the existing version.
For the normal version, you can either choose to rush in for combos from a closer distance, or, because recovery has been reduced, go for strikes and throws instead.
For the Windclad version, there are more changes than just the shorter distance. Blowback after a hit, the advantage of hitting mid-screen, and the time given for a follow-up attack after hitting in the corner have all been adjusted.
The advantage and distance on block are uniform across both versions, so use the best version for the situation.
Normal/Overdrive Windclad Condor Dive (PP or PPP during a neutral jump or a forward jump)
When Windclad, you can now expend Windclad stock to perform another Condor Dive when rebounding from a hit or block. It can be used to increase damage on an attack, or to stop an opponent’s attempt to counterattack after blocking.
Since it’s now possible to go from an Overdrive Tomahawk Buster to an Overdrive Condor Dive and then another Condor Dive, you can use your resources all at once and deal massive damage.
Re-performing a Condor Dive can only be executed once, regardless of whether it is the normal or Overdrive version. The additional Overdrive Condor Dive’s drive gauge consumption is 10,000.
Also, the damage and hit effects differ from the normal version.
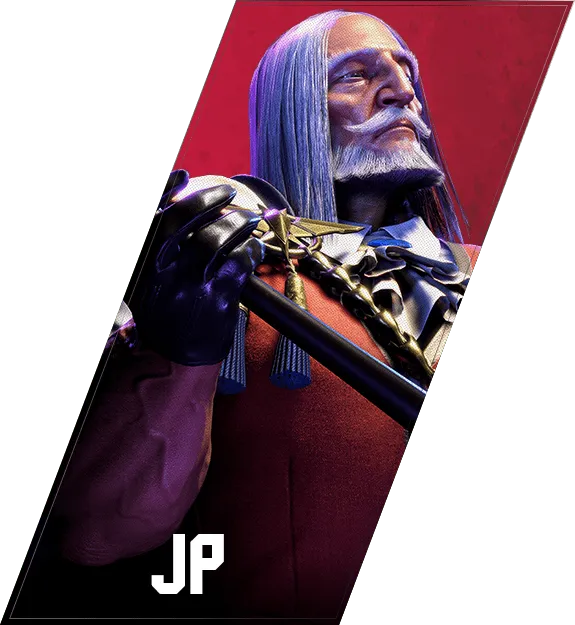
jp
We looked at the strength of a few of JP's Normal Moves as well as the situation after a Forward Throw in the corner. These changes make for less of a return on hit, and while there are some moves that will be harder to throw out, there are also more options from his signature move Departure, so his options in neutral shouldn't feel too limited.
Departure: Shadow
Some moves that were previously unable to cancel into this move now are able to (with the exception of Crouching Heavy Kick). Moves with good reach like Standing Medium Punch and Crouching Medium Kick can now make a block string or let you aim for a combo, so your pressure is now even scarier while you have Departure on screen.
Forward Throw
JP had one of the best situations of any character after landing a Forward Throw in the corner, so considering how it can be used in combination with Departure to increase the returns, we've made large changes to both the advantage and distance you are left at.
The strength of looping offense after a throw and your options for follow-up attacks after setting a Departure are now much more limited, so going for big damage will now cost you some Drive Gauge.
Departure: Shadow
Some moves that were previously unable to cancel into this move now are able to (with the exception of Crouching Heavy Kick). Moves with good reach like Standing Medium Punch and Crouching Medium Kick can now make a block string or let you aim for a combo, so your pressure is now even scarier while you have Departure on screen.
Forward Throw
JP had one of the best situations of any character after landing a Forward Throw in the corner, so considering how it can be used in combination with Departure to increase the returns, we've made large changes to both the advantage and distance you are left at.
The strength of looping offense after a throw and your options for follow-up attacks after setting a Departure are now much more limited, so going for big damage will now cost you some Drive Gauge.
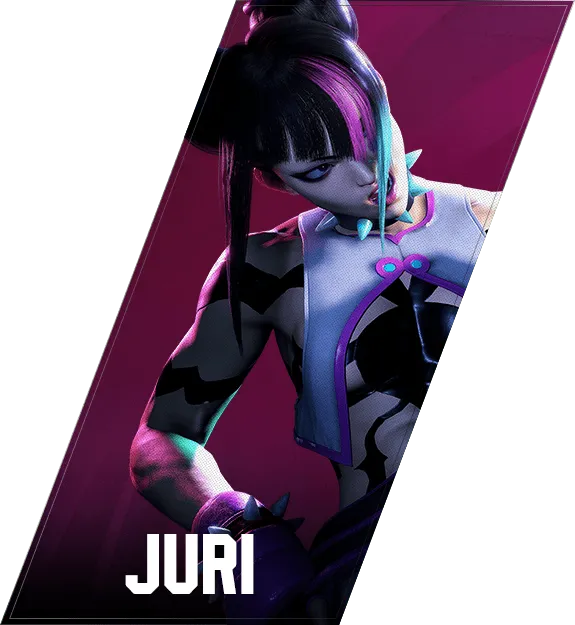
juri
We have assessed Juri's performance and made adjustments to her Ankensatsu technique and Overdrive Fuhajin combos.
While these changes slightly increase the risk of missing Renko Kicks (→ + Heavy Punch), they allow you to use Ankensatsu to check an opponent from a distance if they attempt to move away and cause a whiff.
Normal/Fuha Boosted/Overdrive Ankensatsu (↓↘→ + Medium Kick or Light Kick + Heavy Kick)
We reduced the advantage on block and extended the reach of the latter half of the combo. Adjustments were also made to allow the non-combo attack to zone an opponent by targeting the tip.
In particular, we adjusted the standby block hitbox and pushback on block for the normal version to allow a non-combo hit to cause a knockdown, enhancing its usability as a spacing tool. This will help create opportunities to attack with no Fuha stocks.
Additionally, the Boosted version can now produce a ground bound when hitting a mid-air opponent, which can be followed up with a level 3 Super Art. The advantage on hit has also been increased to better enable wake-up attacks.
Overdrive Fuhajin (↓↙← + Two Kicks)
The
Depending on your distance upon hit, you can pick up with Korenzan (← + Heavy Kick) or Kyosesho (→ + Medium Punch) and follow up with additional attacks. We have improved the performance of light Tensenrin (→↓↘ + Light Punch) upon hit and improved the availability of follow-up options, such as high-damage attacks that consume Drive Gauge or Fuha stocks.
Adjustments were also made to Modern Controls for Assisted Combo 2.
While these changes slightly increase the risk of missing Renko Kicks (→ + Heavy Punch), they allow you to use Ankensatsu to check an opponent from a distance if they attempt to move away and cause a whiff.
Normal/Fuha Boosted/Overdrive Ankensatsu (↓↘→ + Medium Kick or Light Kick + Heavy Kick)
We reduced the advantage on block and extended the reach of the latter half of the combo. Adjustments were also made to allow the non-combo attack to zone an opponent by targeting the tip.
In particular, we adjusted the standby block hitbox and pushback on block for the normal version to allow a non-combo hit to cause a knockdown, enhancing its usability as a spacing tool. This will help create opportunities to attack with no Fuha stocks.
Additionally, the Boosted version can now produce a ground bound when hitting a mid-air opponent, which can be followed up with a level 3 Super Art. The advantage on hit has also been increased to better enable wake-up attacks.
Overdrive Fuhajin (↓↙← + Two Kicks)
The
combo count
and blowback distance were adjusted to allow for more follow-up attacks, making it a valuable option to acquire Fuha stocks while dealing damage.Depending on your distance upon hit, you can pick up with Korenzan (← + Heavy Kick) or Kyosesho (→ + Medium Punch) and follow up with additional attacks. We have improved the performance of light Tensenrin (→↓↘ + Light Punch) upon hit and improved the availability of follow-up options, such as high-damage attacks that consume Drive Gauge or Fuha stocks.
Adjustments were also made to Modern Controls for Assisted Combo 2.
deejay
Dee Jay's main changes have to do with solidifying the strengths of each version of Machine Gun Uppercut and Juggling Sway.
This has resulted in increased combo damage and ways he can fake out his opponent, amplifying Dee Jay's unique groove.
On the other hand, his Crouching Medium and Heavy Punch will leave you more vulnerable when whiffed, making his powerful counter-pokes riskier.
Crouching Medium Punch
While the length of the move and hurtbox on whiff have been extended making it riskier, the knockback time has also increased, and now it can combo into Medium Machine Gun Uppercut. You can now get good damage off of a stray hit or combo without spending Drive Gauge.
Overdrive Machine Gun Uppercut (↓↙←+PP)
While it does deal good damage, there were few opportunities to use this move. With the faster attack start up, you can now combo into this move from moves like Standing Heavy Punch and Face Breaker (←+HK).
Normal/Overdrive Juggling Sway (↓↙←+K or KK>→+P>←+P)
The hurtbox while moving has shrunk and you can now cancel into Jus Cool follow-up attacks during the latter half of the movement, so now you can avoid opponents reacting to your approach as well as punish with a counter-attack.
Of particular note is when the Overdrive Jus Cool is blocked at close range. You now have an even greater number of strong follow-ups, making it all the more certain your opponent will be unable to defend against your assault.
This has resulted in increased combo damage and ways he can fake out his opponent, amplifying Dee Jay's unique groove.
On the other hand, his Crouching Medium and Heavy Punch will leave you more vulnerable when whiffed, making his powerful counter-pokes riskier.
Crouching Medium Punch
While the length of the move and hurtbox on whiff have been extended making it riskier, the knockback time has also increased, and now it can combo into Medium Machine Gun Uppercut. You can now get good damage off of a stray hit or combo without spending Drive Gauge.
Overdrive Machine Gun Uppercut (↓↙←+PP)
While it does deal good damage, there were few opportunities to use this move. With the faster attack start up, you can now combo into this move from moves like Standing Heavy Punch and Face Breaker (←+HK).
Normal/Overdrive Juggling Sway (↓↙←+K or KK>→+P>←+P)
The hurtbox while moving has shrunk and you can now cancel into Jus Cool follow-up attacks during the latter half of the movement, so now you can avoid opponents reacting to your approach as well as punish with a counter-attack.
Of particular note is when the Overdrive Jus Cool is blocked at close range. You now have an even greater number of strong follow-ups, making it all the more certain your opponent will be unable to defend against your assault.
cammy
Cammy's signature move Cannon Strike has been adjusted to include benefits for executing it effectively. We have also implemented improvements to make her combo pieces easier to use.
Delayed Ripper (→ + Heavy Kick)
The follow-up attack options have been expanded by reducing recovery on hit and the
Normal/Overdrive Cannon Strike (↓↙← + Kick/Two Kicks During Forward Jump)
We have made improvements to the hit effect just after landing the attack, making it easier to pressure an opponent on block and connect combos on hit. While it may be difficult to pull off, successful execution will allow you to quickly gain the upper hand.
Super Art level 1 Spin Drive Smasher (↓↘→↓↘→ + Kick)
Adjustments were made to prevent an issue where only the 1st active frame lacked an attack hitbox during the move, causing one player to lose out in a clash.
Delayed Ripper (→ + Heavy Kick)
The follow-up attack options have been expanded by reducing recovery on hit and the
combo-count
start value. A normal hit can now lead from a Cancel Drive Rush into moves like Swing Combination, and a light Quick Spin Knuckle can be followed up with a level 1 Super Art during a Punish Counter without having to cancel.Normal/Overdrive Cannon Strike (↓↙← + Kick/Two Kicks During Forward Jump)
We have made improvements to the hit effect just after landing the attack, making it easier to pressure an opponent on block and connect combos on hit. While it may be difficult to pull off, successful execution will allow you to quickly gain the upper hand.
Super Art level 1 Spin Drive Smasher (↓↘→↓↘→ + Kick)
Adjustments were made to prevent an issue where only the 1st active frame lacked an attack hitbox during the move, causing one player to lose out in a clash.
ryu
As a character with high single strike damage potential, Ryu’s strength is in waiting for the opportune moment to unleash powerful attacks. Over past adjustments, we’ve focused on improving that strength, but as we have done so, we’ve realized that the rewards have started to outweigh the risks. This time, our adjustments are about bringing back that balance.
Solar Plexus Strike (→+Heavy Punch)
This powerful move already enabled you to continue attacking through combos or blocks regardless of distance. However, we improved it to the point that it could potentially stop your opponent from making any attack, putting you at a massive advantage when attacking from a distance.
Originally from this distance, we wanted the player to utilize a Whirlwind Kick or a Special Move to keep their opponent in check, but given the favorable situation of using a Solar Plexus Strike it was hard to see the benefit of using anything else, so we delayed the activation timing of the block idle hitbox.
This way, the move stays the same the close distances, but by making it easier for your opponent to retreat when using it from afar, we’ve brought it closer in balance to other zoning techniques.
High Double Strike (Heavy Punch > Heavy Kick)
We’ve made two major changes to Heavy Double Strike. First, we adjusted the blowback, increasing the frame advantage when transitioning into Denjin Charge. Second, we changed the timing for the pushback on hit when in the corner. These changes open up the option to use it in a combo when cornering an opponent.
You can also now follow up with a Medium or Overdrive Shoryuken on a standing hit.
Crouching Heavy Punch
Due to only the first active frame being cancelable, we observed many cases where the first frame of a Crouching Heavy Punch performed in response to a counter/punish counter was barely missed. This resulted in either combos not connecting, or cases when the second frame hit but the Ryu player still took a counter-attack.
We judged that the difficulty of making snap combo decisions on the fly was too high, so we expanded the reach of the first frame during a combo.
Solar Plexus Strike (→+Heavy Punch)
This powerful move already enabled you to continue attacking through combos or blocks regardless of distance. However, we improved it to the point that it could potentially stop your opponent from making any attack, putting you at a massive advantage when attacking from a distance.
Originally from this distance, we wanted the player to utilize a Whirlwind Kick or a Special Move to keep their opponent in check, but given the favorable situation of using a Solar Plexus Strike it was hard to see the benefit of using anything else, so we delayed the activation timing of the block idle hitbox.
This way, the move stays the same the close distances, but by making it easier for your opponent to retreat when using it from afar, we’ve brought it closer in balance to other zoning techniques.
High Double Strike (Heavy Punch > Heavy Kick)
We’ve made two major changes to Heavy Double Strike. First, we adjusted the blowback, increasing the frame advantage when transitioning into Denjin Charge. Second, we changed the timing for the pushback on hit when in the corner. These changes open up the option to use it in a combo when cornering an opponent.
You can also now follow up with a Medium or Overdrive Shoryuken on a standing hit.
Crouching Heavy Punch
Due to only the first active frame being cancelable, we observed many cases where the first frame of a Crouching Heavy Punch performed in response to a counter/punish counter was barely missed. This resulted in either combos not connecting, or cases when the second frame hit but the Ryu player still took a counter-attack.
We judged that the difficulty of making snap combo decisions on the fly was too high, so we expanded the reach of the first frame during a combo.
honda
We have adjusted E. Honda's normal and Sumo Spirit Hundred Hand Slap to make them easier to execute.
These changes were mainly geared toward the Sumo Spirit Hundred Hand Slap. It will now lead into the final attack even on block, and the advantage on block and Drive Gauge reduction are more favorable compared to the normal version. The Overdrive version in particular can result in frame advantage on block.
In addition, the medium version can now link from light attacks into a combo, and the combo damage has been raised. We also fixed an issue where follow-up attacks failed to connect even after using a stock when linking from a long-range light attack into a light Hundred Hand Slap with Sumo Spirit active.
Since there are more opportunities to land a Medium Hundred Hand Slap, the pushback on hit has increased slightly only for the final attack, but its overall usability has improved significantly.
These changes were mainly geared toward the Sumo Spirit Hundred Hand Slap. It will now lead into the final attack even on block, and the advantage on block and Drive Gauge reduction are more favorable compared to the normal version. The Overdrive version in particular can result in frame advantage on block.
In addition, the medium version can now link from light attacks into a combo, and the combo damage has been raised. We also fixed an issue where follow-up attacks failed to connect even after using a stock when linking from a long-range light attack into a light Hundred Hand Slap with Sumo Spirit active.
Since there are more opportunities to land a Medium Hundred Hand Slap, the pushback on hit has increased slightly only for the final attack, but its overall usability has improved significantly.
blanka
Blanka's attacks that are often chained with his Super Art 2 Lightning Beast while a Blanka-chan Bomb is out have had their strength reduced.
For other changes, his pokes that were a bit risky but have long reach were hard to make use of at mid-range have been buffed, so his pokes should have more interesting uses.
The chain of hits from a Blanka-chan Bomb in the corner were very difficult for the opponent to deal with, and we thought it was hard to utilize the defensive tools available to find a way out. Add in a series of attacks from Super Art 2, and you had a situation that was too favorable for Blanka where it was easy to burn out the opponent on block, combo on hit and also get excellent options to continue pressure when knocking down the opponent.
Blanka also has a lot of moves that switch sides with the opponent, so even when you push him to the corner, if you slip up on your offense he can switch sides, start his own corner pressure and turn the tables in an instant. We saw many situations that should have been advantageous to the opponent end up not being the case.
We reduced his strengths with the aim of alleviating situations with high return and little counterplay, as well as limiting the deterring effect of moves that cause the opponent to hesitate on offense.
Blanka-chan Bomb
Considering the amount of situations a player can utilize during the hits of a Blanka-chan Bomb in the corner, the way it limits the effectiveness of invincible moves and Drive Reversals and the return on hit, we have made it so that the bomb will lose it's hitbox if Blanka is hit by an attack while the bomb is active.
Surprise Forward Hop
Taking into consideration how a canceling into this from a Normal Move could easily turn the tide in Blanka's favor, we've removed the throw invincibility, so now it should be easier for an opponent to counter with a Normal Throw.
There will still be cases where with good timing Blanka can avoid the opponent's throw and switch sides, but the timing window and distances where the opponent can connect with a Normal Throw have improved, so it's not as easy to use as an escape tool.
Standing Medium Kick
Due to the knockback time increasing, you can now combo into Wild Lift on counter hit. The pushback on hit has also decreased, so Overdrive Backstep Rolling Attack will also be easier to combo into.
Wild Nail
The advantage on hit has increased, so it is now easier to continue pressure after knocking down an opponent. Hitting with the latter part of the move will allow you to close in with a Surprise Forward Hop and still have a frame advantage, and canceling into Coward Crouch > Surprise Forward Hop is even more advantageous.
For other changes, his pokes that were a bit risky but have long reach were hard to make use of at mid-range have been buffed, so his pokes should have more interesting uses.
The chain of hits from a Blanka-chan Bomb in the corner were very difficult for the opponent to deal with, and we thought it was hard to utilize the defensive tools available to find a way out. Add in a series of attacks from Super Art 2, and you had a situation that was too favorable for Blanka where it was easy to burn out the opponent on block, combo on hit and also get excellent options to continue pressure when knocking down the opponent.
Blanka also has a lot of moves that switch sides with the opponent, so even when you push him to the corner, if you slip up on your offense he can switch sides, start his own corner pressure and turn the tables in an instant. We saw many situations that should have been advantageous to the opponent end up not being the case.
We reduced his strengths with the aim of alleviating situations with high return and little counterplay, as well as limiting the deterring effect of moves that cause the opponent to hesitate on offense.
Blanka-chan Bomb
Considering the amount of situations a player can utilize during the hits of a Blanka-chan Bomb in the corner, the way it limits the effectiveness of invincible moves and Drive Reversals and the return on hit, we have made it so that the bomb will lose it's hitbox if Blanka is hit by an attack while the bomb is active.
Surprise Forward Hop
Taking into consideration how a canceling into this from a Normal Move could easily turn the tide in Blanka's favor, we've removed the throw invincibility, so now it should be easier for an opponent to counter with a Normal Throw.
There will still be cases where with good timing Blanka can avoid the opponent's throw and switch sides, but the timing window and distances where the opponent can connect with a Normal Throw have improved, so it's not as easy to use as an escape tool.
Standing Medium Kick
Due to the knockback time increasing, you can now combo into Wild Lift on counter hit. The pushback on hit has also decreased, so Overdrive Backstep Rolling Attack will also be easier to combo into.
Wild Nail
The advantage on hit has increased, so it is now easier to continue pressure after knocking down an opponent. Hitting with the latter part of the move will allow you to close in with a Surprise Forward Hop and still have a frame advantage, and canceling into Coward Crouch > Surprise Forward Hop is even more advantageous.
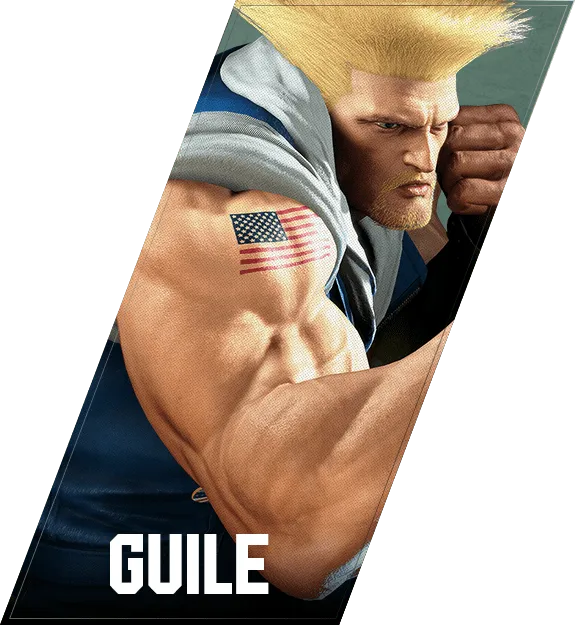
guile
Several adjustments were made to techniques Guile can use at long and short distances. The goal was to increase the range of Guile's movements without sacrificing his simplicity and ease of use.
Crouching Heavy Punch
The 1st frame of the attack can now be canceled, allowing it to be incorporated into combos and attack sequences. It can become a simple yet powerful combo piece by chaining into moves like Somersault Kick and Sonic Boom.
Drake Fang (↓ + Medium Kick > → + Medium Punch)
When the first hit lands as a Counter/Punish Counter, the effect of the second hit was changed to allow for follow-up attacks. It will now be easier to perform quick counter-attacks, even when Crouching Medium Kick is countered or Somersault Kick isn't fully charged.
Overdrive Sonic Blade (↓↙← + Two Punches)
The move's attack speed will now be determined by the Punch input strength. This adjustment provides many uses, such as inputting Light + Medium in front of your opponent to restrict their movement, or inputting Medium + Heavy to cancel projectiles and close the gap.
However, since the Light + Medium version excels at immobilizing opponents, it was too overpowering when used against certain characters who lack projectile attack deterrents. To that end, projectile invincibility was added to parts of the Crouching Light Kick hurtbox for those characters. If they react quickly enough, they can attack as soon as Guile begins to move.
Crouching Heavy Punch
The 1st frame of the attack can now be canceled, allowing it to be incorporated into combos and attack sequences. It can become a simple yet powerful combo piece by chaining into moves like Somersault Kick and Sonic Boom.
Drake Fang (↓ + Medium Kick > → + Medium Punch)
When the first hit lands as a Counter/Punish Counter, the effect of the second hit was changed to allow for follow-up attacks. It will now be easier to perform quick counter-attacks, even when Crouching Medium Kick is countered or Somersault Kick isn't fully charged.
Overdrive Sonic Blade (↓↙← + Two Punches)
The move's attack speed will now be determined by the Punch input strength. This adjustment provides many uses, such as inputting Light + Medium in front of your opponent to restrict their movement, or inputting Medium + Heavy to cancel projectiles and close the gap.
However, since the Light + Medium version excels at immobilizing opponents, it was too overpowering when used against certain characters who lack projectile attack deterrents. To that end, projectile invincibility was added to parts of the Crouching Light Kick hurtbox for those characters. If they react quickly enough, they can attack as soon as Guile begins to move.
ken
For Ken, this time around we really wanted to strengthen his pokes and expand on his combos and multi-hit attacks. We feel that all the adjustments come together nicely to further show off Ken’s strength as a fighter.
Crouching Heavy Punch
Multi-hit attacks at close range have been made easier to use through changes to Drive Gauge reduction and advantage on block.
Canceling into a Heavy Jinrai Kick no longer guarantees a Drive Impact and Jinrai Kick > Forward Step Kick can no longer be interrupted by moves other than invincible attacks.
Normal Kazekama Shin Kick (→+ Light Kick during Jinrai Kick)
We previously changed the effect of on counter hit to a knockdown, but we felt this lowered its appeal as a way to keep your opponents in check. To counteract this, we upped the damage and improved the return on hit.
Overdrive Senka Snap Kick (→+ Heavy Kick during an Overdrive Jinrai Kick)
By increasing the active frames, we’ve made it easier to hit high-up opponents during a mid-air combo.
Incorporating it after a Chin Buster or when picking up an airborne opponent with a Drive Rush > Normal Move combo, will easily allow you to follow up with a Jinrai Kick > Shoryuken.
Super Art level 2 Shippu Jinrai-kyaku (↓↘→↓↘→+K)
We’ve increased the damage on Counter/Punish Counter. While damage is not generally increased on Counter or Punish Counter for Super Arts, given that this move has no invincibility frames and cannot be used for to interrupt, we wanted to utilize its fast startup and give it some utility as a counterattack.
Crouching Heavy Punch
Multi-hit attacks at close range have been made easier to use through changes to Drive Gauge reduction and advantage on block.
Canceling into a Heavy Jinrai Kick no longer guarantees a Drive Impact and Jinrai Kick > Forward Step Kick can no longer be interrupted by moves other than invincible attacks.
Normal Kazekama Shin Kick (→+ Light Kick during Jinrai Kick)
We previously changed the effect of on counter hit to a knockdown, but we felt this lowered its appeal as a way to keep your opponents in check. To counteract this, we upped the damage and improved the return on hit.
Overdrive Senka Snap Kick (→+ Heavy Kick during an Overdrive Jinrai Kick)
By increasing the active frames, we’ve made it easier to hit high-up opponents during a mid-air combo.
Incorporating it after a Chin Buster or when picking up an airborne opponent with a Drive Rush > Normal Move combo, will easily allow you to follow up with a Jinrai Kick > Shoryuken.
Super Art level 2 Shippu Jinrai-kyaku (↓↘→↓↘→+K)
We’ve increased the damage on Counter/Punish Counter. While damage is not generally increased on Counter or Punish Counter for Super Arts, given that this move has no invincibility frames and cannot be used for to interrupt, we wanted to utilize its fast startup and give it some utility as a counterattack.
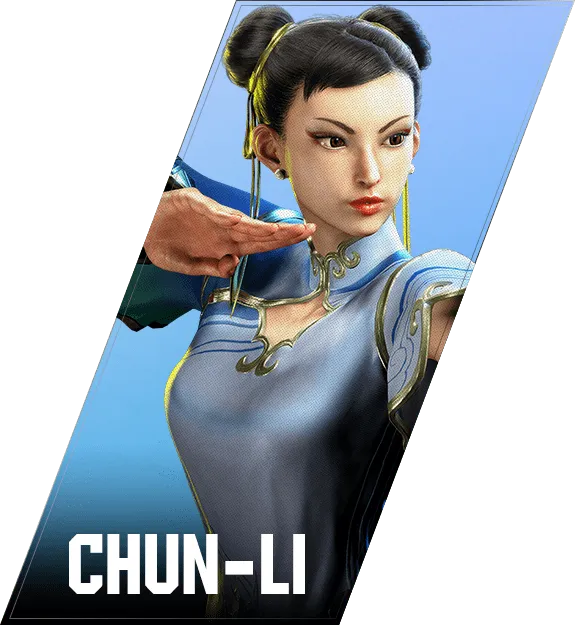
chunli
For Chun-Li, our adjustments primarily focused on two attacks performed during Serenity Stream as well as Light Hazanshu. We’ve made each move easier to use and strengthened their usage in the neutral game.
Snake Strike (↓↙←+P > Medium Punch)
The startup time for Snake Strike is faster, making it possible to combo into from a normal hit, like a Standing Heavy Punch or a Crouching Medium Punch.
We’ve also changed the blowback effect, making it easier to land the first hit against an opponent off of a poke.
Forward Strike (↓↙←+P > Light Kick)
We’ve extended the reach to make it easier to land a Crouching Medium Kick or a Swift Thrust on Punish Counter. In fact, Swift Thrust should always connect after a Punish Counter if the hit connects with your opponent’s main hurtbox.
Light Hazanshu (↓↙←+ Light Kick)
We’ve overhauled Light Hazanshu and made it a more viable option in the neutral game by making it harder to be counterattacked when attacking from the tip.
The advantage on block has also been improved and, with the hit effect changing to a knockdown, you can apply pressure on your opponents as soon as they stand up.
It retains function as a quick overhead attack, so you can still easily surprise your foes.
Finally, we’ve also adjusted the
Snake Strike (↓↙←+P > Medium Punch)
The startup time for Snake Strike is faster, making it possible to combo into from a normal hit, like a Standing Heavy Punch or a Crouching Medium Punch.
We’ve also changed the blowback effect, making it easier to land the first hit against an opponent off of a poke.
Forward Strike (↓↙←+P > Light Kick)
We’ve extended the reach to make it easier to land a Crouching Medium Kick or a Swift Thrust on Punish Counter. In fact, Swift Thrust should always connect after a Punish Counter if the hit connects with your opponent’s main hurtbox.
Light Hazanshu (↓↙←+ Light Kick)
We’ve overhauled Light Hazanshu and made it a more viable option in the neutral game by making it harder to be counterattacked when attacking from the tip.
The advantage on block has also been improved and, with the hit effect changing to a knockdown, you can apply pressure on your opponents as soon as they stand up.
It retains function as a quick overhead attack, so you can still easily surprise your foes.
Finally, we’ve also adjusted the
combo count
, so after racking up multiple mid-air hits with a Senpu Kick (↓↙←+P > Medium Kick), hit them with a Light Hazanshu to finish up your combo in situations where other special moves won’t connect.zangief
Zangief’s adjustments are almost entirely focused on his Overdrive Double Lariat.
With his long reaching medium attacks and close-range multi-hit attacks, Zangief’s strengths lie in forcing opponents to guard and chipping away at their Drive Gauge. However, after forcing an opponent into burnout, his move set left something to be desired.
This time adjustments were made so that the fourth hit of an Overdrive Double Lariat will also hit a crouching opponent, and that during burnout the first, second, and fourth hits now can't be interrupted.
Together with the adjustments made to recovery and knockback on hit, if you utilize horizontal movement well, you can effectively chip away at an opponent’s health.
While this does leave you open to counterattacks from characters with long-reaching Super Arts, try to anticipate the health and resources of you and your opponent and aim for the best time to strike.
We’ve also made some adjustments to Smetana Dropkick as we thought it was underused by players. We’ve reduced the downwards hurtbox, making it smaller than other low-rising moves like Knee Hammer and Cyclone Wheel Kick, allowing you to easily overcome the opponent’s pokes.
With his long reaching medium attacks and close-range multi-hit attacks, Zangief’s strengths lie in forcing opponents to guard and chipping away at their Drive Gauge. However, after forcing an opponent into burnout, his move set left something to be desired.
This time adjustments were made so that the fourth hit of an Overdrive Double Lariat will also hit a crouching opponent, and that during burnout the first, second, and fourth hits now can't be interrupted.
Together with the adjustments made to recovery and knockback on hit, if you utilize horizontal movement well, you can effectively chip away at an opponent’s health.
While this does leave you open to counterattacks from characters with long-reaching Super Arts, try to anticipate the health and resources of you and your opponent and aim for the best time to strike.
We’ve also made some adjustments to Smetana Dropkick as we thought it was underused by players. We’ve reduced the downwards hurtbox, making it smaller than other low-rising moves like Knee Hammer and Cyclone Wheel Kick, allowing you to easily overcome the opponent’s pokes.
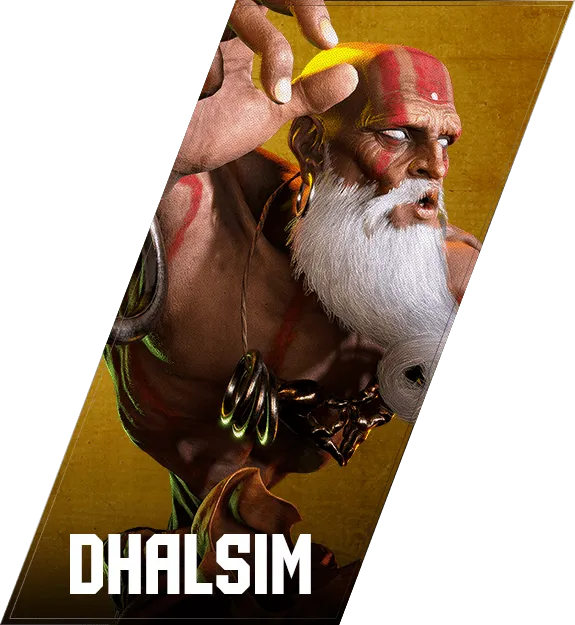
dhalsim
Dhalsim's main changes are a revision to his follow-up attacks from Overdrive Yoga Flame, and related adjustments to airborne attacks. There are also some adjustments to Medium and Heavy Yoga Flame to make them easier to use and increase their strengths as pokes.
Jumping Medium Punch
The hit effect during a combo has been changed and you can now cancel into Yoga Mummy and Drill Kick, so now this move is more useful as a mid-air combo piece. Other than as a follow up to Overdrive Yoga Flame, discussed below, it's handy for ad-libbing combos after a mid-air hit from Yoga Arch to tack on some extra damage during the neutral game.
Jumping Heavy Punch, Jumping Heavy Kick
The
Overdrive Yoga Flame (→↘↓↙← + PP)
Since the past change that made Yoga Blast better as a combo piece, we observed that situations to use Overdrive Yoga Flame have become slim, so we've added the ability to follow it up to distinguish it from Yoga Blast.
You can now follow up Overdrive Yoga Flame with Jumping Medium Punch, and mid-screen you can even combo that into Yoga Mummy and Super Art 1, or in the corner use Overdrive Yoga Comet > Yoga Float > Jumping Heavy Punch, giving you completely different combo options from Yoga Blast.
Jumping Medium Punch
The hit effect during a combo has been changed and you can now cancel into Yoga Mummy and Drill Kick, so now this move is more useful as a mid-air combo piece. Other than as a follow up to Overdrive Yoga Flame, discussed below, it's handy for ad-libbing combos after a mid-air hit from Yoga Arch to tack on some extra damage during the neutral game.
Jumping Heavy Punch, Jumping Heavy Kick
The
combo count
has been adjusted to make these usable as a mid-air combo ender. Depending on the situation, you can go for a good knockdown or knock the opponent far away to make use of Dhalsim's signature reach.Overdrive Yoga Flame (→↘↓↙← + PP)
Since the past change that made Yoga Blast better as a combo piece, we observed that situations to use Overdrive Yoga Flame have become slim, so we've added the ability to follow it up to distinguish it from Yoga Blast.
You can now follow up Overdrive Yoga Flame with Jumping Medium Punch, and mid-screen you can even combo that into Yoga Mummy and Super Art 1, or in the corner use Overdrive Yoga Comet > Yoga Float > Jumping Heavy Punch, giving you completely different combo options from Yoga Blast.
rashid
We have made several enhancements to Rashid's anti-air attacks, pokes, and combos. Our goal was to improve the usability of his moves in various situations and boost his overall strength.
Standing Heavy Kick
The
Medium Normal Spinning Mixer (↓↘→ + Medium Punch)
The air attack invincibility timing has been extended from the end of the 1st hit's active frames to the end of the 2nd hit's active frames, thus increasing its potential as an anti-air technique. Considering Rashid's anti-air attack range and air attack invincibility timing, these adjustments will better allow you to react when facing long-reaching horizontal jumping attacks where it is hard to judge whether your move will reach or not.
Overdrive Whirlwind Shot (Hold) (↓↘→ + Hold Two Kicks)
The attack startup has been accelerated, and it is now possible to cancel into Wing Stroke/Rolling Assault partway through the attack. This change will allow you to close in on your opponent at an advantage during the neutral game. Similar to the Heavy Arabian Cyclone > Wing Stroke combo, you'll be able to keep the pressure going from a safe distance.
We have also adjusted the blowback distance when the non-held version hits a standing opponent and when the held version hits an airborne opponent, making it easier to perform follow-up attacks after landing a hit.
Standing Heavy Kick
The
combo count
during a Punish Counter has been adjusted. It can now chain into techniques like Flapping Spin and Light Eagle Spike, adding more opportunities for follow-up attacks.Medium Normal Spinning Mixer (↓↘→ + Medium Punch)
The air attack invincibility timing has been extended from the end of the 1st hit's active frames to the end of the 2nd hit's active frames, thus increasing its potential as an anti-air technique. Considering Rashid's anti-air attack range and air attack invincibility timing, these adjustments will better allow you to react when facing long-reaching horizontal jumping attacks where it is hard to judge whether your move will reach or not.
Overdrive Whirlwind Shot (Hold) (↓↘→ + Hold Two Kicks)
The attack startup has been accelerated, and it is now possible to cancel into Wing Stroke/Rolling Assault partway through the attack. This change will allow you to close in on your opponent at an advantage during the neutral game. Similar to the Heavy Arabian Cyclone > Wing Stroke combo, you'll be able to keep the pressure going from a safe distance.
We have also adjusted the blowback distance when the non-held version hits a standing opponent and when the held version hits an airborne opponent, making it easier to perform follow-up attacks after landing a hit.
aki
We improved the benefits of A.K.I.'s signature Toxic Blossom mechanic. Now triggering the Toxic Blossom will recover more Drive Gauge than before, letting you recover your resources to enact more of her poisonous plans. To let this change really shine, we also made some adjustments to make it easier to trigger Toxic Blossom when the opponent isn't already poisoned.
All Toxic Blossom Effects
Triggering Toxic Blossom will now recover some of A.K.I.'s Drive Gauge, and efficient use of it should give you more opportunities to add damage through use of said gauge. Along with this, there are now more chances to trigger Toxic Blossom when the opponent is not already poisoned, but be careful as this benefit still does not apply when a Drive Rush is used in a combo.
Standing Light Punch and Hun Dun (Light Punch > Light Punch)
We've made Crouching Light Punch and Kick able to rapid cancel into Standing Light Punch, adding more depth and stability to her close range combos. Since Hun Dun moves you forward, you no longer have to suffer a whiffed Heavy Serpent Lash when trying to combo into it from the tip of a light attack.
Also, the knockback when Hun Dun is canceled into a Special Move has been adjusted, allowing you to combo into Nightshade Pulse and Nightshade Chaser. You can now choose to end your combos with either the high-damage and now drive gauge-filling Nightshade Chaser, or Serpent Lash to keep up the offense.
Overdrive Nightshade Pulse (↓↙←+Two Punches)
Adjustments were made to the
All Toxic Blossom Effects
Triggering Toxic Blossom will now recover some of A.K.I.'s Drive Gauge, and efficient use of it should give you more opportunities to add damage through use of said gauge. Along with this, there are now more chances to trigger Toxic Blossom when the opponent is not already poisoned, but be careful as this benefit still does not apply when a Drive Rush is used in a combo.
Standing Light Punch and Hun Dun (Light Punch > Light Punch)
We've made Crouching Light Punch and Kick able to rapid cancel into Standing Light Punch, adding more depth and stability to her close range combos. Since Hun Dun moves you forward, you no longer have to suffer a whiffed Heavy Serpent Lash when trying to combo into it from the tip of a light attack.
Also, the knockback when Hun Dun is canceled into a Special Move has been adjusted, allowing you to combo into Nightshade Pulse and Nightshade Chaser. You can now choose to end your combos with either the high-damage and now drive gauge-filling Nightshade Chaser, or Serpent Lash to keep up the offense.
Overdrive Nightshade Pulse (↓↙←+Two Punches)
Adjustments were made to the
combo count
, and you can now follow up with medium Serpent Lash and other attacks when the opponent fails to jump over the projectile and lands on it. The attack range on Medium Serpent Lash's makes it easy to hit without having to use Drive Rush to close the distance, and allowing you to follow-up with other attacks while receiving additional Drive Gauge from triggering Toxic Blossom.ed
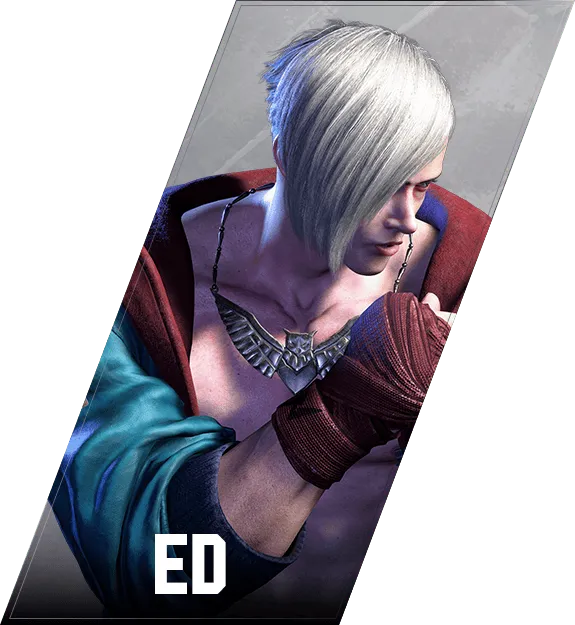
Ed can expect good returns off his far-reaching Normal Moves, so we reviewed the risk associated with these. We particularly looked at Crouching Medium and Heavy Kick, which now should have the appropriate amount of risk for their ease of use and recovery on whiff. We also adjusted some mid-combo damage scaling to help normalize the returns he receives.
Crouching Medium Kick
The recovery on whiff has been increased, the hurtbox has been expanded, and hitboxes have been adjusted so that low-profile and crouching attacks should be more difficult to catch with this move. Now this shouldn't win out as much when clashing with the opponent's crouching moves, so the use of this move has changed drastically.
Crouching Heavy Kick, Low Smash Combination (↓+Heavy Kick > Heavy Punch)
The hitbox and startup have been adjusted in consideration of the returns this move offers. It should now be easier to punish on whiff now that the standby block hitbox has been adjusted, and should be altogether more risky due to the extended recovery and hurtbox.
In addition to the above changes, the recovery at close range has worsened so it is less easy to use. In exchange, following up with Low Smash Combination on hit will now let you cancel into Kill Rush, increasing it's use as a counter poke by giving you a combo without having to spend resources.
Crouching Medium Kick
The recovery on whiff has been increased, the hurtbox has been expanded, and hitboxes have been adjusted so that low-profile and crouching attacks should be more difficult to catch with this move. Now this shouldn't win out as much when clashing with the opponent's crouching moves, so the use of this move has changed drastically.
Crouching Heavy Kick, Low Smash Combination (↓+Heavy Kick > Heavy Punch)
The hitbox and startup have been adjusted in consideration of the returns this move offers. It should now be easier to punish on whiff now that the standby block hitbox has been adjusted, and should be altogether more risky due to the extended recovery and hurtbox.
In addition to the above changes, the recovery at close range has worsened so it is less easy to use. In exchange, following up with Low Smash Combination on hit will now let you cancel into Kill Rush, increasing it's use as a counter poke by giving you a combo without having to spend resources.
gouki
Akuma's biggest two changes are an increase in power to the fully held version of Gou Hadoken as it wasn't seeing much use, and that Overdrive Adamant Flame no longer combos from Crouching Medium Kick. While he'll no longer be able to get big returns from throwing out random low attacks, he's had other changes to give him more tools to use in the neutral game.
Crouching Heavy Punch
The knockback time has increased, so on Punish Counter or Drive Rush this will now combo into a fully held Overdrive Gou Hadoken.
Normal/Overdrive Gou Hadoken (Fully Held) (↓↘→+ P or PP hold)
The time it took for the fully held version to come out made it very hard to use. We've increased the number of hits and reduced the recovery, leaving you at a much larger advantage, so if you manage to get it off you can set yourself up with a very good situation.
The Overdrive version, which charges up faster, is now easier to use and it leaves you at advantage even without charging it up. This should discourage your opponents from trying to stop you from using the fully held version when canceling from a Normal Move on block.
Medium Tatsumaki Zanku-kyaku (↓↙← + Medium Kick)
Since there are now more situations where the first hit will hit high up, such as after a fully held Gou Hadoken, we've extended the active frames of the second hit to prevent it from whiffing mid-combo.
Crouching Medium Kick, Overdrive Adamant Fist (↓↙← + PP)
With the advantage on hit being reduced on Crouching Medium Kick, it will no longer cancel fast enough to connect into Overdrive Adamant Fist on normal hit.
Since Overdrive Adamant Fist cannot be punished on block and leads into big damage in the corner, being able to combo into it from a far-reaching low attack like Crouching Medium Kick was an extremely powerful option. That combined with Akuma's fast walk speed made it an overwhelmingly oppressive tool in the neutral game, so we decided to reign it in.
Crouching Heavy Punch
The knockback time has increased, so on Punish Counter or Drive Rush this will now combo into a fully held Overdrive Gou Hadoken.
Normal/Overdrive Gou Hadoken (Fully Held) (↓↘→+ P or PP hold)
The time it took for the fully held version to come out made it very hard to use. We've increased the number of hits and reduced the recovery, leaving you at a much larger advantage, so if you manage to get it off you can set yourself up with a very good situation.
The Overdrive version, which charges up faster, is now easier to use and it leaves you at advantage even without charging it up. This should discourage your opponents from trying to stop you from using the fully held version when canceling from a Normal Move on block.
Medium Tatsumaki Zanku-kyaku (↓↙← + Medium Kick)
Since there are now more situations where the first hit will hit high up, such as after a fully held Gou Hadoken, we've extended the active frames of the second hit to prevent it from whiffing mid-combo.
Crouching Medium Kick, Overdrive Adamant Fist (↓↙← + PP)
With the advantage on hit being reduced on Crouching Medium Kick, it will no longer cancel fast enough to connect into Overdrive Adamant Fist on normal hit.
Since Overdrive Adamant Fist cannot be punished on block and leads into big damage in the corner, being able to combo into it from a far-reaching low attack like Crouching Medium Kick was an extremely powerful option. That combined with Akuma's fast walk speed made it an overwhelmingly oppressive tool in the neutral game, so we decided to reign it in.
vega
We have improved M. Bison's Psycho Mine-planting Backfist Combo and Super Art level 2, and reassessed his movement speed during Devil Reverse.
Normal Backfist Combo (with Psycho Mine embedded) (↓↙← + Punch)
Since Psycho Crusher Attack is now the main Special Move to use on block against opponents with a Psycho Mine embedded, the advantage on block was improved so you can gain the upper hand with Backfist Combo. Even when used mid-screen, the Medium version on hit can now be followed up with Crouching Heavy Kick, Super Art level 1, or Super Art level 2.
Normal Devil Reverse (Charge ↓↑ + Kick > Punch)
When used to attack from a distance or cause opponents to whiff anti-air attacks by landing behind them, its large effective range made it difficult to react to or counter, so its forward movement distance has been reduced slightly.
Super Art level 2 Psycho Punisher (↓↙←↓↙← + Kick)
We have lowered the attack startup time, enhanced its overall utility, and adjusted the backward movement distance after activation. This will make it easier to hit an opponent who uses forward-moving attacks like Drive Impact or Drive Reversal to get behind you. You can also combo into it from Evil Knee, giving you more opportunities to land hits.
The combo-only hitbox was also expanded upwards to cover for situations where you can't hit opponents at a high elevations due to the quicker attack startup time.
Normal Backfist Combo (with Psycho Mine embedded) (↓↙← + Punch)
Since Psycho Crusher Attack is now the main Special Move to use on block against opponents with a Psycho Mine embedded, the advantage on block was improved so you can gain the upper hand with Backfist Combo. Even when used mid-screen, the Medium version on hit can now be followed up with Crouching Heavy Kick, Super Art level 1, or Super Art level 2.
Normal Devil Reverse (Charge ↓↑ + Kick > Punch)
When used to attack from a distance or cause opponents to whiff anti-air attacks by landing behind them, its large effective range made it difficult to react to or counter, so its forward movement distance has been reduced slightly.
Super Art level 2 Psycho Punisher (↓↙←↓↙← + Kick)
We have lowered the attack startup time, enhanced its overall utility, and adjusted the backward movement distance after activation. This will make it easier to hit an opponent who uses forward-moving attacks like Drive Impact or Drive Reversal to get behind you. You can also combo into it from Evil Knee, giving you more opportunities to land hits.
The combo-only hitbox was also expanded upwards to cover for situations where you can't hit opponents at a high elevations due to the quicker attack startup time.
terry
For Terry, we’ve improved the usability of Round Wave and Overdrive Power Charge and reduced the possibility of Super Arts not connecting in a combo in certain situations. While some moves have seen improvements, the pushback on block during burnout has been increased when using Light Crack Shoot. This should help deter players from spamming Normal Move > Light Crack Shoot.
Overdrive Power Charge (↓↘→+KK)
Like the heavy version of Power Charge, you can now cancel into other special moves. This makes it handy for cornering opponents and also allows for follow-up attacks.
Super Art level 1 Buster Wolf (↓↘→↓↘→+K)
Both the player and the opponent are now invincible during hitstop on the first hit. This mitigates situations where, for example, Buster Wolf hits immediately after an Overdrive Power Wave connects in midair, and the opponent is sent flying before the second hit of Buster Wolf connects causing the move to whiff.
Super Art level 3 / Critical Art Rising Fang (↓↘→↓↘→+P)
We’ve increased the attack startup when canceling from certain moves, mitigating the issue where it failed to connect after Quick Burn hits at low elevation.
Overdrive Power Charge (↓↘→+KK)
Like the heavy version of Power Charge, you can now cancel into other special moves. This makes it handy for cornering opponents and also allows for follow-up attacks.
Super Art level 1 Buster Wolf (↓↘→↓↘→+K)
Both the player and the opponent are now invincible during hitstop on the first hit. This mitigates situations where, for example, Buster Wolf hits immediately after an Overdrive Power Wave connects in midair, and the opponent is sent flying before the second hit of Buster Wolf connects causing the move to whiff.
Super Art level 3 / Critical Art Rising Fang (↓↘→↓↘→+P)
We’ve increased the attack startup when canceling from certain moves, mitigating the issue where it failed to connect after Quick Burn hits at low elevation.
mai
Mai's changes are mainly revisions to her Special Moves, with the largest being her held and Overdrive versions of Kachousen as well as Light Ryuuenbu.
The knockback time for held and Overdrive Kachousen has been decreased on hit and block, so it will now be less effective at locking the opponent down at close range or when approaching behind one with a Drive Rush.
These weaknesses are still somewhat covered by the powered-up Super Art level 1 versions, making landing it more important than before.
On the other hand, we don't want these nerfs to Kachousen to make Mai too ineffective at mid-range, so in exchange we've made Light Ryuuenbu more effective as a poke. This helps flesh out the role of each of her Special Moves and should add more balance to her neutral play.
Kachousen (Held Normal/Boosted Versions, Normal/Boosted Overdrive Versions)
The adjustments to Kachousen affect the fall of the fan after the first hit on both hit and block, which has had the knockback time reduced. This affects viable pressure and combo options after the falling fan, so be sure to check if your go-to options still work.
The knockback time of the first hit has also changed for the versions not powered up by Super Art level 1. The first hit at close range will now leave you at -5, so you'll need to find new ways to use it to extend your pressure, such as using careful spacing.
Light Ryuuenbu (Normal/Boosted Versions)
This move now takes away more Drive Gauge on block and Punish Counter, and has extended reach as well as some invincibility near her feet, which should make it more useful as a poke. Although the attack's hurtbox has extended with its hitbox, the extended reach makes it harder to whiff with and easier to use.
Heavy Ryuuenbu (Normal/Boosted Versions)
The second airborne hit now floats higher, so it should be easier to connect with it after a Standing Heavy Kick on Punish Counter. You can also combo into it from Standing Light Punch while you have Super Art level 1 stocks, so you can get good damage from a light attack if you can confirm your opponent is standing.
Musasabi no Mai (Normal, Overdrive, and Normal Boosted Versions)
The hitbox during a combo has been expanded in the latter part of the move. This was done in order to make it easier to combo off of a Jumping Medium Punch from high up without changing the timing of existing combos.
The knockback time for held and Overdrive Kachousen has been decreased on hit and block, so it will now be less effective at locking the opponent down at close range or when approaching behind one with a Drive Rush.
These weaknesses are still somewhat covered by the powered-up Super Art level 1 versions, making landing it more important than before.
On the other hand, we don't want these nerfs to Kachousen to make Mai too ineffective at mid-range, so in exchange we've made Light Ryuuenbu more effective as a poke. This helps flesh out the role of each of her Special Moves and should add more balance to her neutral play.
Kachousen (Held Normal/Boosted Versions, Normal/Boosted Overdrive Versions)
The adjustments to Kachousen affect the fall of the fan after the first hit on both hit and block, which has had the knockback time reduced. This affects viable pressure and combo options after the falling fan, so be sure to check if your go-to options still work.
The knockback time of the first hit has also changed for the versions not powered up by Super Art level 1. The first hit at close range will now leave you at -5, so you'll need to find new ways to use it to extend your pressure, such as using careful spacing.
Light Ryuuenbu (Normal/Boosted Versions)
This move now takes away more Drive Gauge on block and Punish Counter, and has extended reach as well as some invincibility near her feet, which should make it more useful as a poke. Although the attack's hurtbox has extended with its hitbox, the extended reach makes it harder to whiff with and easier to use.
Heavy Ryuuenbu (Normal/Boosted Versions)
The second airborne hit now floats higher, so it should be easier to connect with it after a Standing Heavy Kick on Punish Counter. You can also combo into it from Standing Light Punch while you have Super Art level 1 stocks, so you can get good damage from a light attack if you can confirm your opponent is standing.
Musasabi no Mai (Normal, Overdrive, and Normal Boosted Versions)
The hitbox during a combo has been expanded in the latter part of the move. This was done in order to make it easier to combo off of a Jumping Medium Punch from high up without changing the timing of existing combos.
elena
Elena's changes have to do with Heavy Rhino Horn and her Super Art levels 1 and 2. There are some improvements to her combos as well as to the held version of Super Art level 2, which wasn't seeing much use.
Heavy Rhino Horn (↓↘→ + Heavy Kick)
This move's slow start up and difficulty hitting crouching opponents made it tricky to use, so we increased the blowback time on hit. With this adjustment, players should be left at a better situation when hitting mid-screen and unleash more effective combos at the corner.
Meteor Volley (Super Art level 1) (↓↘→↓↘→+K)
We adjusted Overdrive Rhino Horn so that it results in a higher knockback when it connects with a grounded opponent. This makes it easier to combo with, allowing you to continue your offensive when it connects, especially when you have your opponent cornered...but be careful! Overdrive Rhino Horn will not always connect off of a mid-air hit.
Revival Dance (Hold) (Super Art level 2) (↓↘→↓↘→ + P > ↓ hold)
The amount healed has increased slightly, and now your Drive Gauge also recovers by 10,000 (1 bar). This will recover even if you've used a Drive Rush in a combo or while in Burnout, giving you an option to strategize with those increased resources.
Heavy Rhino Horn (↓↘→ + Heavy Kick)
This move's slow start up and difficulty hitting crouching opponents made it tricky to use, so we increased the blowback time on hit. With this adjustment, players should be left at a better situation when hitting mid-screen and unleash more effective combos at the corner.
Meteor Volley (Super Art level 1) (↓↘→↓↘→+K)
We adjusted Overdrive Rhino Horn so that it results in a higher knockback when it connects with a grounded opponent. This makes it easier to combo with, allowing you to continue your offensive when it connects, especially when you have your opponent cornered...but be careful! Overdrive Rhino Horn will not always connect off of a mid-air hit.
Revival Dance (Hold) (Super Art level 2) (↓↘→↓↘→ + P > ↓ hold)
The amount healed has increased slightly, and now your Drive Gauge also recovers by 10,000 (1 bar). This will recover even if you've used a Drive Rush in a combo or while in Burnout, giving you an option to strategize with those increased resources.
sagat
The adjustments introduced in our last update achieved much of what we wanted to balance with Sagat, which is why we only made a couple of tweaks in this one.
First, we reduced the pushback on hit for his Standing Light Kick to mitigate an issue in which the furthest hitbox of Medium Tiger Uppercut failed to connect. This adjustment should make Medium Tiger Uppercut connect reliably when a Standing Light Kick lands on the opponent's torso, but not always when it hits an outstretched arm or leg.
Second, given its reach and resulting combo damage, we have also increased the recovery on whiff for his Crouching Medium Punch.
First, we reduced the pushback on hit for his Standing Light Kick to mitigate an issue in which the furthest hitbox of Medium Tiger Uppercut failed to connect. This adjustment should make Medium Tiger Uppercut connect reliably when a Standing Light Kick lands on the opponent's torso, but not always when it hits an outstretched arm or leg.
Second, given its reach and resulting combo damage, we have also increased the recovery on whiff for his Crouching Medium Punch.
cviper
Viper is a character with unique mechanics like her high jump cancels and feints, which add complex inputs to her neutral and combos that are difficult to master. Due to this complexity, we believe this often led to performing some moves unintentionally, which made her strengths as a character hard to utilize.
This time we looked over the overall strength of her moves with the aim of encouraging her unique playstyle, which mostly involved improving the benefits of using Drive Gauge for a high jump cancel.
We also adjusted her Super Art 2 so it's not as easy to activate by accident, eased the difficulty of her combos, and generally improved her ease of use as a character.
Crouching Medium Punch
There has been a slight increase to the duration of the move as well as its hurtbox. This should make it easier to use as a medium-range poke and better at stopping an opponent's Drive Rush.
Standing Heavy Punch
The blockstun has increased, so now Viper is +1 after a blocked Standing Heavy Punch is canceled into a feinted Heavy Thunder Dash, making it a powerful pressure tool.
Aerial Burning Kick (Non-Overdrive Versions)
The blockstun has increased. Now, if you use the Light or Medium versions immediately after a forward high jump, you'll be +1. This is similar to the adjustment made to her Standing Heavy Punch, which we hope will offer some payoff to using these moves.
If your aerial Burning Kick is guarded as a cross-up and you land behind your opponent, the recovery has been adjusted so that you are not left at advantage, which is the same as before.
Standing Heavy Kick
The blowback when hitting an airborne opponent has been adjusted, so now it should be easier to follow-up with an attack. Following with an Overdrive Burning Kick should whiff less often mid-screen, and there should also be more situations where you can follow up with Super Art level 1. Furthermore, you can now follow up with Overdrive Thunder Dash in the corner for a higher damage option.
Limit Decoupler (Super Art level 1)
The hitbox has been extended upwards to make it easier to connect against airborne opponents. Now if your opponent neutral jumps on your wakeup, the move should whiff less often even if you wait to confirm the jump.
We've also made it so that using Thunder Dash and Burning Kick during the Super Art level 1 effect will now increase your Drive Gauge. As there is a disadvantage to the move from the Super Art Gauge being unable to fill during the duration, this should offset that by making moves that normally cost Drive either increase the gauge or at least leave you cost neutral, letting you do more Viper things more often.
Mission Complete (Super Art level 2)
The input shortcut has been disabled for this move when canceling from Heavy Punch and when high jump canceling from any punch move. We observed that Super Art level 2 was often coming out when the player intended to use moves like Heavy Thunder Dash as an anti-air, or when high jump canceling moves into any version of Thunder Dash, so this should help mitigate that.
Now in the above situations, inputting something like ↓←↓↙← or ↓↙←↓← and punch should not activate Super Art level 2, though the simple input is still enabled when canceling from a Special Move.
We received suggestions to change Super Art 2's input to ↓↘→↓↘→, but we tested this before release and when high jump canceling into Seismic Hammer, Super Art 2 would overwrite it even more often than with Thunder Dash, so we ultimately decided to go with the current input.
Otherwise, considering Super Art 2's short reach, we decided to improve its use cases by improving its effectiveness as an anti-air. We adjusted the collision pushbox at the screen freeze, so now it should be more difficult for the opponent to slip under the move when they are high up.
This time we looked over the overall strength of her moves with the aim of encouraging her unique playstyle, which mostly involved improving the benefits of using Drive Gauge for a high jump cancel.
We also adjusted her Super Art 2 so it's not as easy to activate by accident, eased the difficulty of her combos, and generally improved her ease of use as a character.
Crouching Medium Punch
There has been a slight increase to the duration of the move as well as its hurtbox. This should make it easier to use as a medium-range poke and better at stopping an opponent's Drive Rush.
Standing Heavy Punch
The blockstun has increased, so now Viper is +1 after a blocked Standing Heavy Punch is canceled into a feinted Heavy Thunder Dash, making it a powerful pressure tool.
Aerial Burning Kick (Non-Overdrive Versions)
The blockstun has increased. Now, if you use the Light or Medium versions immediately after a forward high jump, you'll be +1. This is similar to the adjustment made to her Standing Heavy Punch, which we hope will offer some payoff to using these moves.
If your aerial Burning Kick is guarded as a cross-up and you land behind your opponent, the recovery has been adjusted so that you are not left at advantage, which is the same as before.
Standing Heavy Kick
The blowback when hitting an airborne opponent has been adjusted, so now it should be easier to follow-up with an attack. Following with an Overdrive Burning Kick should whiff less often mid-screen, and there should also be more situations where you can follow up with Super Art level 1. Furthermore, you can now follow up with Overdrive Thunder Dash in the corner for a higher damage option.
Limit Decoupler (Super Art level 1)
The hitbox has been extended upwards to make it easier to connect against airborne opponents. Now if your opponent neutral jumps on your wakeup, the move should whiff less often even if you wait to confirm the jump.
We've also made it so that using Thunder Dash and Burning Kick during the Super Art level 1 effect will now increase your Drive Gauge. As there is a disadvantage to the move from the Super Art Gauge being unable to fill during the duration, this should offset that by making moves that normally cost Drive either increase the gauge or at least leave you cost neutral, letting you do more Viper things more often.
Mission Complete (Super Art level 2)
The input shortcut has been disabled for this move when canceling from Heavy Punch and when high jump canceling from any punch move. We observed that Super Art level 2 was often coming out when the player intended to use moves like Heavy Thunder Dash as an anti-air, or when high jump canceling moves into any version of Thunder Dash, so this should help mitigate that.
Now in the above situations, inputting something like ↓←↓↙← or ↓↙←↓← and punch should not activate Super Art level 2, though the simple input is still enabled when canceling from a Special Move.
We received suggestions to change Super Art 2's input to ↓↘→↓↘→, but we tested this before release and when high jump canceling into Seismic Hammer, Super Art 2 would overwrite it even more often than with Thunder Dash, so we ultimately decided to go with the current input.
Otherwise, considering Super Art 2's short reach, we decided to improve its use cases by improving its effectiveness as an anti-air. We adjusted the collision pushbox at the screen freeze, so now it should be more difficult for the opponent to slip under the move when they are high up.
Buffer Input on Wake-up
- 共通調整 3 frames added to buffer input time on wake-up.
Specific Overhead Attacks
- 共通調整 When performing overhead attacks from a Drive Rush, we've made adjustments to the distance after block, and unified the disadvantage on block to -3 frames. The distance created after blocking an overhead attack differs between characters, but if the opponent continues to hold back (standing block), normal throws and 2 light attacks including low attacks cannot reach the attacker.
Characters with overhead attacks adjusted to -3 frames on block after a Drive Rush (+1 frame)
Ryu, Chun-Li, A.K.I., Akuma, Terry, Elena, Sagat
Characters with overhead attacks that had their distance on block adjusted
Luke, Jamie, Kimberly, Marisa, Lily, JP, Juri, E. Honda, Blanka, Guile, Rashid, M. Bison, Terry, Mai, Sagat, C. Viper
Jump inputs during Drive Rush screen flash
- 共通調整 Characters will now jump after a Drive Rush screen freeze, if Up is input during the screen freeze.
This adjustment only applies if the character is in a neutral state during the screen freeze, and doesn't apply if they are recovering from an attack, or being knocked back by an opponent's attack on either block or hit.
Further, if multiple commands are input during the screen freeze, techniques may be performed instead due to priority, so even if Up is input, the character may perform a Special Move, Drive Impact, etc.
Special Moves, Drive Rush, Drive Impact cancel adjustments
- 不具合修正 When performing a cancelable normal attack into a Special Move, normally Drive Rush/Drive Impacts inputs wouldn't overwrite the previous input and the Drive attacks couldn't be performed. Adjustments have been made so that with attacks that require specific conditions to perform (Guile's Solid Puncher while Super Art 2 is active), even if those conditions aren't met and the player performs the attacks, Drive Rush/Drive Impact inputs would be overwritten and wouldn't be performed. For those situations, Drive Rush/Drive Impact will now be performe.d
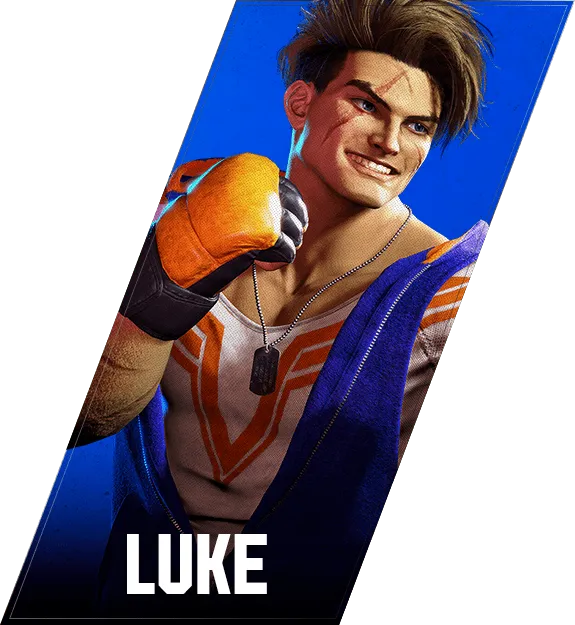
Standing Heavy Punch
调整 1. Recovery on block changed from 23 to 22 frames.
2. Advantage on block changed from -6 frames to -5 frames.
2. Advantage on block changed from -6 frames to -5 frames.
Double Impact<br>(Forward + Heavy Punch > Heavy Punch)
调整 1. Adjusted so the second hit will result in a standing tailspin instead of a blowback knockdown when the first hit connects as a Punish Counter against a standing opponent.
2. Combo scaling on the 2nd attack changed from 20% to 10% when the first attack lands as a Punish Counter.
2. Combo scaling on the 2nd attack changed from 20% to 10% when the first attack lands as a Punish Counter.
Light Flash Knuckle<br>(↓↙← + Light Punch)
调整 1. Recovery changed from 31 to 27 frames.
2. Advantage on block changed from -18 to -12 frames.
3. If the hit connects, it can be canceled into a Super Art during the last three frames of recovery.
4. Blowback distance when hitting a standing opponent has been reduced.
5. Blowback time when hitting an airborne opponent has been reduced.
2. Advantage on block changed from -18 to -12 frames.
3. If the hit connects, it can be canceled into a Super Art during the last three frames of recovery.
4. Blowback distance when hitting a standing opponent has been reduced.
5. Blowback time when hitting an airborne opponent has been reduced.
Light Flash Knuckle (Perfect)<br>(↓↙← + Hold Light Punch)
修复问题 Adjusted the buffer input time at the end of recovery by four frames, matching the buffer window of the held version.
Heavy Flash Knuckle (Perfect/Held)<br>(↓↙← + Hold Heavy Punch)
调整 Decreased pushback on block.
Standing Heavy Punch
调整 1. Decreased blowback and blowback time on aerial hit for the second hit.
2. Increased blowback time on an aerial hit for the final hit.
3. Expanded the attack hitbox that appears during the final hit of a combo upwards.
2. Increased blowback time on an aerial hit for the final hit.
3. Expanded the attack hitbox that appears during the final hit of a combo upwards.
Crouching Light Kick
调整 Advantage on hit changed from +1 to +3 frames.
Crouching Medium Kick
调整 Expanded the attack hitbox forward.
Ransui Haze (Fast Follow-Up)<br>(→ + Heavy Kick > ← + Heavy Kick > Punch)
调整 1. Sped up cancelation out of the backstep by 1 frame.
2. Changed the start up of the final attack from 15 to 14 frames.
3. Changed the number of active frames in the final attack from 4 to 5. (This change affects cancel windows through move start up and active frames.)
4. Advantage on block changed from -12 to -13 frames.
2. Changed the start up of the final attack from 15 to 14 frames.
3. Changed the number of active frames in the final attack from 4 to 5. (This change affects cancel windows through move start up and active frames.)
4. Advantage on block changed from -12 to -13 frames.
Normal/Overdrive Freeflow Strikes (Drink level 4)<br>(↓↘→ + Punch, or Two punches > → + Punch > → + Punch)
调整 1. Added an attack hitbox to the first hit of the first additional attack that can only hit during a combo.
2. Adjusted pushback so that the first hit of the first additional attack moves the opponent toward Jamie.
2. Adjusted pushback so that the first hit of the first additional attack moves the opponent toward Jamie.
Overdrive Bakkai<br>(↓↘→ + Two Kicks)
调整 1. Attack start up changed from 21 to 18 frames.
2. Changed the 1st attack's active frames from 3 to 6 frames.
3. Changed recovery from 62 to 59 frames.
4. Recovery on block reduced from 46 to 43 frames.
5. Increased upward blowback and blowback time on the final attack.
2. Changed the 1st attack's active frames from 3 to 6 frames.
3. Changed recovery from 62 to 59 frames.
4. Recovery on block reduced from 46 to 43 frames.
5. Increased upward blowback and blowback time on the final attack.
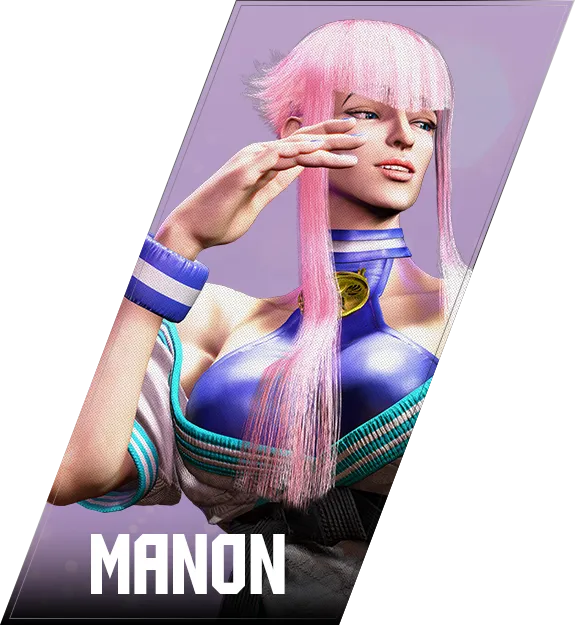
Standing Heavy Punch
调整 Increased
combo count
upper limit. Standing Heavy Kick
调整 Standby block hitbox timing changed from the 2nd frame of the technique to the 12th frame.
Crouching Light Kick
調整・不具合修正 1. Added projectile invincibility to the front hurtbox near the head from the 3rd frame of the technique until the end of the attack.
2. Fixed the size of the hurtbox on the rapid cancel version that appears during the attack's active frames until the 2nd last active frame, as it differed from the normal attack.
2. Fixed the size of the hurtbox on the rapid cancel version that appears during the attack's active frames until the 2nd last active frame, as it differed from the normal attack.
Temps Lié<br>(Heavy Punch > Heavy Punch)
调整 Active frames changed from 2 to 5 frames.
En Haut<br>(← + Medium Kick > Medium Kick)
调整 Adjusted so when the 1st attack lands as a counter or punish counter, the 2nd attack will also be considered a counter/punish counter.
Light Rond-point<br>(↓↘→ + Light Kick)
修复问题 Adjusted so there is no longer pushback on hit when the attack connects on an airborne opponent in the corner.
Light Dégagé<br>(↓↙← + Light Kick)
调整 Expanded the attack hitbox on the 2nd attack that only appears during a combo to reduce issues where the attack would miss even if the first attack connected with an airborne opponent.
Heavy Dégagé<br>(↓↙← + Heavy Kick)
调整 Reduced hitback.
Hidden Variable (Normal)<br>(↓↙← + Punch)
调整 1.The effect of normal attacks (excluding Crouching Heavy Kick) hitting an airborne opponent after reappearing changed from knockback to knockdown.
2.Increased the
2.Increased the
combo count
limit of normal attacks (except Crouching Heavy Kick) after reappearing. SA1 Bushin Beats<br>(↓↘→↓↘→ + Kick)
修复问题 Fixed a bug where a backward recovery input could not be performed after being hit while having 0 Shuriken Bomb stocks.
Standing Light Punch, Standing Light Kick
修复问题 Fixed an issue where the standby block hitbox that appeared on the 2nd frame of the technique until the attack's start-up ends was shorter than the attack hitbox itself.
Standing Heavy Kick (Normal/Held)
调整 Expanded the front hurtbox that appears 12 frames before the technique ends.
Crouching Medium Kick
调整 Advantage on hit changed from +3 to +5 frames.
Novacula Thrust/Novacula Swipe<br>(→ + Medium Punch > Heavy Punch/Heavy Kick)
调整 Startup on the first attack changed from 10 to 9 frames.
Phalanx (Normal)<br>(→↓↘ + Punch)
调整 1. Advantage on block changed from +2 to +3 frames.
2. Pushback on block reduced on the heavy version.
2. Pushback on block reduced on the heavy version.
Overdrive Phalanx<br>(→↓↘ + Two Punches)
调整 1. Armor hitbox expanded downward.
2. Armor active frames changed from 7 to 12 frames.
3. Pushback on block reduced.
2. Armor active frames changed from 7 to 12 frames.
3. Pushback on block reduced.
Light Dimachaerus<br>(↓↙← + Light Punch)
调整 Combo-only attack hitbox added to the 1st active frame, allowing Marisa to hit opponents in front of her easier.
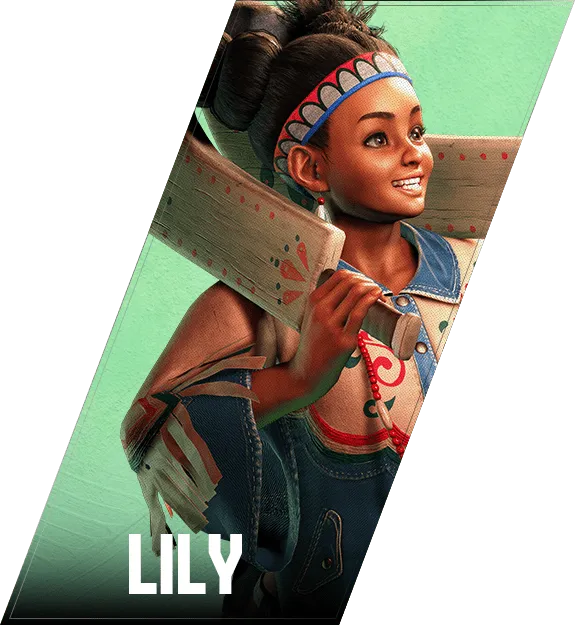
Standing Heavy Punch
调整 Attack startup changed from 11 to 10 frames.
Overdrive Condor Spire (Normal)<br>(↓↘→ + Two Kicks)
调整 1. Reduced the distance traveled when pressing either Light and Medium or Light and Heavy Kicks.
Note: When using Modern controls, ↙ or↓+ AUTO + SP will result in less distance traveled, while ↘ + AUTO + SP will result in the regular distance.
2. Recovery changed from 16 to 13 frames.
3. The knockback time when blocking has changed from 21 to 18 frames.
4. Increased horizontal blowback and blowback time on hit.
Note: When using Modern controls, ↙ or↓+ AUTO + SP will result in less distance traveled, while ↘ + AUTO + SP will result in the regular distance.
2. Recovery changed from 16 to 13 frames.
3. The knockback time when blocking has changed from 21 to 18 frames.
4. Increased horizontal blowback and blowback time on hit.
Overdrive Condor Spire (Windclad)<br>(↓↘→ + Two Kicks)
调整 Reduced the distance traveled when pressing either Light and Medium or Light and Heavy Kicks.
When using Modern controls, ↙ or↓+ AUTO + SP will result in less distance traveled, while ↘ + AUTO + SP will result in the regular distance.
The shorter-distance Overdrive Windclad Condor Spire has different effects on hit, such as blowback, from the existing version.
When using Modern controls, ↙ or↓+ AUTO + SP will result in less distance traveled, while ↘ + AUTO + SP will result in the regular distance.
The shorter-distance Overdrive Windclad Condor Spire has different effects on hit, such as blowback, from the existing version.
Normal/Overdrive Condor Dive (Windclad)<br>(During a vertical or forward jump: Two Punches or Three Punches)
调整 You can now expend Windclad stock to perform another Condor Dive when rebounding from a hit or block.
Notes:
Can only be re-performed once. The Overdrive version costs 10,000 Drive Gauge.
Damage and hit effects differ from the normal version.
Notes:
Can only be re-performed once. The Overdrive version costs 10,000 Drive Gauge.
Damage and hit effects differ from the normal version.
Standing Heavy Kick
调整 Drive Gauge reduction on block changed from -6000 to -4000.
Crouching Medium Punch
调整 Adjusted the hurtbox so that it remains for the entire duration of the recovery instead of disappearing 9 frames before the move ended.
Zilant<br>(Heavy Kick > Heavy Punch)
调整 Drive Gauge reduction on block changed from -2500 to -2000.
Torbalan<br>(↓↘→ + Medium Kick or Heavy Kick or Two Kicks)
调整 Extended the vertical search area upward of the projectile while the move is being performed to help prevent whiffs during aerial combos.
Departure: Shadow<br>(While Departure is active: ↓↙← + Heavy Punch)
调整 1. Made it possible to cancel from Standing Medium Punch, Standing Heavy Kick, Crouching Light Kick, and Crouching Medium Kick.
2. Made it easier to activate after the Departure projectile has gone off-screen.
2. Made it easier to activate after the Departure projectile has gone off-screen.
Forward Throw
调整 1. Decreased the knockdown time by 1 frame.
2. Increased distance from opponent on hit in the corner.
2. Increased distance from opponent on hit in the corner.
Assisted Combo 2
调整 The combo has now changed to the following:
・When the Super Art gauge has at least 1 bar:
Crouching Medium Punch > Overdrive Fuhajin > Kyosesho > Sakkai Fuhazan
・When the Super Art gauge has less than 1 bar:
Crouching Medium Punch > Overdrive Fuhajin > Kyosesho > Heavy Tensenrin
・When the Super Art gauge has at least 1 bar:
Crouching Medium Punch > Overdrive Fuhajin > Kyosesho > Sakkai Fuhazan
・When the Super Art gauge has less than 1 bar:
Crouching Medium Punch > Overdrive Fuhajin > Kyosesho > Heavy Tensenrin
Kyosesho<br>(→ + Medium Punch)
调整 Hit on airborne opponent during a combo changed from knockback to knockdown.
Renko Kicks<br>(→ + Heavy Punch)
调整 1. Recovery on whiff changed from 20 to 23 frames.
2. Expanded the front hurtbox that appears after active frames end from the 5th frame to the end of the attack.
2. Expanded the front hurtbox that appears after active frames end from the 5th frame to the end of the attack.
Light Tensenrin<br>(→↓↘ + Light Punch)
调整 1. Reduced upward blowback when the first hit hits an opponent in the air, making it easier to land the second hit.
2. Increased blowback time when the 2nd hit lands on an aiborne opponent.
3. Added combo-only hitboxes in front and above for the second hit.
Note: The front hitbox is for hitting an airborne opponent who is largely covered by the attack animation.
4. Extended timing to cancel the second hit into a Super Art by 4 frames.
2. Increased blowback time when the 2nd hit lands on an aiborne opponent.
3. Added combo-only hitboxes in front and above for the second hit.
Note: The front hitbox is for hitting an airborne opponent who is largely covered by the attack animation.
4. Extended timing to cancel the second hit into a Super Art by 4 frames.
Overdrive Fuhajin<br>(↓↙← + Two Kicks)
调整 1. Lowered the
2. Lowered the
3. Reduced the horizontal blowback distance.
4. Added 20% combo scaling.
combo-count
start value.2. Lowered the
combo count
gain.3. Reduced the horizontal blowback distance.
4. Added 20% combo scaling.
Normal/Boosted/Overdrive Ankensatsu<br>(↓↘→ + Medium Kick, or ↓↘→ + Light Kick and Heavy Kick)
调整 1. Advantage on block changed from -10 to -8 frames.
2. Expanded hitbox forward from the 3rd to 4th active frame, which gradually expands forward.
3. Reduced the forward hurtbox that appears after active frames end from the 5th frame onwards (except on whiff).
4. Increased pushback on block for the regular version.
5. Effect changed from knockback to knockdown for when the normal version connects from active frame 2 to 4.
6. The activation timing for the normal version's block idle hitbox changed from the 17th to the 5th frame.
7. The effect of the boosted version hitting an airborne opponent changed from slam knockdown to ground bound.
2. Expanded hitbox forward from the 3rd to 4th active frame, which gradually expands forward.
3. Reduced the forward hurtbox that appears after active frames end from the 5th frame onwards (except on whiff).
4. Increased pushback on block for the regular version.
5. Effect changed from knockback to knockdown for when the normal version connects from active frame 2 to 4.
6. The activation timing for the normal version's block idle hitbox changed from the 17th to the 5th frame.
7. The effect of the boosted version hitting an airborne opponent changed from slam knockdown to ground bound.
Normal/Boosted/Overdrive Go Ohsatsu<br>(↓↘→ + Heavy Kick, or ↓↘→ + Medium Kick and Heavy Kick)
调整 Expanded the collision pushbox that appears immediately after the start of the technique upwards, making it difficult to unintentionally slip under opponents at high positions.
Super Art 3/Critical Art Kaisen Dankai Raku<br>(↓↙←↓↙← + Kick)
调整 Expanded the combo-only hitbox upwards.
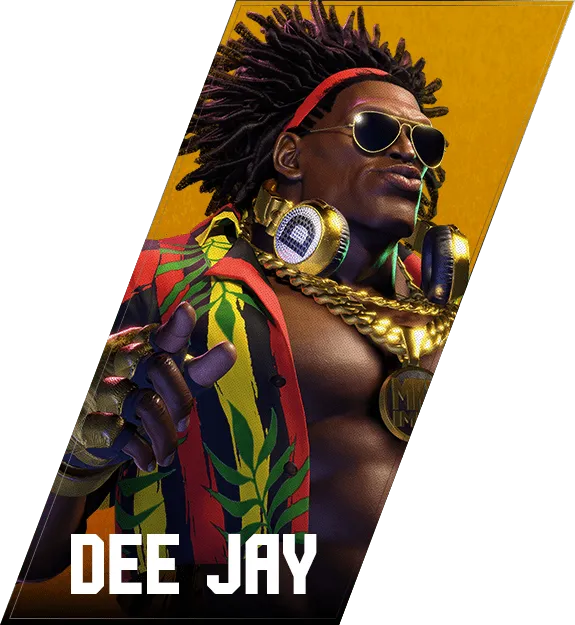
Crouching Medium Punch
调整 1. Changed recovery on hit from +4 to +5 frames.
2. Changed recovery on whiffs from 23 to 24 frames.
3. Adjusted the front hurtbox that appears during recovery on whiff so that it lasts until the end of the move instead of disappearing 3 frames before.
2. Changed recovery on whiffs from 23 to 24 frames.
3. Adjusted the front hurtbox that appears during recovery on whiff so that it lasts until the end of the move instead of disappearing 3 frames before.
Crouching Heavy Punch
调整 Expanded the front hurtbox that appears after active frames end.
Crouching Light Kick
调整 Added projectile invincibility to the hurtbox extending out from above the attacking foot, lasting from the 3rd frame until the end of the move.
Note that this adjustment was done so that the attack wins against stationary projectiles in higher positions.
Note that this adjustment was done so that the attack wins against stationary projectiles in higher positions.
Heavy Machine Gun Uppercut<br>(↓↙← + Heavy Punch)
调整 1. Super Art Gauge increase on hit has changed from 2100 to 2500.
2. Extended input buffer time at the end of the move on hit.
2. Extended input buffer time at the end of the move on hit.
Overdrive Machine Gun Uppercut<br>(↓↙← + Two Punches)
调整 Reduced attack startup from 28 to 26 frames.
Overdrive Waning Moon<br>(↓↙← + Two Kicks > Medium Kick)
调整 No longer hits standing opponents until after the second active frame.
This adjustment was made to give taller characters the same advantage on standing block as characters of average height.
This adjustment was made to give taller characters the same advantage on standing block as characters of average height.
Normal/Overdrive Juggling Sway<br>(↓↙← + Kick, or Two Kicks > → + Punch > ← + Punch)
调整 1. Made it possible to cancel into Funky Slicer, Waning Moon, and Juggling Dash.
2. Reduced the forward hurtbox between frames 5-17 of the normal version and frames 5 to 13 of the Overdrive version.
3. Sped up the timing of when Dee Jay moves backward in the Overdrive version.
2. Reduced the forward hurtbox between frames 5-17 of the normal version and frames 5 to 13 of the Overdrive version.
3. Sped up the timing of when Dee Jay moves backward in the Overdrive version.
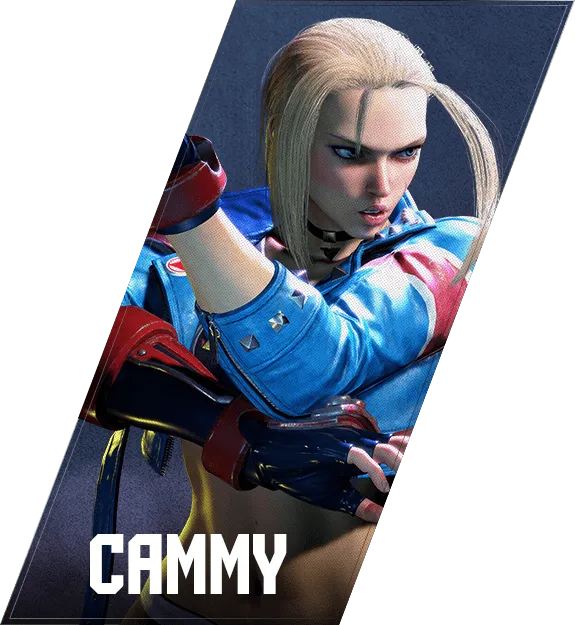
Delayed Ripper<br>(→ + Heavy Kick)
调整 1. Changed recovery on hit from 25 to 20 frames.
2. Increased upward blowback on Punish Counter.
3. Lowered the
2. Increased upward blowback on Punish Counter.
3. Lowered the
combo-count
start value. Heavy Cannon Spike<br>(→↓↘ + Heavy Kick)
调整 Increased the distance moved forward upon attack start-up, making it easier to hit the lower part of the body.
Normal/Overdrive Cannon Strike<br>(During a forward jump: ↓↙← + Kick, or ↓↙← + Two Kicks)
调整 The following changes have been applied when hitting just above the ground:
1. The screen will shake on hit or block.
2. Knockback time on hit or block increased by 2 frames.
3. Reduced pushback on hit or block.
1. The screen will shake on hit or block.
2. Knockback time on hit or block increased by 2 frames.
3. Reduced pushback on hit or block.
Super Art 1 Spin Drive Smasher<br>(↓↘→↓↘→ + Kick)
调整 Extended active frames of first hit from 3 to 4 frames.
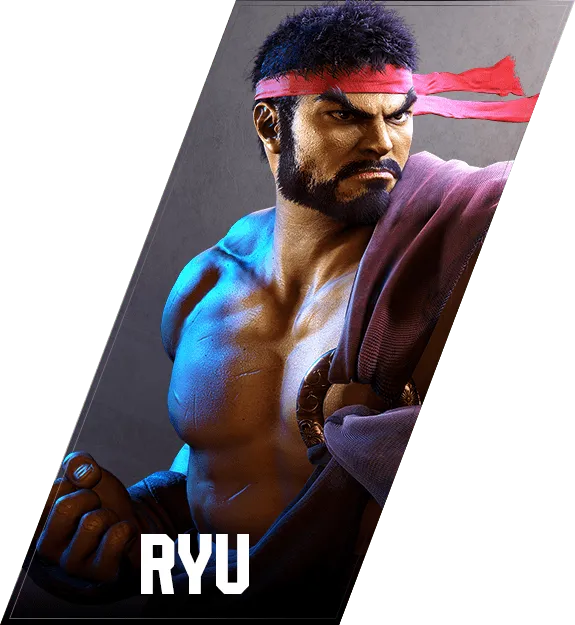
Standing Medium Punch
调整 1. Recovery on whiff changed from 11 to 13 frames.
2. Adjusted the hurtbox to remain on the arms and body until the end of a whiff recovery.
2. Adjusted the hurtbox to remain on the arms and body until the end of a whiff recovery.
Crouching Heavy Punch
调整 Added a new hitbox when the attack hits on the first active frame during a combo, making it have the same reach as the second active frame.
Solar Plexus Strike<br>(→ + Heavy Punch)
调整 Activation timing for the standby block hitbox changed from the 3rd to the 17th frame.
High Double Strike<br>(Heavy Punch > Heavy Kick)
调整 1. Increased upward blowback and blowback time when attack hits.
2. From activation until the end of active frames, pushback on hit or block while in the corner will no longer be applied.
2. From activation until the end of active frames, pushback on hit or block while in the corner will no longer be applied.
Overdrive Shoryuken<br>(→↓↘ + Two Punches)
调整 Added a new hitbox when the attack hits on the first active frame during a combo, extending forward reach.
Light Hashogeki<br>(↓↙← + Light Punch)
调整 1. Drive gauge reduction on block changed from -4000 to -2000.
2. Increased pushback on block during burnout.
2. Increased pushback on block during burnout.
Edmond Honda
Medium Hundred Hand Slap (Normal/Boosted)<br>(↓↙← + Medium Punch)
调整 1. Reduced attack startup from 18 to 16 frames.
2. Expanded the combo-only hitbox forward from the second attack and onward, making it easier to land all hits when hitting an airborne opponent at the tip of the attack.
3. Pushback on hit increased for the final attack of the normal version.
2. Expanded the combo-only hitbox forward from the second attack and onward, making it easier to land all hits when hitting an airborne opponent at the tip of the attack.
3. Pushback on hit increased for the final attack of the normal version.
Heavy Hundred Hand Slap (Normal/Boosted)<br>(↓↙← + Heavy Punch)
调整 1. Reduced attack startup from 21 to 19 frames.
2. Expanded the combo-only hitbox forward from the second attack and onward, making it easier to land all hits when hitting an airborne opponent at the tip of the attack.
2. Expanded the combo-only hitbox forward from the second attack and onward, making it easier to land all hits when hitting an airborne opponent at the tip of the attack.
Normal/Overdrive Hundred Hand Slap (Normal/Boosted)<br>(↓↙← + Punch, or ↓↙← + Two Punches)
调整 1. Will now transition into the final attack on block just as it would on hit.
2. Advantage on block improved by 4 frames compared to the normal version. (Light: ±0 Frames; Medium/Heavy: -4 Frames; OD: +1 Frame)
3. Drive Gauge reduction on block changed by 3000. (Light: -6000; Medium: -7000; Heavy/OD: -8000)
2. Advantage on block improved by 4 frames compared to the normal version. (Light: ±0 Frames; Medium/Heavy: -4 Frames; OD: +1 Frame)
3. Drive Gauge reduction on block changed by 3000. (Light: -6000; Medium: -7000; Heavy/OD: -8000)
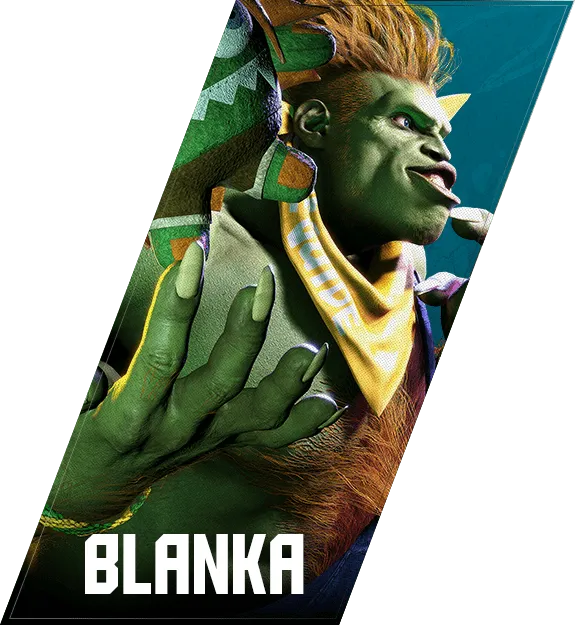
Standing Medium Kick
调整 1. Advantage on hit changed from +4 to +5 frames.
2. Reduced hitback.
2. Reduced hitback.
Crouching Heavy Punch
调整 A counter hit will now result in a knockdown instead of knockback on grounded opponents.
Wild Nail<br>(→ + Heavy Punch)
调整 Increased knockdown time on hit/counter hit by 7 frames.
Surprise Forward Hop<br>(→ + Three Kicks)
调整 Removed throw invincibility.
Rolling Attacks following Normal Lightning Beast<br>(Charge ←, then → + Punch)
调整 1. Decreased Drive Gauge reduction on block for Light and Medium versions from -7500 to -4000.
2. Decreased Drive Gauge reduction on block for the Heavy version from -10000 to -6000.
2. Decreased Drive Gauge reduction on block for the Heavy version from -10000 to -6000.
Blanka-chan Bomb<br>(↓↓ + P)
调整 Blanka-chan dolls will lose their hit box if Blanka is hit after activating it.
Crouching Heavy Punch
调整 Can now be canceled on the 1st active frame.
Spinning Back Knuckle<br>(→ + Heavy Punch)
调整 Super Art gauge increase on hit has changed from 500 to 1200.
Drake Fang<br>(↓ + Medium Kick > → + Medium Punch)
调整 1. When a Crouching Medium Kick lands as a Counter/Punish Counter, the 2nd kick will now also act as a Counter/Punish Counter.
2. When hitting as a Counter/Punish Counter, the effect has changed from a knockback to a ground bound.
3. Drive Gauge reduction on punish counter changed from -4000 to -2000.
2. When hitting as a Counter/Punish Counter, the effect has changed from a knockback to a ground bound.
3. Drive Gauge reduction on punish counter changed from -4000 to -2000.
Overdrive Sonic Blade<br>(↓↙← + Two Punches)
调整 1. When pressed simultaneously with another button, the Punch input strength will determine the attack speed.
2. Added a standby block hitbox from attack start to the end of active frames.
2. Added a standby block hitbox from attack start to the end of active frames.
Super Art 1 Sonic Hurricane (Horizontal)<br>(Charge ←, →←→ + Light or Medium Punch)
调整 Expanded the projectile collision hitbox upward and adjusted it to collide with Sagat's Tiger Shot.
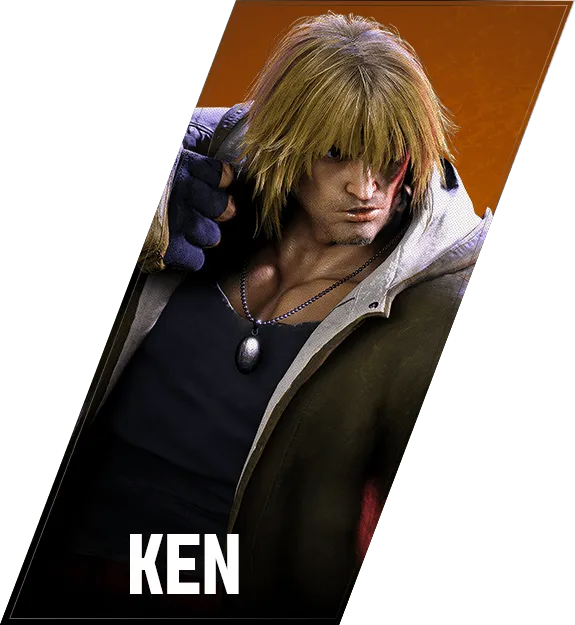
Standing Medium Kick
调整 1. Removed initial scaling of 20%.
2. Can now be canceled into a Super Art.
2. Can now be canceled into a Super Art.
Crouching Heavy Punch
调整 1. Advantage on block changed from -10 to -7 frames.
2. Drive Gauge reduction on block changed from -5000 to -6000.
2. Drive Gauge reduction on block changed from -5000 to -6000.
Shoryuken (Quick Dash)<br>(→↓↘ + Punch)
调整 Adjusted
combo count
increase for the 1st and 2nd hit making it harder to miss an airborne opponent on the 2nd hit. Normal Kazekama Shin Kick<br>(→ + Light Kick during Jinrai Kick)
调整 1. Damage changed from 500 to 600.
2. Knockdown time on Counter or Punish Counter increased by 4 frames.
3. Changed to prevent backward recovery from being performed during a Counter or Punish Counter.
2. Knockdown time on Counter or Punish Counter increased by 4 frames.
3. Changed to prevent backward recovery from being performed during a Counter or Punish Counter.
Overdrive Senka Snap Kick<br>(→ + Heavy Kick during Overdrive Jinrai Kick)
调整 Active frames changed from 4 to 6 frames.
Super Art 2 Shippu Jinrai-kyaku<br>(↓↘→↓↘→ + Kick)
调整 Damage increased on a Counter or Punish Counter.
Modern Controls
调整 After performing Snake Strike (↓↙← + Punch > Medium Punch), you can now maintain her stance by pressing either Up or Down.
Note: This is an adjustment to address the issue of not being able to follow up a Snake Strike with an Orchid Palm, Snake Strike or Lotus Fist.
Note: This is an adjustment to address the issue of not being able to follow up a Snake Strike with an Orchid Palm, Snake Strike or Lotus Fist.
Snake Strike<br>(↓↙← + Punch > Medium Punch)
调整 1. Attack startup changed from 7 to 6 frames.
2. Active frames changed from 11 to 12 frames.
3. Reduced horizontal blowback when attack hits, increased blowback time.
2. Active frames changed from 11 to 12 frames.
3. Reduced horizontal blowback when attack hits, increased blowback time.
Forward Strike<br>(↓↙← + Punch > Light Kick)
调整 Hitbox expanded forward.
Lightning Kick Barrage<br>(Two Kicks during Overdrive Hundred Lightning Kicks)
调整 Combo scaling is no longer applied when following up from an Overdrive Hundred Lightning Kicks.
Light Hazanshu<br>(↓↙← + Light Kick)
调整 1. Damage changed from 1000 to 700.
2. Active frames changed from 2 to 3 frames.
3. Recovery changed from 21 to 20 frames.
4. Advantage on block changed from -9 to -5 frames.
5. When hitting a standing opponent, effect has changed from a knockback to a knockdown.
6. When hitting an airborne opponent, effect has changed from a knockdown to a ground bound.
7. Increased pushback on block.
8. Reduced forward movement.
9. Projectile invincibility has been removed.
10. Increased
2. Active frames changed from 2 to 3 frames.
3. Recovery changed from 21 to 20 frames.
4. Advantage on block changed from -9 to -5 frames.
5. When hitting a standing opponent, effect has changed from a knockback to a knockdown.
6. When hitting an airborne opponent, effect has changed from a knockdown to a ground bound.
7. Increased pushback on block.
8. Reduced forward movement.
9. Projectile invincibility has been removed.
10. Increased
combo count
limit. Heavy/Overdrive Hazanshu<br>(↓↙← + Heavy Kick, or ↓↙← + Two Kicks)
修复问题 Due to chip damage to opponents during burnout being lower than the specified value of 1/4 of actual damage, the normal value has been corrected from 250 to 300.
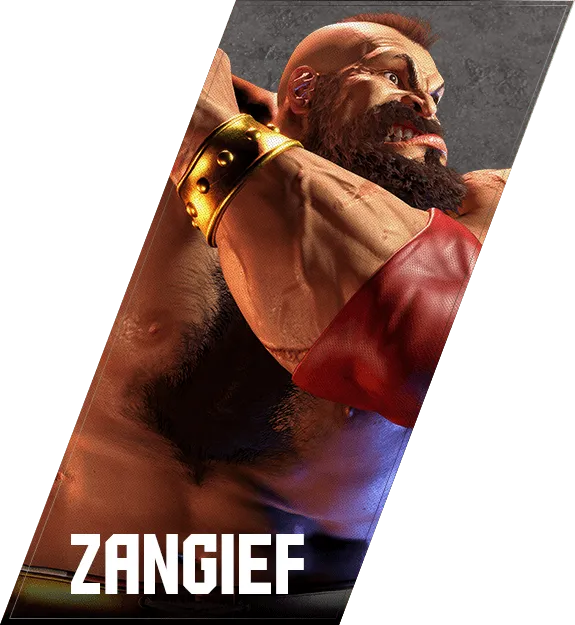
Smetana Dropkick<br>(↘ + Heavy Kick)
调整 Reduced the downward hurtbox from the 5th frame to the end of the active frames.
Overdrive Double Lariat<br>(Three Punches)
调整 1. The knockback time from blocking the 2nd hit has been changed from 17 to 14 frames.
2. Reduced the pushback on block on the 2nd hit.
3. Expanded the hitbox on the 4th hit downward, making it possible to hit crouching opponents.
4. Pushback on block on the 4th hit increased for opponents in burnout.
2. Reduced the pushback on block on the 2nd hit.
3. Expanded the hitbox on the 4th hit downward, making it possible to hit crouching opponents.
4. Pushback on block on the 4th hit increased for opponents in burnout.
Drive Parry
修复问题 Corrected an error in which, after 30 frames, the Drive Gauge would decrease twice as fast as other characters when holding the button to Drive Parry.
Jumping Medium Punch
调整 1. Changed the hit effect on a mid-air combo from a blowback to a blowback knockdown.
2. Reduced horizontal blowback on a mid-air hit.
3. Made it possible to cancel into Drill Kick and Yoga Mummy.
4. Increased
2. Reduced horizontal blowback on a mid-air hit.
3. Made it possible to cancel into Drill Kick and Yoga Mummy.
4. Increased
combo count
value. Jumping Heavy Punch, Jumping Heavy Kick
调整 Increased
combo count
upper limit. Drill Kick<br>(↓ While Jumping + Kick)
调整 Increased
combo count
upper limit. Yoga Mummy<br>(↓ While Jumping + Light Punch)
调整 Increased
combo count
upper limit. Medium Yoga Flame<br>(→↘↓↙← + Medium Punch)
调整 1. Expanded the front hitbox. (Projectile collision hitbox and standby block hitbox were also expanded.)
2. Drive Gauge increase changed from 2400 to 3000.
2. Drive Gauge increase changed from 2400 to 3000.
Medium Yoga Flame<br>(→↘↓↙← + Heavy Punch)
调整 1. Expanded the front hitbox. (Projectile collision hitbox and standby block hitbox were also expanded.)
2. Drive Gauge increase changed from 2700 to 4000.
2. Drive Gauge increase changed from 2700 to 4000.
Overdrive Yoga Flame<br>(→↘↓↙← + Two Punches)
调整 1. Recovery on hit reduced by 5 frames.
2. Decreased blowback time when the final attack hits an airborne opponent.
2. Decreased blowback time when the final attack hits an airborne opponent.
Overdrive Yoga Comet<br>(While Jumping: →↘↓↙← + Two Punches)
调整 1. Increased the
2. Reduced the
3. Increased buffer input time at end of recovery.
combo count
upper limit of the projectile while it is in the air and when it hits the ground.2. Reduced the
combo count
value of the first hit.3. Increased buffer input time at end of recovery.
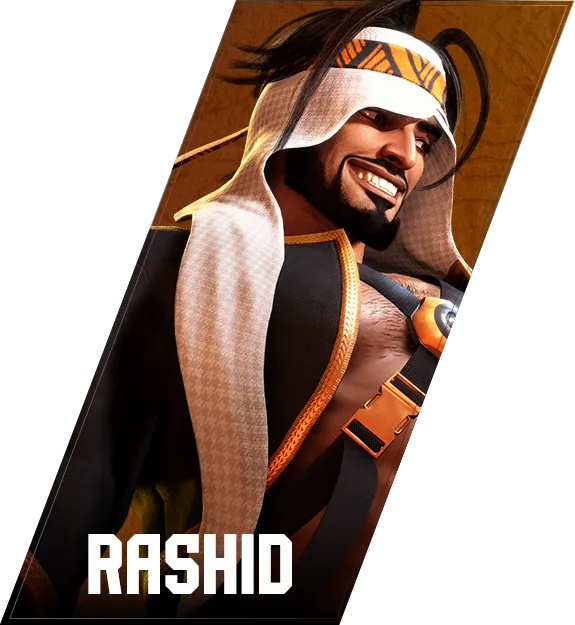
Standing Heavy Kick
调整 Lowered the
combo-count
start value when executing a Punish Counter on the ground. Medium Spinning Mixer (Normal)<br>(↓↘→ + Medium Punch)
调整 Changed air attack invincibility timing from frames 6 to 10 to frames 6 to 14 (until the end of the 2nd hit's active frames).
Overdrive Whirlwind Shot<br>(↓↘→ + Two Kicks)
调整 Horizontal blowback distance when hitting a standing opponent has been reduced.
Overdrive Whirlwind Shot (Held)<br>(↓↘→ + Hold Two Kicks)
調整・不具合修正 1. Attack startup changed from 41 to 38 frames.
2. Can now be canceled into Wing Stroke/Rolling Assault at frame 54.
3. Increased the upward blowback and blowback time when the 3rd hit commects on an airborne opponent.
4. Fixed a bug where Rashid would not light up when executing an Overdrive Whirlwind Shot directly after a held Overdrive Whirlwind Shot.
2. Can now be canceled into Wing Stroke/Rolling Assault at frame 54.
3. Increased the upward blowback and blowback time when the 3rd hit commects on an airborne opponent.
4. Fixed a bug where Rashid would not light up when executing an Overdrive Whirlwind Shot directly after a held Overdrive Whirlwind Shot.
Toxic Blossom
调整 A.K.I.'s Drive Gauge gain increased by 2000 when Toxic Blossom is triggered.
Qiong Qi (Heavy Punch > Heavy Punch), Nightshade Chaser: changed from 3000 to 5000
Light/Medium Serpent Lash (↓↘→+Light or Medium Punch), Venomous Fang (Punch during Sinister Slide): changed from 2000 to 4000
Heavy Serpent Lash (↓↘→+Heavy Punch): changed from 2500 to 4500
Overdrive Nightshade Chaser (Forward+Punch during Nightshade Pulse), Overdrive Serpent Lash (↓↘→+Two Punches): changed from 0 to 2000
However, if a Drive Rush is used during a combo when Toxic Blossom is triggered, Drive Gauge recovery does not occur as usual.
Qiong Qi (Heavy Punch > Heavy Punch), Nightshade Chaser: changed from 3000 to 5000
Light/Medium Serpent Lash (↓↘→+Light or Medium Punch), Venomous Fang (Punch during Sinister Slide): changed from 2000 to 4000
Heavy Serpent Lash (↓↘→+Heavy Punch): changed from 2500 to 4500
Overdrive Nightshade Chaser (Forward+Punch during Nightshade Pulse), Overdrive Serpent Lash (↓↘→+Two Punches): changed from 0 to 2000
However, if a Drive Rush is used during a combo when Toxic Blossom is triggered, Drive Gauge recovery does not occur as usual.
Standing Light Punch
调整 Can now be performed as a rapid cancel attack from Crouching Light Punch and Crouching Light Kick.
Hun Dun<br>(Light Punch > Light Punch)
调整 1. Knockback time on hit and block increased by 1 frame.
2. Recovery changed from 14 to 15 frames.
3. Cancel timing into Drive Rush is now 1 frame slower.
2. Recovery changed from 14 to 15 frames.
3. Cancel timing into Drive Rush is now 1 frame slower.
Overdrive Nightshade Pulse<br>(↓↙← + Two Punches)
调整 Combo count value on the 2nd hit reduced.
Crouching Light Punch
调整 Added projectile invincibility to the front hurtbox near the head from the 2rd frame of the move until the end of the attack.
Note that this adjustment was done so that the attack wins against stationary projectiles that are high up.
Note that this adjustment was done so that the attack wins against stationary projectiles that are high up.
Crouching Medium Kick
调整 1. Recovery when the attack misses changed from 17 to 19 frames.
2. Reduced the rear attack hitbox that hits crouching opponents, reducing its horizontal reach against characters that are in a low profile position.
3. The front hurtbox that disappears on the 26th frame of the technique now lasts until the end of the move.
2. Reduced the rear attack hitbox that hits crouching opponents, reducing its horizontal reach against characters that are in a low profile position.
3. The front hurtbox that disappears on the 26th frame of the technique now lasts until the end of the move.
Crouching Heavy Kick
调整 1. Recovery changed from 17 to 19 frames, and an additional 2 frames of recovery added when the attack misses.
2. Advantage on hit changed from +1 to -1 frame.
3. Disadvantage on block changed from -4 to -6 frames.
4. Standby block hitbox timing changed from the 6th frame of the technique to the 9th frame.
2. Advantage on hit changed from +1 to -1 frame.
3. Disadvantage on block changed from -4 to -6 frames.
4. Standby block hitbox timing changed from the 6th frame of the technique to the 9th frame.
Low Smash Combination<br>(↓ + Heavy Kick > Heavy Punch)
调整 1. Can only be canceled into Kill Rush when the attack hits.
2. Blowback distance upward and forward as well as blowback time increased on hit.
2. Blowback distance upward and forward as well as blowback time increased on hit.
Overdrive Psycho Flicker<br>(↓↘→ + Two Kicks)
调整 Combo scaling changed from 15% to 20%.
Super Art 2 Psycho Cannon<br>(↓↙←↓↙← + Punch)
调整 After this attack hits and upon performing a follow-up attack, Ed's Super Art gauge increase changed from 80% to 50% until the combo ends.
Akuma
Standing Medium Punch
调整 1. Changed recovery on whiff from 11 frames to 13 frames.
2. Extended the frontal hitbox from lasting 20 frames to lasting until the end of the move.
2. Extended the frontal hitbox from lasting 20 frames to lasting until the end of the move.
Crouching Heavy Punch
调整 Extended knockback by one frame if the move connects during the first three active frames.
(Advantage on hit changed from 0 to +1 when the move connects during the first active frame.)
(Advantage on hit changed from 0 to +1 when the move connects during the first active frame.)
Crouching Medium Kick
调整 Advantage on hit changed from +1 to 0.
Normal/Overdrive Gou Hadoken (Longest Held Version)<br>(↓↘→ + Hold Punch, or ↓↘→ + Hold Two Punches)
调整 1. Increased damage from 1200 to 1350.
2. Total recovery time reduced by 7 frames, changing the normal version from 84 to 77 frames and the Overdrive version from 59 to 52 frames. (If the projectile doesn't connect within the frames above, overall recovery is 82 frames for the normal version and 57 frames for the Overdrive version.)
3. Advantage on block changed from +5 to +20 frames.
4. Increased the number of hits from 3 to 4.
5. Increased Drive Gauge consumption on block from -3000 to -4000.
6. Drive Gauge consumption for the normal version increased from 1000 to 5000.
2. Total recovery time reduced by 7 frames, changing the normal version from 84 to 77 frames and the Overdrive version from 59 to 52 frames. (If the projectile doesn't connect within the frames above, overall recovery is 82 frames for the normal version and 57 frames for the Overdrive version.)
3. Advantage on block changed from +5 to +20 frames.
4. Increased the number of hits from 3 to 4.
5. Increased Drive Gauge consumption on block from -3000 to -4000.
6. Drive Gauge consumption for the normal version increased from 1000 to 5000.
Tatsumaki Zanku-kyaku<br>(↓↙← + Medium Kick)
调整 Increased the number of active frames on the second hit from 2 to 3.
Overdrive Adamant Flame<br>(↓↙← + Two Punches)
调整 Increased the number of active frames when canceled out of crouching Medium Kick from 18 to 20.
M. Bison
Psycho Mine Backfist Combo - Normal<br>(↓↙← + Punch)
调整 Advantage on block changed from +6 to +9 frames.
Psycho Mine Backfist Combo - Medium<br>(↓↙← + Medium Punch)
调整 Reduced horizontal blowback when attack hits and increased blowback time.
Normal Devil Reverse<br>(Charge↓, ↑ + Kick > Punch)
调整 Reduced forward movement distance for pressing forward when activated in front of your opponent.
Super Art 2 Psycho Punisher<br>(↓↙←↓↙← + Kick)
调整 1. Reduced attack startup from 26 to 24 frames.
2. Increased backward movement distance when pressing inputs after activating the move.
3. Expanded the combo-only hitbox upwards.
2. Increased backward movement distance when pressing inputs after activating the move.
3. Expanded the combo-only hitbox upwards.
Crouching Medium Punch
调整 Recovery on whiff changed from 14 to 15 frames.
Light Crack Shoot<br>(↓↙← + Kick)
调整 Pushback on block during Burnout has increased.
Round Wave<br>(↓↘→ + Heavy Punch)
调整 Pushback on hit has been reduced.
Overdrive Power Charge<br>(↓↘→ + Two Kicks)
调整 Like the heavy version, it can now cancel into Special Moves other than Power Charge when it hits.
Super Art 1 Buster Wolf<br>(↓↘→↓↘→ + Kick)
调整 Both the player and opponent will be invincible during hitstop when the first attack hits.
Super Art 3/Critical Art Rising Fang<br>(↓↘→↓↘→ + Punch)
调整 Attack startup when canceling into certain Special Moves has been changed from 3 to 2 frames.
Normal/Boosted Kachousen (Held)<br>(↓↘→ + Hold Punch)
调整 1. Knockback time on hit/block on the falling fan reduced by 5 frames.
2. Knockback time on the normal version's 1st attack reduced by 2 frames.
3. Total recovery time on the normal version changed from 62 to 64 frames.
2. Knockback time on the normal version's 1st attack reduced by 2 frames.
3. Total recovery time on the normal version changed from 62 to 64 frames.
Normal/Boosted Overdrive Kachousen<br>(↓↘→ + Two Punches)
调整 1. Knockback time on hit/block on the falling fan reduced by 5 frames.
2. Knockback time on the normal version's 1st attack reduced by 2 frames.
2. Knockback time on the normal version's 1st attack reduced by 2 frames.
Light Normal/Boosted Ryuuenbu<br>(↓↙← + Light Punch)
调整 1. Hitbox expanded forward.
Note that the projectile collision hitbox and standby block hitbox are also expanded.
2. Hurtbox around the feet reduced upward from the 7th frame of the technique until the 1st active frame.
3. Hurtbox around the body expanded forward when the attack misses.
4. Drive Gauge reduction on block changed from 2000 to 4000.
5. Drive Gauge reduction on punish counter changed from 2500 to 6000.
Note that the projectile collision hitbox and standby block hitbox are also expanded.
2. Hurtbox around the feet reduced upward from the 7th frame of the technique until the 1st active frame.
3. Hurtbox around the body expanded forward when the attack misses.
4. Drive Gauge reduction on block changed from 2000 to 4000.
5. Drive Gauge reduction on punish counter changed from 2500 to 6000.
Heavy Normal/Boosted Ryuuenbu<br>(↓↙← + Heavy Punch)
调整 1. Blowback time for the second hit on an airborne opponent increased.
2. On the Kagero no Mai version, attack startup on 1st hit changed from 15 to 14 frames on grounded opponent.
2. On the Kagero no Mai version, attack startup on 1st hit changed from 15 to 14 frames on grounded opponent.
Hissatsu Shinobi Bachi<br>(↓↘→ + Kick)
调整 Forward movement reduced on hit and block.
Normal/Overdrive Musasabi no Mai (Normal or Boosted)<br>(During a forward jump: ��↙← + Punch, or ↓↙← + Two Punches)
调整 Expanded the combo-only hitbox forward from the 7th active frame and later.
Heavy Rhino Horn<br>(↓↘→ + Heavy Kick)
调整 Blowback time on hit increased.
Super Art 1 Meteor Volley<br>(↓↘→↓↘→ + Kick)
调整 Blowback time when hitting a standing opponent increased.
Super Art 2 Revival Dance (Held)<br>(↓↘→↓↘→ + Punch > Hold ↓)
调整 1. Vitality recovery changed from 1300 to 1600
2. Now recovers 10000 Drive Gauge
2. Now recovers 10000 Drive Gauge
Standing Light Kick
调整 Reduced pushback on hit.
Crouching Medium Punch
调整 Recovery on whiff changed from 17 to 19 frames.
Heavy Tiger Knee Crush<br>(↓↘→ + Heavy Kick)
修复问题 Fixed a bug where damage would decrease when the portion of the move that causes a spinning knockback hit as a counter hit.
Standing Heavy Punch
调整 Disadvantage on block changed from -3 to -2.
Standing Heavy Kick
调整 1. Horizontal blowback reduced on when hitting an airborne opponent.
2. Ground bound time increased when hitting an airborne opponent.
2. Ground bound time increased when hitting an airborne opponent.
Crouching Medium Punch
调整 1. Active frames changed from 3 to 4 frames.
2. Hurtbox on the arms during the attack's active frames reduced backward.
2. Hurtbox on the arms during the attack's active frames reduced backward.
Heavy Thunder Dash<br>(↓↙← + Heavy Punch)
调整 Collision pushbox expanded upward on hit, making it harder for the opponent to pass under after the attack.
Normal Aerial Burning Kick<br>(During a vertical or forward jump: ↓↘→ + Kick)
调整 1. Knockback time on block increased by 1 frame.
2. Updated so if the opponent is behind Viper when the attack is blocked, landing recovery is 1 frame more than if the attack hit.
2. Updated so if the opponent is behind Viper when the attack is blocked, landing recovery is 1 frame more than if the attack hit.
Super Art 1 Limit Decoupler<br>(↓↘→↓↘→ + Kick)
调整 1. Attack hitbox on the 1st and 2nd attack expanded upward.
2. While the timer is active, when Tracer Combination, Knuckled Pursuit, and Double Burn hit or are blocked, the Drive Gauge increases by 3000.
2. While the timer is active, when Tracer Combination, Knuckled Pursuit, and Double Burn hit or are blocked, the Drive Gauge increases by 3000.
Super Art 2 Mission Complete<br>(↓↙←↓↙← + Punch)
调整 1. Collision pushbox expanded upward immediately after the attack is performed.
2. Viper's center axis no longer moves from the attack's activation point from the time immediately after the attack is performed until the 4th frame after the screen transition.
3. Easy inputs are no longer recognized when Heavy Punch is input while in a neutral or reversal situation while standing on the ground.
Note: While you cannot input ↓←↓↙←+Heavy Punch or ↓↙←↓←+Heavy Punch to perform Super Art 2, easy inputs are still recognized with Light and Medium Punch inputs, or during special move or super cancels.
Note #2: Due to the limited number of buttons when using Modern Controls, easy inputs are not turned off in neutral or reversal situations while standing on the ground.
4. When the move is performed after a high jump cancel, easy inputs will be not be recognized for any Punch inputs.
5. The input buffer window when easy inputs are not recognized during the situations described in points 3 and 4 has been shortened.
6. On the first frame of a Normal or Special Move, the input will only be overwritten by an input of Super Art 2 when a non-easy input command is used.
2. Viper's center axis no longer moves from the attack's activation point from the time immediately after the attack is performed until the 4th frame after the screen transition.
3. Easy inputs are no longer recognized when Heavy Punch is input while in a neutral or reversal situation while standing on the ground.
Note: While you cannot input ↓←↓↙←+Heavy Punch or ↓↙←↓←+Heavy Punch to perform Super Art 2, easy inputs are still recognized with Light and Medium Punch inputs, or during special move or super cancels.
Note #2: Due to the limited number of buttons when using Modern Controls, easy inputs are not turned off in neutral or reversal situations while standing on the ground.
4. When the move is performed after a high jump cancel, easy inputs will be not be recognized for any Punch inputs.
5. The input buffer window when easy inputs are not recognized during the situations described in points 3 and 4 has been shortened.
6. On the first frame of a Normal or Special Move, the input will only be overwritten by an input of Super Art 2 when a non-easy input command is used.
Overall Concept
This update focuses primarily on adjusting Mai, Elena and Sagat.
With Elena and Sagat, they were released after the last overall balance adjustment, so we've made adjustments to improve their usability to ensure that some of their main moves that should define their unique style become more effective in practice. The changes should increase the range of combos and links so that they can better express their strengths and individuality.
In a previous update we downgraded some of Mai's attacks that heavily restricted the opponent's actions, but combos using all versions of Kachousen still made it very easy for her to take control of the stage. Her ability to corner opponents were the best among all of the characters. These attacks were difficult to counter unless the opponent opted for high-risk, high difficulty techniques like Perfect Parries or invincible attacks, so we've re-balanced them again.
The adjustments we've made are aimed at reducing the barrier of difficulty with countering Mai's offense, and its tendency to loop, so we've made it more difficult for Mai to induce Burnout when opponents block or use normal parries. Additionally, by tweaking the situation after Mai lands her forward throw in the corner, we've made it easier for the defender to deal with Mai's offense.
For more information on the adjustments, please see each character's adjustment list.
With Elena and Sagat, they were released after the last overall balance adjustment, so we've made adjustments to improve their usability to ensure that some of their main moves that should define their unique style become more effective in practice. The changes should increase the range of combos and links so that they can better express their strengths and individuality.
In a previous update we downgraded some of Mai's attacks that heavily restricted the opponent's actions, but combos using all versions of Kachousen still made it very easy for her to take control of the stage. Her ability to corner opponents were the best among all of the characters. These attacks were difficult to counter unless the opponent opted for high-risk, high difficulty techniques like Perfect Parries or invincible attacks, so we've re-balanced them again.
The adjustments we've made are aimed at reducing the barrier of difficulty with countering Mai's offense, and its tendency to loop, so we've made it more difficult for Mai to induce Burnout when opponents block or use normal parries. Additionally, by tweaking the situation after Mai lands her forward throw in the corner, we've made it easier for the defender to deal with Mai's offense.
For more information on the adjustments, please see each character's adjustment list.
mai
The primary changes to Mai surround her combo-related attacks and their effect on the Drive Gauge, and a change to her forward throw after using it while in the corner.
For Drive Gauge adjustments, her standing heavy punch and all versions of Kachousen are affected. Her standing heavy punch is easy to use at the beginning or middle of combos, and also has a lot of chances to force the opponent to block, so we've decreased the amount of Drive Gauge reduced when the opponent blocks it.
For Kachousen, the amount of Drive Gauge gained on normal and Perfect Parry is now increased. We looked to reduce situations where a successful Perfect Parry would result in an overall negative balance compared to the cost of performing the parry in the first place. By ensuring a certain amount of Drive recovery even with just a normal parry, Mai's opponents will now be less likely to go into Burnout.
Especially for the held version of Light Kachousen, with its ability to really suffocate the opponent, and normal Boosted Kachousen, parrying the first two attacks will result in an overall positive Drive gain for opponents. Characters that don't have a lot of counters to projectiles will find it easier to avoid Kachousen with a normal parry.
After Mai's forward throw hits in the corner, the distance between the opponent is now closer, so after it hits, Mai can't avoid a throw from a recovering opponent even if she performs forward dash into a backward walk. Although Mai's frame advantage after a forward dash hasn't changed, it's now more difficult for her to deal with both an opponent's normal throw and invincible move at the same time, so she'll need to be more creative with her approach.
For Drive Gauge adjustments, her standing heavy punch and all versions of Kachousen are affected. Her standing heavy punch is easy to use at the beginning or middle of combos, and also has a lot of chances to force the opponent to block, so we've decreased the amount of Drive Gauge reduced when the opponent blocks it.
For Kachousen, the amount of Drive Gauge gained on normal and Perfect Parry is now increased. We looked to reduce situations where a successful Perfect Parry would result in an overall negative balance compared to the cost of performing the parry in the first place. By ensuring a certain amount of Drive recovery even with just a normal parry, Mai's opponents will now be less likely to go into Burnout.
Especially for the held version of Light Kachousen, with its ability to really suffocate the opponent, and normal Boosted Kachousen, parrying the first two attacks will result in an overall positive Drive gain for opponents. Characters that don't have a lot of counters to projectiles will find it easier to avoid Kachousen with a normal parry.
After Mai's forward throw hits in the corner, the distance between the opponent is now closer, so after it hits, Mai can't avoid a throw from a recovering opponent even if she performs forward dash into a backward walk. Although Mai's frame advantage after a forward dash hasn't changed, it's now more difficult for her to deal with both an opponent's normal throw and invincible move at the same time, so she'll need to be more creative with her approach.
elena
Elena's main adjustments revolve around her Boosted Leopard Snap and Super Art level 1 Meteor Volley.
Boosted Leopard Snap
The distance between Elena and her opponent is now shorter when this attack is blocked either at the center of the stage or in the corner, making it easier to keep up the offense. At the center of the stage, you can now string together two light attacks against an opponent who blocks this attack, such as crouching light punch or crouching light kick into crouching light punch, making it easier to pressure opponents who are looking to retreat from an anticipated throw or want to take back their turn with a light attack.
Meteor Volley
We've sped up its attack start-up, increased its abilities as an anti-air tool, and made it easier to use as part of a follow-up attack in a mid-air combo. In addition, after this attack hits, any follow-ups will now grant Super Art gauge gains, giving this attack much more utility.
Boosted Leopard Snap
The distance between Elena and her opponent is now shorter when this attack is blocked either at the center of the stage or in the corner, making it easier to keep up the offense. At the center of the stage, you can now string together two light attacks against an opponent who blocks this attack, such as crouching light punch or crouching light kick into crouching light punch, making it easier to pressure opponents who are looking to retreat from an anticipated throw or want to take back their turn with a light attack.
Meteor Volley
We've sped up its attack start-up, increased its abilities as an anti-air tool, and made it easier to use as part of a follow-up attack in a mid-air combo. In addition, after this attack hits, any follow-ups will now grant Super Art gauge gains, giving this attack much more utility.
sagat
We've looked at improving Sagat's Tiger Nexus and follow-up attacks, as well as the abilities of his low-hitting attacks. Other than that, there were rare cases when his multi-hitting attacks wouldn't connect mid-way through or wouldn't go into the proper lock animation, so we've made adjustments to those to ensure that Sagat wouldn't suddenly encounter a disadvantage.
Light/Medium Tiger Nexus, Mighty Tiger
Sagat now moves forward more with the light and medium versions of Tiger Nexus, giving him more range with this attack. Along with the changes to pushback on hit and block to crouching light kick, this makes it easier to hit an opponent with Tiger Nexus after Sagat's light attacks, giving him better comboability.
For Tiger Nexus > Mighty Tiger's change to blowback on mid-air hits, this is a change made so that the other tweaks won't affect any current mid-air combos.
Crouching Light Kick, Crouching Medium Kick
Sagat's close and mid-range low attacks now have better performance.
Due to Sagat's slow forward walk speed, it was difficult for him to chase down retreating opponents, so this change is meant to compensate for one of Sagat's weaknesses, which is the risk he takes when stepping back.
Tiger Monolith
When used as an early anti-air attack there were times when no active attack frames were present, so with this adjustment, it should allow Sagat to win more situations when this attack clashes with an opponent's jumping attack, instead of trading or straight up losing out.
Light/Medium Tiger Nexus, Mighty Tiger
Sagat now moves forward more with the light and medium versions of Tiger Nexus, giving him more range with this attack. Along with the changes to pushback on hit and block to crouching light kick, this makes it easier to hit an opponent with Tiger Nexus after Sagat's light attacks, giving him better comboability.
For Tiger Nexus > Mighty Tiger's change to blowback on mid-air hits, this is a change made so that the other tweaks won't affect any current mid-air combos.
Crouching Light Kick, Crouching Medium Kick
Sagat's close and mid-range low attacks now have better performance.
Due to Sagat's slow forward walk speed, it was difficult for him to chase down retreating opponents, so this change is meant to compensate for one of Sagat's weaknesses, which is the risk he takes when stepping back.
Tiger Monolith
When used as an early anti-air attack there were times when no active attack frames were present, so with this adjustment, it should allow Sagat to win more situations when this attack clashes with an opponent's jumping attack, instead of trading or straight up losing out.
Change to Drive Gauge Appearance
- 共通調整 To make it easier to distinguish whether or not each block has Drive remaining, the color of the block will change if even a small amount of Drive remains.
Crouching Light Kick for All Characters
- 共通調整 Adjusted so the hurtbox around the feet that appears before the attack hitbox comes out is invincible to cross-up attacks.
(This applies when attacking an opponent's cross-up attack from behind just before they land.)
Manon, Lily, and Zangief's Super Art Level 3/CA
- 共通調整 Omitted an unnecessary block idle hitbox that was set before the throw hitbox comes out.
*This caused an issue when a Super Art was timed with the landing of a jump, making it possible to avoid the attack that should have been unavoidable.
Projectile Clashes
- 不具合修正 Fixed an issue where the timing for multi-hit projectiles's hitboxes disappearing would be inconsistent when canceling each other out, even when performed in the same situation.
Speedy Maracas<br>(↓↓+2 Punches)
修复问题 Fixed an issue where the level 2 Super Art gauge version would be performed when Dee Jay's gauge was between 1.98 and under 2 bars. It will now only be performed at 2 bars and over.
Standing Light Kick
修复问题 Fixed an issue where the attack would hit an opponent behind Cammy.
Orchid Palm, Forward Strike, Senpu Kick<br>(Light Punch, Light Kick or Medium Kick during Serenity Stream)
修复问题 Fixed an issue where Chun-Li could still block during some recovery frames when Perfect Parried by the opponent.
*This fix will reduce the overall frames of the attack when it's Perfect Parried.
*This fix will reduce the overall frames of the attack when it's Perfect Parried.
Merciless Yoga (Critical Art)<br>(↓↘→↓↘→+Kick)
修复问题 During a cancel the following parameters were set to their Super Art level 3 equivalents, but have now been changed to their correct Critical Art values.
1. Drive Gauge reduction on block changed from 7500 to 10000.
2. Chip damage to opponent during Burnout changed from 1000 to 1250.
1. Drive Gauge reduction on block changed from 7500 to 10000.
2. Chip damage to opponent during Burnout changed from 1000 to 1250.
M. Bison
Overdrive Psycho Crusher Attack (with Psycho Mine)
修复问题 Fixed an issue where on the 1st attack's 2nd active frame and later, Bison's hit stop would be reduced by 1 frame when the attack hits at a specific range and timing, which would result in the explosion caused by Overdrive Psycho Crusher to occur immediately after the Psycho Mine's automatic detonation.
Standing Heavy Punch
调整 Drive Gauge reduction on block changed from 5000 to 4000.
Standing Light Kick
修复问题 Adjusted so the hurtbox around the feet that appears before the attack hitbox comes out is invincible to cross-up attacks.
(This applies when attacking an opponent's cross-up attack from behind just before they land.)
(This applies when attacking an opponent's cross-up attack from behind just before they land.)
Normal Kachousen (Held)<br>(↓↘→+Hold Punch)
调整 1. Drive Gauge increase from parrying the attack changed from 2500/2500 to 5000/2500.
2. Drive Gauge increase from Perfect Parrying the attack changed from 2500/2500 to 5000/5000.
2. Drive Gauge increase from Perfect Parrying the attack changed from 2500/2500 to 5000/5000.
Overdrive Kachousen (Held)<br>(↓↘→+Hold 2 Punches)
调整 Drive Gauge increase from parrying/Perfect Parrying the attack changed from 1400 x 2 to 2500 x 2
Midare Kachousen<br>(↓↘→+Hold 2 Punches > →+Punch)
调整 1. Drive Gauge increase from Perfect Parrying the 1st and 2nd attack changed from 1200 x 2 to 2500 x 2.
2. Drive Gauge increase from Perfect Parrying the 3rd and 4th attack (falling fan) changed from 1150 x 2 to 5000 x 2.
2. Drive Gauge increase from Perfect Parrying the 3rd and 4th attack (falling fan) changed from 1150 x 2 to 5000 x 2.
Normal Kachousen (Kagerou no Mai Boosted)<br>(↓↘→+Punch)
调整 Drive Gauge increase from parrying/Perfect Parrying the attack changed from 2500 x 2 to 3000 x 2.
Normal Kachousen (Held, Kagerou no Mai Boosted)<br>(↓↘→+Hold Punch)
调整 1. Drive Gauge increase from parrying the attack changed from 1250 x 2/2500 to 2500 x 3.
2. Drive Gauge increase from Perfect Parrying the attack changed from 1250 x 2/2500 to 2500 x 2/5000.
2. Drive Gauge increase from Perfect Parrying the attack changed from 1250 x 2/2500 to 2500 x 2/5000.
Overdrive Kachousen (Held, Kagerou no Mai Boosted)<br>(↓↘→+Hold 2 Punches)
调整 1. Drive Gauge increase from parrying/Perfect Parrying the 1st and 2nd attack changed from 1200 x 2 to 2500 x 2.
2. Drive Gauge increase from Perfect Parrying the 3rd and 4th attack (falling fan) changed from 750 x 2 to 2500 x 2.
2. Drive Gauge increase from Perfect Parrying the 3rd and 4th attack (falling fan) changed from 750 x 2 to 2500 x 2.
Midare Kachousen (Kagerou no Mai Boosted)<br>(↓↘→+Hold 2 Punches > →+Punch)
调整 1. Drive Gauge increase from Perfect Parrying the 1st and 2nd attack changed from 1050 x 2 to 2500 x 2.
2. Drive Gauge increase from Perfect Parrying the 3rd and 4th attack (falling fan) changed from 750 x 2 to 2500 x 2.
2. Drive Gauge increase from Perfect Parrying the 3rd and 4th attack (falling fan) changed from 750 x 2 to 2500 x 2.
Normal Hissatsu Shinobi Bachi (Normal/Boosted)<br>(↓↘→+Kick)
修复问题 Fixed an occurance where the distance between the characters would be shorter compared to mid-screen when taking a hit during the move's recovery while the opponent is in the corner of the stage.
Forward Throw
调整 The distance between the characters after hitting at the corner of the screen has been shortened.
Leopard Snap (Normal)<br>(↓↘→+Punch > →+Light Kick)
调整 Changed Super Art gauge increase from 600 to 1000.
Leopard Snap (Boosted)<br>(↓↘→+Punch > →+Punch > →+Light Kick)
调整 1. Adjusted the distance between the characters after this attack is blocked while the opponent is in the corner of the stage to match the distance when at the center of the stage.
2. Pushback on block reduced.
3. The blowback when the 1st attack is a mid-air hit has been reduced, making it less likely for the 2nd attack to miss.
2. Pushback on block reduced.
3. The blowback when the 1st attack is a mid-air hit has been reduced, making it less likely for the 2nd attack to miss.
Moon Glider (Follow-up Part)<br>(↓↙←+Punch > →+Punch)
调整 Expanded the attack hitbox of the follow-up's 2nd attack forward, making it less likely to miss.
Overdrive Moon Glider<br>(↓↙←+2 Punches)
调整 1. Pushback on hit reduced.
2. Increased forward movement distance after the initial step back.
2. Increased forward movement distance after the initial step back.
Super Art Level 1 Meteor Volley<br>(↓↘→↓↘→+Kick)
調整・不具合修正 1. Attack start up changed from 9 to 7 frames.
2. Follow-up attacks can now fill up the Super Art gauge.
3. Fixed an issue where if Elena takes an attack while falling after missing, she would sometimes go back into the air. This has been changed to a blowback knockdown.
2. Follow-up attacks can now fill up the Super Art gauge.
3. Fixed an issue where if Elena takes an attack while falling after missing, she would sometimes go back into the air. This has been changed to a blowback knockdown.
Crouching Light Kick
调整 Pushback on hit and on block reduced.
Crouching Medium Kick
调整 Advantage on hit changed from +4 to +5.
Tiger Monolith<br>(←+Heavy Punch)
调整 Active frames for the 1st attack changed from 2 to 3 frames.
Heavy Tiger Uppercut (Held)<br>(→↓↘+Hold Heavy Punch)
调整 1. Attack will now go into the cinematic when hitting on the 3rd active frame.
2. Damage on the 3rd active frame changed from 1700 to 1800.
3. Hitstop when hitting on the 3rd active frame changed from 13 to 20 frames.
4. Can now only be canceled into Super Art level 3/Critical Art when hitting on the 3rd active frame.
5. Added an attack hitbox on the 3rd active frame that only appears during a combo.
6. Collision pushbox on active frames 1-2 expanded upward, making it difficult to unintentionally sneak under opponents at high positions.
2. Damage on the 3rd active frame changed from 1700 to 1800.
3. Hitstop when hitting on the 3rd active frame changed from 13 to 20 frames.
4. Can now only be canceled into Super Art level 3/Critical Art when hitting on the 3rd active frame.
5. Added an attack hitbox on the 3rd active frame that only appears during a combo.
6. Collision pushbox on active frames 1-2 expanded upward, making it difficult to unintentionally sneak under opponents at high positions.
Heavy Tiger Knee Crush<br>(↓↘→+Heavy Kick)
调整 Expanded the attack hitbox of the 2nd attack that only appears during a combo upwards, allievating the issue of the 2nd attack missing when the 1st attack didn't result in a spinning knockdown on a mid-air hit.
Light/Medium Tiger Nexus<br>(↓↙←+Light Kick or Medium Kick)
调整 1. Pushback on hit increased.
2. Forward movement increased from 2 frames before attack start up until attack start up.
3. Increased side blowback on a mid-air hit.
4. Collision pushbox on the head reduced backward.
2. Forward movement increased from 2 frames before attack start up until attack start up.
3. Increased side blowback on a mid-air hit.
4. Collision pushbox on the head reduced backward.
Mighty Tiger<br>(↓↙←+Kick > →+Light Kick)
调整 1. Pushback on hit increased.
2. Increased side blowback on a mid-air hit.
2. Increased side blowback on a mid-air hit.
Greedy Tiger<br>(↓↙←+Kick > →+Medium Kick)
调整 Drive Gauge decrease on block changed from 6000 to 8000.
Nova Tiger<br>(↓↙←+Kick > →+Heavy Kick)
调整 Pushback on block reduced.
Dynamic Controls
修复问题 1. Fixed an issue where the normal version of Focus Force would be performed from a high jump cancel instead when trying to perform the Overdrive version.
2. Fixed an issue where performing a high jump cancel with a downward input followed by ↖ with Super Art 1 active or during Burnout would not result in a vertical high jump.
2. Fixed an issue where performing a high jump cancel with a downward input followed by ↖ with Super Art 1 active or during Burnout would not result in a vertical high jump.
Jumping Light Punch, Jumping Heavy Punch
修复问题 Fixed an issue where hitting a crouching opponent would force them into a standing position.
Focus Force (Level 3, Normal/Overdrive)<br>(↓↙←+ hold Kick or 2 Kicks)
修复问题 Fixed an issue where the opponent's stunned time would not increase on Punish Counter.
Behavior when two Super Arts are performed at the same time
- 不具合修正 Fixed a crash issue that occurred when both Player 1 and 2 performed specific Super Arts at the same time.
Note: This was fixed previously but we've confirmed it has happened again so this is an additional fix.
Character-Specific Settings during online Training Mode
- 不具合修正 Fixed a crash issue that occurred when two players are in online training mode and one player using C. Viper would select Character-Specific Settings from the training menu.
Note: While the above crash issue was resolved in the update, we've also confirmed that changing C. Viper's Limit Decoupler setting to 'Infinite' under Character-Specific Settings will result in irregular behavior for the character and the Super Art gauge.
In addition, continuing online training mode with this irregular behavior active can increase the chance of a network error occurring. These new issues will be resolved in a future update, but please refrain from using the settings outlined above until that fix has been implemented. We apologize for any inconvenience this may cause in the meanwhile.
Overdrive Aerial Burning Kick (Modern)<br>(↓↘→+2 Attack Buttons during a vertical or forward jump)
修复问题 Fixed an issue where a normal Aerial Burning Kick would be performed when using Modern Controls and manual inputs to perform an Overdrive Aerial Burning Kick even though two attack buttons were pressed simultaneously.
High Jump Cancel during Super Art 1
修复问题 Fixed an issue where the Super Art 1 timer would disappear when performing a High Jump Cancel even if C. Viper wasn't in Burnout.
Behavior when two Super Arts are performed at the same time
- 不具合修正 Fixed an issue where the game would crash when Player 1 and Player 2 performed certain Super Arts at the same time.
Crouching Block (After Super Art level 3)
修复问题 Fixed an issue where if you crouched to block against certain attacks while in boosted mode after performing Super Art level 3 and continued to crouch, you would become invincible for only 2 frames during the technique.
Hurtbox and Collision Pushbox
修复问题 Fixed an issue where some mid-air hurtbox and collision pushboxes were smaller than other characters of the same size.
Sonic Blade (follow-up)<br>(After performing Solid Puncher, Punch after Sonic Boom or Sonic Blade)
修复问题 Fixed an issue where if Guile was attacked by an opponent while performing Sonic Break (follow-up), Guile would not be able to perform the next Sonic Break (follow-up) up to the maximum amount of times it could be performed.
Mission Complete Super Art level 2<br>(↓↙←↓↙←+Punch)
修复问题 Fixed an issue where if Viper lands a Super Art level 2 after landing a combo with Drive Rush, Viper's Drive Gauge would automatically start to refill during the cinematic, even though the combo would still continue.
Drive Rush behavior when canceled into from certain whiffed light attacks
- 不具合修正 Fixed an issue where if a Cancel Drive Rush was input at a specific timing during a light attack, nothing would happen if the move missed, but the Cancel Drive Rush would only be activated if the move was hit or blocked by the opponent.
This fix applies to the following characters and their light attacks
Chun-Li: Crouching Light Kick
A.K.I.: Standing Light Kick
Ed: Crouching Light Kick
Mai: Standing Light Kick
Elena: Standing Light Kick
Sagat: Standing Light Kick
Priority for Drive Rush Cancel and canceling certain attacks into special moves
- 不具合修正 Fixed an issue where inputting a special move command and Drive Parry would result not in a Cancel Drive Rush but the special move being performed when certain attacks connect or are blocked by the opponent.
This fix applies to the following characters and their attacks
Marisa: Crouching Light Punch
A.K.I.: Standing Light Kick
Akuma: Crouching Light Punch
M. Bison: Standing Light Punch
Elena: Standing Light Punch
Sagat: Crouching Light Punch, Tiger Slash (crouching medium punch, crouching heavy punch)
Behavior for certain Super Art 1 and 2 when hitting an opponent during Burnout
- 調整 When hitting an opponent who is in Burnout with certain level 1/2 Super Arts that lock the opponent on hit, the opponent's Drive gauge will no longer stop recovering during the animation.
This adjustment applies to the following characters and their attacks
Kimberly: Super Art 2 (including aerial version)
Cammy: Super Art 2 (including aerial version)
Marisa: Super Art 1 (held version), Super Art 2 (when the 1st attack hits)
E. Honda: Super Art 2
Akuma: Super Art 2
M. Bison: Super Art 2
Elena: Super Art 2
Sagat: Super Art 2 (all variations)
Issue regarding Super Art gauge increase
- 不具合修正 Fixed an issue where if you land 16 or more attacks during a combo and then land a Super Art that has a Super Art recovery scaling setting, the amount of gauge recovered for subsequent follow-up attacks would decrease.
Freeflow Strikes (Normal, Drink level 4)<br>(↓↘→+Punch)
调整 Expanded the collision push box upwards when the first attack hits, making it more difficult to switch positions with an airborne opponent.
Note: this is to address an issue where the attack would miss the opponent and Freeflow Kicks would unintentionally be performed while using Modern controls.
Note: this is to address an issue where the attack would miss the opponent and Freeflow Kicks would unintentionally be performed while using Modern controls.
Renversé<br>Grand Fouetté<br>(Modern controls)
调整 While using Modern controls, if you tried to cancel Renversé into Super Art 3 by pressing the button at the same time, Renversé Feint or Grand Fouetté would unintentionally be performed, so the following adjustment was made.
1. While using Modern controls, the input for Renversé (Feint) has been changed from Special (hold) to Light Attack (Hold)
2. While using Modern controls, the command for Grand Fouetté has been changed from any attack button to medium attack.
3) The input buffer time Renversé Feint just before its recovery ends has been increased.
1. While using Modern controls, the input for Renversé (Feint) has been changed from Special (hold) to Light Attack (Hold)
2. While using Modern controls, the command for Grand Fouetté has been changed from any attack button to medium attack.
3) The input buffer time Renversé Feint just before its recovery ends has been increased.
Overdrive Torbalan<br>(↓↘→+KK)
调整 Mitigated an issue where an unnatural whiff would occur against a mid-air opponent by adding an attack hitbox that appears only during a combo.
Overdrive Waning Moon<br>(↓↙←+KK > Medium Kick)
调整 Expanded the collision pushbox upward from frames 16 - 19.
Note: This adjustment was done due to Assist Combo 3 causing the player to go under an opponent and not connecting with the combos in certain situations.
Note: This adjustment was done due to Assist Combo 3 causing the player to go under an opponent and not connecting with the combos in certain situations.
Light Spiral Arrow<br>(↓↘→+Light Kick)
调整 Increased the blowback time on a mid-air hit after active frame 6.
Note: This adjustment was made as Cannon Spike would sometimes whiff after connecting with Swing Combination > Light Spiral Arrow at a certain distance from the corner.
Note: This adjustment was made as Cannon Spike would sometimes whiff after connecting with Swing Combination > Light Spiral Arrow at a certain distance from the corner.
Overdrive Hadoken (Denjin Charge)<br>(↓↙←+PP)
修复问题 Corrected the amount of chip damage done to an opponent in Burnout from 400 to its correct value of 200.
Crouching Light Kick
修复问题 1. Fixed an issue where the Punish Counter hitbox would still remain 1 frame after recovery had ended.
2. Fixed an issue where the rapid cancel version of standing light punch, crouching light punch and crouching light kick would unintentionally be performed when performing techniques that involved pressing light punch or kick (throws, special moves, etc.) 5 frames before recovery ends.
2. Fixed an issue where the rapid cancel version of standing light punch, crouching light punch and crouching light kick would unintentionally be performed when performing techniques that involved pressing light punch or kick (throws, special moves, etc.) 5 frames before recovery ends.
Jumping Medium Punch
修复问题 Fixed an issue where cancel timing would not be displayed when landing this attack during a backwards jump in Training Mode.
Overdrive Tensho Kicks<br>(↓↓+KK)
调整 1. Expanded the collision pushbox on hit upwards.
2. Expanded the final attack's hitbox forward
*This is to address an issue where the attack would go in the opposite direction if you go under the opponent before rising for the second time.
2. Expanded the final attack's hitbox forward
*This is to address an issue where the attack would go in the opposite direction if you go under the opponent before rising for the second time.
Soten Ranka (Critical Art)<br>(↓↙←↓↙←+K)
修复问题 Fixed an issue where an combo only attack hitbox that was added to Super Art level 3 was not added to the Critical Art.
Double Lariat (Modern controls)<br>(Medium+Heavy attack)
修复问题 Made an adjustment for Modern controls so Double Lariat is performed instead of a normal throw if the player presses 3 attack buttons at the same time while in Burnout.
M. Bison
Throw Escape input
调整 Fixed an issue where throw escapes would not be possible if a special move command that does not exist for M. Bison (← or → + PPP or KKK, →↓↘ + PP) was executed when inputting a throw escape.
Head Press (Normal)<br>(Charge ↓, then ↑+Kick > Kick)
修复问题 When Bison's Head Press was used against a counter-style move (Amnesia, Marisa Super Art 1, etc.),
it would bounce back, allowing for forward and backward movement, but Somersault Skull Diver could not be performed. We have made a change so that when Head Press is used against such moves, it will no longer bounce back.
it would bounce back, allowing for forward and backward movement, but Somersault Skull Diver could not be performed. We have made a change so that when Head Press is used against such moves, it will no longer bounce back.
Psycho Crusher attack (Normal/Overdrive)<br>Backfist Combo (Normal/Overdrive)
修复问题 Fixed an issue in Extreme Battle where when consecutive attacks hit an opponent character and then a gimmick (such as a bomb) unnatural behavior would occur, such as the technique being interrupted or Bison's Psycho Mine not detonating.
Note: This change does not affect regular 1 vs 1 battles.
Note: This change does not affect regular 1 vs 1 battles.
Overdrive Quick Burn<br>(↓↙←+Light Punch+Medium Punch or Light Punch+Heavy Punch)
调整 Super Art 2/3 cancel timing has been changed to only the 2nd active frame of the 2nd attack.
Note: This adjustment is to address issues where the 2nd attack's 1st active frame would not reach the opponent when canceling the attack, resulting in the Super Art not comboing.
Note: This adjustment is to address issues where the 2nd attack's 1st active frame would not reach the opponent when canceling the attack, resulting in the Super Art not comboing.
Medium Ryuuenbu (Normal/Boosted)<br>(↓↙←+Medium Punch)
修复问题 1. Fixed an issue where only the 2nd attack of the regular/boosted version would have 20% initial scaling added.
2. Fixed an issue where only the 2nd attack of the regular version during a combo would have 20% combo scaling added.
2. Fixed an issue where only the 2nd attack of the regular version during a combo would have 20% combo scaling added.
Sliding<br>(↘+Heavy Kick)
修复问题 Fixed an issue where the opponent's blowback would behave unnaturally on a mid-air counter/Punish Counter.
Moon Glider (Normal/Overdrive)<br>(↓↙←+Punch > →+Punch)
修复问题 The first attack's hit stun and block stun had different values, so they have been unified to match the hit stun's value.
Rapid Cancel Assisted Combo
修复问题 Fixed an issue where if the player released the Assist button immediately after the first hit of Lily's rapid cancel Assisted Combo (crouching light kick), the next attack (crouching light punch) would not be performed even if the player buffered down+light Attack during the recovery of crouching light kick.
Orchid Palm, Snake Strike, Forward Strike, Senpu Kick<br>(Light Punch, Medium Punch, Light Kick or Medium Kick during Serenity Stream)
调整 We've confirmed that when Serenity Stream's attacks are perfect parried, initial scaling won't be applied to the opponent's counterattack under certain conditions.
This is due to the Serenity Stream's intended design, which allows the player to continue in the stance or cancel out of it when it's perfect parried.
During a perfect parry, a counterattacks is all but guaranteed while in this state, so there was no upside to continue the stance during this disadvantage. Considering this, we've made a change so that the stance will always be canceled when the attack is perfect parried, which will ensure initial scaling is added.
This is due to the Serenity Stream's intended design, which allows the player to continue in the stance or cancel out of it when it's perfect parried.
During a perfect parry, a counterattacks is all but guaranteed while in this state, so there was no upside to continue the stance during this disadvantage. Considering this, we've made a change so that the stance will always be canceled when the attack is perfect parried, which will ensure initial scaling is added.
Standing Light Punch, Crouching Light Punch, Crouching Light Kick
修复问题 Fixed an issue where the rapid cancel version of standing light punch/crouching light punch/crouching light kick would unintentionally be performed when inputting those buttons (even for other techniques like throws or special moves) during the attack recovery.
Drive Impact
调整 Reduced the downward attack hitbox to match the lowest positioned hitbox of other characters.
Heavy Tiger Uppercut<br>(→↓↘ + Heavy Punch)
修复问题 Fixed an issue where the attack startup would be 1 frame faster when releasing the button under specific timing.
Overdrive Avenger<br>(↓↘→ + Two Kicks)
调整 Reduced the armor hitbox around the head downward.
Please note that this adjustment was made so that it doesn't interfere with Sagat's High Tiger Shot.
Please note that this adjustment was made so that it doesn't interfere with Sagat's High Tiger Shot.
Temps Lié<br>(Heavy Punch > Heavy Punch)
修复问题 Fixed an issue where it was possible to cancel into another action 1 frame before recovery ended when the attack was blocked.
Overdrive Sprint (Modern)<br>(→ + Assist + Special Move)
修复问题 1. Fixed an issue where Emergency Stop was performed instead of Shadow Slide when pressing Down-back+Attack after Overdrive Sprint.
2. Fixed an issue where Neck Hunter was performed instead of Shadow Slide when pressing Down-forward+Attack after Overdrive Sprint.
2. Fixed an issue where Neck Hunter was performed instead of Shadow Slide when pressing Down-forward+Attack after Overdrive Sprint.
Crouching Medium Punch<br>Crouching Medium Kick<br>Crouching Heavy Kick
调整 Changed high positioned hurtboxes when crouching to be invincible to projectiles.
Please note that this adjustment was made so that it doesn't interfere with Sagat's High Tiger Shot.
Please note that this adjustment was made so that it doesn't interfere with Sagat's High Tiger Shot.
Normal/Overdrive Spiral Arrow<br>(↓↘→ + Kick or Two Kicks)
调整 For each strength, the hurtbox has been expanded upwards immediately after the start of the move and after it reaches its highest height.
Light: Frames 1 - 2, Frames 14 - 21
Medium: Frames 1 - 2 , Frames 14 - 23
Heavy: Frames 1 - 5, Frames 23 - 32
Overdrive: Frames 1 - 4, Frames 19 - 29
Please note that this adjustment was made so that it doesn't interfere with Sagat's High Tiger Shot.
Light: Frames 1 - 2, Frames 14 - 21
Medium: Frames 1 - 2 , Frames 14 - 23
Heavy: Frames 1 - 5, Frames 23 - 32
Overdrive: Frames 1 - 4, Frames 19 - 29
Please note that this adjustment was made so that it doesn't interfere with Sagat's High Tiger Shot.
Super Art Level 1 Spin Drive Smasher<br>(↓↘→↓↘→ + Kick)
调整 The hurtbox that appears from the start of the technique until the 5th frame that is invincible to everything except projectiles has been expanded upwards.
Please note that this adjustment was made so that it doesn't interfere with Sagat's High Tiger Shot.
Please note that this adjustment was made so that it doesn't interfere with Sagat's High Tiger Shot.
Edmond Honda
Neko Damashi<br>(↓↓ + Punch)
修复问题 Fixed an issue where buffering a Super Art Level 3/Critical Art input would not work.
Normal/Overdrive Backstep Rolling Attack<br>(→↘↓↙← + Kick or Two Kicks)
修复问题 Fixed an issue where the movement distance change by inputting forward or back would be different depending on if Blanka was facing left or right.
Critical Art Soten Ranka<br>(↓↙←↓↙← + Kick)
修复问题 Fixed an issue where the amount of Drive gained when absorbing the attack via Drive Parry would be smaller compared to other Super Arts.
Drive Parry
修复问题 The hurtbox and throw hurtbox for Drive Parry from frame 3 and later was slightly smaller than the expansion of the basic hurtbox in the June adjustment, so we expanded the hurtbox forward so it matches the basic hurtbox.
Crouching Medium Punch
调整 Changed high positioned hurtboxes when crouching to be invincible to projectiles.
Please note that this adjustment was made so that it doesn't interfere with Sagat's High Tiger Shot.
Please note that this adjustment was made so that it doesn't interfere with Sagat's High Tiger Shot.
Double Lariat (Modern Controls)<br>(Medium Attack + Heavy Attack)
修复问题 In the June adjustment, we made an adjustment so that pressing all three attack buttons during Burnout would perform a Double Lariat instead of a normal throw. However in certain situations this would result in Double Lariat being performed unintentionally, so we have rolled back this adjustment to pre-June settings.
Note: We plan on reimplementing this change in a future update after further investigation.
Note: We plan on reimplementing this change in a future update after further investigation.
Tundra Storm<br>(↓↓ + Heavy Kick)
调整 Counter hitbox expanded upward.
Please note that this adjustment was made so that it could also apply to Sagat's standing heavy kick and High Step Kick.
Please note that this adjustment was made so that it could also apply to Sagat's standing heavy kick and High Step Kick.
Crouching Light Kick
调整 Expanded the projectile invincible hurtbox downward during the technique.
Please note that this adjustment was made so that it doesn't interfere with Sagat's Low Tiger Shot.
Please note that this adjustment was made so that it doesn't interfere with Sagat's Low Tiger Shot.
Crouching Heavy Kick
调整 Changed high positioned hurtboxes when crouching to be invincible to projectiles.
Please note that this adjustment was made so that it doesn't interfere with Sagat's High Tiger Shot.
Please note that this adjustment was made so that it doesn't interfere with Sagat's High Tiger Shot.
Venomous Fang<br>(↓ + Two Punches > Punch)
调整 Adjusted the position of the projectile invincible hurtbox during the technique.
Please note that this adjustment was made so that it doesn't interfere with Sagat's Low Tiger Shot.
We have also made sure that this change should not affect other projectiles.
Please note that this adjustment was made so that it doesn't interfere with Sagat's Low Tiger Shot.
We have also made sure that this change should not affect other projectiles.
Light Psycho Uppercut<br>(→↓↘ + Light Punch)
修复问题 Fixed an issue where it was possible to cancel into another action 4 frames before recovery ended when the attack misses.
Akuma
Normal/Overdrive Adamant Flame (Follow-up)<br>(↓↙← + Punch or Two Punches > → + Punch)<br>Demon Gou Rasen<br>(↓↘→ + Two Kicks > ↓↙← + Kick)
修复问题 Fixed an issue where this attack could not be performed when a projectile was on the screen.
Super Art Level 1 Messatsu Gohado<br>(↓↘→↓↘→ + Punch)<br>Super Art Level 1 Tenma Gozanku<br>(During a neutral of forward jump, ↓↘→↓↘→ + Kick)
修复问题 Updated so that when the attack is absorbed by a Perfect Parry, the amount of Drive gauge obtained is the same as other Super Arts (20000).
M. Bison
Drive Impact
修复问题 Fixed an issue where the armor hitbox on the back and other parts of the body were processed differently, resulting in the armor being able to absorb more than 3 attacks.
Overdrive Quick Burn/Overdrive Burning Knuckle
调整 Changed the attack performed from Overdrive Burn Knuckle to Overdrive Quick Burn when inputting ↓↙←+Light+Heavy.
Super Art Level 3/Critical Art Rising Fang<br>(↓↘→↓↘→ + Punch)
修复问题 1) Fixed an issue where the amount of Drive gained when absorbing the attack via Drive Parry would be smaller compared to other Super Arts.
2) Updated so that when the attack is absorbed by a Perfect Parry, the amount of Drive gauge obtained is the same as other Super Arts (20000).
2) Updated so that when the attack is absorbed by a Perfect Parry, the amount of Drive gauge obtained is the same as other Super Arts (20000).
Round Arch<br>(← + Heavy Kick)
修复问题 Fixed an issue where after performing Drive Rush > Round Arch, remaining in neutral position would result in Elena moving forward.
Critical Art Song of the Grasslands<br>(↓↙←↓↙← + Kick)
修复问题 Fixed an issue where the attack data damage values would be increased by 1000 when the Critical Art KO'd the opponent.
Overall Concept
Our focus for this end of the content year update was various character tunings in addition to alterations to the general strategy of the game through a number of battle system changes. A list of changes and our explanations behind them can be found below. We hope these explanations will help explain our thought process, especially for adjustments where the intention is less obvious than others.
Perfect Parry
A screen freeze will no longer occur when successfully performing a Perfect Parry unless the correct direction is held. Down-back must be held for low attacks, and back must be held for high and overhead attacks to successfully produce a screen freeze.
This change is intended to improve the feeling of being on the receiving end of a Perfect Parry, and is in response to a number of situations. One, because Perfect Parry required no additional input, it was too easy of a choice to simply parry the moment the player sees their opponent move. Another was the Drive Parry before Drive Rush occasionally causing a Perfect Parry by chance when hit by an opponent's spacing attack. These kind of "incidental Perfect Parry" situations were found to result in frustration for players when a Perfect Parry turned the tide of a match.
While we had attempted to balance the risk and reward of Perfect Parry through gauge use/gain and increasing recovery of Drive Parry, reward was still too high on success, and the risk too low on failure.
By requiring an additional input alongside the already present timing requirement, we hope to reduce these incidental Parries.
Perfect Parry against projectiles, which produces no time freeze, have been kept as they were in order to prevent projectiles from becoming overly oppressive.
Adjustments Resulting from Perfect Parry Changes
Because the Perfect Parry alterations have made highs and lows more important, many characters have received changes to their lows to ensure they are not overly powerful.
This change also means that it will be more difficult to perform Perfect Parry against an attack out of Drive Rush, a common choice to begin an offensive push. Taking this into consideration, crouching medium kicks that cannot be canceled into other moves have been given scaling in order to ease their strength when used from Drive Rush, as they could lead to combos and were safe on block.
In anticipation of long-reaching lows becoming a powerful way to begin offense, characters that are able to cancel their crouching medium kicks will no longer be able to evade an opponent's throw after having their Drive Rush > Light Attack blocked from crouching medium kick. This will require the opponent to throw as soon as they are able.
Attack sequences using crouching light kick from close ranges have also received changes. Because Perfect Parry was universal for strikes, it was common to have crouching light kicks Perfect Parried when trying to check an opponent's wakeup. This combined with the fact that most light punches resulted in more advantage, crouching light kicks were considered a low priority move. With the changes in Perfect Parry, these attacks should see much more use. We have also made it more likely for consecutive light attacks to reach with alterations to advantage and pushback on block to light moves.
As discussed below we've added Assisted Combos that incorporate a crouching light attack as the 2nd attack in the string, so you can attack in a similar fashion as when using Classic controls
Throw Escapes
The player who escapes a throw will now receive more Drive Gauge and Super Art gauge than before.
A classic defensive strategy was to perform a delayed throw escape after blocking for an instant. This was a strong option against both strikes and throws, but it proved difficult to turn the fight around into your favor as the attacker could simply wait and attack a whiffed throw attempt, making it a high-risk but low-return defensive option.
As a defensive measure against throws, players could also back dash or jump to get better rewards, which meant that throw escapes was not an option that was chosen often.
In order to provide players with another valuable close-range option when on the defensive, we decided to give more resources upon a successful throw escape. This will be a huge boon for a player especially just before hitting Burnout, and can become a valid option to get out of a tight situation.
Sweeps
Along with reducing the hurtbox on the 1st active frame, we made adjustments so that on a normal or counter hit, players can still perform a recovery.
By greatly reducing the hurtbox immediately after the attack start-up, although there's some risk if the attack was blocked or missed, it's now an attack that can win out against other pokes more often. Remember this option when you don't have much health left or are in a pinch.
On the other hand, the move can now be recovered from after a normal or counterhit, so your offensive situation after hit is much different. Each character will have a different wake-up gameplay now so study up.
Due to this change, the strategy of knocking down an opponent and switching sides before they get up is now gone, except if the attack lands as a Punish Counter.
Note that attacks that slide along the ground are not subject to this change.
Modern Controls have received two major updates.
1. Jumping Attacks
By pressing the Assist button with an attack button, you can now use different jumping attacks while in the air. As a general rule, good air-to-ground attacks require pressing the Assist button, while attacks suited for air-to-air situations are now the normal jumping attacks.
2. Unique Assisted Combos can now be performed starting from a rapid cancel light attack.
Due to the properties of Assisted Combos when using Modern controls, it wasn't possible to look for a combo after a second light attack with the exception of some characters. However, considering the changes made to Perfect Parry, it's now more important to mix up the high/low levels of attacks more than ever, so by performing ↓+AUTO+Light from a rapid cancel light attack, you can now perform a unique Assisted Combo that begins with a light attack.
This unique Assisted Combo is the exact same as every character's Assisted Combo 1, but when rapid canceled it will continue until the end regardless if the attack hits or is blocked.
Perfect Parry
A screen freeze will no longer occur when successfully performing a Perfect Parry unless the correct direction is held. Down-back must be held for low attacks, and back must be held for high and overhead attacks to successfully produce a screen freeze.
This change is intended to improve the feeling of being on the receiving end of a Perfect Parry, and is in response to a number of situations. One, because Perfect Parry required no additional input, it was too easy of a choice to simply parry the moment the player sees their opponent move. Another was the Drive Parry before Drive Rush occasionally causing a Perfect Parry by chance when hit by an opponent's spacing attack. These kind of "incidental Perfect Parry" situations were found to result in frustration for players when a Perfect Parry turned the tide of a match.
While we had attempted to balance the risk and reward of Perfect Parry through gauge use/gain and increasing recovery of Drive Parry, reward was still too high on success, and the risk too low on failure.
By requiring an additional input alongside the already present timing requirement, we hope to reduce these incidental Parries.
Perfect Parry against projectiles, which produces no time freeze, have been kept as they were in order to prevent projectiles from becoming overly oppressive.
Adjustments Resulting from Perfect Parry Changes
Because the Perfect Parry alterations have made highs and lows more important, many characters have received changes to their lows to ensure they are not overly powerful.
This change also means that it will be more difficult to perform Perfect Parry against an attack out of Drive Rush, a common choice to begin an offensive push. Taking this into consideration, crouching medium kicks that cannot be canceled into other moves have been given scaling in order to ease their strength when used from Drive Rush, as they could lead to combos and were safe on block.
In anticipation of long-reaching lows becoming a powerful way to begin offense, characters that are able to cancel their crouching medium kicks will no longer be able to evade an opponent's throw after having their Drive Rush > Light Attack blocked from crouching medium kick. This will require the opponent to throw as soon as they are able.
Attack sequences using crouching light kick from close ranges have also received changes. Because Perfect Parry was universal for strikes, it was common to have crouching light kicks Perfect Parried when trying to check an opponent's wakeup. This combined with the fact that most light punches resulted in more advantage, crouching light kicks were considered a low priority move. With the changes in Perfect Parry, these attacks should see much more use. We have also made it more likely for consecutive light attacks to reach with alterations to advantage and pushback on block to light moves.
As discussed below we've added Assisted Combos that incorporate a crouching light attack as the 2nd attack in the string, so you can attack in a similar fashion as when using Classic controls
Throw Escapes
The player who escapes a throw will now receive more Drive Gauge and Super Art gauge than before.
A classic defensive strategy was to perform a delayed throw escape after blocking for an instant. This was a strong option against both strikes and throws, but it proved difficult to turn the fight around into your favor as the attacker could simply wait and attack a whiffed throw attempt, making it a high-risk but low-return defensive option.
As a defensive measure against throws, players could also back dash or jump to get better rewards, which meant that throw escapes was not an option that was chosen often.
In order to provide players with another valuable close-range option when on the defensive, we decided to give more resources upon a successful throw escape. This will be a huge boon for a player especially just before hitting Burnout, and can become a valid option to get out of a tight situation.
Sweeps
Along with reducing the hurtbox on the 1st active frame, we made adjustments so that on a normal or counter hit, players can still perform a recovery.
By greatly reducing the hurtbox immediately after the attack start-up, although there's some risk if the attack was blocked or missed, it's now an attack that can win out against other pokes more often. Remember this option when you don't have much health left or are in a pinch.
On the other hand, the move can now be recovered from after a normal or counterhit, so your offensive situation after hit is much different. Each character will have a different wake-up gameplay now so study up.
Due to this change, the strategy of knocking down an opponent and switching sides before they get up is now gone, except if the attack lands as a Punish Counter.
Note that attacks that slide along the ground are not subject to this change.
Modern Controls have received two major updates.
1. Jumping Attacks
By pressing the Assist button with an attack button, you can now use different jumping attacks while in the air. As a general rule, good air-to-ground attacks require pressing the Assist button, while attacks suited for air-to-air situations are now the normal jumping attacks.
2. Unique Assisted Combos can now be performed starting from a rapid cancel light attack.
Due to the properties of Assisted Combos when using Modern controls, it wasn't possible to look for a combo after a second light attack with the exception of some characters. However, considering the changes made to Perfect Parry, it's now more important to mix up the high/low levels of attacks more than ever, so by performing ↓+AUTO+Light from a rapid cancel light attack, you can now perform a unique Assisted Combo that begins with a light attack.
This unique Assisted Combo is the exact same as every character's Assisted Combo 1, but when rapid canceled it will continue until the end regardless if the attack hits or is blocked.
luke
With Luke we revamped some of the details of his combos involving the hold version of medium Flash Knuckle, and tweaked some of his Overdrive attacks that weren't seeing much action. In addition, we made small adjustments like tweaking his Snapback Combo and his combo damage in the corner so he feels better to play.
Medium Flash Knuckle (hold) (↓↙←+hold Medium Punch)
The perfect version of medium Flash Knuckle comes out fast and can combo from crouching Heavy Punch for big damage, but by removing the combo scaling from the perfect version gives it a more pronounced difference, so we tweaked the attack so even if you miss the perfect version, if your execution is good, the combo will still connect. To go along with this adjustment, we removed the tweak where the hold version's recovery would be shorter if it collided with a Drive Impact.
Snapback Combo (Medium Punch > Medium Punch > Medium Punch > Medium Punch)
On hit Luke will gain much more Drive gauge than before, and knockdown time has increased, allowing you to do a forward dash into standing Heavy Kick for a meaty set up, providing Luke with some advantageous wakeup options.
Light Rising Uppercut (→↓↘+Light Punch)
We've greatly increased the
Medium Flash Knuckle (hold) (↓↙←+hold Medium Punch)
The perfect version of medium Flash Knuckle comes out fast and can combo from crouching Heavy Punch for big damage, but by removing the combo scaling from the perfect version gives it a more pronounced difference, so we tweaked the attack so even if you miss the perfect version, if your execution is good, the combo will still connect. To go along with this adjustment, we removed the tweak where the hold version's recovery would be shorter if it collided with a Drive Impact.
Snapback Combo (Medium Punch > Medium Punch > Medium Punch > Medium Punch)
On hit Luke will gain much more Drive gauge than before, and knockdown time has increased, allowing you to do a forward dash into standing Heavy Kick for a meaty set up, providing Luke with some advantageous wakeup options.
Light Rising Uppercut (→↓↘+Light Punch)
We've greatly increased the
combo count
upper value so it can be used in juggle combos more often. You'll find that there are more chances to do this especially in the corner, which helps to alleviate some frustration with Luke as his combo power drops once he backs opponents into the corner.jamie
With Jamie we looked at adjusting his standing medium kick, which was great at controlling the neutral from mid to long range, by increasing its risk when it misses. In addition, we increased the variety of techniques he can use in a combo at close range, improving his return when he goes on the offensive.
Standing Medium Kick
We adjusted him so that the hurtbox when he misses remains for a while, so its ability to zone out characters has weakened, but we made the startup faster so it can combo from a crouching light punch or crouching medium punch on Punish Counter, making it another option when going on a counter attack.
Freeflow Strike (Normal/Overdrive)
The final attack can be canceled into a Super Art, giving it more utility in combos, and with the Overdrive version you can cancel it into Super Art level 2, making it a strong offensive option even when the attack is blocked.
The adjustment made to the movement distance to the non-Level 4 light and medium versions was done to alleviate issues where the attacks after the first attack landed would miss.
Standing Medium Kick
We adjusted him so that the hurtbox when he misses remains for a while, so its ability to zone out characters has weakened, but we made the startup faster so it can combo from a crouching light punch or crouching medium punch on Punish Counter, making it another option when going on a counter attack.
Freeflow Strike (Normal/Overdrive)
The final attack can be canceled into a Super Art, giving it more utility in combos, and with the Overdrive version you can cancel it into Super Art level 2, making it a strong offensive option even when the attack is blocked.
The adjustment made to the movement distance to the non-Level 4 light and medium versions was done to alleviate issues where the attacks after the first attack landed would miss.
manon
Manon has a unique ability to pull opponents towards her with her two target combos, and we made changes to their hit effects when the first attack lands as a Punish Counter. We wanted to offset Manon's slow movement speed by improving her ability to move around and take the initiative after those attacks.
On the other hand, we've increased the risk of standing medium punch when it misses and tweaked the disadvantage of the attack on block, making it less likely that Manon can string together consecutive standing medium punches on an opponent in Burnout.
À Terre (Medium Punch > Medium Kick) now produces a knockdown, allowing Manon to start her wakeup games on hit. Temps Lié (Standing Heavy Punch > Standing Heavy Punch) now launches the opponent while pulling them in, so you can directly go into a combo from Overdrive Rond-point (↓↘→+KK) and other attacks.
Other adjustments include removing the knockdown effect on the light version of Rond-point, giving more diversity between the various strengths of the move. Now after the light version hits, Manon can continue with her offensive in ways she couldn't previously.
On the other hand, we've increased the risk of standing medium punch when it misses and tweaked the disadvantage of the attack on block, making it less likely that Manon can string together consecutive standing medium punches on an opponent in Burnout.
À Terre (Medium Punch > Medium Kick) now produces a knockdown, allowing Manon to start her wakeup games on hit. Temps Lié (Standing Heavy Punch > Standing Heavy Punch) now launches the opponent while pulling them in, so you can directly go into a combo from Overdrive Rond-point (↓↘→+KK) and other attacks.
Other adjustments include removing the knockdown effect on the light version of Rond-point, giving more diversity between the various strengths of the move. Now after the light version hits, Manon can continue with her offensive in ways she couldn't previously.
kimberly
We've given Kimberly's Shuriken Bomb Spread different abilities on each strength level, which will increase the number of variations at her disposal. Other changes are primarily ones based on the common adjustments.
Shuriken Bomb Spread (light/medium/heavy) (↓↓+PP)
By pressing Light+Medium or Medium+Heavy you can change the detonation timing between the shuriken bombs, giving Kimberly new combo possibilities. This will allow Kimberly to break down the opponent with strikes and throws, so smart placement will give Kimberly a big advantage.
Bushin Prism Strikes (Light Punch > Medium Punch > Heavy Punch > Heavy Kick)
We felt that Bushin Prism Strikes was a little overshadowed compared to Kimberly's other target combos, so we changed the opponent's hit reaction to give Kimberly a better advantage. This is especially true when in the corner, as you can place your Shuriken Bombs and continue with the advantage. Now Kimberly will be able to keep her unique situations even when she starts her offense with light attacks.
Shuriken Bomb Spread (light/medium/heavy) (↓↓+PP)
By pressing Light+Medium or Medium+Heavy you can change the detonation timing between the shuriken bombs, giving Kimberly new combo possibilities. This will allow Kimberly to break down the opponent with strikes and throws, so smart placement will give Kimberly a big advantage.
Bushin Prism Strikes (Light Punch > Medium Punch > Heavy Punch > Heavy Kick)
We felt that Bushin Prism Strikes was a little overshadowed compared to Kimberly's other target combos, so we changed the opponent's hit reaction to give Kimberly a better advantage. This is especially true when in the corner, as you can place your Shuriken Bombs and continue with the advantage. Now Kimberly will be able to keep her unique situations even when she starts her offense with light attacks.
marisa
The appeal of Marisa was clobbering people with heavy strikes for massive damage, but her combo starters had big openings, and combined with her slow walk speed compared to other characters, she had a hard time engaging in the neutral.
Marisa will now be able to get damage a little bit easier than before via different approaches thanks to the changes made to her low attacks in conjunction with the Perfect Parry Changes, and updates that make her combos and counter attacks hit their mark better from normal moves.
Additionally, Super Art Level 1 Javelin of Marisa will active on a throw, and the attack range for the first hit of Super Art Level 2 Meteorite has been expanded. This will now give Marisa more opportunities to use her Super Art gauge when on the defensive.
Marisa will now be able to get damage a little bit easier than before via different approaches thanks to the changes made to her low attacks in conjunction with the Perfect Parry Changes, and updates that make her combos and counter attacks hit their mark better from normal moves.
Additionally, Super Art Level 1 Javelin of Marisa will active on a throw, and the attack range for the first hit of Super Art Level 2 Meteorite has been expanded. This will now give Marisa more opportunities to use her Super Art gauge when on the defensive.
lily
Lily's anti-air attacks such as Horn Breaker (←+Heavy Punch) and crouching heavy punch, and other attacks saw their proficiencies downward, but techniques that move her forward, such as her forward dash and Desert Storm (→+Heavy Punch) got adjusted to be stronger.
In addition, medium Tomahawk Buster (→↓↘+Medium Punch) is now easier to incorporate into combos, which is a big change for her. Lily has good comboability from her light attacks, so now when she doesn't have Windclad stocked, you can use it to cover situations where previously only Overdrive Condor Spire (↓↘→+KK) was an option. There were also situations where standing and crouching light punch would not hit with the attack tip despite their long range, but we believe Lily will be able to maintain her Drive gauge while fighting in these situations.
Super Art 2 had a longer and further period of invulnerability compared to other Super Arts, so it's been adjusted. The start-up for the standing version is now changed to a standing hitbox, which is a changed made so that it doesn't lose out to anti-air special moves after the screen transition.
In addition, medium Tomahawk Buster (→↓↘+Medium Punch) is now easier to incorporate into combos, which is a big change for her. Lily has good comboability from her light attacks, so now when she doesn't have Windclad stocked, you can use it to cover situations where previously only Overdrive Condor Spire (↓↘→+KK) was an option. There were also situations where standing and crouching light punch would not hit with the attack tip despite their long range, but we believe Lily will be able to maintain her Drive gauge while fighting in these situations.
Super Art 2 had a longer and further period of invulnerability compared to other Super Arts, so it's been adjusted. The start-up for the standing version is now changed to a standing hitbox, which is a changed made so that it doesn't lose out to anti-air special moves after the screen transition.
jp
Other than damage adjustments for specific special moves, there are no big changes for JP. Initial scaling was added to his combo starters, medium and heavy Torbalan (↓↘→+Medium Kick or Heavy Kick) and crouching medium kick. Increasing the damage on his Overdrive Stribog (↓↘→+PP) when it hits with the tip of the attack rounds out his main adjustments.
juri
We looked to adjust Juri's ability to lock down opponents with some attacks, as well as the easiness and risk for opponents to punish her.
Jumping Heavy Punch
The hurtbox is expanded to make it easier to trade with anti-air attacks, and the advantage on block was adjusted so that it's now +1 instead of +5 when blocked by opponents of average height. Now Juri players will have to exercise more caution after forcing an opponent to block this attack if they aim for their head.
Korenzan (←+Heavy Kick)
Adjustments were made so that this attack can better snipe attacks going for your feet in the neutral, and with the change in frames on hit, you can now combo into Ansatsuken (↓↘→+Medium Kick) or Heavy Fuhajin (↓↙←+Heavy Kick)
Crouching Light Punch
We adjusted the attack hitbox for this technique upward as the attack level was low and interfering with some of the armor hitboxes of some characters.
Jumping Heavy Punch
The hurtbox is expanded to make it easier to trade with anti-air attacks, and the advantage on block was adjusted so that it's now +1 instead of +5 when blocked by opponents of average height. Now Juri players will have to exercise more caution after forcing an opponent to block this attack if they aim for their head.
Korenzan (←+Heavy Kick)
Adjustments were made so that this attack can better snipe attacks going for your feet in the neutral, and with the change in frames on hit, you can now combo into Ansatsuken (↓↘→+Medium Kick) or Heavy Fuhajin (↓↙←+Heavy Kick)
Crouching Light Punch
We adjusted the attack hitbox for this technique upward as the attack level was low and interfering with some of the armor hitboxes of some characters.
deejay
Dee Jay's adjustments are primarily focused on tuning Heavy Jackknife Maximum and Overdrive Jus Cool. His neutral game won't see much change, but we adjusted him so his comboability and anti-air proficiency is a little better.
Heavy Jackknife Maximum (Charge ↓,↑+Heavy Kick)
The startup for heavy Jackknife Maximum is faster, making it easier to use as an anti-air. Because of the faster start up time, it can also combo from an upclose Overdrive Air Slasher (Charge ←, →+PP), giving him some new combo routes.
Overdrive Jus Cool (↓↙←+KK)
The opponent's recovery on block is increased, meaning that with fastest timing transitioning into Overdrive Funky Slicer (Light Kick after Overdrive Jus Cool) is a natural combo string. We also adjusted his Overdrive Waning Moon (Medium Kick after Overdrive Jus Cool) as it had limited use. It now chips away at the opponent's Drive Gauge better so it can be used in those situations when up close.
Heavy Jackknife Maximum (Charge ↓,↑+Heavy Kick)
The startup for heavy Jackknife Maximum is faster, making it easier to use as an anti-air. Because of the faster start up time, it can also combo from an upclose Overdrive Air Slasher (Charge ←, →+PP), giving him some new combo routes.
Overdrive Jus Cool (↓↙←+KK)
The opponent's recovery on block is increased, meaning that with fastest timing transitioning into Overdrive Funky Slicer (Light Kick after Overdrive Jus Cool) is a natural combo string. We also adjusted his Overdrive Waning Moon (Medium Kick after Overdrive Jus Cool) as it had limited use. It now chips away at the opponent's Drive Gauge better so it can be used in those situations when up close.
cammy
Cammy's adjustments focus on adding more combo options and adjusting her situation after an attack hits.
Swing Combination (Heavy Punch > Heavy Kick)
Considering how easy it is to hit with this attack and it's ability to carry opponents into the corner, we adjusted this move so that after the final attack and hitting with a medium Spiral Arrow, the situation after Hooligan Combination is slightly worse.
Heavy Cannon Spike (→↓↘+Heavy Kick)
The attack hitbox on the tip of the attack was higher than other characters, allowing it to win out against standing and crouching medium punch, so we've adjusted the attack hitbox so that it's at an average height compared to other attacks.
Swing Combination (Heavy Punch > Heavy Kick)
Considering how easy it is to hit with this attack and it's ability to carry opponents into the corner, we adjusted this move so that after the final attack and hitting with a medium Spiral Arrow, the situation after Hooligan Combination is slightly worse.
Heavy Cannon Spike (→↓↘+Heavy Kick)
The attack hitbox on the tip of the attack was higher than other characters, allowing it to win out against standing and crouching medium punch, so we've adjusted the attack hitbox so that it's at an average height compared to other attacks.
ryu
Ryu's adjustment are aimed at tweaking his situation after a special move connects and improving the abilities of his attacks after using Denjin Charge.
By improving Ryu's situation after hitting with Heavy Shoryuken or Super Art level 3, we're looking to achieve a balance between Ryu's traditional high damage and continuing his offense, which we hope will increase the expected amount of damage he can dish out in a single interaction.
While Ryu can continue on the offense after a big hit, Denjin Charge requires him to temporarily stop his offensive, so we looked to improve his boosted attacks in general to make it worth charging. This is especially true for Super Art level 1 and level 2, which will give him situations and combo damage previously unattainable. Ryu players will now see better rewards when using these techniques as they require two separate resources (Super Art and Denjin stock)
By improving Ryu's situation after hitting with Heavy Shoryuken or Super Art level 3, we're looking to achieve a balance between Ryu's traditional high damage and continuing his offense, which we hope will increase the expected amount of damage he can dish out in a single interaction.
While Ryu can continue on the offense after a big hit, Denjin Charge requires him to temporarily stop his offensive, so we looked to improve his boosted attacks in general to make it worth charging. This is especially true for Super Art level 1 and level 2, which will give him situations and combo damage previously unattainable. Ryu players will now see better rewards when using these techniques as they require two separate resources (Super Art and Denjin stock)
honda
Honda has received a number of expansions to his combo pieces in addition to the character-wide moves explained in the general balance overview.
Overdrive Taiho Cannon Lift (↓↘→+KK>↓+P)
By altering where the opponent lands after being launched by Overdrive Taiho Cannon Lift and reducing its
Normal Sumo Headbutt (Charge ←, →+P)
Perfect Parry was an effective countermeasure against the safe on block Sumo Headbutt, but now that Honda's opponents will have to also worry about inputting the correct direction while closing the distance, we've decided this would be too effective at keeping his opponents away. We've reduced the amount of Drive Gauge damage Sumo Headbutt deals in order to make sure opponents who are unable to parry in time aren't overly punished for blocking.
Overdrive Taiho Cannon Lift (↓↘→+KK>↓+P)
By altering where the opponent lands after being launched by Overdrive Taiho Cannon Lift and reducing its
combo count
, it should now significantly differ from its normal version. It will now link after hitting with the second hit of Standing Heavy Kick or after Power Stomp, even while in the center of the screen. Hondo will now also be able to use a follow-up attack after it, unlike with the normal version.Normal Sumo Headbutt (Charge ←, →+P)
Perfect Parry was an effective countermeasure against the safe on block Sumo Headbutt, but now that Honda's opponents will have to also worry about inputting the correct direction while closing the distance, we've decided this would be too effective at keeping his opponents away. We've reduced the amount of Drive Gauge damage Sumo Headbutt deals in order to make sure opponents who are unable to parry in time aren't overly punished for blocking.
blanka
Blanka's most significant change is his ability to combo into his Overdrive Wild Hunt. Look for opportunities to successfully connect with a Punish Counter Standing Heavy Punch or after hitting an opponent with a normal out of Drive Rush after they've been launched high in the air. Make use of the large advantage it gives on hit alongside the opponent's inability to back roll on Hard Knockdown to inflict heavy pressure, especially when paired with a Blanka-chan doll.
guile
Guile's projectiles are now a bit easier to use, and a number of his combo pieces have been extended. While these changes boost his combo damage and projectile-based gameplan, Knee Bazooka can no longer jump over the enemy, making it much more difficult for him to swap sides with his opponent when hitting with a strike. This means he will have to be careful to not give up much ground, lest he find himself stuck in the corner.
Sonic Boom and Other Projectiles
Guile's projectiles will now disappear faster when they are judged to have left the screen, allowing him to shoot projectiles faster in situations like when his Sonic Boom misses after being jumped over. With total on-screen projectile time getting a boost, this will improve Guile's pressure game.
Super Art Level 1 Sonic Hurricane (Horizontal)
While Sonic Hurricane has always had a hitbox that only appears during a combo, this hitbox would not hit opponent's that had been blown back by projectiles. This has been changed, making it much easier for Guile to combo into his Sonic Hurricane on an opponent who has been wall splatted by Overdrive Sonic Cross.
Sonic Boom and Other Projectiles
Guile's projectiles will now disappear faster when they are judged to have left the screen, allowing him to shoot projectiles faster in situations like when his Sonic Boom misses after being jumped over. With total on-screen projectile time getting a boost, this will improve Guile's pressure game.
Super Art Level 1 Sonic Hurricane (Horizontal)
While Sonic Hurricane has always had a hitbox that only appears during a combo, this hitbox would not hit opponent's that had been blown back by projectiles. This has been changed, making it much easier for Guile to combo into his Sonic Hurricane on an opponent who has been wall splatted by Overdrive Sonic Cross.
ken
Ken had two major focuses for his changes: offensive and defensive properties of his Jinrai Kick, and his positioning after performing a forward throw in the corner.
Ken's various offensive options forced his opponent's to make difficult split-second decisions where making one wrong move often meant not only getting put in the corner, but also led to Ken's easily looped corner pressure. With the changes to Perfect Parry, Ken should find his commonly used normals parried less, giving his Jinrai Kick a boost in power. As such, we've reduced it and its follow-ups in power slightly.
We've preserved Ken's advantageous situations when hitting with his strikes, as well as his corner carry, but have touched up his Jinrai Kick, Kazekama Shin Kick, and his positioning after a forward throw in the corner to give his opponent's more choices to fight against his onslaught, as a few character's in particular were very limited in their options.
Light/Medium Jinrai Kick (↓↘→+Light Kick or Medium Kick), Kazekama Shin Kick (→+Light Kick During Jinrai Kick)
Medium Jinrai Kick is now more likely to be punished by a fast normal attack on block. Additionally, Kazekama Shin Kick, often used to punish those who attack while at a frame disadvantage, will now result in Ken being knocked down when he is counter hit during it. These changing make using Jinrai Kick and its follow-ups a bit more risky, as well as reducing the reward for successfully hitting with them. Finally, both Jinrai Kick and Kazekama Shin Kick will deal slightly less damage to the Drive Gauge, easing some of the pressure from blocking them.
Ken's various offensive options forced his opponent's to make difficult split-second decisions where making one wrong move often meant not only getting put in the corner, but also led to Ken's easily looped corner pressure. With the changes to Perfect Parry, Ken should find his commonly used normals parried less, giving his Jinrai Kick a boost in power. As such, we've reduced it and its follow-ups in power slightly.
We've preserved Ken's advantageous situations when hitting with his strikes, as well as his corner carry, but have touched up his Jinrai Kick, Kazekama Shin Kick, and his positioning after a forward throw in the corner to give his opponent's more choices to fight against his onslaught, as a few character's in particular were very limited in their options.
Light/Medium Jinrai Kick (↓↘→+Light Kick or Medium Kick), Kazekama Shin Kick (→+Light Kick During Jinrai Kick)
Medium Jinrai Kick is now more likely to be punished by a fast normal attack on block. Additionally, Kazekama Shin Kick, often used to punish those who attack while at a frame disadvantage, will now result in Ken being knocked down when he is counter hit during it. These changing make using Jinrai Kick and its follow-ups a bit more risky, as well as reducing the reward for successfully hitting with them. Finally, both Jinrai Kick and Kazekama Shin Kick will deal slightly less damage to the Drive Gauge, easing some of the pressure from blocking them.
chunli
Chun-Li's main areas of focus were helping her ability to fight on the ground with changes to her Crouching Heavy Kick and Hundred Lighting Kicks, as well as increasing the effectiveness of Tensho Kicks' ability to anti-air.
Crouching Heavy Kick
With range around the same as her Crouching Medium Kick, Chun-Li's Crouching Heavy Kick was a move with limited effective use. Its range has been increased, making it more useful as both a counter-attack and a whiff punish. While it is more unsafe on block now, it should be a better tool in Chun-Li's already powerful ground game.
Normal/Overdrive Hundred Lightning Kicks
We've given each strength of Hundred Lighting Kicks their own strengths, making them both easier to use, and giving them clear uses. In particular, Light Hundred Lightning Kicks' startup has been changed to 5 frames, helping Chun-Li counter-attack against certain moves and links where she before lacked an effective choice. The Overdrive version's increase in damage makes it more valuable as both a combo piece and as a Punish Counter, giving it a wider range of uses than it was seeing previously.
Normal/Overdrive Tensho Kicks
By altering Tensho Kick's active frames and hitbox, we've reduced the number of situations where Chun-Li will whiff while using it in a combo or as an anti-air.
Crouching Heavy Kick
With range around the same as her Crouching Medium Kick, Chun-Li's Crouching Heavy Kick was a move with limited effective use. Its range has been increased, making it more useful as both a counter-attack and a whiff punish. While it is more unsafe on block now, it should be a better tool in Chun-Li's already powerful ground game.
Normal/Overdrive Hundred Lightning Kicks
We've given each strength of Hundred Lighting Kicks their own strengths, making them both easier to use, and giving them clear uses. In particular, Light Hundred Lightning Kicks' startup has been changed to 5 frames, helping Chun-Li counter-attack against certain moves and links where she before lacked an effective choice. The Overdrive version's increase in damage makes it more valuable as both a combo piece and as a Punish Counter, giving it a wider range of uses than it was seeing previously.
Normal/Overdrive Tensho Kicks
By altering Tensho Kick's active frames and hitbox, we've reduced the number of situations where Chun-Li will whiff while using it in a combo or as an anti-air.
zangief
Zangief has had the base hurtbox around his torso expanded, both weakening his throws and reducing his effectiveness in neutral. With opponent attacks now easier to hit, hits results in an what is effectively a reduction in the range of his own moves, forcing him to work harder in neutral than he had to before.
Normal/Overdrive Double Lariat - Overdrive Screw Piledriver
As a result of the hurtbox expansion, Zangief now finds himself at more of a distance from his opponent even when close, in order to ensure his combos and links still function as they did, Double Lariat's hitbox has been expanded, while OD Screw Piledriver's range has been increased to preserve Zangief's identity as a grappler.
06/06/2025
Normal and Overdrive Double Lariat / Overdrive Screw Piledriver
With the expansion of Zangief's pushbox, there will now be more distance between him and the opponent when touching.
This will have an impact on close range attack sequences, but as a means of maintaining certain established staple combos and attack sequences, Double Lariat's hitbox has been expanded for when it is used in a combo.
In addition, and to further accentuate Zangief's characteristics, we have also expanded the throw hitbox for Overdrive Screw Piledriver.
Drive Impact
Zangief's Drive Impact range was already shorter compared to other characters, so in order for the reach to not be too short alongside his hurtbox changes, he will now move further forward during a Drive Impact.
Normal/Overdrive Double Lariat - Overdrive Screw Piledriver
As a result of the hurtbox expansion, Zangief now finds himself at more of a distance from his opponent even when close, in order to ensure his combos and links still function as they did, Double Lariat's hitbox has been expanded, while OD Screw Piledriver's range has been increased to preserve Zangief's identity as a grappler.
06/06/2025
Normal and Overdrive Double Lariat / Overdrive Screw Piledriver
With the expansion of Zangief's pushbox, there will now be more distance between him and the opponent when touching.
This will have an impact on close range attack sequences, but as a means of maintaining certain established staple combos and attack sequences, Double Lariat's hitbox has been expanded for when it is used in a combo.
In addition, and to further accentuate Zangief's characteristics, we have also expanded the throw hitbox for Overdrive Screw Piledriver.
Drive Impact
Zangief's Drive Impact range was already shorter compared to other characters, so in order for the reach to not be too short alongside his hurtbox changes, he will now move further forward during a Drive Impact.
dhalsim
Our main focus with Dhalsim was taking a look at the properties of his Yoga Blast and touching up how he fights at medium distance.
Normal/Overdrive Yoga Blast (→↘↓↙←+K or KK)
In order to boost its anti-air properties, Yoga Blast's hurtbox has been reduced from the time its hitbox first appears, making it less likely for the attack to get canceled out by attacks coming from a sharp angle above. Additionally, the Overdrive version has been given air invincibility from when the hitbox appears except for around the feet, giving it a much higher return when successful, as well as making it easier to use.
Because of its slow startup, the Heavy version of Yoga Blast was unable to use this change effectively. As such, Heavy Yoga Blast's forward movement, hitbox, and the opponent's reaction on hit have been changed, allowing it to be used as a powerful combo piece from medium attacks and above.
Grounded/Airborne Yoga Float (↓+KK)
Dhalsim will now be able to act faster after using Yoga Float while on the ground, making it easier to cancel into and otherwise. The speed at which Dhalsim moves during Yoga Float has been increased. While not a drastic change, it allows him to better fine to his distance to the opponent.
Jumping Heavy Punch
Due to its small hurtbox, Dhalsim's Jumping Heacy Punch would often clash with anti-air moves like Shoryuken, resulting in both attacks missing, and Dhalsim attacking his recovering opponent after he landed from the air. We've expanded the size of this hurtbox in all directions from when the hitbox appears to prevent this from happening.
Normal/Overdrive Yoga Blast (→↘↓↙←+K or KK)
In order to boost its anti-air properties, Yoga Blast's hurtbox has been reduced from the time its hitbox first appears, making it less likely for the attack to get canceled out by attacks coming from a sharp angle above. Additionally, the Overdrive version has been given air invincibility from when the hitbox appears except for around the feet, giving it a much higher return when successful, as well as making it easier to use.
Because of its slow startup, the Heavy version of Yoga Blast was unable to use this change effectively. As such, Heavy Yoga Blast's forward movement, hitbox, and the opponent's reaction on hit have been changed, allowing it to be used as a powerful combo piece from medium attacks and above.
Grounded/Airborne Yoga Float (↓+KK)
Dhalsim will now be able to act faster after using Yoga Float while on the ground, making it easier to cancel into and otherwise. The speed at which Dhalsim moves during Yoga Float has been increased. While not a drastic change, it allows him to better fine to his distance to the opponent.
Jumping Heavy Punch
Due to its small hurtbox, Dhalsim's Jumping Heacy Punch would often clash with anti-air moves like Shoryuken, resulting in both attacks missing, and Dhalsim attacking his recovering opponent after he landed from the air. We've expanded the size of this hurtbox in all directions from when the hitbox appears to prevent this from happening.
rashid
Rashid's impressive agility and special moves allowed him to easily escape the corner, while easily pushing his opponent into the corner. We've weakened his easily looped offensive in the corner using his forward throw, while giving him a larger reward for hitting with strikes in neutral.
Forward Throw
Rashid will now be further away from his opponent when successfully performing a forward throw. With the ability to stay at an advantage with a number of powerful strikes while in the corner after a forward throw, it was extremely difficult for opponents to escape this pressure. In order to reduce the number of situations where this can occur, we've altered the situation Rashid find himself in after a throw.
Overdrive Whirlwind Shot (Held) (↓↘→+Hold KK)
Overdrive Whirlwind Shot now requires less time held in order to fully power up, boosting its ease of use. It can know also be lined into from Rising Kick (Medium Punch > Heavy Kick).
Overdrive Spinning Mixer (↓↘→+PP)
Due to the number of hits, Overdrive Spinning Mixer often beat Drive Impact. This has been altered so that, like other characters' Overdrive moves, this will not occur.
Note: Akuma has also received a balance change in the same vein.
Forward Throw
Rashid will now be further away from his opponent when successfully performing a forward throw. With the ability to stay at an advantage with a number of powerful strikes while in the corner after a forward throw, it was extremely difficult for opponents to escape this pressure. In order to reduce the number of situations where this can occur, we've altered the situation Rashid find himself in after a throw.
Overdrive Whirlwind Shot (Held) (↓↘→+Hold KK)
Overdrive Whirlwind Shot now requires less time held in order to fully power up, boosting its ease of use. It can know also be lined into from Rising Kick (Medium Punch > Heavy Kick).
Overdrive Spinning Mixer (↓↘→+PP)
Due to the number of hits, Overdrive Spinning Mixer often beat Drive Impact. This has been altered so that, like other characters' Overdrive moves, this will not occur.
Note: Akuma has also received a balance change in the same vein.
aki
The main focus of A.K.I.'s changes were her combos and attack sequences. While some of her most commonly used combo starters were given scaling and weakened slightly, she has also received a number of new options to use in her combos.
Standing Medium Punch
With slightly more recovery on block, A.K.I. is no longer able to cancel her Standing Medium Punch into Toxic Wreath after a delay to punish opponents who move. However, she will now have Crouching Medium Kick blocked automatically after Drive Rush canceling from a blocked Standing Medium Punch, and an opponent in Burnout will no longer be able to interrupt Standing Medium Punch into Heel Strike (↓+PP>K). Because of the boost in power this adjustment brings we've also increased the pushback of Heel Strike on block against an opponent in Burnout.
Medium Serpent Lash (↓↘→+Medium Punch)
Medium Serpent Lash is now faster on startup, and can more easily be used for both follow-up attacks and against opponents in the air. Because the hitbox appears faster now, we've also increased the amount of active frames to ensure it will still hit in combos where it was used previously.
Normal/Overdrive Cruel Fate (↓↙←+K or KK)
With its hitbox during combos expanded forward, Cruel Fate is now easier to use as a part of combos. In particular, Cruel Fate is now easier to link to from Standing Heaving Kick on Punish Counter, making it much more usable to follow up your attacks in situations like whiff punishing.
Standing Medium Punch
With slightly more recovery on block, A.K.I. is no longer able to cancel her Standing Medium Punch into Toxic Wreath after a delay to punish opponents who move. However, she will now have Crouching Medium Kick blocked automatically after Drive Rush canceling from a blocked Standing Medium Punch, and an opponent in Burnout will no longer be able to interrupt Standing Medium Punch into Heel Strike (↓+PP>K). Because of the boost in power this adjustment brings we've also increased the pushback of Heel Strike on block against an opponent in Burnout.
Medium Serpent Lash (↓↘→+Medium Punch)
Medium Serpent Lash is now faster on startup, and can more easily be used for both follow-up attacks and against opponents in the air. Because the hitbox appears faster now, we've also increased the amount of active frames to ensure it will still hit in combos where it was used previously.
Normal/Overdrive Cruel Fate (↓↙←+K or KK)
With its hitbox during combos expanded forward, Cruel Fate is now easier to use as a part of combos. In particular, Cruel Fate is now easier to link to from Standing Heaving Kick on Punish Counter, making it much more usable to follow up your attacks in situations like whiff punishing.
ed
Ed's ability to make use of his held Psycho Flicker after a forward throw in the corner was extremely powerful, especially against characters who didn't have a good way to reverse the pressure. We also took a look at his ability to start combos using his long-reaching normals, his ease of closing gaps after said combos, and routing using his Psycho Cannon Super Art. As a result, we've changed the situation he's left in after a forward throw, while giving him a new movement option from his iconic Psycho Flicker.
Forward Throw
Ed's advantage and position on a successful throw has been significantly altered, especially in the corner. Ed will no longer be able throw or hit with a held Psycho Flicker right as the opponent recovers, thus making continuing his attack after a forward throw much more risky.
Psycho Flicker (↓↘→+K)
With Psycho Flicker now cancelable into Kill Rush, the non-held version of the move can now be used as both a powerful space-controlling move that can quickly close space on counter hit, or as a new combo piece.
Additionally, after considering the high return gained on Punish Counter and the strength of the held version, we've increased the risk of using Psycho Flicker by adding a screen freeze on successful Perfect Parry.
Forward Throw
Ed's advantage and position on a successful throw has been significantly altered, especially in the corner. Ed will no longer be able throw or hit with a held Psycho Flicker right as the opponent recovers, thus making continuing his attack after a forward throw much more risky.
Psycho Flicker (↓↘→+K)
With Psycho Flicker now cancelable into Kill Rush, the non-held version of the move can now be used as both a powerful space-controlling move that can quickly close space on counter hit, or as a new combo piece.
Additionally, after considering the high return gained on Punish Counter and the strength of the held version, we've increased the risk of using Psycho Flicker by adding a screen freeze on successful Perfect Parry.
gouki
Akuma gave his opponents few options when faced up against his powerful neutral game and attack sequences. By tweaking the pushback of his moves on block and the properties of his attack sequences, we've given opponents a bit of help when faced with Akuma's numerable options.
Kikoku Combination (→+Heavy Punch), Gou Hadoken (↓↘→+P), Heavy Adamant Flame (↓↙←+Heavy Punch)
Akuma was often able to make use of these moves to avoid punishment on block, we've reduced the amount of pushback on block to ensure he's more likely to eat a counter-attack, while trying to preserve the ease of use of these attacks. Kikoku Combination will now leave Akuma closer to his opponent when blocked after using the attack from Drive Rush, making this a buff in some situations as well.
Crouching Heavy Kick
Akuma's Crouching Heavy Kick was very powerful when paired with Tatsumaki Zanku-kyaku (↓↙←+Light Kick), too often creating situations where the opponent had little choice in how to fight back. In an effort to curb this, we've reduced the amount of time the opponent is knocked down after hit while in the air.
Overdrive Demon Raid (↓↘→+KK)
The Overdrive version of Demon Raid can now be canceled into Tenma Gozanku, giving Akuma more options for combos while in the corner.
Crouching Light Kick
By increasing the speed of Akuma's Crouching Light Kick rapid cancel, we've reduced the likelihood that the attack clashes with an opponent's normal moves. Attacks that connect after rapid cancel have also been made more likely to reach the opponent.
Kikoku Combination (→+Heavy Punch), Gou Hadoken (↓↘→+P), Heavy Adamant Flame (↓↙←+Heavy Punch)
Akuma was often able to make use of these moves to avoid punishment on block, we've reduced the amount of pushback on block to ensure he's more likely to eat a counter-attack, while trying to preserve the ease of use of these attacks. Kikoku Combination will now leave Akuma closer to his opponent when blocked after using the attack from Drive Rush, making this a buff in some situations as well.
Crouching Heavy Kick
Akuma's Crouching Heavy Kick was very powerful when paired with Tatsumaki Zanku-kyaku (↓↙←+Light Kick), too often creating situations where the opponent had little choice in how to fight back. In an effort to curb this, we've reduced the amount of time the opponent is knocked down after hit while in the air.
Overdrive Demon Raid (↓↘→+KK)
The Overdrive version of Demon Raid can now be canceled into Tenma Gozanku, giving Akuma more options for combos while in the corner.
Crouching Light Kick
By increasing the speed of Akuma's Crouching Light Kick rapid cancel, we've reduced the likelihood that the attack clashes with an opponent's normal moves. Attacks that connect after rapid cancel have also been made more likely to reach the opponent.
vega
M. Bison already boasts powerful offense out of his first-class Drive Rush and commands the neutral game with his Standing Heavy Punch and Double Knee Press. With the system changes being introduced in the upcoming patch, particularly those to Perfect Parry, M. Bison is likely to receive a further boost to his offense.
Taking this into consideration, we've reduced the effectiveness of a number of his moves. These include: Standing Light Punch, deadly when paired with his Drive Rush. Standing Heavy Punch, which gives him a combo on normal hit. And finally his Backfist Combo, which allows him to set a Psycho Mine and further push his offense. Additionally, we've improved the situation M. Bison finds himself in when a number of his special moves hit, as they were not seeing much use. This should give M. Bison another avenue of attack to keep the opponent guessing.
Light/Medium/Overdrive Backfist Combo, Light/Medium Psycho Crusher Attack
M. Bison will now have a harder time launching an offensive against his opponent from the center of the screen using Drive Rush after hitting with the Light and Medium versions of Backfist Combo after changes to Bison's recovery and hit effect on the opponent. On the other hand, it will now be easier to pressure opponents after planting a mine with Drive Rush after the Overdrive version, as they will now land closer to the villain.
Unlike Light and Medium Backfist Combo, Light and Medium Psycho Crusher Attack now leave Bison in a better situation before even when used mid-screen, allowing him to press his opponent further with his pressure. The light version has received changes to both its startup and hitbox, allowing it to link from light normals. This change should allow Bison to consider both his position on the screen and his resources when deciding which special to end a combo with.
Taking this into consideration, we've reduced the effectiveness of a number of his moves. These include: Standing Light Punch, deadly when paired with his Drive Rush. Standing Heavy Punch, which gives him a combo on normal hit. And finally his Backfist Combo, which allows him to set a Psycho Mine and further push his offense. Additionally, we've improved the situation M. Bison finds himself in when a number of his special moves hit, as they were not seeing much use. This should give M. Bison another avenue of attack to keep the opponent guessing.
Light/Medium/Overdrive Backfist Combo, Light/Medium Psycho Crusher Attack
M. Bison will now have a harder time launching an offensive against his opponent from the center of the screen using Drive Rush after hitting with the Light and Medium versions of Backfist Combo after changes to Bison's recovery and hit effect on the opponent. On the other hand, it will now be easier to pressure opponents after planting a mine with Drive Rush after the Overdrive version, as they will now land closer to the villain.
Unlike Light and Medium Backfist Combo, Light and Medium Psycho Crusher Attack now leave Bison in a better situation before even when used mid-screen, allowing him to press his opponent further with his pressure. The light version has received changes to both its startup and hitbox, allowing it to link from light normals. This change should allow Bison to consider both his position on the screen and his resources when deciding which special to end a combo with.
terry
Overall, Terry is character with where we feel the majority of his moves are at an acceptable place. Because of this, the focus for this update was to make his combos a bit easier to use, and to help a couple of his moves stand out a bit more with small tunings to their properties.
Standing Medium Punch
With a slight boost to the reach of the move directly after the hitbox appears this attack should no longer hit at different times depending on the distance to the opponent. The window to use the target combo has also been expanded, making it easier to use after confirming Standing Medium Punch has hit.
Power Drive (Medium Punch > Heavy Punch)
With both a damage boost and scaling addition, Power Drive will end up dealing around the same damage when used in a combo, but will deal more damage when an opponent is counter hit after trying to move first when blocking Standing Medium Punch.
Heavy Crack Shoot (↓↙←+Heavy Kick)
With improvements to its usefulness as a projectile and tweaks to the third hit's hitbox, it should now be easier to ensure every hit connects when combing from Heavy Power Charge into Heavy Crack Shoot.
Standing Medium Punch
With a slight boost to the reach of the move directly after the hitbox appears this attack should no longer hit at different times depending on the distance to the opponent. The window to use the target combo has also been expanded, making it easier to use after confirming Standing Medium Punch has hit.
Power Drive (Medium Punch > Heavy Punch)
With both a damage boost and scaling addition, Power Drive will end up dealing around the same damage when used in a combo, but will deal more damage when an opponent is counter hit after trying to move first when blocking Standing Medium Punch.
Heavy Crack Shoot (↓↙←+Heavy Kick)
With improvements to its usefulness as a projectile and tweaks to the third hit's hitbox, it should now be easier to ensure every hit connects when combing from Heavy Power Charge into Heavy Crack Shoot.
mai
With her powerful tools to keep opponent's away in mid and long ranges, as well as an ability to repeat certain avenues of attack with little risk, Mai was too effective at keeping her opponent's choices limited when she was on offense. As such, we've tweaked her Standing Heavy Kick and Kachousen, which we recognized as the main problem areas when it came to limiting the opponent. Additionally, we've changed the timing when Mai gains her Flame stocks, limiting the benefit she gained even when her Kagero no Mai was blocked.
Standing Heavy Kick
With additional recovery and expansion of its hurtbox, Standing Heavy Kick is now riskier for Mai to use. Pushback on block has also been reduced, making it more likely for Mai to lose her turn.
Standing Heavy Kick
With additional recovery and expansion of its hurtbox, Standing Heavy Kick is now riskier for Mai to use. Pushback on block has also been reduced, making it more likely for Mai to lose her turn.
Corner Jump Behavior
- 不具合修正 Fixed an issue where Player 1 and Player 2 behavior would differ when performing a forward jump on an opponent who is in the corner of the stage.
Corner Behavior for Certain Characters
- 不具合修正 Fixed an issue where characters would switch sides when certain forward-moving attacks were performed as a counter after a Perfect Parry in the corner of the stage.
Advancing Drive Gauge Recovery Amount
- 調整 Drive gauge recovery now occurs from frame 11 and later after moving forward.
The cooldown period that occurs after immediately performing an Overdrive art is not affected due to the amount of Drive recovered changing depending on time elapsed.
Perfect Parry Requirements
- 調整 Conditions for a Perfect Parry are changed for some attacks.
The screen freeze that occurs with a Perfect Parry will no longer occur if the correct block direction input is not used.
High, Overhead attacks: Standing Block + Parry
Low attacks: Crouching Block + Parry
If a player performs an incorrect block input, a Perfect Parry will not trigger, but they will recover more Drive gauge than a normal parry.
For projectiles that do not trigger a screen freeze, the old Perfect Parry input still applies.
In training mode, adjusting the Switch Block setting will change whether the dummy performs a Perfect Parry or not.
Perfect Parry Buffer Inputs
- 不具合修正 Fixed an issue where a buffered input would be completely lost when performing a Perfect Parry during an attack that has a long buffer input period.
Dynamic Controls
- 不具合修正 Fixed an issue where certain inputs would cause a character to not land on the ground if they are in the air when time runs out. This fix affects Cammy, Ed, M. Bison, Terry and Mai.
Assisted Combo
- 不具合修正 Fixed an issue that caused a buffer input to be lost if the first attack of an Assisted Combo misses and the same attack is inputted as a buffer.
- 調整 Unified the input period from the 1st attack of Assisted Combo to the 2nd attack. The input timing is now unified to the frame before the attack hitbox of the 1st attack comes out.
This was done in order to prevent the 2nd attack of Assisted Combo from being performed unintentionally. - 調整 By pressing ↓+Assist Button+Light Attack button after a rapid cancelable light attack, players can now perform a new Assisted Combo starting from a low attack.
The conditions for a Perfect Parry have changed, and previously it wasn't possible to separate high and low attacks from a close light attack, limiting the offensive options in comparison to Classic controls.
For some characters this new Assisted Combo has the same structure as the already existing Assisted Combo 1, but the conditions for this Assisted Combo are slightly different, and repeatedly pressing Assist Button+Light Attack will allow you to perform an Assisted Combo to the final hit regardless of if it is blocked or hits.
Jumping Attacks (Modern Controls)
- 調整 Different jumping attacks can now be used depending on if the Assist button is pressed or not. The general rule for jumping attacks is as follows.
Normal: Attacks effective against an opponent in the air
Assist button: Attacks effective against an opponent on the ground
When jumping up to attack an opponent in the air, the ability to think quicking and act is the most important. In order to avoid increasing the complexity of the controls in those situations, we designed this change so that attacks that are effective in air-to-air situations can be performed without pressing the Assist button.
For characters that had jumping attacks with the same downward attack direction of the same strength, the jump attack that was previously used will be performed under the Normal situation.
For details on what move is performed for each character, please visit their respective section.
Normal Throw
- 不具合修正 Fixed an issue where a throw would miss even in a Punish Counter situation when performing a normal throw after a Drive Parry. This change affects A.K.I. (forward and back throws) and M. Bison (back throw)
Back Throw
- 不具合修正 Fixed an issue where a back throw would be misinterpreted as a forward throw when the opponent performs a technique that causes a dark screen transition just as the player's attack recovery is about to end.
Normal Throws and Command Throws
- 不具合修正 Fixed an issue where if two players attempt a throw at the same time, under certain circumstances the result be fixed to one side rather than be random as intended.
Throw Escapes
- 調整 Increased the amount of Drive and Super Art gauge gained after a successful throw escape.
Crouching Heavy Kick
- 調整 1. Behavior on hit and counter hit has been unified, and you may now backwards recover from both.
The status on hit changes depending on the character.
This change affects A.K.I. and Ed's crouching heavy punch instead of their crouching heavy kick, and does not apply to Dee Jay.
2. Reduced the hurtbox on the 1st active frame.
3. Increased buffer input time at the end of recovery.
Jumping Attacks (Modern Controls)
调整 The following attacks can now be performed while jumping based on whether the Assist button is held:
Assist Button Not Held:
Light Attack During Jump - Jumping Light Punch
Medium Attack During Jump - Jumping Medium Punch
Heavy Attack During Jump - Jumping Heavy Kick
Assist Button Held:
Assist Button + Light Attack During Jump - Jumping Light Kick
Assist Button + Medium Attack During Jump - Jumping Medium Kick
Assist Button + Heavy Attack During Jump - Jumping Heavy Punch
Assist Button Not Held:
Light Attack During Jump - Jumping Light Punch
Medium Attack During Jump - Jumping Medium Punch
Heavy Attack During Jump - Jumping Heavy Kick
Assist Button Held:
Assist Button + Light Attack During Jump - Jumping Light Kick
Assist Button + Medium Attack During Jump - Jumping Medium Kick
Assist Button + Heavy Attack During Jump - Jumping Heavy Punch
Nose Breaker (Modern Controls)<br>(↓ + Medium Attack > ↓ + Medium Attack)
调整 Input window timing for the 2nd attack using Modern Controls changed from starting on frame 2 to frame 5. Additionally, it's now more difficult for accidental inputs to occur.
Triple Impact (Modern Controls)<br>(Light Attack > Light Attack > Light Attack)
调整 Input window timing for the 3rd attack using Modern Controls changed from starting on frame 3 to frame 5. Additionally, it's now more difficult for accidental inputs to occur.
Crouching Light Kick
调整 1. Recovery changed from 12 to 11 frames.
2. Advantage on hit changed from -1 to 0 frames.
3. Advantage on block changed from -5 to -3 frames.
2. Advantage on hit changed from -1 to 0 frames.
3. Advantage on block changed from -5 to -3 frames.
Standing Heavy Kick
调整 Reduced hurtbox around the feet upward between frames 8-15.
<span class='battle_change_caution'>Crouching Heavy Kick</span>
調整3 06/06/2025
Total technique length changed from 39 to 36 frames when the attack hits or misses.
Total technique length changed from 39 to 36 frames when the attack hits or misses.
Outlaw Kick<br>(← + Heavy Kick)
调整 1. Advantage on block changed from -5 to -3 frames.
2. Reduced pushback on block.
3. Adjusted so that some forward momentum remains if this attack is blocked when performed from a Drive Rush.
2. Reduced pushback on block.
3. Adjusted so that some forward momentum remains if this attack is blocked when performed from a Drive Rush.
Snapback Combo<br>(Medium Punch > Medium Punch > Medium Punch)
调整 1. Increased knockdown time on hit by 1 frame.
2. Drive gauge increase on the 3rd attack changed from 400 to 1000.
3. Drive gauge increase on the 4th attack changed from 500 to 2000.
2. Drive gauge increase on the 3rd attack changed from 400 to 1000.
3. Drive gauge increase on the 4th attack changed from 500 to 2000.
Normal Sand Blast<br>(↓↘→ + Punch)
调整 1. Reduced hurtbox around the arms backward between the frame before the attack hitbox comes out until the 2nd active frame.
2. Drive gauge reduction on block changed from 2500 to 3000.
2. Drive gauge reduction on block changed from 2500 to 3000.
Overdrive Sand Blast<br>(↓↘→ + Two Punches)
调整 1. Drive gauge reduction on block changed from 2000 to 3000.
2. Extended the timing for when you can cancel into Fatal Shot by 5 frames.
2. Extended the timing for when you can cancel into Fatal Shot by 5 frames.
Fatal Shot<br>(↓↘→ + Two Punches > Two Punches)
调整 Changed attack startup from 12 to 8 frames.
Charged Medium Flash Knuckle<br>(↓↙← + Medium Punch (Hold))
调整 1. Changed attack start up from 30 to 29 frames.
2. Recovery is no longer reduced when absorbing an attack with super armor.
2. Recovery is no longer reduced when absorbing an attack with super armor.
Overdrive Aerial Flash Knuckle<br>(↓↙← + Two Punches, during neutral or forward jump)
调整 1. Increased horizontal blowback distance when hitting an airborne opponent.
2. To prevent inputs from being switched due to the opponent's position during recovery, the input now depends on the direction Luke is facing.
2. To prevent inputs from being switched due to the opponent's position during recovery, the input now depends on the direction Luke is facing.
Light Rising Uppercut<br>(→↓↘ + Light Punch)
调整 Increased upper limit on
combo count
Overdrive Impaler<br>(↓↘→ + Two Kicks > Kick)
调整 Advantage on block changed from -5 to -3 frames.
Jumping Attacks (Modern Controls)
调整 The following attacks can now be performed while jumping based on whether the Assist button is held:
Assist Button Not Held:
Light Attack During Jump - Jumping Light Kick
Medium Attack During Jump - Jumping Medium Punch
Heavy Attack During Jump - Jumping Heavy Kick
Assist Button Held:
Assist Button + Light Attack During Jump - Jumping Light Punch
Assist Button + Medium Attack During Jump - Jumping Medium Kick
Assist Button + Heavy Attack During Jump - Jumping Heavy Punch
Assist Button Not Held:
Light Attack During Jump - Jumping Light Kick
Medium Attack During Jump - Jumping Medium Punch
Heavy Attack During Jump - Jumping Heavy Kick
Assist Button Held:
Assist Button + Light Attack During Jump - Jumping Light Punch
Assist Button + Medium Attack During Jump - Jumping Medium Kick
Assist Button + Heavy Attack During Jump - Jumping Heavy Punch
Phantom Sway (Modern Controls)<br>(↘ + Heavy Attack > Heavy Attack > Heavy Attack)
调整 Input window timing for the 3rd attack using Modern Controls changed from starting on frame 2 to frame 5. Additionally, it's now more difficult for accidental inputs to occur.
Full Moon Kick (Modern Controls)<br>(→ + Medium Attack > Medium Attack > Medium Attack)
调整 Input window timing for the 3rd attack using Modern Controls changed from starting on frame 3 to frame 5. Additionally, it's now more difficult for accidental inputs to occur.
Ransui Haze (Modern Controls)<br>(→ + Heavy Attack > ← + Heavy Attack >Attack)
调整 Input window timing for the 3rd attack using Modern Controls changed from starting on frame 2 to frame 5. Additionally, it's now more difficult for accidental inputs to occur.
Walking Backwards
修复问题 Fixed an issue where movement speed would decreased if Jamie continued to walk backwards.
Standing Medium Punch
调整 Advantage on hit changed from +5 to +6 frames.
Standing Heavy Punch
调整 Collision pushbox has been expanded upwards, making it more difficult for Jamie to pass underneath airborne opponents during a combo.
Standing Medium Kick
调整 1. Attack startup changed from 10 to 9 frames.
2. Recovery changed from 17 to 18 frames when the attack misses
3. Expanded hurtbox on the body forward from the end of active frames until the end of the move's recovery.
2. Recovery changed from 17 to 18 frames when the attack misses
3. Expanded hurtbox on the body forward from the end of active frames until the end of the move's recovery.
Standing Heavy Kick
调整 Advantage on hit changed from +1 to +3 frames.
Crouching Light Punch
调整 Extended momentum left Drive Rush by 1 frame.
Crouching Medium Punch
调整 1. Recovery changed from 13 to 15 frames when the attack misses.
2. Expanded hurtbox that appears around the feet between frames 16-17 when the attack misses upwards. Hurtbox will now remain until recovery ends.
3. Removed hurtbox around the feet between frames 16-17 when the attack is blocked or hits.
2. Expanded hurtbox that appears around the feet between frames 16-17 when the attack misses upwards. Hurtbox will now remain until recovery ends.
3. Removed hurtbox around the feet between frames 16-17 when the attack is blocked or hits.
Crouching Heavy Punch
调整 1. Attack startup changed from 9 to 8 frames.
2. Reduced horizontal blowback when hitting an airborne opponent.
2. Reduced horizontal blowback when hitting an airborne opponent.
The Devil Inside<br>(↓↓ + Punch)
修复问题 Fixed an issue where The Devil Inside would not recover Drive gauge when the button is held as Jamie goes from level 3 to level 4.
Bitter Strikes<br>(Light Punch > Light Kick > Medium Punch)
调整 Advantage on hit on the last attack changed from -2 to -1 frames.
Full Moon Kick<br>(→ + Medium Kick > Medium Kick > Punch)
调整 Jamie will not longer drink if the kick button is held after the 2nd attack hits.
Intoxicated Assault (Third Attack)<br>(← + Heavy Punch > Heavy Punch > Heavy Kick)
修复问题 Fixed an issue where a Punish Counter hitbox set before the 3rd attack was mistakenly set as a Counter hitbox.
Normal/Overdrive Freeflow Strikes<br>(↓↘→ + Punch or Two Punches > → + Punch > → + Punch)
调整 1. The final attack can now canceled into a Super Art level 3/Critical Art, and the Overdrive version can also cancel into Super Art level 2.
2. Initial scaling of 20% added to the 2nd attack of the normal version.
3. Initial scaling of 25% added to the 1st and 2nd attacks of the Overdrive version, and 20% combo scaling added to the 2nd attack.
4. Increased the distanced traveled forward by light and medium version of the 1st attack when Jamie is between Drink level 1-3.
2. Initial scaling of 20% added to the 2nd attack of the normal version.
3. Initial scaling of 25% added to the 1st and 2nd attacks of the Overdrive version, and 20% combo scaling added to the 2nd attack.
4. Increased the distanced traveled forward by light and medium version of the 1st attack when Jamie is between Drink level 1-3.
Medium/Heavy Swagger Step<br>(↓↙← + Medium Punch or Heavy Punch)
调整 Increased blowback time on the medium and heavy versions when hitting an airborne opponent.
Overdrive Swagger Step<br>(↓↙← + Two Punches)
调整 Expanded collision pushbox upwards from 4 frames before the attack start up until the end of active frames.
Normal/Overdrive Arrow Kick<br>(→↓↘ + Kick or Two Kicks)
调整 1. Added 3 active frames on the light version, and reduced recovery by 3 frames.
2. Added 2 active frames on the medium and heavy versions, and reduced recovery by 2 frames.
3. Lowered blowback on the active frames added above when they hit an opponent.
2. Added 2 active frames on the medium and heavy versions, and reduced recovery by 2 frames.
3. Lowered blowback on the active frames added above when they hit an opponent.
Light Bakkai<br>(↓↘→ + Light Kick)
调整 Added an additional attack hitbox to the 3rd and 4th attacks during a combo only, making it easier to hit an opponent at a high elevation.
Heavy Bakkai<br>(↓↘→ + Heavy Kick)
调整 1. Attack startup changed from 26 to 25 frames.
2. Reduced attack hitbox backward on the 1st active frame.
2. Reduced attack hitbox backward on the 1st active frame.
Jumping Attacks (Modern Controls)
调整 The following attacks can now be performed while jumping based on whether the Assist button is held:
Assist Button Not Held:
Light Attack During Jump - Jumping Light Punch
Medium Attack During Jump - Jumping Medium Punch
Heavy Attack During Jump - Jumping Heavy Kick
Assist Button Held:
Assist Button + Light Attack During Jump - Jumping Light Kick
Assist Button + Medium Attack During Jump - Jumping Medium Kick
Assist Button + Heavy Attack During Jump - Jumping Heavy Punch
Assist Button Not Held:
Light Attack During Jump - Jumping Light Punch
Medium Attack During Jump - Jumping Medium Punch
Heavy Attack During Jump - Jumping Heavy Kick
Assist Button Held:
Assist Button + Light Attack During Jump - Jumping Light Kick
Assist Button + Medium Attack During Jump - Jumping Medium Kick
Assist Button + Heavy Attack During Jump - Jumping Heavy Punch
À Terre (Modern Controls)<br>(Medium Attack > Medium Attack)
调整 Input window timing for the 2nd attack using Modern Controls changed from starting on frame 2 to frame 5. Additionally, it's now more difficult for accidental inputs to occur.
Standing Medium Punch
调整 1. Recovery changed from 14 to 15 frames.
2. Knockback time on hit increased by 1 frame.
3. Advantage on block changed from -1 to -2 frames.
2. Knockback time on hit increased by 1 frame.
3. Advantage on block changed from -1 to -2 frames.
Crouching Medium Punch
调整 1. Recovery changed from 13 to 15 frames when the attack misses.
2. Expanded hurtbox forward on frames 14-15 when the attack misses.
2. Expanded hurtbox forward on frames 14-15 when the attack misses.
Crouching Light Kick
调整 Advantage on block changed from -5 to -3 frames.
Crouching Medium Kick
调整 Added initial scaling of 20%.
À Terre<br>(Medium Punch > Medium Kick)
调整 1. Changed the effect of standing medium punch on Punish Counter from a knockback on the ground to a sweep knockdown.
2. Increased hitstop on standing medium punch on Punish Counter from 11 to 14 frames.
2. Increased hitstop on standing medium punch on Punish Counter from 11 to 14 frames.
Temps Lié<br>(Heavy Punch > Heavy Punch)
调整 1. Changed the behavior of standing heavy punch on Punish Counter from a knockback on the ground to a blowback knockdown.
2. Expanded standing heavy punch's attack hitbox horizontally on Punish Counter.
3. Increased hitstop on standing heavy punch on Punish Counter from 13 to 15 frames.
4. Added 20% combo scaling on the 2nd attack.
5. Increased buffer input time at the end of recovery.
2. Expanded standing heavy punch's attack hitbox horizontally on Punish Counter.
3. Increased hitstop on standing heavy punch on Punish Counter from 13 to 15 frames.
4. Added 20% combo scaling on the 2nd attack.
5. Increased buffer input time at the end of recovery.
Light Rond-point<br>(↓↘→ + Light Kick)
调整 1. Changed the effect when hitting an opponent on the ground from a blowback knockdown to a tailspin.
2. Changed the Super Art 3/Critical Art canceling timing to the 2nd attack.
3. Increased buffer input time at the end of recovery.
2. Changed the Super Art 3/Critical Art canceling timing to the 2nd attack.
3. Increased buffer input time at the end of recovery.
<span class='battle_change_caution'>Assisted Combo 3</span>
不具合修正3 06/19/2025
Fixed an issue where after reaching the Sprint point of the combo, additional scaling would be applied when transitioning to a branching attack from Sprint that is not part of this Assisted Combo.
Fixed an issue where after reaching the Sprint point of the combo, additional scaling would be applied when transitioning to a branching attack from Sprint that is not part of this Assisted Combo.
Modern Controls
调整 The following attacks can now be performed while jumping based on whether the Assist button is held:
Assist Button Not Held:
Light Attack During Jump - Jumping Light Punch
Medium Attack During Jump - Jumping Medium Punch
Heavy Attack During Jump - Jumping Heavy Kick
Assist Button Held:
Assist Button + Light Attack During Jump - Jumping Light Kick
Assist Button + Medium Attack During Jump - Jumping Medium Kick
Assist Button + Heavy Attack During Jump - Jumping Heavy Punch
Assist Button Not Held:
Light Attack During Jump - Jumping Light Punch
Medium Attack During Jump - Jumping Medium Punch
Heavy Attack During Jump - Jumping Heavy Kick
Assist Button Held:
Assist Button + Light Attack During Jump - Jumping Light Kick
Assist Button + Medium Attack During Jump - Jumping Medium Kick
Assist Button + Heavy Attack During Jump - Jumping Heavy Punch
Vagabond Edge (Modern Controls)<br>(Special Move)
调整 When using Modern controls, the light version of the attack will now be performed when using simplified inputs.
Medium Shuriken Bomb Spread (Modern Controls)<br>(↓↓ + Light and Heavy Attack)
调整 When using Modern controls and light/medium/heavy are pressed at the same time, the medium version of the attack will now be performed.
Bushin Tiger Fangs (Modern Controls)<br>(Medium Attack > Medium Attack)
调整 Input window timing for the 2nd attack using Modern Controls changed from starting on frame 2 to frame 5. Additionally, it's now more difficult for accidental inputs to occur.
Bushin Prism Strikes/Bushin Hellchain/Bushin Hellchain Throw (Modern Controls)<br>(Light Attack > Light Attack > Light Attack > Light Attack / Light Attack > Light Attack > ↓ + Light Attack > Light Attack / Light Attack > Light Attack > ↓ + Light Attack > ↓ + Light Attack)
调整 Input window timing for the 3rd and 4th attacks using Modern Controls changed from starting on frame 2 to frame 5. Additionally, it's now more difficult for accidental inputs to occur.
Crouching Medium Punch
调整 1. Recovery when the attack misses changed from 13 to 15 frames.
2. Expanded hurtbox that appears around the feet between frames 6-18 of the technique (starting from frame 6 until the technique ends when the attack misses)
3. Expanded hurtbox around the arm forward between frames 13-15 when the attack misses.
4. Reduced hurtbox around the arm backward when the attack misses between frames 16-18.with Hurtbox will now remain until the technique ends.
5. Reduced pushback on block.
2. Expanded hurtbox that appears around the feet between frames 6-18 of the technique (starting from frame 6 until the technique ends when the attack misses)
3. Expanded hurtbox around the arm forward between frames 13-15 when the attack misses.
4. Reduced hurtbox around the arm backward when the attack misses between frames 16-18.with Hurtbox will now remain until the technique ends.
5. Reduced pushback on block.
Crouching Light Kick
调整 Reduced pushback on block.
Crouching Medium Kick
调整 Changed initial scaling from 15% to 20%
Jumping Light Kick
修复问题 Fixed an issue where the block idle hitbox would appear or disappear 1 frame faster than other jumping attacks.
Jumping Heavy Punch
调整 Decreased intial
Decreased additional
combo count
value.Decreased additional
combo count
value. Bushin Prism Strikes<br>(Light Punch > Medium Punch > Heavy Punch > Heavy Kick
调整 1. Changed the hit effect on an opponent in the air for the final attack from a slam knockdown to a ground bound.
2. Recovery on the final attack on hit changed from 24 to 19 frames.
2. Recovery on the final attack on hit changed from 24 to 19 frames.
Normal Vagabond Edge<br>(↓↘→ + Punch)
调整 Expanded hurtbox that lasts until the end of the technique only when the attack misses forward.
Overdrive Bushin Senpukyaku<br>(↓↙← + Two Kicks)
修复问题 Fixed an issue where the successful command input requirements was the same as the aerial version.
Normal/Overdrive Aerial Bushin Senpukyaku<br>(↓↙← + Kick or Two Kicks, during a forward jump)
调整 Expanded the hitbox of the final attack upward.
Normal/Overdrive Sprint<br>(↓↘→ + Punch or Two Punches)
调整 Tweaked so the transition from Sprint to Arc Step is slightly faster.
This adjustment was made due to Zangief's hurtbox changing, and should not affect combos or routes against other characters.
This adjustment was made due to Zangief's hurtbox changing, and should not affect combos or routes against other characters.
Light/Medium/Heavy Shuriken Bomb Spread (↓↓ + Two Punches)
调整 1. Delayed the timing for the explosion to be later for the Light+Medium and Medium+Heavy versions.
2. Changed the hit effect for the Light+Medium and Medium+Heavy versions to a blowback.
2. Changed the hit effect for the Light+Medium and Medium+Heavy versions to a blowback.
Jumping Attacks (Modern Controls)
调整 The following attacks can now be performed while jumping based on whether the Assist button is held:
Assist Button Not Held:
Light Attack During Jump - Jumping Light Punch
Medium Attack During Jump - Jumping Medium Punch
Heavy Attack During Jump - Jumping Heavy Punch
Assist Button Held:
Assist Button + Light Attack During Jump - Jumping Light Kick
Assist Button + Medium Attack During Jump - Jumping Medium Kick
Assist Button + Heavy Attack During Jump - Jumping Heavy Kick
Assist Button Not Held:
Light Attack During Jump - Jumping Light Punch
Medium Attack During Jump - Jumping Medium Punch
Heavy Attack During Jump - Jumping Heavy Punch
Assist Button Held:
Assist Button + Light Attack During Jump - Jumping Light Kick
Assist Button + Medium Attack During Jump - Jumping Medium Kick
Assist Button + Heavy Attack During Jump - Jumping Heavy Kick
Novacula Swipe/Novacula Thrust (Modern Controls)<br>(→ + Medium or Heavy Attack)
调整 Input window timing for the 2nd attack attacks using Modern Controls changed from starting on frame 2 to frame 5. Additionally, it's now more difficult for accidental inputs to occur.
Crouching Light Punch
调整 1. Advantage on hit changed from +3 to +4 frames.
2. Advantage on block changed from -3 to -1 frames.
3. Drive Rush cancel timing is now 1 frame later.
2. Advantage on block changed from -3 to -1 frames.
3. Drive Rush cancel timing is now 1 frame later.
Standing Light Kick
调整 Pushback on hit reduced.
Crouching Light Kick
调整 Advantage on hit changed from 0 to +2 frames.
Crouching Medium Kick
调整 1. Advantage on hit changed from +2 to +3 frames.
2. Initial scaling of 20% added.
2. Initial scaling of 20% added.
Crouching Heavy Punch (Hold)
调整 1. Can now be canceled into a Super Art until the 2nd active frame.
2. 2 frames of hit stop added.
2. 2 frames of hit stop added.
Standing Heavy Punch (Normal/Hold)
调整 Increased buffer input time at the end of recovery.
Heavy Two Hitter<br>(Heavy Punch > Heavy Punch)
调整 Increased knockdown time on hit by 7 frames.
Normal/Overdrive Phalanx (↓↘→ + Punch or Two Punches)
调整 1. Reduced hurtbox around the feet upward on the light, medium, and Overdrive versions from immediately after the jump until the 3rd active frame.
2. For the heavy version, the adjustment in #1 to the hurtbox around the feet occurs 3 frames faster than the other versions.
2. For the heavy version, the adjustment in #1 to the hurtbox around the feet occurs 3 frames faster than the other versions.
Medium Dimachaerus (↓↘→ + Punch)
调整 Expanded the anti-air invincibility property from only the head to the area from the waist up.
SA1 Javelin of Marisa (↓↘→↓↘→ + Punch)
调整 1. Counter now triggers if Marisa is thrown during the held version.
2. Damage on counter changed from 2640 to 2400.
3. Expanded the collision pushbox on the longest held version that appears 1 frame before the attack hitbox until the 2nd active frame upward
4. Added an additional attack hitbox to the longest held version that can only hit during a combo, making it easier to hit an opponent at a high elevation.
2. Damage on counter changed from 2640 to 2400.
3. Expanded the collision pushbox on the longest held version that appears 1 frame before the attack hitbox until the 2nd active frame upward
4. Added an additional attack hitbox to the longest held version that can only hit during a combo, making it easier to hit an opponent at a high elevation.
SA2 Meteorite (↓↙←↓↙← + Punch)
调整 1. Increased active frames and invincibility time by 1 frame each.
2. Added an additional attack hitbox to the 1st hit that can only hit during a combo, making it easier to hit an opponent at a high elevation.
3. Expanded the collision pushbox that appears immediately after start up until the end of the active frames upward.
4. You can now press left or right during the attack to adjust horizontal distance moved.
2. Added an additional attack hitbox to the 1st hit that can only hit during a combo, making it easier to hit an opponent at a high elevation.
3. Expanded the collision pushbox that appears immediately after start up until the end of the active frames upward.
4. You can now press left or right during the attack to adjust horizontal distance moved.
Assisted Combo 1
调整 Combo has now changed to the following during Burnout.
Before adjustment
Crouching Light Kick > Crouching Light Punch > Heavy Tomahawk Buster
After adjustment
With no Windstock
Crouching Light Kick > Crouching Light Punch > Medium Tomahawk Buster
With Windstock
Crouching Light Kick > Crouching Light Punch > Medium Condor Spire
Before adjustment
Crouching Light Kick > Crouching Light Punch > Heavy Tomahawk Buster
After adjustment
With no Windstock
Crouching Light Kick > Crouching Light Punch > Medium Tomahawk Buster
With Windstock
Crouching Light Kick > Crouching Light Punch > Medium Condor Spire
Jumping Attacks (Modern Controls)
调整 The following attacks can now be performed while jumping based on whether the Assist button is held:
Assist Button Not Held:
Light Attack During Jump - Jumping Light Punch
Medium Attack During Jump - Jumping Medium Punch
Heavy Attack During Jump - Jumping Heavy Kick
Assist Button Held:
Assist Button + Light Attack During Jump - Jumping Light Kick
Assist Button + Medium Attack During Jump - Jumping Medium Kick
Assist Button + Heavy Attack During Jump - Jumping Heavy Punch
Assist Button Not Held:
Light Attack During Jump - Jumping Light Punch
Medium Attack During Jump - Jumping Medium Punch
Heavy Attack During Jump - Jumping Heavy Kick
Assist Button Held:
Assist Button + Light Attack During Jump - Jumping Light Kick
Assist Button + Medium Attack During Jump - Jumping Medium Kick
Assist Button + Heavy Attack During Jump - Jumping Heavy Punch
Forward Dash
��整 Increased forward movement distance.
Crouching Light Kick
调整 Reduced pushback on hit and block.
Crouching Heavy Punch
调整 No longer hits an opponent behind Lily on active frames 1-2.
Jumping Medium Punch
调整 Can now be canceled into special moves.
Horn Breaker (← + Heavy Punch)
调整 The expanded hurtbox around the body now disappears 3 frames later and remains until the end of recovery.
Desert Storm (First Hit) (→ + Heavy Punch)
调整 1. Attack startup changed from 18 to 16 frames.
2. Advantage on block changed from -5 to -4 frames.
3. Attack hitbox on the 1st active frame expanded forward, and matches the hitbox on the 2nd active frame.
2. Advantage on block changed from -5 to -4 frames.
3. Attack hitbox on the 1st active frame expanded forward, and matches the hitbox on the 2nd active frame.
Desert Storm (Second Hit) (→ + Heavy Punch > Heavy Punch)
調整・不具合修正 1. Expanded attack hitbox upward.
2. Expanded collision pushbox upward from when the technique is performed until the end of active frames.
3. Fixed an issue where a Punish Counter hitbox set before the attack startup was mistakenly set as a Counter hitbox.
2. Expanded collision pushbox upward from when the technique is performed until the end of active frames.
3. Fixed an issue where a Punish Counter hitbox set before the attack startup was mistakenly set as a Counter hitbox.
Desert Storm (Final Hit) (→ + Heavy Punch > Heavy Punch > Heavy Punch)
調整・不具合修正 1. Recovery changed from 42 to 39 frames.
The advantage on hit has also changed.
2. Advantage on block changed from -26 to -23 frames.
3. Expanded collision pushbox upward from when the technique is performed until the end of active frames.
4. Fixed an issue where a Punish Counter hitbox set before the attack startup was mistakenly set as a Counter hitbox.
The advantage on hit has also changed.
2. Advantage on block changed from -26 to -23 frames.
3. Expanded collision pushbox upward from when the technique is performed until the end of active frames.
4. Fixed an issue where a Punish Counter hitbox set before the attack startup was mistakenly set as a Counter hitbox.
Medium/Heavy Condor Wing
调整 Added an additional attack hitbox that can only hit during a combo, making it easier to hit an opponent at a high elevation.
Light Windclad Tomahawk Buster
调整 Increased the blowback time when the 2nd attack hits an opponent standing on the ground.
Medium Normal/Windclad Tomahawk Buster (↓↘→ + Medium Punch)
调整 Added an additional attack hitbox that can only hit during a combo, making it easier to hit an opponent in front of you.
Overdrive Normal/Windclad Condor Dive
调整 Removed the 10% immediate scaling.
This change does not affect the move when performed after Overdrive Tomahawk Buster.
This change does not affect the move when performed after Overdrive Tomahawk Buster.
SA1 Breezing Hawk (↓↘→↓↘→ + Punch)
调整 1. Added an additional attack hitbox that can only hit during a combo to the 2nd and 3rd attacks if the 1st attack hits, and to the 3rd attack if the 2nd attack hits, making it easier to hit an opponent at a high elevation.
2. Expanded attack hitbox for the final attack upward.
2. Expanded attack hitbox for the final attack upward.
SA2 Normal/Windclad Thunderbird/Soaring Thunderbird (↓↘→↓↘→ + Kick/↓↘→↓↘→ + Kick While Jumping)
调整 1. Active frames for the 1st attack of the regular version changed from 2 to 4 frames.
2. Attack is completely invincible from attack start-up until frame 4, and then projectile invincible after that until the attack hitbox for the final attack disappears.
3. The attack is now considered grounded until the end of the active frames of the 1st attack.
Note that this change does not apply if canceled from Overdrive Condor Spire.
2. Attack is completely invincible from attack start-up until frame 4, and then projectile invincible after that until the attack hitbox for the final attack disappears.
3. The attack is now considered grounded until the end of the active frames of the 1st attack.
Note that this change does not apply if canceled from Overdrive Condor Spire.
Jumping Attacks (Modern Controls)
调整 The following attacks can now be performed while jumping based on whether the Assist button is held:
Assist Button Not Held:
Light Attack During Jump - Jumping Light Punch
Medium Attack During Jump - Jumping Medium Kick
Heavy Attack During Jump - Jumping Heavy Kick
Assist Button Held:
Assist Button + Light Attack During Jump - Jumping Light Kick
Assist Button + Medium Attack During Jump - Jumping Medium Punch
Assist Button + Heavy Attack During Jump - Jumping Heavy Punch
Assist Button Not Held:
Light Attack During Jump - Jumping Light Punch
Medium Attack During Jump - Jumping Medium Kick
Heavy Attack During Jump - Jumping Heavy Kick
Assist Button Held:
Assist Button + Light Attack During Jump - Jumping Light Kick
Assist Button + Medium Attack During Jump - Jumping Medium Punch
Assist Button + Heavy Attack During Jump - Jumping Heavy Punch
Overdrive Departure (Modern Controls) (↓↙← + Light and Heavy Attack)
调整 When using Modern controls and light/medium/heavy are pressed at the same time, the medium version of the attack will now be performed.
Crouching Medium Kick
调整 20% initial scaling added.
Overdrive Stribog (↓↘→ + Two Punches)
调整 Damage for the 2nd attack changed from 400 to 800.
Departure: Shadow (↓↙← + Heavy Punch While Departure is Active)
修复问题 Fixed an issue where inttpuing a command with specific timing would cause Departure: Shadow's animation to play regardless if Departure's attack hitbox appeared.
Medium/Heavy Torbalan (↓↘→ + Medium Kick or Heavy Kick)
调整 Added initial scaling of 20%
Jumping Attacks (Modern Controls)
调整 The following attacks can now be performed while jumping based on whether the Assist button is held:
Assist Button Not Held:
Light Attack During Jump - Jumping Light Punch
Medium Attack During Jump - Jumping Medium Punch
Heavy Attack During Jump - Jumping Heavy Punch
Assist Button Held:
Assist Button + Light Attack During Jump - Jumping Light Kick
Assist Button + Medium Attack During Jump - Jumping Medium Kick
Assist Button + Heavy Attack During Jump - Jumping Heavy Kick
Assist Button Not Held:
Light Attack During Jump - Jumping Light Punch
Medium Attack During Jump - Jumping Medium Punch
Heavy Attack During Jump - Jumping Heavy Punch
Assist Button Held:
Assist Button + Light Attack During Jump - Jumping Light Kick
Assist Button + Medium Attack During Jump - Jumping Medium Kick
Assist Button + Heavy Attack During Jump - Jumping Heavy Kick
Death Crest (Modern Controls) Medium Attack > ← + Medium Attack > Medium Attack
调整 Input window timing for the 2nd and 3rd attack using Modern Controls changed from starting on frame 4 to frame 5. Additionally, it's now more difficult for accidental inputs to occur.
Overdrive Ankensatsu (Modern Controls) (↓↘→ + Light and Heavy Attack)
调整 When using Modern controls, pressing light/medium/heavy at the same time will now perform Overdrive Ankensatsu instead of Overdrive Go Ohsatsu.
Normal/Chain Combo Standing Heavy Punch
调整 1. Expanded hurtbox around the kicking leg immediately after the end of active frames to match the hurtbox on the 2nd frame after the active frames end.
2. Changed the hurtbox adjusted in #1 to disappear on frame 24.
3. The hurtbox around the body that appears between frames 28-29 now appears on frame 24 and remains until the end of the technique.
4. Expanded the hurtbox adjusted in #3 downward.
2. Changed the hurtbox adjusted in #1 to disappear on frame 24.
3. The hurtbox around the body that appears between frames 28-29 now appears on frame 24 and remains until the end of the technique.
4. Expanded the hurtbox adjusted in #3 downward.
Normal/Chain Combo Crouching Light Punch
调整 Expanded attack hitbox upward.
Normal/Chain Combo Crouching Medium Punch
调整 1. Recovery changed from 14 to 15 frames when the attack misses.
2. Expanded hurtbox from frame 20 until the end of the technique when the attack misses forward.
2. Expanded hurtbox from frame 20 until the end of the technique when the attack misses forward.
Normal/Chain Combo Jumping Heavy Punch
调整 1. Changed knockback time on block from 19 to 15 frames.
2. Expanded hurtbox around the kicking leg downward and backward.
2. Expanded hurtbox around the kicking leg downward and backward.
Korenzan<br>(← + Heavy Kick)
调整 1. Advantage on hit changed from -2 to +2 frames.
2. Reduced hurtbox around the feet from frames 3-6 backward.
3. Slid the attack hitbox on the 3rd active frame of the 2nd attack downward, so the attack can beat opponent's attacks aiming for the feet easier.
2. Reduced hurtbox around the feet from frames 3-6 backward.
3. Slid the attack hitbox on the 3rd active frame of the 2nd attack downward, so the attack can beat opponent's attacks aiming for the feet easier.
Death Crest (Medium Punch + ← + Heavy Punch > Heavy Punch)
调整 Increased the
combo count
upper value for the 2nd and 3rd attack. Overdrive Saihasho (↓↘→ + Light Kick and Medium Kick)
调整 1. Added 20% initial scaling.
2. Added 20% combo scaling.
2. Added 20% combo scaling.
Normal/Fuha Boosted/Overdrive Ankensatsu (↓↘→ + Medium Kick or Two Kicks)
调整 Increased buffer input time at the end of recovery.
Normal Ankensatsu (↓↘→ + Medium Kick)
调整 Reduced pushback on hit.
SA2 Feng Shui Engine (↓↙←↓↙← + Punch)
修复问题 Fixed an issue where the attack would not be performed between jump frames 1-2
Assisted Combo 3
調整・不具合修正3 Combo has now changed to the following.
Before adjustment
Face Breaker > Overdrive Jus Cool > Maximum Strike > Double Rolling Sobat > Weekend Pleasure
After adjustment
Face Breaker > Overdrive Jus Cool > Waning Moon > Double Rolling Sobat > Weekend Pleasure
06/19/2025
Fixed an issue where after reaching the Overdrive Jus Cool point of the combo, additional scaling would be applied when transitioning to a branching attack from Overdrive Jus Cool that is not part of this Assisted Combo.
Before adjustment
Face Breaker > Overdrive Jus Cool > Maximum Strike > Double Rolling Sobat > Weekend Pleasure
After adjustment
Face Breaker > Overdrive Jus Cool > Waning Moon > Double Rolling Sobat > Weekend Pleasure
06/19/2025
Fixed an issue where after reaching the Overdrive Jus Cool point of the combo, additional scaling would be applied when transitioning to a branching attack from Overdrive Jus Cool that is not part of this Assisted Combo.
Jumping Attacks (Modern Controls)
调整 The following attacks can now be performed while jumping based on whether the Assist button is held:
Assist Button Not Held:
Light Attack During Jump - Jumping Light Kick
Medium Attack During Jump - Jumping Medium Punch
Heavy Attack During Jump - Jumping Heavy Kick
Assist Button Held:
Assist Button + Light Attack During Jump - Jumping Light Punch
Assist Button + Medium Attack During Jump - Jumping Medium Kick
Assist Button + Heavy Attack During Jump - Jumping Heavy Punch
Assist Button Not Held:
Light Attack During Jump - Jumping Light Kick
Medium Attack During Jump - Jumping Medium Punch
Heavy Attack During Jump - Jumping Heavy Kick
Assist Button Held:
Assist Button + Light Attack During Jump - Jumping Light Punch
Assist Button + Medium Attack During Jump - Jumping Medium Kick
Assist Button + Heavy Attack During Jump - Jumping Heavy Punch
SA2 Sunrise Festival (Modern Controls)
调整 You can now choose between Lowkey/Marvelous/Headliner Sunrise Festival after the dark screen transition.
If no input is pressed during the dark screen transition after performing the move, Dee Jay will perform Lowkey Sunrise Festival. Pressing back will perform Marvelous Sunrise Festival, and pressing forward will perform Headliner Sunrise Festival.
Additionally, after the final attack of Marvelous/Headliner Sunrise Festival, pressing back and heavy attack will perform Climax Blow, while neutral or forward+heavy will perform Encore Beat.
If no input is pressed during the dark screen transition after performing the move, Dee Jay will perform Lowkey Sunrise Festival. Pressing back will perform Marvelous Sunrise Festival, and pressing forward will perform Headliner Sunrise Festival.
Additionally, after the final attack of Marvelous/Headliner Sunrise Festival, pressing back and heavy attack will perform Climax Blow, while neutral or forward+heavy will perform Encore Beat.
Threebeat Combo (Modern Controls) (Light Attack > Medium Attack > Medium Attack)
调整 Input window timing for the 3rd attack using Modern Controls changed from starting on frame 1 to frame 5. Additionally, it's now more difficult for accidental inputs to occur.
Dee Jay Special (Modern Controls) (Medium Attack > Heavy Attack > Heavy Attack)
调整 Input window timing for the 3rd attack using Modern Controls changed from starting on frame 2 to frame 5. Additionally, it's now more difficult for accidental inputs to occur.
Jackknife Maximum (Modern Controls) (Charge ↓ + Special Button)
调整 When using Modern controls, the heavy version of the attack will now be performed when using simplified inputs.
Standing Heavy Punch
调整 Reduced the pushback on hit when the attack hits on the 3rd active frame or later.
Crouching Light Kick
调整 Reduced pushback on block and on hit.
Medium Jackknife Maximum (Charge ↓, ↑ + Medium Kick)
调整 Increased horizontal blowback distance when the 2nd attack hits an opponent in the air.
Heavy Jackknife Maximum (Charge ↓, ↑ + Heavy Kick)
调整 1. Attack startup changed from 6 to 5 frames.
2. Added an additional attack hitbox to the final attack that can only hit during a combo, making it easier to hit an opponent at a low elevation.
3. Expanded collision pushbox on hit downward.
4. The movement values during the technique have been adjusted to minimize changes after the move is performed.
2. Added an additional attack hitbox to the final attack that can only hit during a combo, making it easier to hit an opponent at a low elevation.
3. Expanded collision pushbox on hit downward.
4. The movement values during the technique have been adjusted to minimize changes after the move is performed.
Overdrive Jackknife Maximum (Charge ↓, ↑ + Two Kicks)
调整 Expanded the attack hitbox forward for the first attack that can only hit during a combo.
Overdrive Jus Cool (↓↙← + Two Kicks)
调整 1. Advantage on block changed from -22 to -18 frames, and adjusted so Funky Slicer is also blocked.
2. Adjusted so that transition attacks can be buffered during hit stop.
2. Adjusted so that transition attacks can be buffered during hit stop.
SA1 The Greatest Sobat (↓↘→↓↘→ + Kick)
调整 Added an additional attack hitbox that can only hit during a combo, making it easier to hit an opponent in front of Dee Jay.
SA2 Marvelous Sunrise Festival/Headliner Sunrise Festival (↓↘→↓↘→ + Medium Punch or Heavy Punch)
修复问题 Fixed an issue where damage was increased on Counter and Punish Counter when the player failed to input the proper commands for the attack.
Jumping Attacks (Modern Controls)
调整 The following attacks can now be performed while jumping based on whether the Assist button is held:
Assist Button Not Held:
Light Attack During Jump - Jumping Light Punch
Medium Attack During Jump - Jumping Medium Punch
Heavy Attack During Jump - Jumping Heavy Kick
Assist Button Held:
Assist Button + Light Attack During Jump - Jumping Light Kick
Assist Button + Medium Attack During Jump - Jumping Medium Kick
Assist Button + Heavy Attack During Jump - Jumping Heavy Punch
Assist Button Not Held:
Light Attack During Jump - Jumping Light Punch
Medium Attack During Jump - Jumping Medium Punch
Heavy Attack During Jump - Jumping Heavy Kick
Assist Button Held:
Assist Button + Light Attack During Jump - Jumping Light Kick
Assist Button + Medium Attack During Jump - Jumping Medium Kick
Assist Button + Heavy Attack During Jump - Jumping Heavy Punch
Lift Combination (Modern Controls) (← + Medium Attack > Medium Attack)
调整 Input window timing for the 3rd attack using Modern Controls changed from starting on frame 2 to frame 4. Additionally, it's now more difficult for accidental inputs to occur.
Standing Light Kick
调整 Reduced attack hitbox on the tip of the technique downward.
Swing Combination (Heavy Punch > Heavy Kick)
调整 Cancel timing for the final attack is now 2 frames later.
06/06/2025
The timing for canceling into Cancel Drive Rush, or moves other than Super Arts, out of the final attack of this move has been shifted 2 frames later.
06/06/2025
The timing for canceling into Cancel Drive Rush, or moves other than Super Arts, out of the final attack of this move has been shifted 2 frames later.
Light Spiral Arrow (↓↘→ + Light Kick)
调整 Increased blowback time when hitting an opponent in the air.
Heavy Cannon Spike (→↓↘ + Heavy Kick)
调整 Reduced horizontal blowback when hitting an opponent in the air between active frames 1-2.
Light Quick Spin Knuckle (↓↙← + Light Pitch)
调整 1. Increased
2. Decreased horizontal blowback when hitting an opponent in the air.
combo count
upper limit value.2. Decreased horizontal blowback when hitting an opponent in the air.
Jumping Attacks (Modern Controls)
调整 The following attacks can now be performed while jumping based on whether the Assist button is held:
Assist Button Not Held:
Light Attack During Jump - Jumping Light Punch
Medium Attack During Jump - Jumping Medium Punch
Heavy Attack During Jump - Jumping Heavy Kick
Assist Button Held:
Assist Button + Light Attack During Jump - Jumping Light Kick
Assist Button + Medium Attack During Jump - Jumping Medium Kick
Assist Button + Heavy Attack During Jump - Jumping Heavy Punch
Assist Button Not Held:
Light Attack During Jump - Jumping Light Punch
Medium Attack During Jump - Jumping Medium Punch
Heavy Attack During Jump - Jumping Heavy Kick
Assist Button Held:
Assist Button + Light Attack During Jump - Jumping Light Kick
Assist Button + Medium Attack During Jump - Jumping Medium Kick
Assist Button + Heavy Attack During Jump - Jumping Heavy Punch
Standing Medium Punch
调整 Expanded hurtbox around the body forward from attack startup until the end of recovery.
Crouching Light Kick
调整 Advantage on block changed from -3 to -1 frames.
Crouching Medium Punch
调整 1. Recovery changed from 13 to 15 frames when the attack misses.
2. Hurtbox around the arms disappears on frame 16 instead of frame 15.
3. Expanded hurtbox around the feet during recovery upward. The hurtbox will also now remain until the end of the technique.
2. Hurtbox around the arms disappears on frame 16 instead of frame 15.
3. Expanded hurtbox around the feet during recovery upward. The hurtbox will also now remain until the end of the technique.
Jumping Heavy Kick
调整 Attack startup changed from 12 to 10 frames.
Senpu-kyaku (→ + Heavy Kick)
调整 Expanded the proximity block hitbox that appears between frames 2-10 of the technique.
Heavy Shoryuken (→↓↘ + Heavy Punch)
调整 1. Landing recovery changed from 15 to 12 frames.
2. Knockdown time increased by 5 frames when the attack hits on active frames 1-2.
2. Knockdown time increased by 5 frames when the attack hits on active frames 1-2.
Normal Hadoken (↓↘→ + Punch)
调整 1. Recovery on hit changed according to strength.
Light: +1 > +2
Medium: -1 > 0
Heavy: -3 > -2
2. Damage changed from 600 to 700.
Light: +1 > +2
Medium: -1 > 0
Heavy: -3 > -2
2. Damage changed from 600 to 700.
Normal Denjin Charge Hadoken (↓↘→ + Punch)
调整 1. Technique length changed from 42 to 40 frames.
2. Advantage on block changed from -3 to -1 frames.
3. Damage changed from 800 to 1000.
2. Advantage on block changed from -3 to -1 frames.
3. Damage changed from 800 to 1000.
Overdrive Hadoken (↓↘→ + Two Punch)
调整 1. Damage changed from 800 to 1000.
2. Projectile speed increased.
2. Projectile speed increased.
Overdrive Denji Charge Hadoken (↓↘→ + Two Punches)
调整 Damage changed from 1000 to 1200.
Overdrive Aerial Tatsumaki Senpu-kyaku (Senpu-kyaku Cancel) (→ + Heavy Kick > ↓↙← + Two Kicks)
调整 1. Expanded collision pushbox on hit upward.
2. Added an additional attack hitbox on the 2nd attack and later that can only hit during a combo, making it easier to hit an opponent at a high elevation.
2. Added an additional attack hitbox on the 2nd attack and later that can only hit during a combo, making it easier to hit an opponent at a high elevation.
SA1 Shunku Hadoken (↓↘→↓↘→ + Punch)
调整 1. Increased projectile speed.
2. Reduced attack hitbox downward on the 1st attack's startup 3rd frame or later that only appears during a combo, and expanded it forward.
The downward reduction is an adjustment made so that if the first attack hits an opponent in the air at a high elevation, it will be more difficult for the opponent to fall through on the 2nd attack or later.
2. Reduced attack hitbox downward on the 1st attack's startup 3rd frame or later that only appears during a combo, and expanded it forward.
The downward reduction is an adjustment made so that if the first attack hits an opponent in the air at a high elevation, it will be more difficult for the opponent to fall through on the 2nd attack or later.
SA1 Denjin Charge Shinku Hadoken (↓↘→↓↘→ + Punch)
调整 1. Doubled projectile speed.
2. Increased total technique length from 86 to 89 frames.
3. Increased number of hits from 5 to 8.
4. Reduced hitstop/blockstun by 3 frames for hits 1 through 7.
5. Added a hitbox that will hit only during combos during active frames 1-2, making it easier to hit opponents in front of you.
6. Hitbox that appears on the third frame of the first hit during a combo has been reduced downward and expanded forward.
Note: Downward reduction of the hit box is intended to make it easier for the second hit to connect when connecting with the first hit against an enemy high in the air.
2. Increased total technique length from 86 to 89 frames.
3. Increased number of hits from 5 to 8.
4. Reduced hitstop/blockstun by 3 frames for hits 1 through 7.
5. Added a hitbox that will hit only during combos during active frames 1-2, making it easier to hit opponents in front of you.
6. Hitbox that appears on the third frame of the first hit during a combo has been reduced downward and expanded forward.
Note: Downward reduction of the hit box is intended to make it easier for the second hit to connect when connecting with the first hit against an enemy high in the air.
SA2 Normal/Denjin Charge Shin Hashogeki (↓↙←↓↙← + Punch)
调整 1. Shortened time to charge to Level 2 by 2 frames for both normal and Denjin Charge versions.
Note: This will not change the Shin Hashogeki used in Assisted Combo 2 for Modern Controls.
2. Changed Level 2 on-hit effect to match Level 3.
3. Added 20% combo scaling to Level 2 Shin Hashogeki.
Note: This will not change the Shin Hashogeki used in Assisted Combo 2 for Modern Controls.
2. Changed Level 2 on-hit effect to match Level 3.
3. Added 20% combo scaling to Level 2 Shin Hashogeki.
SA3/CA Shin Shoryuken (↓↘→↓↘→ + Kick)
调整 Advantage on hit changed from +8 to +14 frames.
Edmond Honda
Jumping Attacks (Modern Controls)
调整 The following attacks can now be performed while jumping based on whether the Assist button is held:
Assist Button Not Held:
Light Attack During Jump - Jumping Light Punch
Medium Attack During Jump - Jumping Medium Punch
Heavy Attack During Jump - Jumping Heavy Punch
Assist Button Held:
Assist Button + Light Attack During Jump - Jumping Light Kick
Assist Button + Medium Attack During Jump - Jumping Medium Kick
Assist Button + Heavy Attack During Jump - Jumping Heavy Kick
Assist Button Not Held:
Light Attack During Jump - Jumping Light Punch
Medium Attack During Jump - Jumping Medium Punch
Heavy Attack During Jump - Jumping Heavy Punch
Assist Button Held:
Assist Button + Light Attack During Jump - Jumping Light Kick
Assist Button + Medium Attack During Jump - Jumping Medium Kick
Assist Button + Heavy Attack During Jump - Jumping Heavy Kick
Standing Medium Punch
调整 Increased recovery on miss from 13 to 15 frames.
Standing Heavy Kick
调整 Added a hitbox for the second hit that can only hit during a combo, making it easier to hit opponents in the air.
Crouching Medium Punch
修复问题 Fixed an issue where proximity block trigger did not work correctly when used from Drive Rush.
Crouching Medium Kick
调整 Added initial scaling of 20%.
Power Stomp (↘ + Heavy Kick)
调整 1. Increased the amount of time opponent ground bounces of aerial hit.
2. Added 20% combo scaling.
3. Increased buffer input window at the end of recovery.
2. Added 20% combo scaling.
3. Increased buffer input window at the end of recovery.
Medium Heavy Hundred Hand Slap (↓↙← + Medium Punch or Heavy Punch)
调整 Reduced knockback.
Normal/Overdrive Sumo Spirit Hundred Hand Slap (↓↙← + Punch or Two Punches)
调整 Expanded hitbox for the last hit during a combo forward.
Normal Sumo Headbutt (Charge ←, → + Punch)
调整 Reduced Drive Gauge damage on block.
Light/Medium: 7500 to 6000
Heavy: 10000 to 7500
Light/Medium: 7500 to 6000
Heavy: 10000 to 7500
Normal/Overdrive Taiho Cannon Lift (↓ + Punch During Sumo Dash)
调整 Increased buffer input time at the end of recovery.
Overdrive Taiho Cannon Lift (↓ + Punch During Overdrive Sumo Dash)
调整 1. Reduced blowback on grounded hit.
2. Reduced initial
2. Reduced initial
combo count
. Nako Damashi
调整 1. Increased
2. Reduced
combo count
upper limit.2. Reduced
combo count
value. SA3/CA The Final Bout (↓↙←↓↙← + Punch)
调整 Expanded hitbox for the last hit during a combo forward.
Jumping Attacks (Modern Controls)
调整 The following attacks can now be performed while jumping based on whether the Assist button is held:
Assist Button Not Held:
Light Attack During Jump - Jumping Light Punch
Medium Attack During Jump - Jumping Medium Punch
Heavy Attack During Jump - Jumping Heavy Kick
Assist Button Held:
Assist Button + Light Attack During Jump - Jumping Light Kick
Assist Button + Medium Attack During Jump - Jumping Medium Kick
Assist Button + Heavy Attack During Jump - Jumping Heavy Punch
Assist Button Not Held:
Light Attack During Jump - Jumping Light Punch
Medium Attack During Jump - Jumping Medium Punch
Heavy Attack During Jump - Jumping Heavy Kick
Assist Button Held:
Assist Button + Light Attack During Jump - Jumping Light Kick
Assist Button + Medium Attack During Jump - Jumping Medium Kick
Assist Button + Heavy Attack During Jump - Jumping Heavy Punch
Crouching Heavy Punch
调整 1. Increased damage from 800 to 900.
2. Removed hurtbox around the arms 2 frames before hitbox appears.
3. Hurtbox around the arms 1 frame before the hitbox appears is now invincible to strikes.
2. Removed hurtbox around the arms 2 frames before hitbox appears.
3. Hurtbox around the arms 1 frame before the hitbox appears is now invincible to strikes.
Crouching Light Kick
调整 Can now be rapid canceled 1 frame earlier.
Jumping Attack/Crouching Heavy Punch (Guard Action)
修复问题 Removed an unintended proximity block trigger from the first frame of the animation.
Jumping Light Punch/Junping Medium Punch<br>Jumping Light Kick/Jumping Medium Kick
修复问题 1. Fixed an issue where a proximity block trigger was created on frame 1 of the animation. The trigger will now be created 1 frame before the hitbox appears to be consistent with other characters' jump attacks.
2. Fixed an issue where jumping medium kick's proximity block trigger was shorter than other jumping attacks.
2. Fixed an issue where jumping medium kick's proximity block trigger was shorter than other jumping attacks.
Double Knee Bombs (→ + Medium Kick)
调整 Will now induce standing knockback on hit.
Overdrive Wild Hunt (↓↘→ + Two Kicks)
调整 Can now be used in both grounded and aerial combos.
SA1 Shout of Earth (During Lightning Beast) (↓↘→↓↘→ + Punch)
修复问题 Fixed an issue where the buffer input grace period as attack recovery ends was not set during Lighting Beast..
SA3/CA Ground Shave Cannonball (↓↘→↓↘→ + Kick)
修复问题 Fixed an issue where Drive gauge recovery slowed on hit because the hit was judged as being in the air.
Jumping Attacks (Modern Controls)
调整 The following attacks can now be performed while jumping based on whether the Assist button is held:
Assist Button Not Held:
Light Attack During Jump - Jumping Light Punch
Medium Attack During Jump - Jumping Medium Punch
Heavy Attack During Jump - Jumping Heavy Kick
Assist Button Held:
Assist Button + Light Attack During Jump - Jumping Light Kick
Assist Button + Medium Attack During Jump - Jumping Medium Kick
Assist Button + Heavy Attack During Jump - Jumping Heavy Punch
Assist Button Not Held:
Light Attack During Jump - Jumping Light Punch
Medium Attack During Jump - Jumping Medium Punch
Heavy Attack During Jump - Jumping Heavy Kick
Assist Button Held:
Assist Button + Light Attack During Jump - Jumping Light Kick
Assist Button + Medium Attack During Jump - Jumping Medium Kick
Assist Button + Heavy Attack During Jump - Jumping Heavy Punch
Drake Fang (Modern Controls) (↓ + Medium Attack > → + Medium Attack)
调整 Input window timing for the 2nd attack using Modern Controls changed from starting on frame 4 to frame 5. Additionally, it's now more difficult for accidental inputs to occur.
Phantom Cutter (Modern Controls) (↘ + Heavy Attack > ↘ + Heavy Attack)
调整 Input window timing for the 2nd attack using Modern Controls changed from starting on frame 3 to frame 5. Additionally, it's now more difficult for accidental inputs to occur.
Standing Heavy Kick
调整 1. Advantage on hit changed from 3 to 4 frames.
2. Added initial scaling of 20%
2. Added initial scaling of 20%
Crouching Light Kick
调整 1. Recovery changed from 13 to 12 frames.
*Advantage on hit has not changed.
2. Advantage on block changed from -5 to -3.
*Advantage on hit has not changed.
2. Advantage on block changed from -5 to -3.
Crouching Heavy Kick
调整 1. Reduced knockback on hit/counter hit of the first hit.
2. Expanded hitbox of the second hit forward.
3. Expanded proximity block trigger forward.
2. Expanded hitbox of the second hit forward.
3. Expanded proximity block trigger forward.
Knee Bazooka (← + Light Kick)
调整 Extended clash hitbox downward from frames 5 to 20.
Guile High Kick (↘ + Heavy Kick)
调整 1. Increased hitstop on Punish Counter from 13 to 20 frames.
2. Reduced starting
3. Extended the time and height the opponent is blown back on Punish Counter.
2. Reduced starting
combo count
on Punish Counter.3. Extended the time and height the opponent is blown back on Punish Counter.
Normal/Overdrive Sonic Boom (Charge ←, → + Punch or Two Punches)<br>Normal/Overdrive Sonic Cross (→ + Punch or Two Punches During Sonic Blade)<br>Normal/Overdrive Sonic Break (Two Punches During Solid Puncher) (Punch or Two Punches during Sonic Boom or Sonic Break)
调整 Reduced time it takes for projectiles to disappear after leaving the screen.
Overdrive Sonic Blade (↓↙← + Two Punches)
调整 Expanded hitbox horizontally.
SA1 Sonic Hurricane (Side)<br><br>(Charge ←, →←→ + Light Punch or Medium Punch)
调整 Combo hitbox will now hit opponents that have been blown back by projectiles.
Jumping Attacks (Modern Controls)
调整 The following attacks can now be performed while jumping based on whether the Assist button is held:
Assist Button Not Held:
Light Attack During Jump - Jumping Light Punch
Medium Attack During Jump - Jumping Medium Punch
Heavy Attack During Jump - Jumping Heavy Kick
Assist Button Held:
Assist Button + Light Attack During Jump - Jumping Light Kick
Assist Button + Medium Attack During Jump - Jumping Medium Kick
Assist Button + Heavy Attack During Jump - Jumping Heavy Punch
Assist Button Not Held:
Light Attack During Jump - Jumping Light Punch
Medium Attack During Jump - Jumping Medium Punch
Heavy Attack During Jump - Jumping Heavy Kick
Assist Button Held:
Assist Button + Light Attack During Jump - Jumping Light Kick
Assist Button + Medium Attack During Jump - Jumping Medium Kick
Assist Button + Heavy Attack During Jump - Jumping Heavy Punch
Forward Throw
调整 Increased distance from opponent on hit in the corner.
Standing Light Punch
调整 Extended forward momentum from drive rush by 3 frames.
Standing Medium Punch
调整 1. Separated hitboxes, hitboxes other than the lower part of the character have been reduced downward.
2. Extended hitbox around the legs forward from when hitbox appears to the end of the animation.
2. Extended hitbox around the legs forward from when hitbox appears to the end of the animation.
Crouching Light Punch
调整 Extended forward momentum from drive rush by 4 frames.
Crouching Medium Punch
调整 1. Increased recovery on miss from 14 to 16 frames.
2. Expanded hurtbox around the arms forward from frame 17 to the end of the animation on miss.
3. Expanded hurtbox around the feet forward from the beginning of the attack to the end of the animation.
2. Expanded hurtbox around the arms forward from frame 17 to the end of the animation on miss.
3. Expanded hurtbox around the feet forward from the beginning of the attack to the end of the animation.
Crouching Heavy Kick
调整 Effects on knockdown changed to match those on normal hit, as they were different between normal hit and counter hit/Punish Counter.
Neutral Jumping Heavy Kick
调整 Shifted central axis of the character forward during the animation.
Note: This change is purely visual and will have no effect on attack properties.
Note: This change is purely visual and will have no effect on attack properties.
Light Medium Jinrai Kick (↓↘→ + Light Kick or Medium Kick)
调整 1. Reduced Drive gauge damage on block from -3000 to -2000.
2. Expanded hurtbox forward during recovery for the medium version only.
2. Expanded hurtbox forward during recovery for the medium version only.
Normal Kazekama Shin Kick (→ + Light Kick During Jinrai Kick)
调整 1.Reduced Drive gauge damage on block from -3000 to -2000.
2. Changed effect of a successful counter hit/Punish Counter from grounded knockback to knockdown.
2. Changed effect of a successful counter hit/Punish Counter from grounded knockback to knockdown.
Kasai Thrust Kick (→ + Kick Overdrive Kazekama Shin Kick or Overdrive Gorai Axe Kick or Overdrive Senka Snap Kick)
调整 Added initial scaling of 40%.
SA2 Shippu Jinrai-kyaku (↓↘→↓↘→ + Kick)
调整 1. Advantage on block changed from -19 to -5.
2. Increased pushback on block for the last hit.
2. Increased pushback on block for the last hit.
SA3/CA Shinryu Reppa (↓↘→↓↘→ + Punch)
调整 Added 10 frames of recovery on guard and miss.
Jumping Attacks (Modern Controls)
调整 The following attacks can now be performed while jumping based on whether the Assist button is held:
Assist Button Not Held:
Light Attack During Jump - Jumping Light Punch
Medium Attack During Jump - Jumping Medium Punch
Heavy Attack During Jump - Jumping Heavy Kick
Assist Button Held:
Assist Button + Light Attack During Jump - Jumping Light Kick
Assist Button + Medium Attack During Jump - Jumping Medium Kick
Assist Button + Heavy Attack During Jump - Jumping Heavy Punch
Note: Assist + Heavy > Heavy has been adjusted to perform Soaring Eagle Punches.
Assist Button Not Held:
Light Attack During Jump - Jumping Light Punch
Medium Attack During Jump - Jumping Medium Punch
Heavy Attack During Jump - Jumping Heavy Kick
Assist Button Held:
Assist Button + Light Attack During Jump - Jumping Light Kick
Assist Button + Medium Attack During Jump - Jumping Medium Kick
Assist Button + Heavy Attack During Jump - Jumping Heavy Punch
Note: Assist + Heavy > Heavy has been adjusted to perform Soaring Eagle Punches.
Hundred Lightning Kicks (Modern Controls) (Special Button)
调整 When using Modern controls, the light version of the attack will now be performed when using simplified inputs.
<span class='battle_change_caution'>Crouching Light Punch</span>
調整3 06/19/2025
Expanded attack hitbox upward.
Note: Adjusted for interactions with super armor moves such as Gladius.
Expanded attack hitbox upward.
Note: Adjusted for interactions with super armor moves such as Gladius.
Crouching Medium Punch
调整 1. Increased recovery on miss from 13 to 14 frames.
2. Adjusted hurtbox around the arms from frame 6 to the end of the move to match the height of the torso while crouching.
2. Adjusted hurtbox around the arms from frame 6 to the end of the move to match the height of the torso while crouching.
Crouching Heavy Kick
调整 1. Increased the distance moved forward before attack begins.
2. Advantage on block changed from -7 to -9 frames.
2. Advantage on block changed from -7 to -9 frames.
Water Lotus Fist (↘ + Heavy Punch)
调整 1. Advantage on hit changed from +1 to +2 frames.
2. Reduced active frames from 4 to 3 frames.
2. Reduced active frames from 4 to 3 frames.
Falling Crane (↘ + Kick)
修复问题 Fixed an issue where the opponent's Drive gauge would recover on Counter Hit.
<span class='battle_change_caution'>Serenity Stream</span>
不具合修正3 06/19/2025
Previously, if a branching attack from Serenity Stream was Perfect Parried, Chun-Li would be unable to move until Serenity Stream's recovery was complete. Now, Chun-Li will be able to act from the end of the branching attack's recovery.
Note: The Perfect Parry scaling and punish counter state will also reset from the end of the branching attack's recovery.
Previously, if a branching attack from Serenity Stream was Perfect Parried, Chun-Li would be unable to move until Serenity Stream's recovery was complete. Now, Chun-Li will be able to act from the end of the branching attack's recovery.
Note: The Perfect Parry scaling and punish counter state will also reset from the end of the branching attack's recovery.
Kikoken (Charge ←, → + Punch or Two Punches)
调整 Increased the speed the projectile disappears after active frames end.
Light Hundred Lightning Kicks (↓↘→ + Light Kick)
调整 1. Reduced startup from 8 to 5 frames.
2. Extended hitbox forward.
3. Extended the timing to cancel into Super Art 3/Critical Art by 3 frames.
4. Changed effect of a successful Punish Counter from knockback state to blowback knockdown.
5. Reduced blowback on all hits other than the last when hitting an opponent in the air.
6. Added initial scaling of 20%.
2. Extended hitbox forward.
3. Extended the timing to cancel into Super Art 3/Critical Art by 3 frames.
4. Changed effect of a successful Punish Counter from knockback state to blowback knockdown.
5. Reduced blowback on all hits other than the last when hitting an opponent in the air.
6. Added initial scaling of 20%.
Medium Hundred Lightning Kicks (↓↘→ + Medium Kick)
调整 Reduced startup from 14 to 12 frames.
Overdrive Hundred Lightning Kicks (↓↘→ + Two Kicks)
调整 1. Increased damage from 800 to 1000.
2. Changed effect of a successful Punish Counter from knockback state to backward crumple.
3. Changed effect of successful Punish Counter in the air from blowback knockdown, to spin state.
4. Reduced
5. Added initial scaling of 20%.
5. Extended buffer input grace period as attack recovery ends.
2. Changed effect of a successful Punish Counter from knockback state to backward crumple.
3. Changed effect of successful Punish Counter in the air from blowback knockdown, to spin state.
4. Reduced
combo count
starting value on successful Punish Counter in the air.5. Added initial scaling of 20%.
5. Extended buffer input grace period as attack recovery ends.
Overdrive Aerial Hundred Lightning Kicks (↓↘→ + Two Kicks During Neutral or Forward Jump)
调整 1. Reduced recovery after landing on hit from 5 to 3 frames.
2. Increased falling speed after the attack ends.
3. Added a new hitbox when used during a combo, making it easier to hit opponents in front of you.
4. Increased blowback when hitting an opponent in the air.
2. Increased falling speed after the attack ends.
3. Added a new hitbox when used during a combo, making it easier to hit opponents in front of you.
4. Increased blowback when hitting an opponent in the air.
Normal/Overdrive Tensho Kicks (↓↓ + Kick)
调整 1. Extended active frames of first hit from 2 to 3 frames.
2. Extended active frames on hits 3 to 6 of the Overdrive version from 2 to 3 frames.
3. Extended hitboxes for all hits and versions upwards.
4. Extended hitbox on the second hit of the Overdrive version forward when used in a combo.
5. Made the last hit of the heavy version less likely to miss by increasing the distance moved during the third and fourth hits. Falling speed after the move has been increased, which ensures the situation after hitting the move remains unchanged.
2. Extended active frames on hits 3 to 6 of the Overdrive version from 2 to 3 frames.
3. Extended hitboxes for all hits and versions upwards.
4. Extended hitbox on the second hit of the Overdrive version forward when used in a combo.
5. Made the last hit of the heavy version less likely to miss by increasing the distance moved during the third and fourth hits. Falling speed after the move has been increased, which ensures the situation after hitting the move remains unchanged.
SA2 Hoyoku-san (↓↘→↓↘→ + Kick)
调整 1. Opponent will now be drawn inwards between the first hit and when Chun-Li kicks upwards on midair hit.
2. Collision box will now expand upwards on hit on the first hit of the attack instead of the second.
2. Collision box will now expand upwards on hit on the first hit of the attack instead of the second.
SA3 Soten Ranka (↓↙←↓↙←)
调整 Added a new hitbox when used during a combo, making it easier to hit opponents in the air.
General Hurtbox Adjustment
调整 Expanded the hurtbox that acts as the torso's base forward while standing, crouching, and while in the air.
Note: This results in the hurtbox of all techniques expanding, not only while blocking or not holding block.
06/06/2025
The body (core) hurtbox and pushbox when standing, crouching, or in the air has been expanded forward.
Note: This does not just apply to when Zangief is in a hit state or blocking. The forward expansion of the core hurtbox also applies to active hurtboxes during all of his actions and attacks.
Note: This results in the hurtbox of all techniques expanding, not only while blocking or not holding block.
06/06/2025
The body (core) hurtbox and pushbox when standing, crouching, or in the air has been expanded forward.
Note: This does not just apply to when Zangief is in a hit state or blocking. The forward expansion of the core hurtbox also applies to active hurtboxes during all of his actions and attacks.
Jumping Attacks (Modern Controls)
调整 The following attacks can now be performed while jumping based on whether the Assist button is held:
Assist Button Not Held:
Light Attack During Jump - Jumping Light Punch
Medium Attack During Jump - Jumping Medium Punch
Heavy Attack During Jump - Jumping Heavy Kick
Assist Button Held:
Assist Button + Light Attack During Jump - Jumping Light Kick
Assist Button + Medium Attack During Jump - Jumping Medium Kick
Assist Button + Heavy Attack During Jump - Jumping Heavy Punch
Assist Button Not Held:
Light Attack During Jump - Jumping Light Punch
Medium Attack During Jump - Jumping Medium Punch
Heavy Attack During Jump - Jumping Heavy Kick
Assist Button Held:
Assist Button + Light Attack During Jump - Jumping Light Kick
Assist Button + Medium Attack During Jump - Jumping Medium Kick
Assist Button + Heavy Attack During Jump - Jumping Heavy Punch
Bodyslam (Follow Up) (Modern Controls) (Throw > Hold Button)
修复问题 Fixed and issue where holding the throw button when following up a Punish Counter would allow the opponent to recover backwards while using Modern Controls.
Screw Piledriver (Modern Controls) (Special Button)
调整 Attack will no longer occur when inputting up while using simplified controls with Modern Controls.
Russian Suplex/Siberian Express (Modern Controls) (← + Special)
调整 Attack will no longer occur when inputting up while using simplified controls with Modern Controls.
Double Lariat (Modern Controls) (Medium + Heavy Attack)
调整 Changed attack that occurs when pressing all three attack buttons at the same time during Burnout from normal throw to Double Lariat.
Drive Rush
调整 Zangief will now appear slightly further back while moving.
Note: This change is purely visual, the distance traveled will remain the same.
Note: This change is purely visual, the distance traveled will remain the same.
Spinebuster (↘ + Throw)
调整 Reduced knockdown time on hit by 5 frames.
Crouching Medium Kick
调整 Added initial scaling of 20%.
Power Stomps (↓↓ + Medium Kick > Medium Kick > Medium Kick)
调整 Changed attack type of all hits from High to Low.
Drive Impact
调整 Increased the distance moved forward before the attack starts.
Overdrive (Screw Piledriver) (360 + Two Punches)
调整 Extended throw hitbox forward.
Normal/Overdrive Siberian Express (→↘↓↙← + Kick)
调整 Extended throw hitbox forward.
Normal/Overdrive Double Lariat (Two Punches or Three Punches)
调整 Added a new hitbox when the first and second hits are used during a combo, making it easier to hit opponents in front of you.
Jumping Attacks (Modern Controls)
调整 The following attacks can now be performed while jumping based on whether the Assist button is held:
Assist Button Not Held:
Light Attack During Jump - Jumping Light Punch
Medium Attack During Jump - Jumping Medium Punch
Heavy Attack During Jump - Jumping Heavy Punch
Assist Button Held:
Assist Button + Light Attack During Jump - Jumping Light Kick
Assist Button + Medium Attack During Jump - Jumping Medium Kick
Assist Button + Heavy Attack During Jump - Jumping Heavy Kick
Assist Button Not Held:
Light Attack During Jump - Jumping Light Punch
Medium Attack During Jump - Jumping Medium Punch
Heavy Attack During Jump - Jumping Heavy Punch
Assist Button Held:
Assist Button + Light Attack During Jump - Jumping Light Kick
Assist Button + Medium Attack During Jump - Jumping Medium Kick
Assist Button + Heavy Attack During Jump - Jumping Heavy Kick
Yoga Blast (Modern Controls) (↓ + Special Button)
调整 When using Modern controls, the medium version of the attack will now be performed when using simplified inputs.
Crouching Heavy Punch
调整 Reduced hitstop and blockstun from 24 to 20 frames.
Note: Advantage has also been altered from -1/-12 on hit/block to +3/-8 on hit/block.
Note: Advantage has also been altered from -1/-12 on hit/block to +3/-8 on hit/block.
Jumping Heavy Punch
调整 1. Extended hurtbox around the torso forward from attack startup to the end of active frames.
2. Extended hurtbox 50% of the extension from 1 around the torso forward from end of active frames to the end of the animation.
3. Extended hurtbox around the arms downward during active frames 1 and 2.
4. Extended hurtbox around the tros downward during active frames 3 and 4.
Note: Extended hurtboxes have projectile invincibility.
2. Extended hurtbox 50% of the extension from 1 around the torso forward from end of active frames to the end of the animation.
3. Extended hurtbox around the arms downward during active frames 1 and 2.
4. Extended hurtbox around the tros downward during active frames 3 and 4.
Note: Extended hurtboxes have projectile invincibility.
Agile Kick (↙ + Light Kick)
调整 Advantage on block changed from -5 to -3 frames.
Overdrive Yoga Fire (↓↘→ + Two Punches)
调整 1. Reduced startup from 13 to 12 frames.
2. Extended knockback time on block for the second hit.
3. Extended blowback time on both grounded and aerial hit for the second hit.
4. Added a new hitbox when used during a combo for medium and heavy versions, making it easier to hit opponents in front of you.
2. Extended knockback time on block for the second hit.
3. Extended blowback time on both grounded and aerial hit for the second hit.
4. Added a new hitbox when used during a combo for medium and heavy versions, making it easier to hit opponents in front of you.
Medium Yoga Flame (→↘↓↙← + Medium Punch)
调整 Added a new hitbox when used during a combo, making it easier to hit opponents in front of you.
Normal/Overdrive Yoga Blast (→↘↓↙← + Kick or Two Kicks)
调整 Reduced hurtbox downward from the beginning of the attack to when active froms complete.
Medium Yoga Blast (→↘↓↙← + Medium Kick)
调整 1. Added forward movement before the attack begins.
2. Added a new hitbox when used during a combo, making it easier to hit opponents in front of you.
2. Added a new hitbox when used during a combo, making it easier to hit opponents in front of you.
Heavy Yoga Blast (→↘↓↙← + Heavy Kick)
调整 1. Increased startup from 15 to 17 frames.
2. Added a new hitbox when used during a combo, making it easier to hit opponents in front of you.
3. Increased the distance moved forward before the attack begins.
4. Increased the blowback time and distance on grounded hit.
5. Added 20% combo scaling.
2. Added a new hitbox when used during a combo, making it easier to hit opponents in front of you.
3. Increased the distance moved forward before the attack begins.
4. Increased the blowback time and distance on grounded hit.
5. Added 20% combo scaling.
Overdrive Yoga Blast (→↘↓↙← + Two Kicks)
调整 1. Extended hitbox of second hit only after the first hit connects.
2. Added air attack invincibility from attack start to the end of active frames, except around the feet.
2. Added air attack invincibility from attack start to the end of active frames, except around the feet.
Stationary/Forward Yoga Float (↓ + Two Kicks)
调整 1. Reduced time until Yoga Float can be canceled into air attacks by 6 frames.
2. Extended buffer input grace period as actions become able to be performed.
2. Extended buffer input grace period as actions become able to be performed.
Yoga Float (Forward Moving) (→ During Yoga Float)
调整 1. Increased forward movement speed.
2. Jumping heavy punch performed while moving forward will now longer carry more momentum than other attacks.
Note: Heavy punch will now have the same momentum as before.
2. Jumping heavy punch performed while moving forward will now longer carry more momentum than other attacks.
Note: Heavy punch will now have the same momentum as before.
Jumping Attacks (Modern Controls)
调整 The following attacks can now be performed while jumping based on whether the Assist button is held:
Assist Button Not Held:
Light Attack During Jump - Jumping Light Punch
Medium Attack During Jump - Jumping Medium Punch
Heavy Attack During Jump - Jumping Heavy Kick
Assist Button Held:
Assist Button + Light Attack During Jump - Jumping Light Kick
Assist Button + Medium Attack During Jump - Jumping Medium Kick
Assist Button + Heavy Attack During Jump - Jumping Heavy Punch
Assist Button Not Held:
Light Attack During Jump - Jumping Light Punch
Medium Attack During Jump - Jumping Medium Punch
Heavy Attack During Jump - Jumping Heavy Kick
Assist Button Held:
Assist Button + Light Attack During Jump - Jumping Light Kick
Assist Button + Medium Attack During Jump - Jumping Medium Kick
Assist Button + Heavy Attack During Jump - Jumping Heavy Punch
Forward Walk (During Burnout)
修复问题 Fixed an issue where the first frame of Rashid's forward would be faster than intended during burnout.
Standing Light Punch
调整 Extended forward momentum when using attack from Drive Rush by 3 frames.
Standing Medium Punch
调整 Reduced pushback on Punish Counter.
Jumping Heavy Punch
修复问题 Fixed an issue where the Super Art gauge gain on block was the same as on hit.
Light Spinning Mixer (↓↘→ + Light Punch)
调整 Extended knockback time for second hit on block by 3 frames. Missing with the third hit on opponent in Burnout will no longer leave you open to counterattack.
Medium Spinning Mixer (↓↘→ + Medium Punch)
调整 Expanded hit box forward for the first hit.
Boosted Medium Spinning Mixer (↓↘→ + Medium Punch)
调整 Timing of air attack invincibility changed from frames 5 to 8 to frames 3 to 11.
Overdrive Spinning Mixer (↓↘→ + Two Punches)
调整 Third hit will no longer hit grounded opponents.
Overdrive Whirlwind Shot (Hold) (↓↘→ + Hold Two Kicks)
调整 1. Reduced startup from 44 to 41 frames.
2. Reduced full technique length from 79 to 76 frames.
3. Extended time Air Current lasts by 10 frames.
2. Reduced full technique length from 79 to 76 frames.
3. Extended time Air Current lasts by 10 frames.
Overdrive Arabian Cyclone (↓↙← + Two Punches)
修复问题 Fixed an issue where Rashid would be unable to attack with a standing move or have his damage scaled with Perfect Parry scaling after succesfully Perfect Parrying with certain timings.
Overdrive Arabian Skyhigh (↓↙← + Two Kicks During Forward Jump)
调整 Expanded hit box upwards for the first hit during a combo only.
Forward Throw
调整 Increased distance from opponent on hit in the corner.
Jumping Attacks (Modern Controls)
调整 The following attacks can now be performed while jumping based on whether the Assist button is held:
Assist Button Not Held:
Light Attack During Jump - Jumping Light Punch
Medium Attack During Jump - Jumping Medium Punch
Heavy Attack During Jump - Jumping Heavy Punch
Assist Button Held:
Assist Button + Light Attack During Jump - Jumping Light Kick
Assist Button + Medium Attack During Jump - Jumping Medium Kick
Assist Button + Heavy Attack During Jump - Jumping Heavy Kick
Assist Button Not Held:
Light Attack During Jump - Jumping Light Punch
Medium Attack During Jump - Jumping Medium Punch
Heavy Attack During Jump - Jumping Heavy Punch
Assist Button Held:
Assist Button + Light Attack During Jump - Jumping Light Kick
Assist Button + Medium Attack During Jump - Jumping Medium Kick
Assist Button + Heavy Attack During Jump - Jumping Heavy Kick
Standing Medium Punch
调整 1. Increased recovery on block from 14 to 16 frames.
2. Increased knockback time on block from 16 to 18 frames.
3. Extended buffer input grace period as attack recovery ends after missing or on block.
2. Increased knockback time on block from 16 to 18 frames.
3. Extended buffer input grace period as attack recovery ends after missing or on block.
Standing Heavy Punch
调整 Increased pushback on block.
Crouching Medium Punch
调整 1. Reduced startup from 8 to 7 frames.
2. Reduced the height of blowback on hit. Condition after an air combo will remain the same.
2. Reduced the height of blowback on hit. Condition after an air combo will remain the same.
Crouching Medium Kick
调整 Increased initial scaling from 10% to 20%.
Crouching Heavy Kick
调整 Extended hitbox around the feet after active frames end upwards. Hurtbox will now remain until recovery ends.
Chi Wen (→ + Heavy Punch)
调整 Changed hit effect againt a mid-air opponent from blowback to blockback knockdown.
Heavy Nightshade Pulse (↓↙← + Two Punches)
调整 Added initial scaling of 20%.
Medium Serpent Lash (↓↘→ + Medium Punch)
调整 1. Reduced startup from 17 to 14 frames.
2. Increased active frames from 6 to 9 frames.
2. Increased active frames from 6 to 9 frames.
Normal/Overdrive Cruel Fate (↓↙← + Kick or Two Kicks)
调整 Expanded combo hitbox forward for all normal version hits except the last hit, and all hits during Overdrive version.
Overdrive Cruel Fate (↓↙← + Two Kicks)
调整 Expanded collision pushbox upwards on block, making it more difficult to jump over the opponent.
Heel Strike (Kick During Sinister Slide)
调整 Increased pushback on block during burnout.
Back Throw
调整 1. Increased recovery on hit by 7 frames.
2. Extended buffer input grace period as attack recovery ends on hit.
2. Extended buffer input grace period as attack recovery ends on hit.
Jumping Attacks (Modern Controls)
调整 The following attacks can now be performed while jumping based on whether the Assist button is held:
Assist Button Not Held:
Light Attack During Jump - Jumping Light Punch
Medium Attack During Jump - Jumping Medium Punch
Heavy Attack During Jump - Jumping Heavy Kick
Assist Button Held:
Assist Button + Light Attack During Jump - Jumping Light Kick
Assist Button + Medium Attack During Jump - Jumping Medium Punch
Assist Button + Heavy Attack During Jump - Jumping Heavy Punch
Assist Button Not Held:
Light Attack During Jump - Jumping Light Punch
Medium Attack During Jump - Jumping Medium Punch
Heavy Attack During Jump - Jumping Heavy Kick
Assist Button Held:
Assist Button + Light Attack During Jump - Jumping Light Kick
Assist Button + Medium Attack During Jump - Jumping Medium Punch
Assist Button + Heavy Attack During Jump - Jumping Heavy Punch
Forward/Backward Walk (During Burnout)
修复问题 Fixed an issue where Ed's movement would slow during Burnout.
Normal/Overdrive Psycho Flicker (↓↘→ + Kick or Two Kicks)
调整 Screen will now freeze on successful Perfect Parry.
Note: There is no difference in recovery after Perfect Parry of the normal version, regardless of whether the button was held or not.
Note: There is no difference in recovery after Perfect Parry of the normal version, regardless of whether the button was held or not.
Normal Psycho Flicker (↓↘→ + Kick)
调整 Can now be canceled into Kill Rush (Forward/Backward).
Medium/Heavy Psycho Uppercut (→↓↘ + Medium Punch or Heavy Punch)
调整 Decreased Super gauge gain.
Medium Version: 1200 to 1000
Heavy Version: 1500 to 1200
Medium Version: 1200 to 1000
Heavy Version: 1500 to 1200
Forward Throw
调整 1. Increased recovery by 2 frames.
2. Reduced knockdown time on hit.
3. Reduced distance from opponent on hit in the middle of the screen.
4. Increased distance from opponent on hit in the corner.
5. Extended buffer input grace period as attack recovery ends on hit.
2. Reduced knockdown time on hit.
3. Reduced distance from opponent on hit in the middle of the screen.
4. Increased distance from opponent on hit in the corner.
5. Extended buffer input grace period as attack recovery ends on hit.
Akuma
Jumping Attacks (Modern Controls)
调整 The following attacks can now be performed while jumping based on whether the Assist button is held:
Assist Button Not Held:
Light Attack During Jump - Jumping Light Punch
Medium Attack During Jump - Jumping Medium Punch
Heavy Attack During Jump - Jumping Heavy Kick
Assist Button Held:
Assist Button + Light Attack During Jump - Jumping Light Kick
Assist Button + Medium Attack During Jump - Jumping Medium Kick
Assist Button + Heavy Attack During Jump - Jumping Heavy Punch
Assist Button Not Held:
Light Attack During Jump - Jumping Light Punch
Medium Attack During Jump - Jumping Medium Punch
Heavy Attack During Jump - Jumping Heavy Kick
Assist Button Held:
Assist Button + Light Attack During Jump - Jumping Light Kick
Assist Button + Medium Attack During Jump - Jumping Medium Kick
Assist Button + Heavy Attack During Jump - Jumping Heavy Punch
Bone Crusher Axe Kick (Modern Controls) (Medium Attack > Heavy Attack)
调整 Input window timing for the 2nd attack using Modern Controls changed from starting on frame 4 to frame 5. Additionally, it's now more difficult for accidental inputs to occur.
Kikoku Combination (Modern Controls) (→ + Heavy Attack > Heavy Attack > Heavy Attack)
调整 Input window timing for the 3nd attack using Modern Controls changed from starting on frame 2 to frame 5. Additionally, it's now more difficult for accidental inputs to occur.
Crouching Medium Punch
调整 1. Increased recovery on miss from 14 to 16 frames.
2. Expanded hurtbox around the feet from after the attack begins. Hurtbox will now remain until recovery ends.
3. Extended the time hurtbox around the arms shrinks from 16 to 17 frames.
4. The hurtbox in 3 has also been moved upward, and is now level with the top of the character's head.
5. Expanded hurtbox around the arms after frame 21. Hurtbox will now remain until recovery ends.
6. Increased pushback on hit.
2. Expanded hurtbox around the feet from after the attack begins. Hurtbox will now remain until recovery ends.
3. Extended the time hurtbox around the arms shrinks from 16 to 17 frames.
4. The hurtbox in 3 has also been moved upward, and is now level with the top of the character's head.
5. Expanded hurtbox around the arms after frame 21. Hurtbox will now remain until recovery ends.
6. Increased pushback on hit.
Crouching Light Kick
调整 Attack can now be rapid canceled 1 frame earlier.
Crouching Heavy Kick
调整 Reduced knockdown time by 5 frames when hitting an opponent in the air.
Rago High Kick (← + Heavy Kick)
调整 Increased pushback on block.
Bone Crusher Axe Kick (Medium Kick > Heavy Kick)
修复问题 Fixed an issue where the second hit would face the wrong direction based on the opponent's position after the first hit connects in the air.
Kikoku Combination (→ + Heavy Punch > → + Heavy Punch > Heavy Kick)
调整 1. Expanded hurtbox forward from 2 frames before the initial hit ends to the end of recovery.
2. Reduced pushback on block.
3. Increased Drive gauge gain of first hit from 2000 to 3000.
2. Reduced pushback on block.
3. Increased Drive gauge gain of first hit from 2000 to 3000.
Normal Gou Hadoken (↓↘→ + Punch)
调整 Reduced pushback on block.
Normal Gou Hadoken (Level 2) (↓↘→ + Hold Punch)
调整 Increased opponent's drive gauge increase on Drive Parry from 4000 to 5000.
Normal Shinku Hadoken (↓↘→ + Punch During Forward Jump)
调整 Increased initial scaling from 20% to 40%.
Overdrive Gou Hadoken (↓↘→ + Two Punches)
修复问题 Fixed an issue where this technique and Zanku Hadouken shared an input.
Overdrive Gou Shoryuken (→↓↘ + Two Punches)
调整 Third hit no longer hits a grounded opponent.
Heavy Adamant Flame (↓↙← + Heavy Punch)
调整 1. Advantage on block changed from -2 to -3 frames.
2. Reduced pushback on block.
Note: Pushback during burnout remains unchanged.
2. Reduced pushback on block.
Note: Pushback during burnout remains unchanged.
Overdrive Demon Raid (↓↘→ + Two Kicks)
调整 Can now be canceled into Tenma Gozanku.
Demon Blade Kick (Kick During Demon Raid)
调整 Increased initial scaling from 20% to 30% when performed from normal Demon Raid.
SA1 Tenma Gozanku (↓↘→↓↘→ + Kick During Neutral or Forward Jump)
调整 Extended hitbox upwards during a combo only.
M. Bison
Jumping Attacks (Modern Controls)
调整 The following attacks can now be performed while jumping based on whether the Assist button is held:
Assist Button Not Held:
Light Attack During Jump - Jumping Light Punch
Medium Attack During Jump - Jumping Medium Punch
Heavy Attack During Jump - Jumping Heavy Kick
Assist Button Held:
Assist Button + Light Attack During Jump - Jumping Light Kick
Assist Button + Medium Attack During Jump - Jumping Medium Kick
Assist Button + Heavy Attack During Jump - Jumping Heavy Punch
Assist Button Not Held:
Light Attack During Jump - Jumping Light Punch
Medium Attack During Jump - Jumping Medium Punch
Heavy Attack During Jump - Jumping Heavy Kick
Assist Button Held:
Assist Button + Light Attack During Jump - Jumping Light Kick
Assist Button + Medium Attack During Jump - Jumping Medium Kick
Assist Button + Heavy Attack During Jump - Jumping Heavy Punch
Shadow Hammer/Shadow Spear (Modern Controls) (Assist Button + Heavy Attack > → + Heavy Attack or ↓ + Heavy Attack)
调整 Input window timing for the 2nd attack using Modern Controls changed from starting on frame 3 to frame 5. Additionally, it's now more difficult for accidental inputs to occur.
Standing Light Punch
調整・不具合修正 1. Reduced active frames from 3 to 2 frames.
2. Increased recovery from 9 to 11 frames.
3. Increased total attack length from 16 to 17 frames.
4. Increased knockback time on hit by 1 frame.
Note: This has no affect on advantage.
5. Advantage on block changed from -2 to -3 frames.
6. Extended the window to Drive Rush cancel from 7 to 8 frames.
7. Fixed an issue where a rapid cancel would occur 1 frame faster than other cancels.
2. Increased recovery from 9 to 11 frames.
3. Increased total attack length from 16 to 17 frames.
4. Increased knockback time on hit by 1 frame.
Note: This has no affect on advantage.
5. Advantage on block changed from -2 to -3 frames.
6. Extended the window to Drive Rush cancel from 7 to 8 frames.
7. Fixed an issue where a rapid cancel would occur 1 frame faster than other cancels.
Standing Heavy Punch
调整 1. Increased the distance the central axis of the character moves from 3 frames before the attack begins to 3 frames after active frames end.
Note: Attack animation has not changed, but the hurtbox will now extend further forward.
2. Active frames, hitbox, and collision pushbox have been altered to reflect the change in 1. The attack's reach and the behavior after hit remain unchanged.
3. Increased recovery on whiff and when hitting a armored attack from 17 to 20 frames.
Note: Attack animation has not changed, but the hurtbox will now extend further forward.
2. Active frames, hitbox, and collision pushbox have been altered to reflect the change in 1. The attack's reach and the behavior after hit remain unchanged.
3. Increased recovery on whiff and when hitting a armored attack from 17 to 20 frames.
Standing Medium Kick
调整 1. Reduced active frames from 4 to 3 frames.
2. Increased recovery from 16 to 17 frames.
3. Expanded hurtbox on frames 18 to 20 downwards, and hurtbox from frames 21 to 29 forwards.
2. Increased recovery from 16 to 17 frames.
3. Expanded hurtbox on frames 18 to 20 downwards, and hurtbox from frames 21 to 29 forwards.
Crouching Light Punch
调整 Extended forward momentum when using attack from Drive Rush by 1 frame.
Crouching Light Kick
调整 Attack can now be rapid canceled 1 frame earlier.
Psycho Crusher Attack (Charge ←, → + Punch)<br>Shadow Rise (Charge ↓, ↑ + Kick)
修复问题 Fixed an issue where both back and down charges would reset on attack startup.
Light Psycho Crusher Attack (Charge ←, → + Punch)
調整・不具合修正3 1. Reduced attack startup from 16 to 14 frames.
2. Added a hitbox when attack hits on the first active frame during a combo, making it easier to hit an opponent in front of you.
3. Increased knockdown time by 4 frames.
06/06/2025
Fixed an issue where Psycho Mines embedded in an opponent would detonate twice if the opponent was hit at certain specific times.
2. Added a hitbox when attack hits on the first active frame during a combo, making it easier to hit an opponent in front of you.
3. Increased knockdown time by 4 frames.
06/06/2025
Fixed an issue where Psycho Mines embedded in an opponent would detonate twice if the opponent was hit at certain specific times.
Medium Pyscho Crusher Attack (Charge ←, → + Medium Punch)
调整 Increased knockdown time by 4 frames on hit.
Overdrive Pyscho Crusher Attack (Charge ←, → + Two Punches) (With Psycho Mine)
修复问题 Fixed an issue where proximity block trigger would not move after the end of the technique.
Light/Medium Back Fist Combo (↓↙← + Light Punch or Medium Punch)
调整 1. Added 3 frames of recovery on hit only.
2. Increased blowback on it after the second hit.
3. Extended buffer input grace period as attack recovery ends on hit.
2. Increased blowback on it after the second hit.
3. Extended buffer input grace period as attack recovery ends on hit.
Overdrive Backfist Combo (↓↙← + Two Punches)
调整 1. Expanded hitbox horizontally for the initial hit during a combo.
2. Reduced horizontal blowback after the third hit.
2. Reduced horizontal blowback after the third hit.
Jumping Attacks (Modern Controls)
调整 The following attacks can now be performed while jumping based on whether the Assist button is held:
Assist Button Not Held:
Light Attack During Jump - Jumping Light Kick
Medium Attack During Jump - Jumping Medium Punch
Heavy Attack During Jump - Jumping Heavy Kick
Assist Button Held:
Assist Button + Light Attack During Jump - Jumping Light Punch
Assist Button + Medium Attack During Jump - Jumping Medium Kick
Assist Button + Heavy Attack During Jump - Jumping Heavy Punch
Assist Button Not Held:
Light Attack During Jump - Jumping Light Kick
Medium Attack During Jump - Jumping Medium Punch
Heavy Attack During Jump - Jumping Heavy Kick
Assist Button Held:
Assist Button + Light Attack During Jump - Jumping Light Punch
Assist Button + Medium Attack During Jump - Jumping Medium Kick
Assist Button + Heavy Attack During Jump - Jumping Heavy Punch
Standing Medium Punch
调整 1. Advantage on hit changed from +1 to +2 frames.
2. Expanded hitbox forward from first active attack frame.
3. Delayed timing to cancel into Power Drive/Power Shoot by 1 frame.
4. Extended timing to cancel into Power Drive/Power Shoot by 1 frame.
06/06/2025
3. Delayed timing to cancel into Power Drive/Power Shoot/Passing Sway by 1 frame.
4. Extended timing to cancel into Power Drive/Power Shoot/Passing Sway by 1 frame.
2. Expanded hitbox forward from first active attack frame.
3. Delayed timing to cancel into Power Drive/Power Shoot by 1 frame.
4. Extended timing to cancel into Power Drive/Power Shoot by 1 frame.
06/06/2025
3. Delayed timing to cancel into Power Drive/Power Shoot/Passing Sway by 1 frame.
4. Extended timing to cancel into Power Drive/Power Shoot/Passing Sway by 1 frame.
Standing Medium Kick
调整 Extended buffer input grace period as attack recovery ends.
Standing Heavy Kick
调整 Reduced pushback on Punish Counter.
Crouching Medium Punch
调整 1. Expanded hurtbox around the feet forward from attack startup until the attack is finished.
2. Delayed the timing the hurtbox around the arms disappears from 2 frames before recovery ends, to the end of recovery.
2. Delayed the timing the hurtbox around the arms disappears from 2 frames before recovery ends, to the end of recovery.
Crouching Light Kick
调整 Advantage on block changed from -3 to -2 frames.
Crouching Heavy Kick
调整 1. Reduced startup from 11 to 10 frames.
2. Increased recovery from 23 to 24 frames.
3. Increased knockdown time on Punish Counter by 1 frame.
4. Increased knockback time on block by 1 frame.
5. Increased blowback time on aerial hit by 1 frame.
2. Increased recovery from 23 to 24 frames.
3. Increased knockdown time on Punish Counter by 1 frame.
4. Increased knockback time on block by 1 frame.
5. Increased blowback time on aerial hit by 1 frame.
Power Drive (Medium Punch > Heavy Punch)
调整 1. Increased damage from 700 to 1100.
2. Reduced startup from 16 to 15 frames.
3. Added immediate scaling of 30%.
2. Reduced startup from 16 to 15 frames.
3. Added immediate scaling of 30%.
Medium Power Wave (↓↘→ + Medium Punch)
调整 Increased the time hurtbox around the arms lasts from 18 to 21 frames.
Round Wave (↓↘→ + Heavy Punch)
调整 Changed attack type from High to Low.
Overdrive Power Wave (↓↘→ + Two Punches)
调整 Increased the time hurtbox around the arms lasts from 16 to 21 frames.
Quick Burn (↓↙← + Light Punch)
调整 1. Increased distance moved during attack.
2. Expanded proximity block trigger forward.
3. After canceling from this attack, Super Art 3/Critical Art startup is now faster.
2. Expanded proximity block trigger forward.
3. After canceling from this attack, Super Art 3/Critical Art startup is now faster.
Overdrive Quick Burn (↓↙← + Light Punch Heavy Punch)
调整 1. Extended hitbox of second hit forward.
2. Expanded proximity bock trigger forward.
2. Expanded proximity bock trigger forward.
Heavy Burn Knuckle (↓↙← + Heavy Punch)
调整 Expanded timing to cancel into Super Art 3/Critical Art from to 1 to 5 frames from 1 frame.
Overdrive Burn Knuckle (↓↙← + Two Punches)
调整 Extended hitbox upward.
Medium Crack Shoot (↓↙← + Medium Kick)
调整 Increased damage on grounded opponent from 700 to 900.
Heavy Crack Shoot (↓↙← + Heavy Kick)
调整 1. Reduced hurtbox around the feet downward on frames 17 to 27.
2. Altered hurtbox after the hitbox appears, making it less likely to be hit from behind after jumping over a projectile.
3. Expanded hitbox upward on the 3rd hit during a combo.
4. Increased maximum
5. Reduced
2. Altered hurtbox after the hitbox appears, making it less likely to be hit from behind after jumping over a projectile.
3. Expanded hitbox upward on the 3rd hit during a combo.
4. Increased maximum
combo count
for the 3rd hit.5. Reduced
combo count
value for the 3rd hit. Overdrive Crack Shoot (↓↙← + Two Kicks)
调整 Extended hitbox upward.
Twin Geyser (↓↙←↓↙← + Punch > Two Punches)
调整 Reduced horizontal blowback on hit.
Jumping Attacks (Modern Controls)
调整 The following attacks can now be performed while jumping based on whether the Assist button is held:
Assist Button Not Held:
Light Attack During Jump - Jumping Light Punch
Medium Attack During Jump - Jumping Medium Punch
Heavy Attack During Jump - Jumping Heavy Kick
Assist Button Held:
Assist Button + Light Attack During Jump - Jumping Light Kick
Assist Button + Medium Attack During Jump - Jumping Medium Kick
Assist Button + Heavy Attack During Jump - Jumping Heavy Punch
Assist Button Not Held:
Light Attack During Jump - Jumping Light Punch
Medium Attack During Jump - Jumping Medium Punch
Heavy Attack During Jump - Jumping Heavy Kick
Assist Button Held:
Assist Button + Light Attack During Jump - Jumping Light Kick
Assist Button + Medium Attack During Jump - Jumping Medium Kick
Assist Button + Heavy Attack During Jump - Jumping Heavy Punch
Foward Walk
修复问题 Fixed an issue where Mai would not recover Drive gauge while walking forward.
Standing Heavy Punch
调整 1. Drive gauge increase changed from 3000 to 2000.
2. Reduced pushback.
2. Reduced pushback.
Standing Heavy Kick
调整 1. Increased recovery from 19 to 22 frames when the attack misses.
2. Expanded body hurtbox forward from the end of active frames to the end of recovery.
3. Reduced pushback on block.
2. Expanded body hurtbox forward from the end of active frames to the end of recovery.
3. Reduced pushback on block.
Crouching Light Punch
调整 Expanded attack hitbox upward.
Crouching Heavy Kick
调整 Increased recovery from 22 to 25 frames when the attack misses.
Normal/Overdrive Kachousen (↓↘→ + Punch or Two Punches)
调整 Expanded the projectile clash hitbox inward as the hitbox appears.
Normal/Boosted Kachousen (↓↘→ + Punch)
调整 1. Hurtbox around the legs will now last until recovery has fully completed.
2. Hurtbox around the arms will now last for 27 frames from attack startup.
2. Hurtbox around the arms will now last for 27 frames from attack startup.
Normal Boosted Kachousen (Held) (↓↘→ + Hold Punch)
调整 1. Added a projectile invincible hurtbox at the feet from the 3rd frame.
2. Expanded body hurtbox forward from the 19th frame to the end of recovery when the button is held.
2. Expanded body hurtbox forward from the 19th frame to the end of recovery when the button is held.
Normal/Boosted Kachousen (Held)<br>Overdrive Normal/Boosted Kachousen<br>Overdrive Boosted Kachousen (Held)<br>Overdrive Normal/Boosted Midare Kachousen
调整 Removed proximity block trigger from fans after bouncing.
Overdrive Normal/Boosted Kachousen (↓↘→ + Two Punches)
调整 1. Increased Drive Gauge gained when Drive Parrying/Perfect Parrying the normal version from 2500/2500 to 5000/5000.
2. Increased Drive Gauge gained when Drive Parrying/Perfect Parrying the Overdrive version from 1250/1250/2500 to 2500/2500/5000.
2. Increased Drive Gauge gained when Drive Parrying/Perfect Parrying the Overdrive version from 1250/1250/2500 to 2500/2500/5000.
Normal/Boosted Midare Kachousen (↓↘→ + Hold Two Punches > → + Punch)
调整 Only one fan will remain and bounce now after only one of the 3rd and 4th fans clash with an opponent's moves.
Light Normal/Boosted Ryuuenbu (↓↙← + Light Punch)
调整 Increased Drive gauge gain from 1000 to 2000.
Medium Ryuuenbu (↓↙← + Medium Punch)
调整 Increased Drive gauge gain from 2000 to 3000.
Normal Hishou Ryuuenjin (→↓↘ + Kick)
调整 Increased
combo count
upper limit. Normal/Overdrive Musasabi no Mai (Normal/Boosted) (↓↙←+P or PP during a forward jump)
调整 Will now be standing when hit during recovery instead of crouching.
Normal/Overdrive Boosted Musasabi no Mai (↓↙← + Punch or Two Punches During Foward Jump)
修复问题 Fixed an issue where the normal version would be performed when the Overdrive version two-button input was slightly mistimed with Flame stocks.
SA1 Normal/Boosted Kagerou no Mai (↓↘→↓↘→ + Punch)
調整・不具合修正 1. Flame stocks will now be gained at the end of recovery instead of on attack startup.
2. Fixed an issue where Flame stocks would not be consumed when using the Flame stock boosted version.
2. Fixed an issue where Flame stocks would not be consumed when using the Flame stock boosted version.
SA3/CA Shiranui Ryuu: Enbu Ada Zakura (↓↙←↓↙← + Punch)
调整 Added 50% damage scaling to non-cinematic version.
Drive Reversal
调整 Expanded hitbox during frames 1 and 2 to match frame 3 in order to prevent hitbox from expanding further while active.
Character Guides & Tutorials
- 不具合修正 Some character guides and tutorials had replays that didn't play properly, or text that was inaccurate due to changes made during previous battle adjustment updates. These have now been fixed.
Drive Impact
- 不具合修正 Fixed an issue that caused the input buffer time to be shorter than normal in cases where the attack did not hit the opponent after absorbing a blow with super armor.
Drive Reversal (From Block/Recovery)
- 不具合修正 The backward movement parameters of the first frame have been removed to align with how this technique performs for other characters.
Impacted Characters: Kimberly, Blanka
Perfect Parry
- 調整 If a multi-hit attack is Perfect Parried, it is no longer possible to cancel from the 2nd attack and on.
This fix was implemented during the 12.02.2024 update, but was rolled back due to a known issue. That issue has now been resolved, so this is being re-implemented with this update.
Normal/Overdrive Rond-point<br>(↓↘→ + Kick)
修复问题 Fixed an issue where it was not possible to cancel into a Super Art if this move was parried by the opponent.
SA1 Bushin Beats<br>(↓↘→↓↘→ + Kick)<br>SA2 Bushin Scramble/Soaring Bushin Scramble<br>(↓↙←↓↙← + Punch)
修复问题 Fixed an issue where these moves would not KO the opponent when trading hits.
Overdrive Dimachaerus<br>(↓↙← + Two Punches)
调整 The Super Art cancel input buffer window timing has been changed to start from frame 10 instead of frame 2.
Note: This change has been made to cut down on cases where inputting → + Punch after performing an Overdrive Dimachaerus with ↓↙←↓↙← + Two Punches would result in Marisa's SA2 activating by mistake.
Note: This change has been made to cut down on cases where inputting → + Punch after performing an Overdrive Dimachaerus with ↓↙←↓↙← + Two Punches would result in Marisa's SA2 activating by mistake.
Threebeat Combo<br>(Light Punch > Medium Kick > Medium Kick)
修复问题 Fixed an issue where the the second attack would not come out if a downward direction input was being made at the same time.
SA2 Killer Bee Spin/Aerial Killer Bee Spin<br>(↓↙←↓↙← + Punch)
修复问题 Fixed an issue where these moves would not KO the opponent when trading hits.
Crouching Light Kick
修复问题 Fixed an issue where it was not possible to cancel into a special move if this move was parried by the opponent.
Tenku Kick (Modern Controls)<br>(↓ + Heavy Attack, during Serenity Stream)
修复问题 Fixed an issue where the jump cancel input buffer window after a hit when using Modern Controls differed from the window timing for Classic Controls.
Backward Walk (During Burnout)
修复问题 Fixed an issue where the first frame of a backwards walk during Burnout behaved the same as walking forward.
SA1 Super Rashid Kick<br>(↓↘→↓↘→ + Kick)
修复问题 1. Fixed an issue where this move would not KO the opponent when trading hits.
2. Fixed an issue where the knockback time was considerably short when trading hits.
2. Fixed an issue where the knockback time was considerably short when trading hits.
Level 1 Psycho Knuckle<br>(Hold Heavy Punch)
修复问题 Fixed an issue that caused opponents to not be able to move backwards after being hit with this move during the late active frames (beyond frame 10).
Akuma
Forward Ashura Senku<br>(→ + Three Kicks)
调整 Expanded the throw hurtbox backwards when moving with this technique to make it more difficult to avoid an opponent's throw attempts at the moment of passing through them.
M. Bison
Drive Impact
调整 1. The timing for the character's central axis starting to move forward has been changed from frame 13 to frame 2, increasing the amount of forward movement until the end of the active frames.
Note: The appearance of the movement until the end of the active frames has not been changed.
2. The attack hitbox and pushbox have been adjusted for change 1, so that the reach and situation on hit are not drastically different from before.
3. The hurtbox and armor hurtbox have been adjusted for change 1.
Note: The appearance of the movement until the end of the active frames has not been changed.
2. The attack hitbox and pushbox have been adjusted for change 1, so that the reach and situation on hit are not drastically different from before.
3. The hurtbox and armor hurtbox have been adjusted for change 1.
Forward Walk
调整 The walk animation has been updated to pull the central axis of the character further back so that their appearance on screen better represents their actual position.
Note: This is purely a visual adjustment and no changes have been made to the walk's properties.
Note: This is purely a visual adjustment and no changes have been made to the walk's properties.
Overall Concept
The purpose of these adjustments is to further balance the game, so there will be many changes to tune techniques up and down. There are also some adjustments being made that will impact all characters, such as changes to throws and jumps. For more details, please refer to the battle tuning concept for each character. Below you'll find our overall adjustment direction.
Adjustments to Tune Down Certain Aspects
We've taken a look at defensive techniques that can change a fight too significantly when the player gets a correct read. This is primarily targeting some attacks with invincibility, and low risk techniques that allow for side switching.
If these techniques are too strong, the risk of being pushed into the corner of the stage greatly reduces, and the attacking side would also be taking on more risk than necessary, making it difficult to continue with their offensive, so we are making adjustments to alleviate this issue.
Reassessing Crouching Heavy Kicks (Modern: ↘+Heavy Attack) on Block
We've taken a look at how some character's Crouching Heavy Kick works after block and made it easier to counterattack.
With Street Fighter 6 we've made efforts to make blocked Crouching Heavy Kicks easy to counter attack when they're blocked, but due to their range and attack hitboxes, they could become easy ways to launch an offensive plan when used carefully.
The difficulty in countering a blocked Crouching Heavy kick depends on the matchup, but some characters had more low risk cases than others, so we increased the risk of using the attack by adjusting pushback on block and recovery.
This change applies to Jamie, Ken, Cammy, Akuma and M. Bison.
Please note that while there are other characters that are difficult to counterattack after a block other than the ones noted above, we believe that their attacks can only be used in specific situations due to their interaction with other moves and their individual properties, so they have been left out of this adjustment.
Adjustments to Jump Cancels
We've made adjustments so that characters cannot avoid a normal throw by using techniques that cause the character to leave the ground and then follow up with a special move as a counter attack.
With this iteration of Street Fighter, techniques that offered big returns against normal throws would be adjusted for balance by doing things like adding scaling, but the above mentioned technique is very difficult to adjust for each and every move. For that reason we've opted for this global change. This is one way we're reassessing defensive techniques, which is part of our overall plan to tune down certain aspects of the game. We feel that this is a necessary step to enable more aggressive offensive strategies.
Please note however, that jump cancels can still be performed, so this will not affect how players take control of the characters.
Also, this adjustment is only for normal throws. We believe that this technique didn't provide a huge advantage against command throws so this change doesn't apply in those cases.
Adjustments to Tune Down Certain Aspects
We've taken a look at defensive techniques that can change a fight too significantly when the player gets a correct read. This is primarily targeting some attacks with invincibility, and low risk techniques that allow for side switching.
If these techniques are too strong, the risk of being pushed into the corner of the stage greatly reduces, and the attacking side would also be taking on more risk than necessary, making it difficult to continue with their offensive, so we are making adjustments to alleviate this issue.
Reassessing Crouching Heavy Kicks (Modern: ↘+Heavy Attack) on Block
We've taken a look at how some character's Crouching Heavy Kick works after block and made it easier to counterattack.
With Street Fighter 6 we've made efforts to make blocked Crouching Heavy Kicks easy to counter attack when they're blocked, but due to their range and attack hitboxes, they could become easy ways to launch an offensive plan when used carefully.
The difficulty in countering a blocked Crouching Heavy kick depends on the matchup, but some characters had more low risk cases than others, so we increased the risk of using the attack by adjusting pushback on block and recovery.
This change applies to Jamie, Ken, Cammy, Akuma and M. Bison.
Please note that while there are other characters that are difficult to counterattack after a block other than the ones noted above, we believe that their attacks can only be used in specific situations due to their interaction with other moves and their individual properties, so they have been left out of this adjustment.
Adjustments to Jump Cancels
We've made adjustments so that characters cannot avoid a normal throw by using techniques that cause the character to leave the ground and then follow up with a special move as a counter attack.
With this iteration of Street Fighter, techniques that offered big returns against normal throws would be adjusted for balance by doing things like adding scaling, but the above mentioned technique is very difficult to adjust for each and every move. For that reason we've opted for this global change. This is one way we're reassessing defensive techniques, which is part of our overall plan to tune down certain aspects of the game. We feel that this is a necessary step to enable more aggressive offensive strategies.
Please note however, that jump cancels can still be performed, so this will not affect how players take control of the characters.
Also, this adjustment is only for normal throws. We believe that this technique didn't provide a huge advantage against command throws so this change doesn't apply in those cases.
luke
We've primarily looked at giving some of Luke's lesser-used moves more purpose and reassessing his perfect input combos.
Double Impact (→+Heavy Punch)
While this attack can be hit confirmed and can't be countered when blocked, it has comparable range to Standing Heavy Punch, which is also a quick attack, meaning it doesn't get much love in a fight. For this reason we've looked at increasing its forward moving distance so there's a clear range difference, making it a good option against opponents who are further away.
Overdrive Sand Blast / Fatal Shot (↓↘→+Two Punches)/(Two Punches after OD Sand Blast)
We reassessed this technique as it didn't give that much of a return compared to other Overdrive projectiles. For Overdrive Sand Blast we removed the hurtbox that appears before the attack startup. Removing this hurtbox makes it more reliable as a zoning tool. Additionally, Fatal Shot had limited applications so we changed its behavior on hit to provide more of a payoff for the player.
Medium Flash Knuckle (Perfect Input) (↓↙←+Medium Punch (Hold))
We reexamined this attack as Luke's perfect input combos lost some of their appeal due to combo scaling on his primary tools and because you can combo into both the perfect input and charged version from Standing Heavy Punch. Now depending on your combo opener, you can deal just as much damage as before.
Double Impact (→+Heavy Punch)
While this attack can be hit confirmed and can't be countered when blocked, it has comparable range to Standing Heavy Punch, which is also a quick attack, meaning it doesn't get much love in a fight. For this reason we've looked at increasing its forward moving distance so there's a clear range difference, making it a good option against opponents who are further away.
Overdrive Sand Blast / Fatal Shot (↓↘→+Two Punches)/(Two Punches after OD Sand Blast)
We reassessed this technique as it didn't give that much of a return compared to other Overdrive projectiles. For Overdrive Sand Blast we removed the hurtbox that appears before the attack startup. Removing this hurtbox makes it more reliable as a zoning tool. Additionally, Fatal Shot had limited applications so we changed its behavior on hit to provide more of a payoff for the player.
Medium Flash Knuckle (Perfect Input) (↓↙←+Medium Punch (Hold))
We reexamined this attack as Luke's perfect input combos lost some of their appeal due to combo scaling on his primary tools and because you can combo into both the perfect input and charged version from Standing Heavy Punch. Now depending on your combo opener, you can deal just as much damage as before.
jamie
Jamie will now regain some Drive whenever he performs a technique that increases his drink level even when he's not at drink level 4.
This will make it easier for him to fight at the beginning of a round while also letting him manage his Drive gauge. We felt that instead of the drawback of stopping your offensive to raise Jamie's drink level, we wanted to allow him to express his strengths and make it easier for players to experience that.
Another improvement Jamie receives is that the 2nd hit of his Jumping Heavy Kick will now knock down even on a normal hit, giving you a guaranteed return when chasing down an opponent.
This will make it easier for him to fight at the beginning of a round while also letting him manage his Drive gauge. We felt that instead of the drawback of stopping your offensive to raise Jamie's drink level, we wanted to allow him to express his strengths and make it easier for players to experience that.
Another improvement Jamie receives is that the 2nd hit of his Jumping Heavy Kick will now knock down even on a normal hit, giving you a guaranteed return when chasing down an opponent.
manon
For Manon we took a look at how much Super Art and Drive gauge she gains from her attacks, as well doing some minute tuning.
Now, Manège Doré (→↘↓↙←+Punch) and Renversé (↓↘→+Punch) will gain more Super Art gauge according to her medal level. She also gains more Drive gauge for her mid-range attack Heavy Dégagé (↓↙←+Heavy Kick) and the close range À Terre (Medium Punch > Medium Kick), which will allow her to gain resources more easily.
Grand Fouetté (Kick during Renversé)
This has been adjusted to take care of situations where Medium Dégagé would not reach when this attack hit from a specific range.
Now, Manège Doré (→↘↓↙←+Punch) and Renversé (↓↘→+Punch) will gain more Super Art gauge according to her medal level. She also gains more Drive gauge for her mid-range attack Heavy Dégagé (↓↙←+Heavy Kick) and the close range À Terre (Medium Punch > Medium Kick), which will allow her to gain resources more easily.
Grand Fouetté (Kick during Renversé)
This has been adjusted to take care of situations where Medium Dégagé would not reach when this attack hit from a specific range.
kimberly
Kimberly is a character that is supposed to specialize in offense, but she has only a few reliable moves to help her in the neutral, which makes it difficult for her to create opportunities for herself. Due to this we've made adjustments to help her out.
Water Slicer Slide (↘+Medium Kick)
This attack was designed to nip at the opponent's feet, but even when it landed it often left Kimberly in a disadvantageous situation, making it difficult to incorporate into anyone's gameplan. To help this attack out we've made her recovery during active frames 1-4 fixed so that as long as it hits Kimberly will be at an advantage.
Hisen Kick (→+Heavy Kick)
This technique was slow and didn't have great hitboxes, making it easy to deal with, so we've improved its hitbox to make it more usable in a fight. In addition to its better reach, it'll also lose less to low profile attacks like Crouching Medium Punch. Finally, Kimberly will now gain a lot of Drive from this attack, giving her an effective tool to replenish the Drive gauge.
Standing Heavy Punch
This attack was designed to give a big payoff if you landed a good hit on the opponent, but we adjusted its range to make it easier to use as the starting point of Kimberly's offense. It's now something you can realistically use to force your opponent to block, and combined with the adjustments to Arc Step, Kimberly now has some great attacks to launch from.
In order to balance the move and not make it too powerful, the low position hurtbox has not been changed.
Normal/Overdrive Arc Step (Automatically activates after getting close with Sprint)
The startup for this technique is now faster, and it can now be used in more combos that are difficult to shut down with normal attacks.
Water Slicer Slide (↘+Medium Kick)
This attack was designed to nip at the opponent's feet, but even when it landed it often left Kimberly in a disadvantageous situation, making it difficult to incorporate into anyone's gameplan. To help this attack out we've made her recovery during active frames 1-4 fixed so that as long as it hits Kimberly will be at an advantage.
Hisen Kick (→+Heavy Kick)
This technique was slow and didn't have great hitboxes, making it easy to deal with, so we've improved its hitbox to make it more usable in a fight. In addition to its better reach, it'll also lose less to low profile attacks like Crouching Medium Punch. Finally, Kimberly will now gain a lot of Drive from this attack, giving her an effective tool to replenish the Drive gauge.
Standing Heavy Punch
This attack was designed to give a big payoff if you landed a good hit on the opponent, but we adjusted its range to make it easier to use as the starting point of Kimberly's offense. It's now something you can realistically use to force your opponent to block, and combined with the adjustments to Arc Step, Kimberly now has some great attacks to launch from.
In order to balance the move and not make it too powerful, the low position hurtbox has not been changed.
Normal/Overdrive Arc Step (Automatically activates after getting close with Sprint)
The startup for this technique is now faster, and it can now be used in more combos that are difficult to shut down with normal attacks.
marisa
For Marisa we made adjustments so that her heavy attacks, and the chargeable aspect of them, are easier to use. We've reduced the necessary charge time and improved the charged attacks' abilities across the board to give her a stronger offense.
Falx Crusher (→+Heavy Kick)
The required charge time for this attack hasn't changed, but we have increased the forward distance moved during the charged attack, which should make it easier to use. After it's blocked, the distance between Marisa and the opponent has been shortened, giving you the ability to continue laying on the offensive pressure.
Crouching Heavy Punch
We've expanded the hitbox on the charged version, and the throw hurtbox before the attack no longer expands forward, making this a good strike option when trying to bait a throw escape attempt from the opponent. In addition, we've increased the float on Punish Counter to increase its payoff.
Malleus Breaker (↘+Heavy Punch > ↘+Heavy Punch)
In order to give this attack more flexibility we've changed the hit effect for the 2nd attack to a knockdown instead of leaving the opponent crouching. This will allow players to go on the offensive during an opponent's wake-up without the need for a Drive Rush.
Phalanx (→↓↘+Punch)
We've made this attack easier to use by mitigating the risk when its avoided. By expanding the attack hitbox and increasing the active frames on the attack, it should increase its range and make it more difficult to be hit out of.
Falx Crusher (→+Heavy Kick)
The required charge time for this attack hasn't changed, but we have increased the forward distance moved during the charged attack, which should make it easier to use. After it's blocked, the distance between Marisa and the opponent has been shortened, giving you the ability to continue laying on the offensive pressure.
Crouching Heavy Punch
We've expanded the hitbox on the charged version, and the throw hurtbox before the attack no longer expands forward, making this a good strike option when trying to bait a throw escape attempt from the opponent. In addition, we've increased the float on Punish Counter to increase its payoff.
Malleus Breaker (↘+Heavy Punch > ↘+Heavy Punch)
In order to give this attack more flexibility we've changed the hit effect for the 2nd attack to a knockdown instead of leaving the opponent crouching. This will allow players to go on the offensive during an opponent's wake-up without the need for a Drive Rush.
Phalanx (→↓↘+Punch)
We've made this attack easier to use by mitigating the risk when its avoided. By expanding the attack hitbox and increasing the active frames on the attack, it should increase its range and make it more difficult to be hit out of.
lily
The main focus of Lily's updates was to expand on her combo routes. Now, if you can choose the correct attacks when landing a strike, your damage or follow-up options after the combo should improve.
Crouching Light Punch
We've adjusted the advantage on hit for this attack, and from Drive Rush or on counterhit the number of attacks that can combo from it have increased. For Modern control players, you can link from this attack into Assisted Combo 3 by using Drive Rush, so now even a counterattack with light attack can lead to good damage.
Desert Storm (→+Heavy Punch > Heavy Punch > Heavy Punch)
We've made this easier to use in mid-air combos. In particular when Drive Impact lands for a punish counter, your follow-up attack options are much better. You can now choose to deal damage while building your Wind stock, or you can forget about the Wind stock and forgo the follow-up inputs to plot out your wake-up game.
Normal/Windclad Tomahawk Buster (→↓↘+P)
By having only the 2nd hit of the attack hit a standing opponent, in the middle of the stage you can follow-up with Crouching Heavy Kick or Super Art 1, while in the corner you can go for another Tomahawk Buster, etc. You'll need to confirm the situation first, but even if you have limited Wind stock you can still extend your combos.
Crouching Light Punch
We've adjusted the advantage on hit for this attack, and from Drive Rush or on counterhit the number of attacks that can combo from it have increased. For Modern control players, you can link from this attack into Assisted Combo 3 by using Drive Rush, so now even a counterattack with light attack can lead to good damage.
Desert Storm (→+Heavy Punch > Heavy Punch > Heavy Punch)
We've made this easier to use in mid-air combos. In particular when Drive Impact lands for a punish counter, your follow-up attack options are much better. You can now choose to deal damage while building your Wind stock, or you can forget about the Wind stock and forgo the follow-up inputs to plot out your wake-up game.
Normal/Windclad Tomahawk Buster (→↓↘+P)
By having only the 2nd hit of the attack hit a standing opponent, in the middle of the stage you can follow-up with Crouching Heavy Kick or Super Art 1, while in the corner you can go for another Tomahawk Buster, etc. You'll need to confirm the situation first, but even if you have limited Wind stock you can still extend your combos.
jp
For JP we've only made adjustments to his basic abilities, so his changes this time center around his Super Arts.
Super Art 2 - Lovushka (↓↙←↓↙←+Punch)
We've adjusted this technique so that the projectiles will remain when a normal throw hits for a punish counter. This means activating it in close quarters will allow JP to apply much more pressure.
Super Art 3/Critical Art - Interdiction (↓↘→↓↘→+K)
We've updated this technique so that when Triglav hits an opponent high into the air, it's easier to combo into this Super Art.
Super Art 2 - Lovushka (↓↙←↓↙←+Punch)
We've adjusted this technique so that the projectiles will remain when a normal throw hits for a punish counter. This means activating it in close quarters will allow JP to apply much more pressure.
Super Art 3/Critical Art - Interdiction (↓↘→↓↘→+K)
We've updated this technique so that when Triglav hits an opponent high into the air, it's easier to combo into this Super Art.
juri
We've made adjustments to Juri so in specific situations she'll have more combo routes, and some of her heavy attacks will give her back more Drive meter.
Crouching Heavy Punch
The hit effect when this attack lands for a punish counter on a mid-air opponent has changed. It is primarily a counter attack against invincible attacks, but we wanted to give it different merits, so you can now dish out damage and gain up to 2 Fuha stocks while closing the distance, or go for a combo when scoring a punish counter on a standing opponent for varied results.
Heavy Fuhajin (↓↙←+Heavy Kick)
We made this attack easier to combo into from Crouching Heavy Punch when that attack hits a mid-air opponent for a punish counter.
Crouching Heavy Punch
The hit effect when this attack lands for a punish counter on a mid-air opponent has changed. It is primarily a counter attack against invincible attacks, but we wanted to give it different merits, so you can now dish out damage and gain up to 2 Fuha stocks while closing the distance, or go for a combo when scoring a punish counter on a standing opponent for varied results.
Heavy Fuhajin (↓↙←+Heavy Kick)
We made this attack easier to combo into from Crouching Heavy Punch when that attack hits a mid-air opponent for a punish counter.
deejay
For Dee Jay we primarily looked at revamping the anti-air capabilities of Medium and Heavy Jackknife Maximum, as well as re-adjusting Waning Moon's follow-up abilities.
Medium/Heavy Jackknife Maximum (Charge↓, then↑+Medium Kick or Heavy Kick)
Previously we adjusted the range of the 1st attack to reduce guaranteed counterattacks on the ground, but as an anti-air attack it became less reliable than expected. To improve that aspect we've extended the active frames of the attack and expanded the attack hitbox that only applies to mid-air opponents. Against jumps, if you perform the attack a little early, you'll now see less cases of the first attack missing.
Normal/Overdrive Waning Moon (↓↙←+Kick or 2 Kicks > Medium Kick)
In the last balance adjustment we added the option of a follow-up attack on hit depending on the situation, but the options Dee Jay had in terms of move selection and range were too strict, so we've looked to relax those conditions. When landing the normal version as a punish counter, attacks like Heavy Jackknife Maximum are easier to land, and for the Overdrive version on hit, Quick Rolling Sobat and Double Rolling Sobat will now connect.
Funky Dance Feint (Medium Punch > Medium Punch > ←+Heavy Punch)
We made it more difficult for opponents to respond by making it easier for Dee Jay to snap back with feint techniques. Invincible Overdrive attacks are no longer guaranteed hits, and it's now harder for normal attacks to interrupt this attack.
Medium/Heavy Jackknife Maximum (Charge↓, then↑+Medium Kick or Heavy Kick)
Previously we adjusted the range of the 1st attack to reduce guaranteed counterattacks on the ground, but as an anti-air attack it became less reliable than expected. To improve that aspect we've extended the active frames of the attack and expanded the attack hitbox that only applies to mid-air opponents. Against jumps, if you perform the attack a little early, you'll now see less cases of the first attack missing.
Normal/Overdrive Waning Moon (↓↙←+Kick or 2 Kicks > Medium Kick)
In the last balance adjustment we added the option of a follow-up attack on hit depending on the situation, but the options Dee Jay had in terms of move selection and range were too strict, so we've looked to relax those conditions. When landing the normal version as a punish counter, attacks like Heavy Jackknife Maximum are easier to land, and for the Overdrive version on hit, Quick Rolling Sobat and Double Rolling Sobat will now connect.
Funky Dance Feint (Medium Punch > Medium Punch > ←+Heavy Punch)
We made it more difficult for opponents to respond by making it easier for Dee Jay to snap back with feint techniques. Invincible Overdrive attacks are no longer guaranteed hits, and it's now harder for normal attacks to interrupt this attack.
cammy
For Cammy we've looked at the attacks that start off her combos or offensive flow, as well as her offensive Overdrive attacks. We looked at making adjustments to reduce situations where even if you're at a disadvantage, you can switch sides with your opponent with the correct reads.
Crouching Medium Punch
This attack has fantastic range and startup, but adds lower risk to Cammy compared to other characters with similar moves, so we've increased its recovery and hurtbox.
Overdrive Cannon Spike (→↓↘+Two Kicks)
This attack will no longer switch sides on hit. The heavy version featured the same properties as the Overdrive version when you held down the button, but compared to the heavy held version which is only used in limited situations, the quick startup on the Overdrive Cannon Spike meant that its value as a side switch tool was too high.
Additionally, side switching with an invincible Overdrive attack made the fight less enjoyable for the opponent, and also had the additional disadvantage of being difficult to use for Cammy when she's chasing down the opponent, hence the change.
Overdrive Cannon Strike (↓↙←+Two Kicks during a forward jump)
We've updated the advantage on this when it's performed once Cammy reaches a certain height and the attack lands on the 1st active frame. On hit, the situation is now 50/50 and you're not guaranteed a follow-up attack unless Cannon Strike hits for a punish counter. If you use this attack to avoid an opponent's regular throw you can still follow up with an attack, but Lift Uppercut (← +Medium Punch) no longer hits for a combo, making it more difficult to land this attack's side switch combo. Additionally, recovery on block has also changed, so Cammy is less likely to get hit by a guaranteed counterattack.
Crouching Medium Punch
This attack has fantastic range and startup, but adds lower risk to Cammy compared to other characters with similar moves, so we've increased its recovery and hurtbox.
Overdrive Cannon Spike (→↓↘+Two Kicks)
This attack will no longer switch sides on hit. The heavy version featured the same properties as the Overdrive version when you held down the button, but compared to the heavy held version which is only used in limited situations, the quick startup on the Overdrive Cannon Spike meant that its value as a side switch tool was too high.
Additionally, side switching with an invincible Overdrive attack made the fight less enjoyable for the opponent, and also had the additional disadvantage of being difficult to use for Cammy when she's chasing down the opponent, hence the change.
Overdrive Cannon Strike (↓↙←+Two Kicks during a forward jump)
We've updated the advantage on this when it's performed once Cammy reaches a certain height and the attack lands on the 1st active frame. On hit, the situation is now 50/50 and you're not guaranteed a follow-up attack unless Cannon Strike hits for a punish counter. If you use this attack to avoid an opponent's regular throw you can still follow up with an attack, but Lift Uppercut (← +Medium Punch) no longer hits for a combo, making it more difficult to land this attack's side switch combo. Additionally, recovery on block has also changed, so Cammy is less likely to get hit by a guaranteed counterattack.
ryu
In order for Ryu to further differentiate himself from other similar characters, we've looked at improving his stability and his unique mid-range attacks.
Whirlwind Kick (→++Heavy Kick)
While this attack has fantastic range and is great for controlling space, after it hit it was difficult for Ryu to create any opportunities for himself, so it can now be canceled into a regular Aerial Tatsumaki Senpu-kyaku. When you land this combo, you'll be also to position yourself ina favorable spot, or alternatively, you can use it as a combo from an Overdrive High Blade Kick starter.
Heavy High Blade Kick (↓↘→+Heavy Kick)
This attack has some issues when used to control space due to its slow startup and disadvantage on block, so we've sped up the startup of the attack and reduced the overall frame count to help players use it in different situations.
Crouching Medium Kick
We've sped up the cancel timing into special moves, making it easier to combo from. Even when hitting with the tip of the attack you can safely string into a Heavy Hadoken to force your opponent into a block string. And for Light and Medium Hadokens, so long as you don't delay the cancel, an opponent's Drive Impact is no longer guaranteed to land, giving Ryu more stability over Ken and Akuma.
Whirlwind Kick (→++Heavy Kick)
While this attack has fantastic range and is great for controlling space, after it hit it was difficult for Ryu to create any opportunities for himself, so it can now be canceled into a regular Aerial Tatsumaki Senpu-kyaku. When you land this combo, you'll be also to position yourself ina favorable spot, or alternatively, you can use it as a combo from an Overdrive High Blade Kick starter.
Heavy High Blade Kick (↓↘→+Heavy Kick)
This attack has some issues when used to control space due to its slow startup and disadvantage on block, so we've sped up the startup of the attack and reduced the overall frame count to help players use it in different situations.
Crouching Medium Kick
We've sped up the cancel timing into special moves, making it easier to combo from. Even when hitting with the tip of the attack you can safely string into a Heavy Hadoken to force your opponent into a block string. And for Light and Medium Hadokens, so long as you don't delay the cancel, an opponent's Drive Impact is no longer guaranteed to land, giving Ryu more stability over Ken and Akuma.
honda
We've looked to improve Honda's Teppo Triple Slap to allow him to bring the fight into close-quarters, and we've also looked at improving his damage and mix-up situation with his strikes and throws.
Standing Heavy Punch
This attack can now combo into a regular Taiho Cannon, giving Honda some chonky damage on his strikes.
Teppo Triple Slap (↓↘→+Kick > Punch)
Due to improvements on the hitbox, this attack can now reach opponents better from mid-range, and we made some changes so that he's in a better position than before when it's blocked.
Oicho Throw (→↘↓↙←+Kick)
The startup of this throw is faster, giving his throw game more oomph. Along with the adjustments to his Overdrive Teppo Triple Slap, Honda can now force his opponents into a mix-up game, or he can use this as a counter attack to a Drive Reversal.
Standing Heavy Punch
This attack can now combo into a regular Taiho Cannon, giving Honda some chonky damage on his strikes.
Teppo Triple Slap (↓↘→+Kick > Punch)
Due to improvements on the hitbox, this attack can now reach opponents better from mid-range, and we made some changes so that he's in a better position than before when it's blocked.
Oicho Throw (→↘↓↙←+Kick)
The startup of this throw is faster, giving his throw game more oomph. Along with the adjustments to his Overdrive Teppo Triple Slap, Honda can now force his opponents into a mix-up game, or he can use this as a counter attack to a Drive Reversal.
blanka
With this update Blanka doesn't have any major adjustments, but we did look at making the normal and special moves he uses for controlling space easier to use.
Double Knee Bombs (→+Medium Kick)
Originally this attack was designed to avoid low hitting attacks, but the hurtbox around the feet were bigger than the standard size, so we've reduced it to match other hurtboxes. This change should make it possible to avoid low attacks better. We've also updated its behavior when it hits a mid-air opponent so that the 2nd attack hits consistently.
Wild Nail (→+Heavy Punch)
We felt that there was not much of a payoff when this attack lands normally, so we increased the knockdown time after it hits to allow Blanka's offense to start easier. Additionally, when this attack hit a mid-air opponent it offered less advantage than when it hit a grounded opponent, so we lengthened the knockdown time.
Double Knee Bombs (→+Medium Kick)
Originally this attack was designed to avoid low hitting attacks, but the hurtbox around the feet were bigger than the standard size, so we've reduced it to match other hurtboxes. This change should make it possible to avoid low attacks better. We've also updated its behavior when it hits a mid-air opponent so that the 2nd attack hits consistently.
Wild Nail (→+Heavy Punch)
We felt that there was not much of a payoff when this attack lands normally, so we increased the knockdown time after it hits to allow Blanka's offense to start easier. Additionally, when this attack hit a mid-air opponent it offered less advantage than when it hit a grounded opponent, so we lengthened the knockdown time.
guile
During the overall balance adjustment, we reduced the amount of gauge used by Guile's Overdrive Sonic Cross (↓↙←+2 Punches > →+2 Punches), but opportunities to use it and its follow-up attack was limited, so we've made adjustments for those. Comboability is now more practical, and with more opportunities to use it it's now a better option to opt for when looking for a good ROI.
ken
Ken's appeal to players is great offense and ability to bully opponents into the corner, but we felt that he was able to do this even on the defensive, which made his comeback potential too strong. To counter that we've looked at containing how much he can get out of his invincible attacks.
Overdrive Shoryuken (→↓↘+Two Punches) / Super Art 1 Dragonlash Flame
Ken was able to benefit too much after either of these attacks hit, as he could send the opponent reeling back and then continue the pressure with Drive Rush, which combined with his great combos and throws to make him very scary. For this update we've left his invincible attack as is, but after it connects it'll be more difficult for him to continue with pressure, which should help constrain how many opportunities he gets.
Back Throw
We've made following up this throw after it connects more difficult, as it has great corner carry ability.
Forward Step Kick (Heavy Kick during Quick Dash)
We adjusted the hurtbox on this move as this move had more affinity than Jinrai Kick at close range. We also adjusted it to reduce its return, taking into consideration the low risk of this move due to light attacks adding initial scaling. On the other hand, the amount of Drive gauge it gives has increased so we still think that it's going to be a useful attack when you're looking to get a resource advantage.
Overdrive Shoryuken (→↓↘+Two Punches) / Super Art 1 Dragonlash Flame
Ken was able to benefit too much after either of these attacks hit, as he could send the opponent reeling back and then continue the pressure with Drive Rush, which combined with his great combos and throws to make him very scary. For this update we've left his invincible attack as is, but after it connects it'll be more difficult for him to continue with pressure, which should help constrain how many opportunities he gets.
Back Throw
We've made following up this throw after it connects more difficult, as it has great corner carry ability.
Forward Step Kick (Heavy Kick during Quick Dash)
We adjusted the hurtbox on this move as this move had more affinity than Jinrai Kick at close range. We also adjusted it to reduce its return, taking into consideration the low risk of this move due to light attacks adding initial scaling. On the other hand, the amount of Drive gauge it gives has increased so we still think that it's going to be a useful attack when you're looking to get a resource advantage.
chunli
Our main focus for Chun-Li with this balance adjustment is to increase her combo options. Players will now have to read the situation and choose an appropriate option in order to get a good ROI.
Snake Strike (Medium Punch during Serenity Stream)
Due to the faster startup, it has become one of the better Serenity Stream options when also considering its range. Medium attacks hit multiple times on counterhit, meaning from a Crouching Medium Kick, etc. you can go into Serenity Stream and then, if read the situation properly, knock down the opponent.
Serenity Stream (Modern Controls: ↓↙←+Attack button)
We've made changes to this technique so all transition attacks can now be performed in Modern controls. There were many times when players wanted to cancel into an attack or block, so they would hold ↓ and input a button. Now all kick transitions can be performed with ↓+attack. For the new punch transition attacks, press an attack button without inputting ↓.
Heavy Spinning Bird Kick (Charge ↓, then ↑+Heavy Kick)
This attack had limited uses, so we've made adjustments to create more opportunities where it can hit multiple times, increasing its usefulness in combos.
Snake Strike (Medium Punch during Serenity Stream)
Due to the faster startup, it has become one of the better Serenity Stream options when also considering its range. Medium attacks hit multiple times on counterhit, meaning from a Crouching Medium Kick, etc. you can go into Serenity Stream and then, if read the situation properly, knock down the opponent.
Serenity Stream (Modern Controls: ↓↙←+Attack button)
We've made changes to this technique so all transition attacks can now be performed in Modern controls. There were many times when players wanted to cancel into an attack or block, so they would hold ↓ and input a button. Now all kick transitions can be performed with ↓+attack. For the new punch transition attacks, press an attack button without inputting ↓.
Heavy Spinning Bird Kick (Charge ↓, then ↑+Heavy Kick)
This attack had limited uses, so we've made adjustments to create more opportunities where it can hit multiple times, increasing its usefulness in combos.
zangief
Zangief is a character that's greatly affected by the jump cancel adjustment, so while his defensive capabilities have decreased greatly we still think he's a character that's strong enough to compete.
Because of this, for this update we've looked at minor adjustments to throws that aren't used frequently and increasing the meter gain on his stomping attack.
Because of this, for this update we've looked at minor adjustments to throws that aren't used frequently and increasing the meter gain on his stomping attack.
dhalsim
Last balance adjustment Dhalsim received a lot of changes, so this time around we're looking at making minute changes.
Standing Light Punch / Agile Kick (↙+Light Kick)
Rapid cancel timing into Crouching Light Punch is now faster, and on block it won't trade hits with an opponent's 4 frame startup attack.
Overdrive Yoga Flame (↓↘→+2 Punches)
Due to the rapid cancel timing for light attacks, it wasn't possible to connect with the combo 'Standing Light Punch -> Standing Light Punch -> Crouching Light Punch -> Overdrive Yoga Flame -> Light Yoga Inferno' against a standing opponent at point blank range, so we've made adjustments to cover that point.
Standing Light Punch / Agile Kick (↙+Light Kick)
Rapid cancel timing into Crouching Light Punch is now faster, and on block it won't trade hits with an opponent's 4 frame startup attack.
Overdrive Yoga Flame (↓↘→+2 Punches)
Due to the rapid cancel timing for light attacks, it wasn't possible to connect with the combo 'Standing Light Punch -> Standing Light Punch -> Crouching Light Punch -> Overdrive Yoga Flame -> Light Yoga Inferno' against a standing opponent at point blank range, so we've made adjustments to cover that point.
rashid
Rashid had the ability to counterstrike for big damage in too many situations so we've taken a look at adjusting that aspect.
Overdrive Spinning Mixer (↓↘→+Two Punches)
The situation after hit was far too good for Rashid, as he could use either Drive Rush or call upon Super Art 2 Ysaar to create great opportunities for himself.
Although it'll depend where the hit takes place, it was also possible to send the opponent into the corner while recovering Drive gauge, which was too advantageous for Rashid, so we've made adjustments to make it more difficult to create offensive opportunities after this attack hits.
Super Art 1 Super Rashid Kick (↓↘→↓↘→+K)
Because this attack is also a powerful defensive measure due to its side switching ability, Rashid's advantage after this hits is now lessened so it's more difficult for him to lay on the pressure.
Side Flip (→+Two Kicks)
Side Flip's adjustment was made in order to make it more difficult for it to avoid an opponent's Drive Reversal. By combining his powerful Cancel Drive Rush capabilities with Side Flip, it was possible to have Side Flip be performed only when the opponent performed their Drive Revesal. There are other characters who have similar capabilities, but considering Rashid's Crouching Medium Kick prowess, the advantage he has after Drive Rush, and his options after Drive Rush, adding a Side Flip option into the mix was far too advantageous as a counter for Rashid.
Overdrive Spinning Mixer (↓↘→+Two Punches)
The situation after hit was far too good for Rashid, as he could use either Drive Rush or call upon Super Art 2 Ysaar to create great opportunities for himself.
Although it'll depend where the hit takes place, it was also possible to send the opponent into the corner while recovering Drive gauge, which was too advantageous for Rashid, so we've made adjustments to make it more difficult to create offensive opportunities after this attack hits.
Super Art 1 Super Rashid Kick (↓↘→↓↘→+K)
Because this attack is also a powerful defensive measure due to its side switching ability, Rashid's advantage after this hits is now lessened so it's more difficult for him to lay on the pressure.
Side Flip (→+Two Kicks)
Side Flip's adjustment was made in order to make it more difficult for it to avoid an opponent's Drive Reversal. By combining his powerful Cancel Drive Rush capabilities with Side Flip, it was possible to have Side Flip be performed only when the opponent performed their Drive Revesal. There are other characters who have similar capabilities, but considering Rashid's Crouching Medium Kick prowess, the advantage he has after Drive Rush, and his options after Drive Rush, adding a Side Flip option into the mix was far too advantageous as a counter for Rashid.
aki
In order to give some attention to A.K.I.'s Toxic Blossom combos, we've slightly relaxed the follow-up attack conditions for her combos that were previously quite strict, and increased her combo routes.
Heavy Serpent Lash (↓↘→+Heavy Punch)
We've adjusted this attack so that follow-up attack limitations are relaxed when Toxic Blossom is triggered, giving her the ability to follow-up more during combos. As an example, in the corner of the stage, after Overdrive Nightshade Pulse > Heavy Serpent Lash, etc. you can follow-up with any attack other than a Super Art.
Heavy Cruel Fate (↓↙←+Heavy Kick)
If you hit a mid-air opponent with this, the height of their jump would determine if you could follow-up with Heavy Serpent Lash or not, but this was difficult for players to judge and if you missed, the opponent would get a juicy counter attack opportunitiy. So, we've made an adjustment to ensure that Heavy Serpent Lash will not miss even if the opponent's jump is low to the ground.
Heavy Serpent Lash (↓↘→+Heavy Punch)
We've adjusted this attack so that follow-up attack limitations are relaxed when Toxic Blossom is triggered, giving her the ability to follow-up more during combos. As an example, in the corner of the stage, after Overdrive Nightshade Pulse > Heavy Serpent Lash, etc. you can follow-up with any attack other than a Super Art.
Heavy Cruel Fate (↓↙←+Heavy Kick)
If you hit a mid-air opponent with this, the height of their jump would determine if you could follow-up with Heavy Serpent Lash or not, but this was difficult for players to judge and if you missed, the opponent would get a juicy counter attack opportunitiy. So, we've made an adjustment to ensure that Heavy Serpent Lash will not miss even if the opponent's jump is low to the ground.
ed
Conceptually Ed is a strong mid-range fighter, but many of his long-range attacks gave him a good return and this proved to be too oppressing. For this balance adjustment, we reviewed the risk of those spacing tools that lead to a lot of damage, and slightly adjusted attacks and combos used when on the defensive, which will reduce his ability to turn the tide of battle when fighting in close quarters.
Standing Medium Kick/Crouching Medium Kick
Against a lot of characters this attack was able to take the initiative in encounters, and from a cancel the damage was good, so we decided to increase the risk when the attack whiffs. Now on whiff, it's easier for the opponent to take their turn, forcing Ed players to be more careful when throwing this out.
Kill Rush (Backwards) (←+Two Kicks)
The hurtbox during the technique is expanded forward, making Ed more susceptible to an attack if they try to step back after holding on to Psycho Flicker and are late or predictable with their decision. Other tactics such as going from a normal attack to Psycho Flicker, then reading the situation and performing Kill Rush (Backwards) are also more vulnerable to a well-placed Drive Impact from the opponent.
Crouching Light Kick
This attack featured great startup and range, and on hit it gave you a really nice return, which made it too good in defensive situations. With this adjustment, we've made it so that Crouching Light Kick can't hit again on counterhit, so it's harder to get a return when stopping an opponent's offense. Please note that there are no changes to this move when used consecutively during a cancel.
Overdrive Psycho Blitz (↓↙←+Two Punches)
Considering how good the return is when this attack lands, we've made adjustments so that Ed can be counterattacked by a light attack when this attack is blocked, and also increased the distance traveled during the first attack. While the risk of canceling during a block has increased, it should be easier to put together combos from a further distance now.
Super Art 2 Psycho Cannon
We've made adjustments so that the Drive gauge reduction for the opponent happens during the final stage of the attack. When starting combos with this attack with Ed's back to the corner, he's able to get high damage, and he can gradually chipping away at the opponent's Drive Gauge while recovering his own. This gauge disparity gives Ed far too much of an advantage after the combo. While the weakening of combo-starting attacks doesn't change the damage, the opponent can now recover Drive during long combos, so the gauge disparity won't be as big as before.
Standing Medium Kick/Crouching Medium Kick
Against a lot of characters this attack was able to take the initiative in encounters, and from a cancel the damage was good, so we decided to increase the risk when the attack whiffs. Now on whiff, it's easier for the opponent to take their turn, forcing Ed players to be more careful when throwing this out.
Kill Rush (Backwards) (←+Two Kicks)
The hurtbox during the technique is expanded forward, making Ed more susceptible to an attack if they try to step back after holding on to Psycho Flicker and are late or predictable with their decision. Other tactics such as going from a normal attack to Psycho Flicker, then reading the situation and performing Kill Rush (Backwards) are also more vulnerable to a well-placed Drive Impact from the opponent.
Crouching Light Kick
This attack featured great startup and range, and on hit it gave you a really nice return, which made it too good in defensive situations. With this adjustment, we've made it so that Crouching Light Kick can't hit again on counterhit, so it's harder to get a return when stopping an opponent's offense. Please note that there are no changes to this move when used consecutively during a cancel.
Overdrive Psycho Blitz (↓↙←+Two Punches)
Considering how good the return is when this attack lands, we've made adjustments so that Ed can be counterattacked by a light attack when this attack is blocked, and also increased the distance traveled during the first attack. While the risk of canceling during a block has increased, it should be easier to put together combos from a further distance now.
Super Art 2 Psycho Cannon
We've made adjustments so that the Drive gauge reduction for the opponent happens during the final stage of the attack. When starting combos with this attack with Ed's back to the corner, he's able to get high damage, and he can gradually chipping away at the opponent's Drive Gauge while recovering his own. This gauge disparity gives Ed far too much of an advantage after the combo. While the weakening of combo-starting attacks doesn't change the damage, the opponent can now recover Drive during long combos, so the gauge disparity won't be as big as before.
gouki
Akuma's concept is that he's a glass cannon that has high damage specs but low vitality. However, due to Akuma's great mobility and attacks it was very difficult for opponents to choose the correct option to deal with him, which resulted in Akuma being a more stable character than intended. So, we took a look at his abilities primarily in the neutral game.
Backward Walk
There were many characters who had few ways to counter a defensive Akuma who could retreat and throw out moves to keep opponents at bay, so we've slowed down his movement speed when he moves backward. This will make it more difficult for him to maintain his favored space and also make it more difficult to adjust his spacing.
Resso Snap Kick (→+Medium Kick)
Considering the excellent reach on this move, as well as its overall recovery, we increased the risk on it if it misses the opponent.
Gou Hadoken (↓↘→+Punch)
We've looked at increasing the number of ways opponents can deal with this attack, as it was harder to deal with this compared to other projectiles thanks to its speed and animation. Although it's difficult to react to the attack, it's now easier to hit Akuma using projectile invincible attacks or jumping attacks from range.
Demon Swoop (Hold ↓ during Demon Raid)
Even if opponents were able to read that a Demon Swoop was incoming, it was extremely difficult for opponents to guarantee themselves an attack upon landing, which is one of the reasons why Akuma players who are being chased could switch sides so easily. To remedy this we've increased the landing recovery of this technique when Akuma jumps over his opponent.
Overdrive Tatsumaki Zanku-kyaku (↓↙←+Two Kicks)
After using this in a mid-air combo, we've adjusted so that Akuma won't be susceptible to a counter attack if they miss the Light Gou Shoryuken follow-up due to the height of the opponent.
Backward Walk
There were many characters who had few ways to counter a defensive Akuma who could retreat and throw out moves to keep opponents at bay, so we've slowed down his movement speed when he moves backward. This will make it more difficult for him to maintain his favored space and also make it more difficult to adjust his spacing.
Resso Snap Kick (→+Medium Kick)
Considering the excellent reach on this move, as well as its overall recovery, we increased the risk on it if it misses the opponent.
Gou Hadoken (↓↘→+Punch)
We've looked at increasing the number of ways opponents can deal with this attack, as it was harder to deal with this compared to other projectiles thanks to its speed and animation. Although it's difficult to react to the attack, it's now easier to hit Akuma using projectile invincible attacks or jumping attacks from range.
Demon Swoop (Hold ↓ during Demon Raid)
Even if opponents were able to read that a Demon Swoop was incoming, it was extremely difficult for opponents to guarantee themselves an attack upon landing, which is one of the reasons why Akuma players who are being chased could switch sides so easily. To remedy this we've increased the landing recovery of this technique when Akuma jumps over his opponent.
Overdrive Tatsumaki Zanku-kyaku (↓↙←+Two Kicks)
After using this in a mid-air combo, we've adjusted so that Akuma won't be susceptible to a counter attack if they miss the Light Gou Shoryuken follow-up due to the height of the opponent.
vega
We've tuned down M. Bison's ability to do high damage combos and to chip away at an opponent's Drive gauge. His overall gameplan hasn't changed greatly, but we've looked to adjust him so that he doesn't use his high powered offense to bully his way in.
Overdrive Double Knee Press (↓↘→+KK) / Overdrive Psycho Crusher (Psycho Mine embedded (Charge ←, then →+PP)
We've revamped the damage and scaling on these, whether or not a Psycho Mine is embedded, to put a cap on his high combo damage.
Additionally, taking into account that Bison can continue with his offensive when Psycho Crusher is blocked while a Psycho Mine is embedded, we reduced the amount of Drive gauge the opponent loses.
Evil Knee (←+Heavy Kick)
We reduced the amount of Drive gauge the opponent loses when they block this attack. This attack allows Bison to move forward while keeping him at an advantage, giving Bison players a lot of chances to use it. When blocked, it took a lot of Drive away from the opponent and when it hit, they took a lot of damage. This interaction gave Bison too much of an advantage, so we decided to adjust the reel in the Drive gauge advantages.
Shadow Rise (Charge ↓, then ↑+Kick) / Devil Reverse (Charge ↓, then↑+Kick > Punch)
This technique's ability to change its attack timing and trajectory made it difficult to deal with, and even if the opponent tried to hit Bison out of the air, there were too many situations where Bison could just avoid the attack and counter. To counter this we've expanded the overall hurtbox on the technique and shrunk the attack hitbox, so it loses more often to an opponent's aerial or ground attacks.
Additionally, when a Psycho Mine is embedded and Bison performed Devil Reverse, it was more difficult to keep on the offensive compared to the non-Mine version, so we've adjusted his recovery so that after landing, he doesn't have to lose out on a chance for an offensive push, even if he has to dash in for it.
Overdrive Double Knee Press (↓↘→+KK) / Overdrive Psycho Crusher (Psycho Mine embedded (Charge ←, then →+PP)
We've revamped the damage and scaling on these, whether or not a Psycho Mine is embedded, to put a cap on his high combo damage.
Additionally, taking into account that Bison can continue with his offensive when Psycho Crusher is blocked while a Psycho Mine is embedded, we reduced the amount of Drive gauge the opponent loses.
Evil Knee (←+Heavy Kick)
We reduced the amount of Drive gauge the opponent loses when they block this attack. This attack allows Bison to move forward while keeping him at an advantage, giving Bison players a lot of chances to use it. When blocked, it took a lot of Drive away from the opponent and when it hit, they took a lot of damage. This interaction gave Bison too much of an advantage, so we decided to adjust the reel in the Drive gauge advantages.
Shadow Rise (Charge ↓, then ↑+Kick) / Devil Reverse (Charge ↓, then↑+Kick > Punch)
This technique's ability to change its attack timing and trajectory made it difficult to deal with, and even if the opponent tried to hit Bison out of the air, there were too many situations where Bison could just avoid the attack and counter. To counter this we've expanded the overall hurtbox on the technique and shrunk the attack hitbox, so it loses more often to an opponent's aerial or ground attacks.
Additionally, when a Psycho Mine is embedded and Bison performed Devil Reverse, it was more difficult to keep on the offensive compared to the non-Mine version, so we've adjusted his recovery so that after landing, he doesn't have to lose out on a chance for an offensive push, even if he has to dash in for it.
terry
Terry has been given some adjustments to improve his attack proficiency at mid to close range, and to brush up some spots we felt were difficult to use. The aim is to make him easier to handle, as well as bringing out his personality a bit more.
Crouching Medium Punch
On punish counter this could combo into Heavy Power Charge for big damage, but there were some ranges where it wouldn't connect, leading to dropped combos. We've adjusted it so when attacking the main hurtbox Heavy Power Charge is guaranteed to combo.
Please note that if the attack hits a hurtbox that comes out in front of the main hurtbox, it still may not connect for a combo. Standing Light Kick and Standing Medium Punch can now reach targets easier, so your options there are also improved at close range.
Light Power Charge (↓↘→+Light Kick)
Due to the reduced pushback on hit with Crouching Medium Punch, the attack hitbox on the 1st frame has been reduced in order to not decrease situations where you're aiming to hit during active frames.
Medium Power Wave (↓↘→+Medium Punch)
To make it easier to use as a zoning attack as compensation for the range on his normal attacks, the hurtbox before the attack's startup has been reduced.
Overdrive Crack Shoot / Overdrive Burning Knuckle / Super Art 2 - Power Geyser
There were times when a follow-up attack wasn't always guaranteed when these attacks hit a mid-air opponent, so we've made adjustments to mitigate those situations.
Super Art 2 - Power Geyser (↓↙←↙→+Medium Kick+Heavy Punch)
We designed this attack so players have an easier time performing it, but that also introduced times when it was performed with slightly incorrect inputs. The conditions for this command input were more lax than what was necessary, and sometimes being performed with completely different commands (such as ↘↙↘), so the attack has been updated to require a ↓↙← input.
Crouching Medium Punch
On punish counter this could combo into Heavy Power Charge for big damage, but there were some ranges where it wouldn't connect, leading to dropped combos. We've adjusted it so when attacking the main hurtbox Heavy Power Charge is guaranteed to combo.
Please note that if the attack hits a hurtbox that comes out in front of the main hurtbox, it still may not connect for a combo. Standing Light Kick and Standing Medium Punch can now reach targets easier, so your options there are also improved at close range.
Light Power Charge (↓↘→+Light Kick)
Due to the reduced pushback on hit with Crouching Medium Punch, the attack hitbox on the 1st frame has been reduced in order to not decrease situations where you're aiming to hit during active frames.
Medium Power Wave (↓↘→+Medium Punch)
To make it easier to use as a zoning attack as compensation for the range on his normal attacks, the hurtbox before the attack's startup has been reduced.
Overdrive Crack Shoot / Overdrive Burning Knuckle / Super Art 2 - Power Geyser
There were times when a follow-up attack wasn't always guaranteed when these attacks hit a mid-air opponent, so we've made adjustments to mitigate those situations.
Super Art 2 - Power Geyser (↓↙←↙→+Medium Kick+Heavy Punch)
We designed this attack so players have an easier time performing it, but that also introduced times when it was performed with slightly incorrect inputs. The conditions for this command input were more lax than what was necessary, and sometimes being performed with completely different commands (such as ↘↙↘), so the attack has been updated to require a ↓↙← input.
Normal Throw
- 共通調整 Extended the active frames of a normal throw when its attack hitbox comes into contact with the animation of a jump leaving the ground. This change does not apply to command throws.
<span class='battle_change_through'>Perfect Parry</span>
- 共通調整2 If a multi-hit attack is Perfect Parried, it can no longer be canceled from the 2nd attack and on.This adjustment has been temporarily rolled back due to a known issue. It will be re-implemented at a later date.
Update:
This adjustment was re-implemented as part of the 02.05.2025 update.
Please check the 02.05.2025 update Battle Change List for more details.
Collision Pushbox Behavior
- 不具合修正 Fixed an issue where characters in the corner would move an unexpected distance when switching positions with an airborne opponent.
Super Armor Hitbox
- 不具合修正 Fixed an issue that caused an attack hitting a non-super armored part to be absorbed if it landed during the hitstop of another attack being absorbed by super armor.
Overdrive Arts
- 不具合修正 When performing an Overdrive technique right after recovering from Burnout, the visual effects of the Overdrive technique will now take priority over the Burnout recovery visual effects.
Standing Heavy Punch
调整 Expanded the collision pushbox of the 1st active frame upwards.
Standing Heavy Kick
调整 Changed the Drive Gauge increase from 3000 to 4000.
Double Impact<br>(→+Heavy Punch)
调整 1. Increased the distance moved forward before the attack startup.
2. Expanded the standby block hitbox.
3. Reduced pushback on hit.
2. Expanded the standby block hitbox.
3. Reduced pushback on hit.
Nose Breaker<br>(↓+Medium Kick > ↓+Heavy Punch)
调整 Changed advantage on hit from +1 to +2 frames.
Overdrive Sand Blast<br>(↓↘→+Two Punches)
调整 The hurtbox on the upper body now expands forward on the 19th frame instead of the 14th frame.
Fatal Shot<br>(↓↘→+Two Punches > Two Punches)
调整 1. Behavior on hit has changed so that it now produces a wall splat.
2. Reduced
3. Increased hitstop when the attack hits with the base.
4. Extended the input buffer time when the technique ends.
2. Reduced
combo count
additional value.3. Increased hitstop when the attack hits with the base.
4. Extended the input buffer time when the technique ends.
Light Flash Knuckle (Charged/Perfect)<br>(↓↙←+Light Punch (hold))
调整 Added an additional attack hitbox to the 2nd attack that can only hit during a combo. This change is intended to fix an issue where the 2nd attack would miss even though the 1st attack hits.
Medium Flash Knuckle<br>(↓↙←+Medium Punch)
调整 1. Recovery on block changed from -10 to -8 frames.
2. Reduced hurtbox during recovery.
3. Reduced pushback on hit.
4. Extended the input buffer time when the technique ends.
2. Reduced hurtbox during recovery.
3. Reduced pushback on hit.
4. Extended the input buffer time when the technique ends.
Medium Flash Knuckle (Perfect)<br>(↓↙←+Medium Punch (hold))
调整 2nd attack no longer has combo scaling added to it when it lands.
Super Art 2 Eraser<br>(↓↙←↓↙←+P)
调整 1. Increased the distance moved forward when the attack hits.
2. Reduced the blowback distance on the 1st hit when it hits a mid-air opponent. This change is intended to fix an issue where the 2nd attack and later would miss even though the 1st attack hit.
2. Reduced the blowback distance on the 1st hit when it hits a mid-air opponent. This change is intended to fix an issue where the 2nd attack and later would miss even though the 1st attack hit.
Increasing Drink level
调整 Drive Gauge increases even when under drink level 4. The amount of Drive replenished depends on the technique.
Critical Art Cutscene
调整 Extended the input buffer time when time is stopped.
Standing Heavy Kick
调整 Reduced the hurtbox on the front legs during the attack's start up.
Crouching Heavy Kick
共通调整 Reduced the pushback on block when only the 2nd attack is blocked.
Jumping Heavy Kick
调整 Changed to a blowback knockdown on normal hit on a mid-air opponent.
Ransui Haze (Fastest transition)<br>(→+Heavy Kick > ←Heavy Kick > P)
调整 Increased the distance moved forward before the attack startup.
Overdrive Freeflow Strikes<br>(↓↘→+Two Punches)
调整 Increased blowback time when the first attack at Drink level 4 hits a mid-air opponent. This adjustment was made to mitigate instances where the Super Art 3/Critical Art cancel would not combo.
Medium Bakkai<br>(↓↘→+Medium Kick)
调整 Expanded the hitbox on the 4th attack that only appears during a combo upwards. This adjustment was made to mitigate instances where the attack would miss during a mid-air hit.
Super Art 3/Critical Art Getsuga Saiho<br>(↓↘→↓↘→+P)
调整 Expanded the hitbox on the 1st attack that only appears during a combo upwards.
Dynamic Controls
修复问题 Fixed an issue where Dégagé could not be performed during Burnout by pressing ←+EX Button when using Dynamic controls.
Standing Heavy Kick
调整 Changed recovery on hit from -2 to +1 frames.
Note: Recovery on Punish Counter has not been changed.
Note: Recovery on Punish Counter has not been changed.
À Terre<br>(Medium Punch > Medium Kick)
调整 Drive Gauge increase on the 2nd attack changed from 1000 to 2500.
Manège Doré (Normal/Overdrive)<br>(→↘↓↙←+P)
调整 Super Art gauge increase on hit now changes depending on medal level.
Level 1 - 2: 3000 (no change)
Level 3 - 4: 4000
Level 5: 5000
Level 1 - 2: 3000 (no change)
Level 3 - 4: 4000
Level 5: 5000
Heavy Dégagé<br>(↓↙←+Heavy Kick)
调整 Drive Gauge increase changed from 2000 to 3000.
Renversé (Normal/Overdrive)<br>(↓↘→+P)
调整 Super Art gauge increase on hit now changes depending on medal level.
Level 1 - 2: 2150 (no change)
Level 3 - 4: 3150
Level 5: 4150
Level 1 - 2: 2150 (no change)
Level 3 - 4: 3150
Level 5: 4150
Renversé Feint (Normal/Overdrive)<br>(↓↘→+P (hold))
调整 Recovery on feint for all versions of the attack reduced by 2 frames.
Grand Fouetté (Normal)<br>(↓↘→+P > K)
调整 Blowback distance on hit reduced.
Crouching Light Punch
调整 Changed recovery on block from -2 to -1 frame.
Crouching Light Kick
调整 Changed recovery on hit from +2 to +4 frames.
Standing Heavy Punch
调整 1. Increased the distance moved forward before the attack startup.
2. Reduced the attack hitbox on the edge of the attack, and made the bottom part less effective.
The second adjustment has been made in accordance with the first adjustment, so that low-profile attacks still have the same effective reach against this attack as before.
2. Reduced the attack hitbox on the edge of the attack, and made the bottom part less effective.
The second adjustment has been made in accordance with the first adjustment, so that low-profile attacks still have the same effective reach against this attack as before.
Standing Heavy Kick
调整 Adjusted the standby block hitbox as it was shorter than the attack hitbox.
Water Slicer Slide<br>(↘+Medium Kick)
调整 1. Adjusted so that if the attack hits the opponent between active frames 1-4, the advantage on hit will always be +1 and on block will always be -5 frames.
2. Changed so that the attack now results in a knockdown if it hits as a Punish Counter between active frames 1-4.
2. Changed so that the attack now results in a knockdown if it hits as a Punish Counter between active frames 1-4.
Hisen Kick<br>(→+Heavy Kick)
调整 1. Expanded the attack hitbox forward during active frames 1-2.
2. Reduced the hurtbox on the feet.
3. Changed Drive Gauge increase from 1200 to 3000.
4. On hit players can now input buffer 13 frames before recovery ends.
Kimberly's recovery greatly differs between hit and block for this move, so this adjustment is to correct the large difference in input timing.
2. Reduced the hurtbox on the feet.
3. Changed Drive Gauge increase from 1200 to 3000.
4. On hit players can now input buffer 13 frames before recovery ends.
Kimberly's recovery greatly differs between hit and block for this move, so this adjustment is to correct the large difference in input timing.
Elbow Drop<br>(↓+Medium Punch at the peak of a forward jump)
调整 Technique will now be performed at a certain elevation when the input is performed early during the upward arc of a jump before the technique can come out.
Overdrive Torso Cleaver<br>(↓↘→+Two Kicks > Light Kick)
调整 Expanded the attack hitbox that appears only during a combo upwards.
Arc Step (Normal/Overdrive)<br>(Automatically activates after getting close with Sprint)
调整 1. Changed attack startup from 8 to 6 frames.
This is to coincide with the overall technique being shortened by 2 frames.
2. Fixed an issue where the timing for the Punish Counter hurtbox to come out was at the end of the 2nd attack's active frames. It now comes out at the end of the 1st attack's active frames.
This is to coincide with the overall technique being shortened by 2 frames.
2. Fixed an issue where the timing for the Punish Counter hurtbox to come out was at the end of the 2nd attack's active frames. It now comes out at the end of the 1st attack's active frames.
Bushin Hojin Kick (Normal/Overdrive)<br>(Kick during Arc Step)
调整 Normal version
1. Knockdown time on a mid-air hit increased by 1 frame.
This adjustment was made in order to prevent large changes stemming from the Arc Step adjustment.
Overdrive version
1. Blowback distance on the 1st attack reduced when it hits on the ground.
2. Blowback distance on the 1st attack increased when it hits a mid-air opponent.
3. Blowback distance on the 2nd attack increased when it hits a mid-air opponent.
These adjustments were made in order to prevent large changes stemming from the Arc Step adjustment.
1. Knockdown time on a mid-air hit increased by 1 frame.
This adjustment was made in order to prevent large changes stemming from the Arc Step adjustment.
Overdrive version
1. Blowback distance on the 1st attack reduced when it hits on the ground.
2. Blowback distance on the 1st attack increased when it hits a mid-air opponent.
3. Blowback distance on the 2nd attack increased when it hits a mid-air opponent.
These adjustments were made in order to prevent large changes stemming from the Arc Step adjustment.
Light Vagabond Edge<br>(↓↘→+Light Punch)
调整 1. Changed recovery on block from -5 to -4 frames.
2. Pushback on hit reduced.
3. Changed the knockback that occurs when the attack hits on the 3rd active frame.
This adjustment was made to make it easier to determine whether or not a follow-up attack is possible.
2. Pushback on hit reduced.
3. Changed the knockback that occurs when the attack hits on the 3rd active frame.
This adjustment was made to make it easier to determine whether or not a follow-up attack is possible.
Super Art 2 Soaring Bushin Scramble<br>(↓↙←↓↙←+P during a forward jump)
调整 Startup for the aerial version made faster only when canceling from an Overdrive attack.
Jump Cancel Action
修复问题 The hurtbox on the head was unintentionally small so it has been fixed to match the hurtbox when standing.
Marisa Style
调整 The successful charge time for standing heavy punch, standing heavy kick, crouching heavy kick, and Malleus Breaker (↘+Heavy Punch) is now 3 frames faster.
Standing Heavy Punch (Normal/Hold)
调整 1. Attack hitbox expanded forward.
2. The attack hitbox on active frame 1 expanded downward so that it matches the same position as the hitbox on active frame 2.
3. Reduced the horizontal blowback on the charged version when it hits a mid-air opponent.
2. The attack hitbox on active frame 1 expanded downward so that it matches the same position as the hitbox on active frame 2.
3. Reduced the horizontal blowback on the charged version when it hits a mid-air opponent.
Crouching Heavy Punch
调整 1. Increased the launch when the attack hits for a Punish Counter on the ground.
2. Input buffer can now be performed 9 frames before recovery ends.
2. Input buffer can now be performed 9 frames before recovery ends.
Crouching Heavy Punch (Hold)
调整 1. Expanded the attack hitbox forward during active frame 2.
2. Updated so the throw hurtbox before the attack startup doesn't appear in front.
3. Increased the launch when the attack hits for a Punish Counter on the ground.
4. Input buffer can now be performed 9 frames before recovery ends.
2. Updated so the throw hurtbox before the attack startup doesn't appear in front.
3. Increased the launch when the attack hits for a Punish Counter on the ground.
4. Input buffer can now be performed 9 frames before recovery ends.
Crouching Heavy Kick (Normal/Hold)
调整 1. Expanded the attack hitbox that only appears during a combo upward.
2. Expanded the standby idle block hitbox while charging this technique to match the length of the successful charge hitbox.
2. Expanded the standby idle block hitbox while charging this technique to match the length of the successful charge hitbox.
Heavy Two Hitter<br>(Heavy Punch > Heavy Punch)
调整 Increased the
combo count
upper limit on the 2nd attack. Malleus Breaker<br>(↘+Heavy Punch > ↘+Heavy Punch)
调整 1. Changed the hit effect on the 2nd attack to a knockdown.
2. Increased knockdown time on the 2nd attack by 10 frames.
2. Increased knockdown time on the 2nd attack by 10 frames.
Falx Crusher (Hold)<br>(→+Heavy Kick)
调整 1. Increased the distance moved forward before the attack startup.
2. Pushback on block decreased.
2. Pushback on block decreased.
Gladius (Hold)<br>(↓↘→+P (hold))
调整 Expanded the follow-up attack hitbox upwards when hitting a mid-air opppnent.
Phalanx (Normal/Overdrive)<br>(→↓↘+P)
调整 1. Changed active frames from 3 to 6 frames.
2. Extended the mid-air hitbox after the attack by 1 frame.
3. Expanded the attack hitbox forward.
4. Changed Drive Gauge increase of the normal version from 2000 to 3000.
2. Extended the mid-air hitbox after the attack by 1 frame.
3. Expanded the attack hitbox forward.
4. Changed Drive Gauge increase of the normal version from 2000 to 3000.
Scutum (Normal/Overdrive)<br>(↓↙←+ Kick)
调整 Expanded the super armor counter attack hitbox downwards.
This is to fix an issue with the counter attack not hitting against certain low profile moves.
This is to fix an issue with the counter attack not hitting against certain low profile moves.
Crouching Light Punch
调整 1. Changed advantage on hit from +5 to +6 frames.
2. Changed the cancel to Drive Rush timing from frames 6-8 to frames 7-8.
2. Changed the cancel to Drive Rush timing from frames 6-8 to frames 7-8.
Desert Storm<br>(→+Heavy Punch > Heavy Punch > Heavy Punch)
调整 1. Changed the advantage on hit for the 1st attack from +1 to +2.
2. Increased the hitback on the 1st attack.
3. Changed the Drive Gauge increase on the 1st attack from 2000 to 3000.
4. Increased the
5. Expanded the attack hitbox of the 2nd attack upwards and sideways.
6. Changed the damage of the final attack from 500 to 800.
7. Expanded the attack hitbox of the final attack sideways.
2. Increased the hitback on the 1st attack.
3. Changed the Drive Gauge increase on the 1st attack from 2000 to 3000.
4. Increased the
combo count
upper limit for the 1st and 2nd attacks.5. Expanded the attack hitbox of the 2nd attack upwards and sideways.
6. Changed the damage of the final attack from 500 to 800.
7. Expanded the attack hitbox of the final attack sideways.
Windclad Tomahawk Buster (Normal)<br>(→↓↘+P)
调整 Increased the blowback of the 2nd attack when it hits on the ground.
Light Windclad Tomahawk Buster<br>(→↓↘+Light Punch)
调整 Decreased the horizontal blowback of the 2nd attack when it hits on the ground.
Standing Medium Punch
调整 Changed the Drive Gauge increase from 2000 to 3000.
Overdrive Torbalan<br>(↓↘→+Two Kicks)
修复问题 Fixed an issue where the projectile's attack motion and the number of times it hit the opponent would not match when clashing with a single-hit Overdrive attack.
*The projectile will now disappear after one hit.
*The projectile will now disappear after one hit.
Super Art 2 Lovushka<br>(↓↙←↓↙←+P)
调整 Projectiles will now continue to remain on the screen if they are on the screen when a normal throw hits for a Punish Counter.
Super Art 3/Critical Art Interdiction<br>(↓↘→↓↘→+ Kick)
调整 Expanded the attack hitbox that only appears during a combo upward.
Standing Heavy Kick
调整 Changed the Drive Gauge increase to the following.
Normal version: From 3000 to 4000
Chain combo version: From 750 to 1000
Normal version: From 3000 to 4000
Chain combo version: From 750 to 1000
Crouching Heavy Punch
调整 Changed the hit effect on mid-air Punish Counter to a spinning knockdown.
Korenzan<br>(←+Heavy Kick)
调整 Changed the Drive Gauge increase to the following.
Normal version: From 1500 (750*2) to 3500 (1500+2000)
Chain combo version: From 374 (187*2) to 875 (375+500)
Normal version: From 1500 (750*2) to 3500 (1500+2000)
Chain combo version: From 374 (187*2) to 875 (375+500)
Heavy Fuhajin<br>(↓↙←+Heavy Kick)
调整 Changed the attack active frames from 4 to 5 frames.
Knee Shot<br>(↓+Light Kick during a forward jump)
调整 Changed the Drive Gauge increase from 500 to 2000.
Funky Dance Feint<br>(Medium Punch > Medium Punch > ←+Heavy Punch)
调整 Changed the overall frames of the technique from 23 to 22 frames.
Medium Jackknife Maximum<br>(Charge ↓, then ↑+Medium Kick)
调整 Changed the 1st attack's active frames from 3 to 4 frames.
Heavy Jackknife Maximum<br>(Charge ↓, then ↑+Heavy Kick)
调整 1. Changed the 1st attack's active frames from 4 to 5 frames.
2. Expanded the attack hitbox that can only hit a mid-air opponent upward.
2. Expanded the attack hitbox that can only hit a mid-air opponent upward.
Waning Moon (Normal)<br>(↓↙←+K > Medium Kick)
调整 Increased the blowback on Punish Counter.
Overdrive Waning Moon<br>(↓↙←+Two Kicks > Medium Kick)
调整 Decreased the
combo count
additional value. Crouching Medium Punch
共通调整 1. Changed recovery when the attack misses from 14 to 17 frames.
2. Expanded the hurtbox forward from frames 10 - 26 only when the attack misses.
2. Expanded the hurtbox forward from frames 10 - 26 only when the attack misses.
Crouching Heavy Kick
共通调整 Reduced pushback on block.
Overdrive Cannon Spike<br>(→↓↘+Two Kicks)
调整 1. Updated behavior so Cammy does not switch sides with her opponent on hit.
2. Active frames on the close range hitbox reduced by 1 frame.
3. Added a hitbox that extends forward and downward only during a combo to the attack's 3rd and 4th active frames.
4. Changed damage distribution from 1500 (1100+100*4) to 1500 (600+100×3+600)
2. Active frames on the close range hitbox reduced by 1 frame.
3. Added a hitbox that extends forward and downward only during a combo to the attack's 3rd and 4th active frames.
4. Changed damage distribution from 1500 (1100+100*4) to 1500 (600+100×3+600)
Cannon Strike (Normal)<br>(↓↙←+K during a forward jump)
调整 Changed Drive Gauge increase from 1000 to 2500.
Overdrive Cannon Strike<br>(↓↙←+Two Kicks during a forward jump)
共通调整 When performing the attack during a jump's ascent, recovery has changed to the following only when the attack hits on the 1st active frame.
On hit: 0 ~ +2 frames to 0 frame advantage
On block: -2 ~ -4 frames to -2 frames
*Recovery will no longer change up to a certain height.
*If the attack hits on the 2nd frame or later, or if it's performed during the latter half of the jump, the frame difference will be the same as before.
On hit: 0 ~ +2 frames to 0 frame advantage
On block: -2 ~ -4 frames to -2 frames
*Recovery will no longer change up to a certain height.
*If the attack hits on the 2nd frame or later, or if it's performed during the latter half of the jump, the frame difference will be the same as before.
Razor's Edge Slicer (Normal/Hold/Overdrive)<br>(↓↘→+P or Two Punches > No Input)
调整 Expanded the hurtbox on the body upward.
Crouching Medium Kick
调整 Window to cancel into a special move is now 2 frames faster.
Axe Kick (← + Heavy Kick)
调整 Changed Drive Gauge increase from 1500 to 3500 (1500+2000)
Whirlwind Kick (→+Heavy Kick)
调整 1. Can now be canceled into a normal Aerial Tatsumaki Senpu-kyaku.
2. Changed the landing state when landing from a canceled into Aerial Tatsumaki Senpu-kyaku from crouching to standing.
3. Increased
2. Changed the landing state when landing from a canceled into Aerial Tatsumaki Senpu-kyaku from crouching to standing.
3. Increased
combo count
upper limit. Boosted Overdrive Hadoken<br>(↓↘→+Two Punches)
调整 Decreased
combo count
additional value during a mid-air hit. Heavy High Blade Kick<br>(↓↘ → + Heavy Kick)
调整 1. Changed attack startup from 29 to 27 frames.
2. Overall technique length changed from 53 to 50 frames.
3. Changed recovery on block from -5 to -3 frames.
4. Decreased knockdown time on hit by 1 frame.
5. Changed Drive Gauge decrease from 8000 to 10000.
2. Overall technique length changed from 53 to 50 frames.
3. Changed recovery on block from -5 to -3 frames.
4. Decreased knockdown time on hit by 1 frame.
5. Changed Drive Gauge decrease from 8000 to 10000.
Overdrive Hashogeki<br>(↓↙←+Two Punches)
调整 Changed damage from 900 to 1100.
Edmond Honda
Standing Heavy Punch
调整 Changed recovery on hit from -1 to +1 frame.
Teppo Triple Slaps (Normal/Overdrive)<br>(↓↘→+K or Two Kicks > P)
调整 1. Expanded the hitbox on the 1st and 2nd attack horizontally.
2. Reduced the hurtbox on the arms between frames 9-14 and 25-28 of the technique.
3. Reduced the hurtbox on the feet between frames 9-33 of the technique.
2. Reduced the hurtbox on the arms between frames 9-14 and 25-28 of the technique.
3. Reduced the hurtbox on the feet between frames 9-33 of the technique.
Teppo Triple Slaps (Normal)<br>(↓↘→+K > P)
调整 1. Increased pushback on block on the 1st and 2nd attack.
2. Changed Drive Gauge increase from 1000 x 2 to 2000 x 2.
2. Changed Drive Gauge increase from 1000 x 2 to 2000 x 2.
Overdrive Teppo Triple Slaps<br>(↓↘→+Two Kicks > Punch)
调整 1. Changed recovery on block on the 2nd attack from +2 to +3 frames.
2. Reduced the pushback on block for the 1st and 2nd attack.
2. Reduced the pushback on block for the 1st and 2nd attack.
Oicho Throw (Normal/Overdrive)<br>(→↘↓↙←+Kick or Two Kicks)
调整 1. Changed the attack startup from 7 to 6 frames.
2. Changed the attack's active frames from 3 to 4 frames.
2. Changed the attack's active frames from 3 to 4 frames.
Super Art 2 Ultimate Killer Headram<br>(Charge ←溜め, then →←→+Kick)
调整 Updated attack so that after the headbutt attack hits, from the handslap portion until the end of the technique is completely projectile invincible.
Drive Reversal
修复问题 Fixed an issue where the overlap collision hitbox would expand in situations other than a block or parry.
Crouching Heavy Punch
调整 Changed Drive Gauge increase from 3000 to 4000.
Double Knee Bombs<br>(→+Medium Kick)
调整 1. Reduced hurtbox around the feet starting from the 9th frame of the technique.
2. Changed the mid-air hit effect on the 1st attack from a mid-air recovery to a blowback knockdown.
3. Reduced blowback time on a mid-air hit for the 1st and 2nd attack.
4. Reduced blowback distance on a mid-air hit for the 1st and 2nd attack.
5. Fixed an issue where Blanka would have a pushback on hit applied to him when the 2nd attack hits a mid-air opponent in the corner of the stage.
2. Changed the mid-air hit effect on the 1st attack from a mid-air recovery to a blowback knockdown.
3. Reduced blowback time on a mid-air hit for the 1st and 2nd attack.
4. Reduced blowback distance on a mid-air hit for the 1st and 2nd attack.
5. Fixed an issue where Blanka would have a pushback on hit applied to him when the 2nd attack hits a mid-air opponent in the corner of the stage.
Wild Nail<br>(→+Heavy Punch)
调整 1. Increased knockdown time by 2 frames when the attack hits on the ground.
2. Increased knockdown time by 5 frames when the attack hits a mid-air opponent.
Knockdown time on a punish counter has not changed.
2. Increased knockdown time by 5 frames when the attack hits a mid-air opponent.
Knockdown time on a punish counter has not changed.
Spinning Back Knuckle<br>(→+Heavy Punch)
调整 Changed Drive Gauge increase from 3000 to 5000.
Overdrive Sonic Cross<br>(↓↙←+Two Punches > →+Two Punches)
调整 Increased wall splat time by 3 frames on hit.
Hell Wheel (back throw)
调整 Increased the distance created after this throw is successful when the throwing player was in the corner.
Crouching Heavy Kick
共通调整 Reduced pushback on block.
Forward Step Kick<br>(Heavy Kick during Quick Dash)
调整 1. Added 20% initial scaling.
2. Extended the hurtbox forward during recovery.
3. Changed Drive Gauge increase from 2000 to 3000.
2. Extended the hurtbox forward during recovery.
3. Changed Drive Gauge increase from 2000 to 3000.
Overdrive Shoryuken<br>(→↓↘+Two Punches)
调整 Decreased blowback time on hit.
Heavy Jinrai Kick<br>(↓↘→+Heavy Kick)
调整 Changed Drive Gauge increase from 2000 to 3000.
Super Art 1 - Dragonlash Flame<br>(↓↙←↓↙←+ Kick)
共通调整 1. Decreased blowback time on hit.
2. Decreased knockdown time on hit.
2. Decreased knockdown time on hit.
Serenity Stream (Modern Controls)<br>(↓↙←+Attack)
调整 Kick-based techniques out of this move are now performed by pressing Down with an attack button, and punch-based techniques are performed by pressing just an attack button.
Standing Heavy Punch
调整 Changed Drive Gauge increase from 3000 to 4000.
Snake Strike<br>(Medium Punch during Serenity Stream)
调整 1. Attack startup changed from 11 to 7 frames.
2. Drive Gauge increase changed from 500 to 2000
2. Drive Gauge increase changed from 500 to 2000
Senpu Kick<br>(Medium Kick during Serenity Stream)
调整 Knockback time on hit increased by 2 frames.
This change does not affect recovery.
This change does not affect recovery.
Heavy Spinning Bird Kick<br>(Charge ↓, then ↑+Heavy Kick)
调整 Attack startup changed from 21 to 20 frames.
Russian Drop (↙ Throw)<br><br>Brainbuster (↓ Throw)<br><br>German Suplex (→ Throw)
调整 Super Art gauge increase changed from 2000 to 3000.
On punish counter, the gauge increase changed from 4000 to 6000.
On punish counter, the gauge increase changed from 4000 to 6000.
Power Stomps (Modern Controls)<br>(↓↓+Medium > Medium > Medium)
调整 Technique can now be performed by pressing ↓↓+Medium Attack when using Modern controls.
Power Stomps<br>(↓↓+Medium Kick > Medium Kick > Medium Kick)
调整 Drive Gauge increase changed from 1000 x 3 to 1500 x 3.
Siberian Express (Normal/Overdrive)<br>(→↘↓↙←Kick)
修复问题 Siberian Express changes depending on the distance from the opponent when it's performed, but we have fixed an issue where the attack would differ under certain conditions even when activated at the same range.
Standing Light Punch
调整 Rapid cancel timing to Crouching Light Punch is now 1 frame faster.
Standing Heavy Punch
调整 Drive Gauge increase changed from 2500 to 4000.
Crouching Heavy Punch
调整 Drive Gauge increase changed from 2500 to 3500.
Agile Kick<br>(↙+Light Kick)
调整 Rapid cancel timing to Crouching Light Punch is now 1 frame faster.
Overdrive Yoga Fire<br>(↓↘→+Two Punches)
调整 Blowback distance on the 2nd attack reduced.
Overdrive Yoga Arc<br>(↓↘→+Two Kicks)
调整 Relaxed detection for making projectiles disappear when they leave the camera's view when in the center of the stage. This change does not apply to the corners of the stage.
Aerial Yoga Teleport<br>(← or →+Two Punches or Two Kicks)
调整 Collision pushbox now comes out 1 frame faster after teleporting.
This change was done to mitigate situations where Dhalsim would be facing the wrong direction when the opponent is in the corner and Dhalsim tries to teleport behind them.
This change was done to mitigate situations where Dhalsim would be facing the wrong direction when the opponent is in the corner and Dhalsim tries to teleport behind them.
Standing Heavy Kick
调整 Drive Gauge increase changed from 3000 to 4000.
Backup<br>(→+Punch during Run)
调整 Added 20% initial scaling.
Side Flip<br>(→+Two Kicks)
调整 1. Collision pushbox now disappears 2 frames later.
2. Updated the technique so that Rashid does not completely overlap with the opponent when performing this technique while the opponent is in the corner.
2. Updated the technique so that Rashid does not completely overlap with the opponent when performing this technique while the opponent is in the corner.
Overdrive Spinning Mixer<br>(↓↘→+Two Punches)
调整 1. Reduced blowback time when the final attack hits.
2. Reduced blowback distance when the final attack hits.
3. Increased knockdown time by 5 frames when the final attack doesn't hit.
2. Reduced blowback distance when the final attack hits.
3. Increased knockdown time by 5 frames when the final attack doesn't hit.
Super Art 1 Super Rashid Kick<br>(↓↘→↓↘→+ Kick)
共通调整 Advantage when cinematic is triggered on a grounded hit changed from +11 to +1 frame.
Standing Heavy Punch
调整 Drive Gauge increase changed from 2000 to 3000.
Heavy Serpent Lash<br>(↓↘→+Heavy Punch)
调整 Reduced
combo count
additional value when Toxic Blossom is triggered. Heavy Cruel Fate<br>(↓↙←+Heavy Kick)
调整 Increased blowback time when the final attack hits a mid-air opponent.
Drive Reversal
修复问题 Fixed an issue where the overlap collision hitbox would expand in situations other than a block or parry.
Crouching Light Kick
调整 1. Recovery changed from 11 to 12 frames.
2. Advantage on hit changed from +3 to +2 frames.
3. Expanded the hurtbox forward on the 18th frame.
2. Advantage on hit changed from +3 to +2 frames.
3. Expanded the hurtbox forward on the 18th frame.
Standing Medium Kick
调整 1. Increased recovery by 2 frames when the attack misses.
2. Expanded the hurtbox forward from frames 25-31 when the attack misses.
2. Expanded the hurtbox forward from frames 25-31 when the attack misses.
Crouching Medium Kick
调整 1. Increased recovery by 1 frame when the attack misses.
2. Expanded the hurtbox forward from frames 24-25 when the attack misses.
2. Expanded the hurtbox forward from frames 24-25 when the attack misses.
Cobra Punch<br>(→+Heavy Punch)
调整 Drive Gauge increase changed from 3000 to 4000.
Psycho Flicker (Normal)<br>(↓↘→+ Kick)
调整 Changed the timing when the hurtbox extends forward from the point when moving to the attack, to when the technique begins.
Kill Rush (Backward)<br>(←+Two Kicks)
调整 Extended the hurtbox forward.
Overdrive Psycho Blitz<br>(↓↙←+Two Punches)
调整 1. Increased the distance moved forward before the attack comes out.
2. Disadvantage on block changed from -3 to -4 frames.
3. Reduced pushback on block.
2. Disadvantage on block changed from -3 to -4 frames.
3. Reduced pushback on block.
Super Art 2 Light Psycho Cannon<br>(↓↙←↓↙←+Light Punch)
调整 Drive Gauge reduction on hit changed from 1400 x 6+1600 to 0 x 6+10000.
Akuma
Assisted Combo 2 (Burnout included)
修复问题 Fixed an issue where simplified input scaling would be applied when buffering attacks during Adamant Flame.
Backward Walk
调整 Walk speed reduced.
Crouching Medium Kick
调整 Window to cancel into a Drive Impact is now 2 frames faster.
Crouching Heavy Kick
共通调整 1. Distance Akuma is pushed back when attack is block is reduced.
2. Pushback on block reduced.
2. Pushback on block reduced.
Resso Snap Kick<br>(→+Medium Kick)
调整 1. Recovery when the attack misses changed from 30 to 31 frames.
2. Expanded the hurtbox forward from frames 30-31 when the attack misses.
2. Expanded the hurtbox forward from frames 30-31 when the attack misses.
Tenmaku Blade Kick<br>(↓+Medium Kick during a jump)
调整 Drive Gauge increase changed from 2000 to 3000.
Gou Hadoken (Normal/Overdrive)<br>(↓↘→+P or Two Punches)
调整 Expanded the hurtbox forward after attack startup.
Overdrive Gou Shoryuken<br>(→↓↘+Two Punches)
调整 Changed damage from 1900 to 1700.
Overdrive Tatsumaki Zanku-kyaku<br>(↓↙←+Two Kicks)
调整 Knockdown time on hit increased by 1 frame.
Light Demon Raid<br>(↓↘→+Light Kick)
调整 Updated to match other strengths of the technique so that movement speed changes when jumping over the opponent.
Demon Swoop<br>(Hold ↓ during Demon Raid)
调整 Added 5 frames of landing recovery when jumping over the opponent.
M. Bison
Crouching Heavy Kick
共通调整 Disadvantage on block changed from -11 to -12 frames.
Jumping Light Kick
调整 Updated cross-up attack hitbox and extended it backwards to match the hitbox length of jumping medium kick.
Evil Knee<br>(←+Heavy Kick)
调整 Changed Drive Gauge reduction on block from 5000 to 3000.
Psycho Crusher Attack (Medium/Heavy)<br>(Charge ←, then →+P)
调整 1. Changed Drive Gauge increase on the medium version from 2500 to 3500.
2. Changed Drive Gauge increase on the heavy version from 3000 to 5000.
2. Changed Drive Gauge increase on the heavy version from 3000 to 5000.
Overdrive Psycho Crusher Attack<br>(Charge ←, then →+Two Punches)
调整 1. Changed damage when Psycho Mine is embedded from 2000 to 1600.
2. Changed Drive Gauge reduction on block from 10000 to 5000.
2. Changed Drive Gauge reduction on block from 10000 to 5000.
Overdrive Double Knee Press<br>(↓↘→+Two Kicks)
调整 Changed combo scaling from 10% to 20%
Shadow Rise (Normal)<br>(Charge ↓, then ↑+ Kick)
调整 Added a hurtbox around the feet during the jump.
This new hurtbox is invincible to projectiles.
This new hurtbox is invincible to projectiles.
Devil Reverse (Normal)<br>(Charge ↓, then ↑+Kick > Punch)
修复问题 Fixed an issue where the embedded Psycho Mine would not detonate when the attack hits or is blocked at its lowest possible altitude.
调整 1. Reduced the downward attack hitbox.
2. From the 9th frame of the technique until Bison lands, the hurtbox around the body is expanded sideways.
3. During the attack's active frames, the hurtbox around the arms is expanded downwards and sideways.
4. When a Psycho Mine is embedded, the recovery on the final attack on block changed from 23 to 27 frames.
5. When a Psycho Mine is embedded, landing recovery changed from 9 to 8 frames.
2. From the 9th frame of the technique until Bison lands, the hurtbox around the body is expanded sideways.
3. During the attack's active frames, the hurtbox around the arms is expanded downwards and sideways.
4. When a Psycho Mine is embedded, the recovery on the final attack on block changed from 23 to 27 frames.
5. When a Psycho Mine is embedded, landing recovery changed from 9 to 8 frames.
Assisted Combo 1
修复问题 Fixed an issue where if the 2nd attack lands on super armor, the 3rd attack would not be performed.
Standing Heavy Punch
调整 1. Changed disadvantage on block from -1 to +1.
2. Overall length of the technique on block reduced by 2 frames.
This adjustment was made in order to ensure that there are no timing differences whether the attack is blocked or hits.
3. Increased input buffer time on hit by 2 frames.
2. Overall length of the technique on block reduced by 2 frames.
This adjustment was made in order to ensure that there are no timing differences whether the attack is blocked or hits.
3. Increased input buffer time on hit by 2 frames.
Crouching Medium Punch
调整 Reduced pushback on hit.
Crouching Heavy Kick
调整 Updated so that the attack hitbox that hits a grounded opponent is lower, and can't be absorbed by upper body super armor.
Power Dunk<br>(Medium Punch > Heavy Kick > Heavy Kick)
调整 Updated the effects and hit sound on a clean hit.
Medium Power Wave<br>(↓↘→+Medium Punch)
调整 Hurtbox expansion timing changed from the 16th to 18th frame.
Round Wave<br>(↓↘→+Heavy Punch)
调整 1. Overall technique length changed from 53 to 51 frames.
Recovery on a grounded block or hit has not changed.
2. Drive Gauge reduction on block changed from 5000 to 7000.
Recovery on a grounded block or hit has not changed.
2. Drive Gauge reduction on block changed from 5000 to 7000.
Light Power Charge<br>(↓↘→+Light Kick)
调整 Reduced attack hitbox on the 1st active frame of the attack.
Crack Shoot<br>(↓↙←+Light Kick)
调整 Drive Gauge reduction on block changed from 2000 to 2500.
Medium Crack Shoot<br>(↓↙←+Medium Kick)
调整 1. Advantage on hit changed from +1 to +3 frames.
2. Changed behavior on a grounded counter hit from knockback to hard knockdown.
3. Drive Gauge reduction on block changed from 2500 to 3500.
4. Fixed an issue where the knockback time was longer when the attack hit a grounded opponent on the 5th active frame.
2. Changed behavior on a grounded counter hit from knockback to hard knockdown.
3. Drive Gauge reduction on block changed from 2500 to 3500.
4. Fixed an issue where the knockback time was longer when the attack hit a grounded opponent on the 5th active frame.
Heavy Crack Shoot<br>(↓↙←+Heavy Kick)
调整 1. Changed Drive Gauge increase on the final attack from 2000 to 3000.
2. Changed Drive Gauge reduction on block from 4000 to 5000.
2. Changed Drive Gauge reduction on block from 4000 to 5000.
Overdrive Crack Shoot<br>(↓↙←+Two Kicks)
调整 Reduced horizontal blowback on a mid-air hit.
Overdrive Burning Knuckle<br>(↓↙←+Two Punches)
调整 1. Reduced blowback on a mid-air hit.
2. Changed Drive Gauge reduction on block from 6000 to 8000.
2. Changed Drive Gauge reduction on block from 6000 to 8000.
Super Art 2 Power Geyser<br>(↓↙←↓↙←+P)
调整 1. Expanded the attack hitbox that appears only during a combo.
2. Reduced horizontal blowback.
3. Expanded the Twin Geyser attack hitbox.
2. Reduced horizontal blowback.
3. Expanded the Twin Geyser attack hitbox.
Super Art 2 Power Geyser<br>(↓↙←↙→+Medium Kick,Heavy Punch)
调整 Technique would be performed even without the ↓↙← input, so the conditions for performing the technique have been made stricter.
Overall Concept
Some characters have received some balance adjustments for this update.
Rather than sweeping changes to alter the game balance across all characters, this time we've zeroed in to specifically add some tweaks to characters that hadn't seen many changes to their playstyle yet. We've also dampened the unexpected negative impact of some previous changes, and dialed back some factors that were really sticking out.
Rather than sweeping changes to alter the game balance across all characters, this time we've zeroed in to specifically add some tweaks to characters that hadn't seen many changes to their playstyle yet. We've also dampened the unexpected negative impact of some previous changes, and dialed back some factors that were really sticking out.
luke
We'd previously shortened the reach of Luke's normal attacks, in an attempt to suppress his strong defensive capabilities, however, this had a much greater impact on his offensive capabilities than we'd anticipated, resulting in many more cases of his attacks not finding their mark when they should have. To alleviate the issue, we've reduced the knockback of his normal attacks, which should make them more viable for stringing combos again.
After taking into account the drop in Luke's offensive firepower, including the huge influence bumping up the initial scaling of Triple Impact (Light Punch > Medium Punch > Heavy Punch) had, we've also given his parameters some boosts.
The adjustments made to Outlaw Kick (← + Heavy Kick) should lower the difficulty in using it in combos. With the previously mentioned increase to normal attack knockback, it became incredibly difficult to follow up with the attack unless you were able to perform it immediately out of a Drive Rush. We've tweaked things a bit so that even if your input timing is a little slow, the attack can still reach and connect.
After taking into account the drop in Luke's offensive firepower, including the huge influence bumping up the initial scaling of Triple Impact (Light Punch > Medium Punch > Heavy Punch) had, we've also given his parameters some boosts.
The adjustments made to Outlaw Kick (← + Heavy Kick) should lower the difficulty in using it in combos. With the previously mentioned increase to normal attack knockback, it became incredibly difficult to follow up with the attack unless you were able to perform it immediately out of a Drive Rush. We've tweaked things a bit so that even if your input timing is a little slow, the attack can still reach and connect.
kimberly
Setting up plays with Shuriken Bombs (↓↓ + Punch) has always been a fun part of Kimberly's game plan, but the previous overall balance adjustments wound up impacting them heavily, reducing their return despite the heavy cost of using up a limited resource. As such, we've reeled in their initial scaling and combo scaling so that you'll get more bang for your buck when a Shuriken Bomb connects.
jp
JP's anti-air abilities were weakened when Ed joined the roster, and then again when Akuma was added, but that caused JP's abilities to become too restricted, so his crouching heavy punch's anti-air capabilities have been improved. It's not as strong as before, but players can now use it well if they react properly.
On top of this, more combo routes than expected were no longer viable due to the adjustments made to Super Art 2 Lavushka, so we've made some adjustments to JP's standing medium kick and Bylina (→ + Heavy Kick) to make up for this. There are now more consecutive hits than before, so new combo routes can be built.
The adjustments to Triglav (↓↓ + Punch) are related to the adjustments made to Bylina. If Triglav and Bylina are used in regular combos, the value of other attacks will decrease, so we've made adjustments to reduce the knockback only when they hit an opponent that's not in the air. Knockdown time is also adjusted, while the recovery difference on hit has not changed.
On top of this, more combo routes than expected were no longer viable due to the adjustments made to Super Art 2 Lavushka, so we've made some adjustments to JP's standing medium kick and Bylina (→ + Heavy Kick) to make up for this. There are now more consecutive hits than before, so new combo routes can be built.
The adjustments to Triglav (↓↓ + Punch) are related to the adjustments made to Bylina. If Triglav and Bylina are used in regular combos, the value of other attacks will decrease, so we've made adjustments to reduce the knockback only when they hit an opponent that's not in the air. Knockdown time is also adjusted, while the recovery difference on hit has not changed.
deejay
During the overall balance adjustment, Dee Jay didn't receive many buffs, so we've made some more adjustments to him.
His Three Beat Combo (Light Punch > Medium Kick > Medium Kick) didn't have many uses so we've reduced the distance after hit to leave opponents closer to Dee Jay so he can choose between following with a strike or a throw.
Depending on the situation, you can now use it in conjunction with Quick Rolling Sobat (↓↘→ + Medium Kick).
We also improved his Waning Moon (↓↙← + Kick > Medium Kick) out of Jus Cool (↓↙← + Kick) as players were not using it as much as the other transition attacks.
The regular version will now allow for follow-up attacks on Punish Counter.
When blocked, it chips away more Drive Gauge, giving it a different advantage than what Funky Slicer (↓↙←+ Kick > Light Kick) provides.
The Overdrive version can also be followed up with a Super Art attack.
This, combined with a Super Art 1 Greatest Sobat, that hits better on a mid-air opponent, will allow him to score more damage while keeping on the offensive.
His Three Beat Combo (Light Punch > Medium Kick > Medium Kick) didn't have many uses so we've reduced the distance after hit to leave opponents closer to Dee Jay so he can choose between following with a strike or a throw.
Depending on the situation, you can now use it in conjunction with Quick Rolling Sobat (↓↘→ + Medium Kick).
We also improved his Waning Moon (↓↙← + Kick > Medium Kick) out of Jus Cool (↓↙← + Kick) as players were not using it as much as the other transition attacks.
The regular version will now allow for follow-up attacks on Punish Counter.
When blocked, it chips away more Drive Gauge, giving it a different advantage than what Funky Slicer (↓↙←+ Kick > Light Kick) provides.
The Overdrive version can also be followed up with a Super Art attack.
This, combined with a Super Art 1 Greatest Sobat, that hits better on a mid-air opponent, will allow him to score more damage while keeping on the offensive.
guile
Guile's Sonic Boom (Charge ←, then → + Punch) high use rate in the neutral, plus his loop combos, made him superior when it came to meter gain, so we've made adjustments to reduce the amount of Super Art and Drive gauge he gains.
We also took into consideration that his Medium Sonic Boom is weaker than the other versions when it comes to suppressing the opponent and factored that in when making the above change.
We also took into consideration that his Medium Sonic Boom is weaker than the other versions when it comes to suppressing the opponent and factored that in when making the above change.
zangief
While we looked to improve Zangief's performance by adjusting various moves, some of them ended up being taken too far, so we've taken measures to tone down the adjustments.
First, we've taken his Knee Hammer (→ + Medium Kick) and rolled back the disadvantage on block from -3 back to -4 frames.
This was an adjustment done to make the move easier to use, but with the other adjustments Zangief received, it turned out to be too powerful when used as a way to close the gap, so we've made it less advantageous when blocked.
Additionally, there was a big discrepancy between its appearance and hurtbox, so we've expanded the hurtbox in order to match the appearance of the attack more.
However, this attack can still avoid attacks to the feet like before.
For Zangief's Head Butt (→ + Heavy Punch), taking into consideration its ability to keep Zangief on the offensive and its ability to break down defenses, we've lowered the return it gets on hit.
It can still be used in a combo, but the additional scaling added to it will lower its damage.
However, on hit it now can connect into crouching medium punch, meaning that using Super Art 2 in a combo is easier.
First, we've taken his Knee Hammer (→ + Medium Kick) and rolled back the disadvantage on block from -3 back to -4 frames.
This was an adjustment done to make the move easier to use, but with the other adjustments Zangief received, it turned out to be too powerful when used as a way to close the gap, so we've made it less advantageous when blocked.
Additionally, there was a big discrepancy between its appearance and hurtbox, so we've expanded the hurtbox in order to match the appearance of the attack more.
However, this attack can still avoid attacks to the feet like before.
For Zangief's Head Butt (→ + Heavy Punch), taking into consideration its ability to keep Zangief on the offensive and its ability to break down defenses, we've lowered the return it gets on hit.
It can still be used in a combo, but the additional scaling added to it will lower its damage.
However, on hit it now can connect into crouching medium punch, meaning that using Super Art 2 in a combo is easier.
dhalsim
Dhalsim is a character that didn't receive many changes during the overall balance adjustment, so we've gone and made more changes to him.
On top of improving the usability of many of his attacks, his Super Art 1 now deals recoverable damage to the opponent whenever it's blocked.
This means that if Dhalsim can land a hit on the opponent while the opponent has recoverable damage on their health gauge, it will convert into actual damage.
We've also changed things up so that the amount of Drive gauge reduction inflicted and his overall situation when the attack is blocked is better, so you can reduce your opponent's resources by getting them to block the attack, while increasing the pressure for your next attack.
On top of improving the usability of many of his attacks, his Super Art 1 now deals recoverable damage to the opponent whenever it's blocked.
This means that if Dhalsim can land a hit on the opponent while the opponent has recoverable damage on their health gauge, it will convert into actual damage.
We've also changed things up so that the amount of Drive gauge reduction inflicted and his overall situation when the attack is blocked is better, so you can reduce your opponent's resources by getting them to block the attack, while increasing the pressure for your next attack.
rashid
The hurtbox on his crouching light punch (crouching light attack, for Modern controls) was smaller compared to other characters, making it easier to use as an anti-air attack, so we've matched the height of the hurtbox with that of other characters. This hurtbox is only vulnerable to aerial attacks, so this change won't affect ground-based attacks.
Nail Assault's (↓+ SP > → + Attack > → + Attack, for Modern controls) command has been changed to avoid accidental inputs.
When performing Rolling Assault (↓ + SP > → + Attack) from a normal attack, Rashid would sometimes perform Nail Assault by accident if the input was done too quickly, so we've updated the move so it will not be performed if a forward input is not detected.
Nail Assault's (↓+ SP > → + Attack > → + Attack, for Modern controls) command has been changed to avoid accidental inputs.
When performing Rolling Assault (↓ + SP > → + Attack) from a normal attack, Rashid would sometimes perform Nail Assault by accident if the input was done too quickly, so we've updated the move so it will not be performed if a forward input is not detected.
vega
M. Bison's adjustments are primarily bug fixes and weakening some moves that are difficult for the rest of the cast to deal with.
For his Double Knee Press (↓↘→ + Kick), opponents were able to move first after blocking the attack, but the opponents were also pushed out, meaning that Bison was often at an advantage.
This situation was hard for players to grasp, which lead to many situations where Bison could keep on the offensive, so we've reduced the pushback on block so it's more difficult for Bison to continue his pressure.
To go along with this, the hurtbox during his recover is now smaller, so while guaranteed punishes will still hit, attacks with a long reach can now hit Bison more effectively, making it easier to take back your turn.
Finally, although Bison's Drive Reversal doesn't move him forward, its range was very long, which made it difficult to counterattack it depending on the situation, so the hitbox has been reduced.
For his Double Knee Press (↓↘→ + Kick), opponents were able to move first after blocking the attack, but the opponents were also pushed out, meaning that Bison was often at an advantage.
This situation was hard for players to grasp, which lead to many situations where Bison could keep on the offensive, so we've reduced the pushback on block so it's more difficult for Bison to continue his pressure.
To go along with this, the hurtbox during his recover is now smaller, so while guaranteed punishes will still hit, attacks with a long reach can now hit Bison more effectively, making it easier to take back your turn.
Finally, although Bison's Drive Reversal doesn't move him forward, its range was very long, which made it difficult to counterattack it depending on the situation, so the hitbox has been reduced.
ed
Ed didn't change much during the overall balance adjustment, so we made some slight adjustments to him while maintaining his strengths and appeal. Most of his adjustments are to improve aspects of his game that were difficult to use.
Light Psycho Flicker (↓↘→ + Light Kick) was difficult to control after it hit an opponent so we've made adjustments to this. However, follow-ups after this attack have not changed.
We've also made adjustments to the amount of Super Art gauge Ed gains when using Super Art 2 Psycho Cannon in a combo. We considered that the attack didn't have as many different use cases as other Super Art 2 attacks that don't have invincibility, so we didn't add scaling to how much meter Ed could gain, but advancements in its comboability made it so that the return was too much, even for how difficult it is to use. As a result, we've added scaling to the meter gain.
Light Psycho Flicker (↓↘→ + Light Kick) was difficult to control after it hit an opponent so we've made adjustments to this. However, follow-ups after this attack have not changed.
We've also made adjustments to the amount of Super Art gauge Ed gains when using Super Art 2 Psycho Cannon in a combo. We considered that the attack didn't have as many different use cases as other Super Art 2 attacks that don't have invincibility, so we didn't add scaling to how much meter Ed could gain, but advancements in its comboability made it so that the return was too much, even for how difficult it is to use. As a result, we've added scaling to the meter gain.
chunli
When only the first attack of Heavy Tensho Kicks connected, it caused a huge disadvantage for Chun-Li, so we increased the knockdown time for the opponent, so they can't dish out a guaranteed counterattack.
Drive Impact
- 不具合修正 1. With some characters, the length of the standby block hitbox did not match that of the attack hitbox, so the standby block hitbox was adjusted for them to match.
This change applies to Luke, Kimberly, Chun-Li, Dee Jay, and A.K.I.
2. Fixed an issue where receiving an opponent's attack would unintentionally change the properties of the Drive Impact for some characters. The affected characters and fixes applied are detailed below.
Kimberly: Fixed an issue where the standby block hitbox would disappear from frames 1 to 17.
Dee Jay: Fixed an issue where the attack hitbox was shorter than normal.
Blanka: Fixed an issue where the standby block hitbox was too short, and the range on active attack frame 2 was longer than intended.
Drive Reversal
- 調整 Expanded the throw hurtbox forward, so that normal throws can connect as a counter attack when the Drive Reversal is blocked at close range.
Perfect Parry
- 不具合修正 Fixed an issue where when a specific move is Perfect Parried and the darkened screen occurs, the person who performed the Perfect Parry would have the same recovery as if there was no darkened screen. This affects the following two techniques.
Rashid
Arabian Cyclone (2nd attack and later)
JP
Stribog (2nd attack and later)
Special Move Start Up (Modern Controls)
- 不具合修正 Fixed an issue where the simple command scaling would be applied if a manual command was inputted during the dark screen transition of a Super Art, etc.
Assisted Combo
- 不具合修正 Fixed an issue with some characters where if they entered Burnout during an Assisted Combo and buffered the first attack of the same Assisted Combo, the second attack and later would not be performed. This fix applies to the following characters and combos.
Kimberly: Assisted Combo 2
Manon: Assisted Combo 2
Assisted Combo
- 不具合修正 Fixed an issue with some characters where if they entered Burnout during an Assisted Combo and input the first attack of the same Assisted Combo at the same time as the move recovery, the second attack and later would not be performed. This fix applies to the following characters and combos.
Luke: Assisted Combo 2
Manon: Assisted Combo 3
Juri: Assisted Combo 2 and 3
JP: Assisted Combo 3
Dhalsim: Assisted Combo 2
Crouching Light Punch
调整 1. Reduced pushback on hit.
2. Reduced pushback on block.
2. Reduced pushback on block.
Crouching Medium Punch
调整 Reduced pushback on hit.
Crouching Light Kick
调整 1. Reduced pushback on hit.
2. Reduced pushback on block.
2. Reduced pushback on block.
Outlaw Kick<br>(←+Heavy Kick)
调整 Increased inertia out of Drive Rush.
Triple Impact<br>(Light Punch > Medium Punch > Heavy Punch)
调整 1. Immediate scaling on the second attack removed.
2. Changed the damage of the final attack from 600 to 800.
2. Changed the damage of the final attack from 600 to 800.
SA1: Breakin'
修复问题 Fixed an issue where the damage would increase when the first or second attack landed as a counter hit.
Assisted Combo 2
调整 Combo has been changed to the following.
- When Super Art gauge is empty
Standing Medium Kick > Overdrive Rond-point > Medium Dégagé
- When Super Art gauge is empty
Standing Medium Kick > Overdrive Rond-point > Medium Dégagé
Shuriken Bomb/Shuriken Bomb Spread
调整 Changed initial scaling and combo scaling from 20% to 10%.
Hurtbox during a Bound
修复问题 Hurtbox during a bound was changed to match that of the other large characters.
Standing Medium Kick
调整 Advantage on hit changed from +1 to +3 frames.
Crouching Heavy Punch
调整 Added anti-air invincibility to the arm hurtbox from the attack's 2nd active frame until the end of the attack's active frames.
Bylina<br>(→+Heavy Kick)
调整 1. Increased the combo count upper limit of the first attack.
2. Reduced the combo count additional value of the first attack.
2. Reduced the combo count additional value of the first attack.
Triglav (Normal)<br>(↓↓+Punch)
调整 1. Reduced the blowback time on a standing hit by 1 frame.
2. Extended the knockdown time on a standing hit by 1 frame.
2. Extended the knockdown time on a standing hit by 1 frame.
Stribog (Normal/Overdrive)<br>(↓↘→+Punch or Punch x 2)
调整 Expanded the hitbox for the second attack only for when the first attack hits.
Torbalan (Normal/Overdrive)<br>(↓↘→+Kick or Kick x 2)
调整 Removed a projectile collision hitbox that remained after the attack's active frames.
Embrace (Normal/Overdrive)<br>(↓↙←+Kick or Kick x 2)
调整 Changed immediate scaling from 25% to 10%.
Assisted Combo 2
调整 Combo has been changed to the following.
- When the Super Art gauge is empty
Crouching Medium Punch > Overdrive Fuhajin > Heavy Tensenrin
- When the Super Art gauge is empty
Crouching Medium Punch > Overdrive Fuhajin > Heavy Tensenrin
Face Breaker<br>(←+Heavy Kick)
调整 Slightly expanded the collision pushbox sideways when this attack lands as a ground counter hit or Punish Counter.
This fix has been made to alleviate issues with special moves coming out in the wrong direction after the following combo:
Face Breaker > Overdrive Jus Cool > Overdrive Maximum Strike > Drive Rush > Face Breaker
This fix has been made to alleviate issues with special moves coming out in the wrong direction after the following combo:
Face Breaker > Overdrive Jus Cool > Overdrive Maximum Strike > Drive Rush > Face Breaker
Threebeat Combo<br>(Light Punch > Medium Kick > Medium Kick)
调整 1. Changed the second attack's recovery from 18 to 20 frames.
2. Increased the knockback time on hit or block for the second attack by 2 frames.
3. Reduced pushback on hit for the second attack.
4. Added 20% initial scaling to the second attack.
5. Removed the forced standing property from the second attack.
6. Delayed the transition timing from the second attack to the final attack by 2 frames.
7. Changed the opponent's block reaction for the second attack.
8. Changed the final attack's recovery from 21 to 19 frames.
9. Reduced the knockback time on hit or block for the final attack by 2 frames.
10. Changed the hitstop on the final attack from 9 to 11 frames.
2. Increased the knockback time on hit or block for the second attack by 2 frames.
3. Reduced pushback on hit for the second attack.
4. Added 20% initial scaling to the second attack.
5. Removed the forced standing property from the second attack.
6. Delayed the transition timing from the second attack to the final attack by 2 frames.
7. Changed the opponent's block reaction for the second attack.
8. Changed the final attack's recovery from 21 to 19 frames.
9. Reduced the knockback time on hit or block for the final attack by 2 frames.
10. Changed the hitstop on the final attack from 9 to 11 frames.
Jackknife Maximum (Medium/Heavy)<br>(Charge ↓ then ↑+Medium Kick or Heavy Kick)
调整 The attack hitbox at the base of the first attack has been expanded downward slightly in order to hit mid-air attacks that have a low profile when recovering upon landing (Juri's Shikusen, etc.).
Waning Moon (Normal)<br>(↓↙←+Kick > Medium Kick)
调整 1. Drive gauge reduction on block changed from 4000 to 6000.
2. Changed hit effect on Punish Counter from knockdown slam to ground bound.
3. Added initial scaling of 30%.
2. Changed hit effect on Punish Counter from knockdown slam to ground bound.
3. Added initial scaling of 30%.
Waning Moon (Overdrive)<br>(↓↙←+Kick x 2 > Medium Kick)
调整 Changed the hit effect during a mid-air hit from knockdown to ground bound.
SA1: Greatest Sobat
调整 1. Changed the hit effect during a mid-air hit from spinning knockdown to sliding knockdown.
2. Increased combo count upper limit.
2. Increased combo count upper limit.
Denjin Charge - Hashogeki<br>(↓↙←+Heavy Punch)
修复问题 Fixed an issue that resulted in a normal Heavy Hashogeki being performed instead of a Denjin Charge Hashogeki if a Hadoken was still present on the screen.
Edmond Honda
SA2: Ultimate Killer Head Ram
调整 1. Fixed the pushback on hit for the headbutt and the attack hitbox during the slapping portions so that they are less likely to whiff midway through the attack.
2. Increased the knockdown time of the headbutt, but tweaked so that E. Honda cannot be counter attacked when the rest of the attack doesn't hit.
2. Increased the knockdown time of the headbutt, but tweaked so that E. Honda cannot be counter attacked when the rest of the attack doesn't hit.
Lightning Beast - Electric Thunder (Overdrive)<br>(↓↙←+Punch x 2)
修复问题 Fixed an issue that occurred while Lightning Beast was active that caused the Blanka-chan explosive to not detonate as an Overdrive attack under certain circumstances when triggered by an Overdrive Electric Thunder.
Sonic Boom (Normal)<br>(Charge ← then →+Punch)
调整 1. Changed Super Art gauge gain on the Light and Heavy versions form 600 to 300.
2. Changed the Super Art gauge gain on the Medium version from 600 to 450.
3. Changed the Drive gauge gain from 1000 to 500.
2. Changed the Super Art gauge gain on the Medium version from 600 to 450.
3. Changed the Drive gauge gain from 1000 to 500.
Kikoken (Overdrive) - (Modern Controls)
修复问题 Fixed an issue that caused a normal Kikoken to be performed when inputting an Overdrive Kikoken manually and hitting the down input.
Tensho Kicks (Heavy)<br>(↓↓+Heavy Kick)
调整 Increased the knockdown time when the first attack hits.
Knee Hammer<br>(→+Medium Kick)
调整 1. Changed recovery on block from -3 to -4 frames.
2. Expanded the body hurtbox forward on the 2nd frame of the technique and later.
*The hurtbox around the legs from startup until landing has not been expanded.
3. Moved the character's center axis from frames 2-6 of the technique to match the appearance of the attack.
2. Expanded the body hurtbox forward on the 2nd frame of the technique and later.
*The hurtbox around the legs from startup until landing has not been expanded.
3. Moved the character's center axis from frames 2-6 of the technique to match the appearance of the attack.
Headbutt<br>(→+Heavy Punch)
调整 1. Added 25% initial scaling.
2. Changed combo scaling from 10% to 20%.
3. Changed advantage on hit from +7 to +8 frames.
2. Changed combo scaling from 10% to 20%.
3. Changed advantage on hit from +7 to +8 frames.
Assisted Combo 2
调整 Combo has been changed to the following.
- When the Super Art gauge is empty
Divine Kick > Overdrive Yoga Flame > Long Sliding Kick
- When the Super Art gauge is empty
Divine Kick > Overdrive Yoga Flame > Long Sliding Kick
Standing Medium Punch
调整 Changed advantage on hit from -2 to ±0 frames.
Standing Heavy Kick
调整 Changed advantage on Punish Counter from +21 to +24 frames.
Jumping Medium Punch
调整 The tip of the arm hurtbox will no longer be hit by an opponent's cross-up attack.
Nirvana Punch<br>(↙+Heavy Punch)
调整 Reduced the knockback distance from a mid-air hit.
Yoga Fire (Normal)<br>(↓↘→+Punch)
调整 1. Changed the timing for when the attack transitions to the delayed version from frame 5 to frame 7.
2. Changed the recovery of the delayed version on block from -3 to -1 frame.
2. Changed the recovery of the delayed version on block from -3 to -1 frame.
Yoga Fire (Overdrive)<br>(↓↘→+Punch x 2)
调整 1. Changed the knockback time when the first attack hits from 20 to 24 frames.
2. Reduced the pushback on hit for the first attack.
3. Removed the body hurtbox that appears before the attack.
4. Reduced the body hurtbox that appears after the attack backwards.
2. Reduced the pushback on hit for the first attack.
3. Removed the body hurtbox that appears before the attack.
4. Reduced the body hurtbox that appears after the attack backwards.
Yoga Flame (Overdrive)<br>(→↘↓↙←+Punch x 2)
调整 1. Expanded the attack hitbox of the first attack forward.
2. Expanded the attack hitbox that appears for the second attack and after when the opponent is hit during a combo.
2. Expanded the attack hitbox that appears for the second attack and after when the opponent is hit during a combo.
Yoga Comet (Overdrive)<br>(While in the air, →↘↓↙←+Punch x 2)
修复问题 Fixed an issue where if the opponent Perfect Parried this attack, any technique performed after that would have Perfect Parry scaling added to it until Dhalsim landed.
SA 1: Yoga Inferno
调整 1. This attack now deals recoverable damage to the opponent when blocked.
*Recoverable damage is set to 792, with 492 chip damage and 300 recoverable damage during Burnout.
2. Changed Drive gauge reduction on block from 2520 to 5040.
3. Changed overall recovery for the Light and Medium versions from 133 to 128 frames.
4. Changed the advantage on block for the Light and Medium versions from -15 to -10 frames.
5. Increased the pushback on block for the Light and Medium versions.
6. Changed the hurtbox on the Heavy version from start-up to the 3rd active frame from standing to crouching height.
*Recoverable damage is set to 792, with 492 chip damage and 300 recoverable damage during Burnout.
2. Changed Drive gauge reduction on block from 2520 to 5040.
3. Changed overall recovery for the Light and Medium versions from 133 to 128 frames.
4. Changed the advantage on block for the Light and Medium versions from -15 to -10 frames.
5. Increased the pushback on block for the Light and Medium versions.
6. Changed the hurtbox on the Heavy version from start-up to the 3rd active frame from standing to crouching height.
Back Dash
调整 Fixed an issue that caused the collision pushbox to be smaller than the standing one from frame 1 to frame 15 of the technique.
Crouching Light Punch
调整 Added a hurtbox that only responds to mid-air attacks to the head from frame 1 to frame 7 of the technique.
Nail Assault (Modern controls)
调整 1. Changed the input for Modern controls to "Assault Roll > →+Attack"
*This change was made to prevent this move from being performed accidentally when trying to input commands as fast as possible for other techniques out of Assault Roll.
2. To go with the above change, Assisted Combo 2 during Burnout has been changed to the following.
Standing Medium Punch > Rising Kick > Heavy Arabian Cyclone > Assault Roll > Nail Assault
*This change was made to prevent this move from being performed accidentally when trying to input commands as fast as possible for other techniques out of Assault Roll.
2. To go with the above change, Assisted Combo 2 during Burnout has been changed to the following.
Standing Medium Punch > Rising Kick > Heavy Arabian Cyclone > Assault Roll > Nail Assault
Serpent Lash<br>(↓↘→+Punch x 2)
修复问题 Fixed an issue that caused A.K.I. to not gain more advantage frames on Punish Counter Toxic Blossom.
Standing Heavy Kick
调整 Changed advantage on block from +3 to +4 frames.
Jumping Heavy Punch
调整 Changed attack active frames from 4 to 5 frames.
Jumping Heavy Kick
调整 1. Increased the blowback time from a mid-air hit.
2. Decreased Ed's airtime until landing when hitting with the attack from a high jump position.
2. Decreased Ed's airtime until landing when hitting with the attack from a high jump position.
Psycho Blitz (Light)<br>(↓↙←+Light Punch)
调整 Added pushback on block for Ed when the attack is blocked near the corner.
Psycho Flicker (Light)<br>(↓↘→+Light Punch)
调整 Extended the follow-up attack window on Punish Counter by 1 frame.
SA2: Psycho Cannon
调整 When performing a follow-up attack after this attack, Ed's Super Art gauge gain will be fixed at 80% until the combo ends.
Akuma
Gou Hadoken<br>(↓↘→+Punch)
修复问题 Fixed an issue that allowed regular Gou Hadokens to be performed while an Overdrive one was still on the screen.
M. Bison
Drive Reversal
调整 Reduced the attack hitbox and standby block hitbox.
Psycho Crusher Attack with Psycho Mine (Normal)<br>(Charge ←, then →+Punch)
修复问题 1. Fixed an issue where if this move was canceled into Super Art 3 just after colliding with a projectile, neither Psycho Crusher Attack nor Super Art 3 would be able to reach the opponent. Now, Psycho Crusher Attack must hit the opponent before it can be canceled into Super Art 3.
2. Fixed an issue where this move would get canceled mid-action if it collided with a projectile after connecting with an opponent.
2. Fixed an issue where this move would get canceled mid-action if it collided with a projectile after connecting with an opponent.
Psycho Crusher Attack (Normal/Overdrive)<br>(Charge ←, then →+Punch or Punch x 2)
修复问题 Fixed the hurtbox during Burnout to match the normal version, as they would differ after the attack passed by the opponent.
Psycho Crusher Attack with Psycho Mine (Overdrive)<br>(Charge ←, then →+Punch x 2)
修复问题 1. Previously, after the first and second attacks were Perfect Parried, whether or not the third attack triggered the detonation was inconsistent when the third attack was blocked or normal Drive Parried. Now, the detonation will only trigger if the third attack hits.
2. Fixed an issue where follow-up attacks after this attack had combo scaling added to them.
2. Fixed an issue where follow-up attacks after this attack had combo scaling added to them.
Double Knee Press (Normal)<br>(↓↘→+Kick)
調整・不具合修正 1. Reduced the body hurtbox on block and hit for the second attack, from the end of the attack's active frames until mid-recovery.
2. Reduced pushback on block, in line with the above hurtbox reduction change.
3. Fixed an issue where if the first attack hit but the second didn't, the recovery of the second attack would be the same as if the move had completely whiffed.
2. Reduced pushback on block, in line with the above hurtbox reduction change.
3. Fixed an issue where if the first attack hit but the second didn't, the recovery of the second attack would be the same as if the move had completely whiffed.
Devil's Reverse with Psycho Mine (Normal/Overdrive)<br>(Charge ↓, then ↑+Kick > Punch or Punch x 2)<br><br>Psycho Crusher Attack with Psycho Mine (Overdrive)<br>(Charge ←, then →+Punch x 2)
修复问题 Fixed an issue where the Psycho Mine would remain embedded in an opponent even though it had detonated.
Devil's Reverse (Overdrive)<br>(Charge ↓, then ↑+Kick > Punch x 2)<br><br>Devil's Reverse with Psycho Mine (Normal/Overdrive)<br>(Charge ↓, then ↑+Kick > Punch or Punch x 2)
修复问题 Expanded the collision pushbox downwards after the first attack, and fixed an issue that caused attacks after the second one to appear on the other side of the opponent.
Backfist Combo with Psycho Mine (Normal)<br>(↓↙←+Punch)
修复问题 Fixed an issue that resulted in Psycho Mines still detonating when the second attack missed after the first attack was Perfect Parried or connected with a counter technique.
Backfist Combo with Psycho Mine (Overdrive)<br>(↓↙←+Punch x 2)
調整・不具合修正 1. Start up for the detonation is now 2 frames slower, which should make it harder for this attack to whiff opponents located high on the screen.
2. Tweaked the blowback on hit and knockback on block, to limit different interactions occuring due to the change above.
3. Fixed an issue that resulted in Psycho Mines still detonating when later attacks missed after the first, second, or third attack was Perfect Parried or connected with a counter technique.
Please note that even if the first or second attack is Perfect Parried or connects with a counter technique, if the third attack is blocked, normal Drive Parried, connects with super armor, or hits, the Psycho Mine will detonate.
2. Tweaked the blowback on hit and knockback on block, to limit different interactions occuring due to the change above.
3. Fixed an issue that resulted in Psycho Mines still detonating when later attacks missed after the first, second, or third attack was Perfect Parried or connected with a counter technique.
Please note that even if the first or second attack is Perfect Parried or connects with a counter technique, if the third attack is blocked, normal Drive Parried, connects with super armor, or hits, the Psycho Mine will detonate.
SA1: Knee Press Nightmare
修复问题 Fixed an issue where the timer would not stop when the attack hit.
SA2: Psycho Punisher
修复问题 1. Fixed an issue that caused the timer to stop longer than intended after the cutscene on hit.
Please note that this fix impacts the timer, Drive gauge recover timing, and the background starting to move again, along with other elements.
2. Fixed an issue in Training Mode where Wake-up Reversals would not be performed properly after the Super Art 2 hit, despite having Wake-up Reversals set as part of the training behavior.
Please note that this fix impacts the timer, Drive gauge recover timing, and the background starting to move again, along with other elements.
2. Fixed an issue in Training Mode where Wake-up Reversals would not be performed properly after the Super Art 2 hit, despite having Wake-up Reversals set as part of the training behavior.
Parry Drive Rush
- Adjusted so that when perfect parrying a projectile, a player's dash input is not reset. This change will impact the inputs for both dashes and Drive Rushes performed immediately after a perfect parry.
Knockdown Recovery
- Fixed an issue that occurred only when performing a back recovery immediately before being knocked down, where a back recovery would be performed unintentionally if the player held two buttons before getting hit by the attack that knocked them down.
Drive Reversal
- Fixed an issue where a Drive Reversal would cause a KO during a trade.
Drive Parry
- Fixed an issue where parrying an attack that causes the screen to shake would not trigger a screen shake.
Taunt
- Changed the Modern Control input for a taunt from "Light Attack+Medium Attack+Heavy Attack+SP" to "Light Attack+Medium Attack+Heavy Attack+SP+Drive Parry+Assist".
Assisted Combo 1
The 2nd attack input will now be accepted within the rapid cancel timing window.
Breakin' - Super Art Level 1
With the last adjustment update, the number of hits increased, which affected the Drive Gauge increase, so we have adjustments to the values to match the pre-adjustment one.
1. Drive Gauge decrease on block reduced by 200.
2. Drive Gauge increase on parry reduced by 2000.
1. Drive Gauge decrease on block reduced by 200.
2. Drive Gauge increase on parry reduced by 2000.
Overdrive Sprint
Fixed an issue where performing the move with certain inputs would cause the Overdrive version's sound effect to not play.
Certain Anti-Air Attacks
Certain anti-air attacks where the character jumps into the air would have a tendency to lose out to mid-air throws whether or not they had anti-air invincibility after leaving the ground, so we have added a period of throw invincibility to the following attacks.
Bushin Senpukyaku
Light: Throw invincibility from frames 7-11
Medium: Throw invincibility from frames 8-12
Heavy: Throw invincibility from frames 9-13
Overdrive: Throw invincibility from frames 7-11
Bushin Senpukyaku
Light: Throw invincibility from frames 7-11
Medium: Throw invincibility from frames 8-12
Heavy: Throw invincibility from frames 9-13
Overdrive: Throw invincibility from frames 7-11
Assisted Combo 1
The 2nd attack input will now be accepted within the rapid cancel timing window.
Assisted Combo 2
Adjusted so that when Overdrive Stribog is blocked or hits an armored attack, the assisted combo will end when Super Art 2 is activated.
Overdrive Fuhajin
The recent adjustment update made this attack's start-up faster, but some parts of it were left unadjusted, so they have now been fixed.
1. Fuha stock charge timing changed from frame 14 to frame 12.
2. The projectile clash hitbox startup timing changed from frame 12 to frame 10.
3. Proximity block trigger hitbox comes out 2 frames faster.
4. Proximity block trigger hitbox expanded to match the size of the attack hitbox.
1. Fuha stock charge timing changed from frame 14 to frame 12.
2. The projectile clash hitbox startup timing changed from frame 12 to frame 10.
3. Proximity block trigger hitbox comes out 2 frames faster.
4. Proximity block trigger hitbox expanded to match the size of the attack hitbox.
Certain Target Combos
Previously we made adjustments so that pressing Medium Punch and Kick or Heavy Punch and Kick at the same time would not result in transition attacks being performed.
This adjustment was made primarily for cancelable attacks and the beginning of target combos, or special moves with transition techniques that had short recovery. This adjustment was also made to prevent unintended transition techniques from coming out when looking to perform a Drive Rush immediately after your recovery ends, Cancel Drive Rushes, or Drive Impacts. Please note that this adjustment only applied in cases where the Punch and Kick buttons were input at exactly the same time.
As certain target combos did not receive this adjustment previously, we have made adjustments to them now.
Death Crest (Medium Punch > ←+Heavy Punch)
This adjustment was made primarily for cancelable attacks and the beginning of target combos, or special moves with transition techniques that had short recovery. This adjustment was also made to prevent unintended transition techniques from coming out when looking to perform a Drive Rush immediately after your recovery ends, Cancel Drive Rushes, or Drive Impacts. Please note that this adjustment only applied in cases where the Punch and Kick buttons were input at exactly the same time.
As certain target combos did not receive this adjustment previously, we have made adjustments to them now.
Death Crest (Medium Punch > ←+Heavy Punch)
Certain Anti-Air Attacks
Certain anti-air attacks where the character jumps into the air would have a tendency to lose out to mid-air throws whether or not they had anti-air invincibility after leaving the ground, so we have added a period of throw invincibility to the following attacks.
Jackknife Maximum
Medium: Throw invincibility from frames 5-6
Heavy: Throw invincibility from frames 5-6
Jackknife Maximum
Medium: Throw invincibility from frames 5-6
Heavy: Throw invincibility from frames 5-6
Certain Target Combos
Previously we made adjustments so that pressing Medium Punch and Kick or Heavy Punch and Kick at the same time would not result in transition attacks being performed.
This adjustment was made primarily for cancelable attacks and the beginning of target combos, or special moves with transition techniques that had short recovery. This adjustment was also made to prevent unintended transition techniques from coming out when looking to perform a Drive Rush immediately after your recovery ends, Cancel Drive Rushes, or Drive Impacts. Please note that this adjustment only applied in cases where the Punch and Kick buttons were input at exactly the same time.
As certain target combos did not receive this adjustment previously, we have made adjustments to them now.
Threebeat Combo (Light Punch > Medium Kick)
This adjustment was made primarily for cancelable attacks and the beginning of target combos, or special moves with transition techniques that had short recovery. This adjustment was also made to prevent unintended transition techniques from coming out when looking to perform a Drive Rush immediately after your recovery ends, Cancel Drive Rushes, or Drive Impacts. Please note that this adjustment only applied in cases where the Punch and Kick buttons were input at exactly the same time.
As certain target combos did not receive this adjustment previously, we have made adjustments to them now.
Threebeat Combo (Light Punch > Medium Kick)
Standing Medium Punch
Expanded the collision pushbox on hit upward.
Note: This adjustment is made in order to prevent side switches with the opponent during a mid-air hit.
Note: This adjustment is made in order to prevent side switches with the opponent during a mid-air hit.
Crouching Medium Kick
Fixed an issue where the previous adjustment of increasing recovery and expanding the hurtbox on crouching medium kick was not applied when the attack was performed while Super Art 2 was active.
Raid Jump
Fixed an issue in Modern Controls where a mid-air throw would not be performed during Raid Jump when the throw button was pressed.
Rolling Attack/Vertical Rolling Attack
Fixed an issue where the opponent would not be pushed back after blocking the attack and Blanka is rebounding.
Certain Anti-Air Attacks
Certain anti-air attacks where the character jumps into the air would have a tendency to lose out to mid-air throws whether or not they had anti-air invincibility after leaving the ground, so we have added a period of throw invincibility to the following attacks.
Spinning Mixer
Heavy (Boosted version included): Throw invincibility from frames 8-10
Spinning Mixer
Heavy (Boosted version included): Throw invincibility from frames 8-10
Quick Dash
We've made further adjustments to Jinrai Kick's input priority, so now instead of Neutral+2 kick buttons taking priority over the Overdrive version, Neutral+3 kick buttons takes priority.
Note: For Modern Controls, this is Neutral+3 attack buttons.
Due to Ken's Quick Dash Shoryuken attack start-up being adjusted to come out faster, Jinrai Kick opportunities coming out of crouching medium kick, etc. have increased, and we foresee accidental Overdrive attacks increasing, so we decided to change the priority list.
However, this will also impact regular Overdrive inputs as well, so we decided to adjust things to prevent the least amount of side effects by looking at the input methods again.
While this adjustment will affect situations where the player performs an Overdrive with 3 buttons, players need a definitive way to perform Jinrai Kick, which is the reasoning for this adjustment.
Note: Even in situations where 3 buttons are used, if you press any direction with the button input, the Overdrive technique will be performed.
Note: For Modern Controls, this is Neutral+3 attack buttons.
Due to Ken's Quick Dash Shoryuken attack start-up being adjusted to come out faster, Jinrai Kick opportunities coming out of crouching medium kick, etc. have increased, and we foresee accidental Overdrive attacks increasing, so we decided to change the priority list.
However, this will also impact regular Overdrive inputs as well, so we decided to adjust things to prevent the least amount of side effects by looking at the input methods again.
While this adjustment will affect situations where the player performs an Overdrive with 3 buttons, players need a definitive way to perform Jinrai Kick, which is the reasoning for this adjustment.
Note: Even in situations where 3 buttons are used, if you press any direction with the button input, the Overdrive technique will be performed.
Edmond Honda
Certain Anti-Air Attacks
Certain anti-air attacks where the character jumps into the air would have a tendency to lose out to mid-air throws whether or not they had anti-air invincibility after leaving the ground, so we have added a period of throw invincibility to the following attacks.
Sumo Smash
Overdrive: Throw invincibility from frames 5-13
Sumo Smash
Overdrive: Throw invincibility from frames 5-13
Tundra Storm
Fixed an issue where a previous tweak that allowed players to perform Tundra Storm easier, by pressing Neutral > Down > Neutral > Down and then pressing parry with the 2nd Down input, had not been applied to Modern Controls.
Standing Medium Kick
Made further adjustments to this attack, as it exceeded our adjustment intentions in certain combinations and shifted the ground game too much in Zangief's favor.
The attack hitbox has been reduced, rolling back the range to its previous state.
The attack hitbox has been reduced, rolling back the range to its previous state.
Assisted Combo 3
Fixed an issue where the input buffer would not work properly if the player stopped the assisted combo at the first attack (Standing Heavy Punch) and then tried to start it from the first attack again.
Certain Target Combos
Previously we made adjustments so that pressing Medium Punch and Kick or Heavy Punch and Kick at the same time would not result in transition attacks being performed.
This adjustment was made primarily for cancelable attacks and the beginning of target combos, or special moves with transition techniques that had short recovery. This adjustment was also made to prevent unintended transition techniques from coming out when looking to perform a Drive Rush immediately after your recovery ends, Cancel Drive Rushes, or Drive Impacts. Please note that this adjustment only applied in cases where the Punch and Kick buttons were input at exactly the same time.
As certain target combos did not receive this adjustment previously, we have made adjustments to them now.
Body Blow Combination (Medium Punch > Heavy Punch)
Hitman Combination (Medium Kick > Medium Kick)
Low Smash Combination (↓+Heavy Kick > Heavy Punch)
This adjustment was made primarily for cancelable attacks and the beginning of target combos, or special moves with transition techniques that had short recovery. This adjustment was also made to prevent unintended transition techniques from coming out when looking to perform a Drive Rush immediately after your recovery ends, Cancel Drive Rushes, or Drive Impacts. Please note that this adjustment only applied in cases where the Punch and Kick buttons were input at exactly the same time.
As certain target combos did not receive this adjustment previously, we have made adjustments to them now.
Body Blow Combination (Medium Punch > Heavy Punch)
Hitman Combination (Medium Kick > Medium Kick)
Low Smash Combination (↓+Heavy Kick > Heavy Punch)
Akuma
Light Tatsumaki Zanku-kyaku/Kikoku Combination (Second Attack)/Adamant Flame (Light Follow-up)
Fixed an issue where it was possible to cancel some frames of the recovery of these attacks with certain actions when they were blocked by an opponent.
Gou Shoryuken/Tatsumaki Zanku-kyaku
Fixed an issue where the Drive Gauge recovery amount on a perfect parry was smaller than intended.
Tenmaku Blade Kick
Fixed an issue where combo scaling was reduced when hit just before landing.
Zanku Hadoken
Parts of this attack were too difficult for opponents to handle, so we have made adjustments to mitigate those difficult areas.
1. The upper half of the attack hitbox is only active during combos.
2. Hurtbox has been expanded forward.
1. The upper half of the attack hitbox is only active during combos.
2. Hurtbox has been expanded forward.
Ashura Senku
Fixed a phenomenon where this move would still avoid attacks regardless of whether or not Akuma had teleported behind the opponent.
1. Expanded the hurtbox during movement.
2. Adjusted so that if the technique is performed when the opponent is right in the corner, Akuma will not completely overlap with the opponent.
1. Expanded the hurtbox during movement.
2. Adjusted so that if the technique is performed when the opponent is right in the corner, Akuma will not completely overlap with the opponent.
Shun Goku Satsu - Critical Art
Fixed a phenomenon where the opponent's charge command would be released in cases where this attack hit and the players switched sides during the cinematic.
Certain Target Combos
Previously we made adjustments so that pressing Medium Punch and Kick or Heavy Punch and Kick at the same time would not result in transition attacks being performed.
This adjustment was made primarily for cancelable attacks and the beginning of target combos, or special moves with transition techniques that had short recovery. This adjustment was also made to prevent unintended transition techniques from coming out when looking to perform a Drive Rush immediately after your recovery ends, Cancel Drive Rushes, or Drive Impacts. Please note that this adjustment only applied in cases where the Punch and Kick buttons were input at exactly the same time.
As certain target combos did not receive this adjustment previously, we have made adjustments to them now.
Viscera Piercer (Medium Punch > Medium Punch)
Bone Crusher Axe Kick (Medium Kick > Heavy Kick)
This adjustment was made primarily for cancelable attacks and the beginning of target combos, or special moves with transition techniques that had short recovery. This adjustment was also made to prevent unintended transition techniques from coming out when looking to perform a Drive Rush immediately after your recovery ends, Cancel Drive Rushes, or Drive Impacts. Please note that this adjustment only applied in cases where the Punch and Kick buttons were input at exactly the same time.
As certain target combos did not receive this adjustment previously, we have made adjustments to them now.
Viscera Piercer (Medium Punch > Medium Punch)
Bone Crusher Axe Kick (Medium Kick > Heavy Kick)
Overall Concept
Overall Direction
In terms of game balance, while each character has received some buffs and nerfs, in terms of nerfs we primarily focused on the following points.
1. Weaken moves that were difficult to deal with and provided easy results
For example, for attacks that could be canceled into special moves, had good range and short recovery, we decided to adjust them by adding recovery, expanding their hurtbox, etc.
While those attacks are part of a character’s identity, if they proved too difficult for characters to deal with, interactions would end up in stalemates, or they would end up being the best answer to all situations, so we wanted to improve those situations.
2. Weaken moves that proved to be too oppressive
Continuing with the last balance update, techniques that were able to limit the opponent’s movements too much were weakened.
3. Retooling low risk/high return moves
There were many cases where the game system allows for weak attacks to pick up easy returns, while Perfect Parries could turn the tide of the match quickly, so these areas have been slightly adjusted with the idea of reeling things back a little.
Modern Controls
We have changed how Assisted Combos work when the player doesn’t have enough Drive or Super Art gauge. Additionally, some characters had difficult to use Assisted Combo routes, so we also changed those. There are some characters who have had the first attack of an Assisted Combo or their practical use changed, but we feel that in the long term these changes will benefit players using this control scheme.
Drive Reversals
Without an invincible attack, it proved difficult to deal with strong wake-up pressure, so now all characters can perform a Drive Reversal on their wake-up recovery as a way to deal with this. This technique is useful against throws or big attacks, but may be difficult to use against attacks with slow start-up or light attacks, etc.
Additionally, we have made an adjustment when blocking a Drive Reversal so the post-guard situation is more universal across the board. Some Drive Reversals proved to be a little difficult to counterattack if you blocked them, so we have made adjustments so that if you block them, your counterattack should work in most situations.
Drive and Perfect Parry
As noted above, we have looked at adjusting the risk/return for Perfect Parry. We felt that the risk of looking to score a Perfect Parry while out of throw range gave too high of a return, and depending on the situation, it proved more beneficial to get the Perfect Parry instead of going on the attack, so by increasing its overall length and expanding the throw hitbox, we’re looking to make it easier to take risks in these situations. Additionally, in order for Perfect Parries to not change the course of the match too much, after a successful Perfect Parry, the player will receive less meter gain.
For Drive Parries, the hurtbox after the Perfect Parry window has passed (frame 3 and later) is expanding, allowing it to absorb attacks from further away. After absorbing an attack, the time before the Drive gauge begins to replenish has also been shortened, making Drive Parry a more effective tactic primarily against projectiles.
Reworking Successful Command Inputs
We’ve made some changes with the aim of reducing the number of missed or accidental special moves.
1. Adjusted special move input recognition frames
For every command we made adjustments so special moves will come out less often if you complete a command, and then press a button slightly afterwards.
2. Adjusted ↓↘→ or ↓↙← in mid-air
Mid-air commands often require the player to perform the inputs quickly, and certain inputs tended to miss, so we have relaxed the input requirements.
3. Adjusted ↓↓ commands
This is an adjustment to avoid accidental Cancel Drive Rushes. During sequences such as ↓+ Light Punch > Neutral + Medium Punch + Medium Kick > ↓+ Light Punch, ↓↓ commands should no longer come out by accident.
4. Pressing Medium, Heavy attacks at the same time will not perform transition techniques.
This change is primarily aimed at techniques that are cancelable or are target combo starters, and special moves that have transition attacks or low recovery, etc.
We’ve made changes so that with Cancel Drive Rush and Drive Impact, once their recovery is over and players go for an immediate Drive Rush, etc. mistaken inputs would not unintentionally perform transition techniques. Please note that this adjustment is only when the player presses both buttons at exactly the same time.
Back Throws
One way of reducing the return a player gets from a Perfect Parry that we have made is an adjustment to how back throws are handled when performed with your back to the corner. Characters who could perform a back throw into the corner, and then repeatedly throw opponents in any situation will now have a harder time doing so.
In terms of game balance, while each character has received some buffs and nerfs, in terms of nerfs we primarily focused on the following points.
1. Weaken moves that were difficult to deal with and provided easy results
For example, for attacks that could be canceled into special moves, had good range and short recovery, we decided to adjust them by adding recovery, expanding their hurtbox, etc.
While those attacks are part of a character’s identity, if they proved too difficult for characters to deal with, interactions would end up in stalemates, or they would end up being the best answer to all situations, so we wanted to improve those situations.
2. Weaken moves that proved to be too oppressive
Continuing with the last balance update, techniques that were able to limit the opponent’s movements too much were weakened.
3. Retooling low risk/high return moves
There were many cases where the game system allows for weak attacks to pick up easy returns, while Perfect Parries could turn the tide of the match quickly, so these areas have been slightly adjusted with the idea of reeling things back a little.
Modern Controls
We have changed how Assisted Combos work when the player doesn’t have enough Drive or Super Art gauge. Additionally, some characters had difficult to use Assisted Combo routes, so we also changed those. There are some characters who have had the first attack of an Assisted Combo or their practical use changed, but we feel that in the long term these changes will benefit players using this control scheme.
Drive Reversals
Without an invincible attack, it proved difficult to deal with strong wake-up pressure, so now all characters can perform a Drive Reversal on their wake-up recovery as a way to deal with this. This technique is useful against throws or big attacks, but may be difficult to use against attacks with slow start-up or light attacks, etc.
Additionally, we have made an adjustment when blocking a Drive Reversal so the post-guard situation is more universal across the board. Some Drive Reversals proved to be a little difficult to counterattack if you blocked them, so we have made adjustments so that if you block them, your counterattack should work in most situations.
Drive and Perfect Parry
As noted above, we have looked at adjusting the risk/return for Perfect Parry. We felt that the risk of looking to score a Perfect Parry while out of throw range gave too high of a return, and depending on the situation, it proved more beneficial to get the Perfect Parry instead of going on the attack, so by increasing its overall length and expanding the throw hitbox, we’re looking to make it easier to take risks in these situations. Additionally, in order for Perfect Parries to not change the course of the match too much, after a successful Perfect Parry, the player will receive less meter gain.
For Drive Parries, the hurtbox after the Perfect Parry window has passed (frame 3 and later) is expanding, allowing it to absorb attacks from further away. After absorbing an attack, the time before the Drive gauge begins to replenish has also been shortened, making Drive Parry a more effective tactic primarily against projectiles.
Reworking Successful Command Inputs
We’ve made some changes with the aim of reducing the number of missed or accidental special moves.
1. Adjusted special move input recognition frames
For every command we made adjustments so special moves will come out less often if you complete a command, and then press a button slightly afterwards.
2. Adjusted ↓↘→ or ↓↙← in mid-air
Mid-air commands often require the player to perform the inputs quickly, and certain inputs tended to miss, so we have relaxed the input requirements.
3. Adjusted ↓↓ commands
This is an adjustment to avoid accidental Cancel Drive Rushes. During sequences such as ↓+ Light Punch > Neutral + Medium Punch + Medium Kick > ↓+ Light Punch, ↓↓ commands should no longer come out by accident.
4. Pressing Medium, Heavy attacks at the same time will not perform transition techniques.
This change is primarily aimed at techniques that are cancelable or are target combo starters, and special moves that have transition attacks or low recovery, etc.
We’ve made changes so that with Cancel Drive Rush and Drive Impact, once their recovery is over and players go for an immediate Drive Rush, etc. mistaken inputs would not unintentionally perform transition techniques. Please note that this adjustment is only when the player presses both buttons at exactly the same time.
Back Throws
One way of reducing the return a player gets from a Perfect Parry that we have made is an adjustment to how back throws are handled when performed with your back to the corner. Characters who could perform a back throw into the corner, and then repeatedly throw opponents in any situation will now have a harder time doing so.
ryu
Continuing from his last adjustment, we have continued to make adjustments to Ryu in order to bring out his individuality and allow him to create unique developments in fights.
While his ability to keep on the offensive hasn’t changed greatly, with the changes to his Hadoken and Denjin Charge, he’s now a character that has different strengths compared to Ken and Luke.
The last battle adjustment reduced the hurtbox around his hands during his Hadoken, with the universal adjustment to strengthen Drive Parry against projectiles, and taking into account that the hurtbox on his Hadoken still extends much further than other projectiles, we have tweaked his hit/hurtboxes overall.
With this adjustment, Ryu’s Hadoken is less likely to be stuffed by an opponent’s attack, and raises its dependability when it comes to zoning.
Additionally, we’ve increased Ryu’s damage and gauge gain, giving him much more return per attack so that he’s now a character that looks to aim with singular strikes for big damage instead of a flurry-based offense.
While his ability to keep on the offensive hasn’t changed greatly, with the changes to his Hadoken and Denjin Charge, he’s now a character that has different strengths compared to Ken and Luke.
The last battle adjustment reduced the hurtbox around his hands during his Hadoken, with the universal adjustment to strengthen Drive Parry against projectiles, and taking into account that the hurtbox on his Hadoken still extends much further than other projectiles, we have tweaked his hit/hurtboxes overall.
With this adjustment, Ryu’s Hadoken is less likely to be stuffed by an opponent’s attack, and raises its dependability when it comes to zoning.
Additionally, we’ve increased Ryu’s damage and gauge gain, giving him much more return per attack so that he’s now a character that looks to aim with singular strikes for big damage instead of a flurry-based offense.
luke
While Luke's strong anti-air and poke moves formed a core part of his characteristics, they also had very few gaps, leading to matches losing momentum and coming to a standstill. To remedy this, we've weakened some of his interception techniques. To balance this out and expand Luke's offensive options, his forward advancing normals, such as Standing Heavy Kick, have been bolstered and made easier to use.
For Luke's other overall balance adjustments, we've also overhauled some combo parts. While the damage across the board has dropped, combos utilizing Standing Heavy Punch and DDT should see some hefty returns with more damage than they've been able to dish out in the past.
In addition, combo links such as 'Overdrive Flash Knuckle to Heavy Rising Uppercut' or 'Crouching Heavy Punch to Perfect Medium Flash Knuckle' have been adjusted so they have less chances of failing, meaning it's now easier to create some tricky combos for those willing to take up the challenge.
For Luke's other overall balance adjustments, we've also overhauled some combo parts. While the damage across the board has dropped, combos utilizing Standing Heavy Punch and DDT should see some hefty returns with more damage than they've been able to dish out in the past.
In addition, combo links such as 'Overdrive Flash Knuckle to Heavy Rising Uppercut' or 'Crouching Heavy Punch to Perfect Medium Flash Knuckle' have been adjusted so they have less chances of failing, meaning it's now easier to create some tricky combos for those willing to take up the challenge.
kimberly
Kimberly already has a lot of offensive potential going for her, so this time we've made changes to expand some of her neutral game options and increase the utility of some moves.
With some tweaks to its active frames, Light Vagabond Edge should now be on the receiving end of counters less. Until now Kimberly hasn't had many tools available to her in the neutral game, with very few forward reaching moves, but with this change she now has a viable option to tag opponents from an even greater range than her go-to Standing Medium Kick.
In addition to this we've added new avenues for certain Super Arts that were hard to work in, and made certain Special Moves easier to use. One example is Overdrive Nue Twister. It's now easier to weave it into some lethal combos, but we've also counter-balanced its boosts with some additional combo scaling to reign in its combo damage potential a bit.
With some tweaks to its active frames, Light Vagabond Edge should now be on the receiving end of counters less. Until now Kimberly hasn't had many tools available to her in the neutral game, with very few forward reaching moves, but with this change she now has a viable option to tag opponents from an even greater range than her go-to Standing Medium Kick.
In addition to this we've added new avenues for certain Super Arts that were hard to work in, and made certain Special Moves easier to use. One example is Overdrive Nue Twister. It's now easier to weave it into some lethal combos, but we've also counter-balanced its boosts with some additional combo scaling to reign in its combo damage potential a bit.
chunli
Chun-Li's strengths on the ground have been rooted in her powerful pokes and high walking speed, however, those combined with the game systems and the properties of her moves could turn her matches into a waiting game, where it became a little too hard for opponents to fight back. With this in mind, we've opted to dial down some of those core elements.
In exchange, we've strengthened some of her attacks to make taking the fight to the opponent more appealing. While her Standing Heavy Punch was previously hard to use, due to hurtboxes that greatly extended forward before its active frames and the high risk of eating a counter if you misjudged the spacing, these points have been improved on to turn the move into one that can be turned to more frequently for aggressive play.
Swift Thrust has also seen some tweaks. In the past it was difficult to get a good return on confirms with it, but it's now possible to string it together with a wider range of moves via Cancel Drive Rush. The reduced pushback on hit should also make it easier for Forward Strike (Light Kick during Serenity Stream) to reach, making for more a potent tool if used in the right moment.
In exchange, we've strengthened some of her attacks to make taking the fight to the opponent more appealing. While her Standing Heavy Punch was previously hard to use, due to hurtboxes that greatly extended forward before its active frames and the high risk of eating a counter if you misjudged the spacing, these points have been improved on to turn the move into one that can be turned to more frequently for aggressive play.
Swift Thrust has also seen some tweaks. In the past it was difficult to get a good return on confirms with it, but it's now possible to string it together with a wider range of moves via Cancel Drive Rush. The reduced pushback on hit should also make it easier for Forward Strike (Light Kick during Serenity Stream) to reach, making for more a potent tool if used in the right moment.
manon
Manon's options to close in on an opponent were lacking, and her attack options after she got close were a little weak. Considering the adjustments made to Drive Reversal, we expected that she would have a harder time raising her Medal level. For that reason we've given her more striking pressure, and made it easier for her options to hit.
Additionally, we changed the Modern controls so that ↓↙← + Attack will now perform Dégagé. There was some input overlap with Dégagé and her Manège Doré command throw, so we felt it would be difficult to have both in Modern controls and decided to just go with Manège Doré, but Manon not having access to all her Dégagé variations for combos and the neutral game proved to be too much of a disadvantage for her, so now she can use both.
We also made it more difficult for Manège Doré to accidentally come out when inputting Dégagé by changing its input success criteria. Details can be found in the character specific adjustment list, but please note that this also affects Classic controls as well.
Additionally, we changed the Modern controls so that ↓↙← + Attack will now perform Dégagé. There was some input overlap with Dégagé and her Manège Doré command throw, so we felt it would be difficult to have both in Modern controls and decided to just go with Manège Doré, but Manon not having access to all her Dégagé variations for combos and the neutral game proved to be too much of a disadvantage for her, so now she can use both.
We also made it more difficult for Manège Doré to accidentally come out when inputting Dégagé by changing its input success criteria. Details can be found in the character specific adjustment list, but please note that this also affects Classic controls as well.
zangief
In order to highlight Zangief's heavyweight character, we've made adjustments to increase his pressure on individual attacks.
We've made adjustments to improve the usability of his attacks during the neutral game, and have also made big changes to how his moves affect the gauges for both him and his opponent, which will put him in a better position even if his attacks are blocked.
Additionally, when his attacks do strike true, we've increased the ways he can pile on the damage so that he can make the best of the few chances he gets in a fight.
While using Modern controls, there were issues where his normal attacks and Assisted Combos shared the same attack, and some of his Assisted Combos were difficult to use, so we've retweaked those areas.
Due to this Zangief won't be able to rapid cancel his Standing Light Punches, but we believe his Standing Light Kick is now going to be an important part of his gameplan.
We've made adjustments to improve the usability of his attacks during the neutral game, and have also made big changes to how his moves affect the gauges for both him and his opponent, which will put him in a better position even if his attacks are blocked.
Additionally, when his attacks do strike true, we've increased the ways he can pile on the damage so that he can make the best of the few chances he gets in a fight.
While using Modern controls, there were issues where his normal attacks and Assisted Combos shared the same attack, and some of his Assisted Combos were difficult to use, so we've retweaked those areas.
Due to this Zangief won't be able to rapid cancel his Standing Light Punches, but we believe his Standing Light Kick is now going to be an important part of his gameplan.
jp
JP was designed to be a character that was slow and had trouble chasing down opponents, but would be excellent at keeping them away with his useful normals and unique attacks.
However, his long reach and excellent hitboxes made it hard for his opponents to take the risk to get in, and JP was able to throw out attacks without much care if they missed. To combat this, we have adjusted him so that his pokes will lose out more to low attacks, but his standing medium kick will be able to overcome those low attacks. By doing this we're looking to mitigate JP players from using the same techniques repeatedly and instead consider appropriate attacks for a given situation.
The concept behind Super Art Lovushka was to aim to break an oppoent's defenses after activation with an oppressive offense, but its overall recovery was short, meaning it was very unexpectedly useful even as a defensive tool. Therefore we reviewed its overall recovery to reduce the number of situations it can be effectively used. A new approach for Lovushka is to activate it after an Overdrive art like OD Torbalan or OD Stribog. This adjustment was made with the thinking that it will give players new avenues if they're willing to pay the cost for it.
Finally, Interdiction was able to induce stun in too many situations after the opponent was put into Burnout, making it too much of a deciding factor in matches. With this in mind, we've made adjustments so that JP's situation after hit is slightly worse.
However, his long reach and excellent hitboxes made it hard for his opponents to take the risk to get in, and JP was able to throw out attacks without much care if they missed. To combat this, we have adjusted him so that his pokes will lose out more to low attacks, but his standing medium kick will be able to overcome those low attacks. By doing this we're looking to mitigate JP players from using the same techniques repeatedly and instead consider appropriate attacks for a given situation.
The concept behind Super Art Lovushka was to aim to break an oppoent's defenses after activation with an oppressive offense, but its overall recovery was short, meaning it was very unexpectedly useful even as a defensive tool. Therefore we reviewed its overall recovery to reduce the number of situations it can be effectively used. A new approach for Lovushka is to activate it after an Overdrive art like OD Torbalan or OD Stribog. This adjustment was made with the thinking that it will give players new avenues if they're willing to pay the cost for it.
Finally, Interdiction was able to induce stun in too many situations after the opponent was put into Burnout, making it too much of a deciding factor in matches. With this in mind, we've made adjustments so that JP's situation after hit is slightly worse.
dhalsim
We've made adjustments to Dhalsim's overall gameplan so that he'll be able to zone his opponents easier with his projectiles and get a better return from his anti-airs and combos.
While he won't be receiving any large, significant changes, reducing his disadvantage when his attacks are blocked and the new Recovery Drive Reversal will give him better ways to fight back than before.
Merciless Yoga's start-up is now faster when performed out of Yoga Flame, which should make it easier to put together combos.
His Standing Medium Kick adjustment means that after it is blocked, it'll be harder for light attacks to counter attack. Depending on the opponent it proved to be an extremely difficult to use the move, so we've made adjustments so that counterattacks will not reach him unless they're performed up close.
His Drive Reversal will now knock down on the first hit, and we've also made it so Dhalsim is no longer at a one-sided disadvantage when projectiles clash.
While he won't be receiving any large, significant changes, reducing his disadvantage when his attacks are blocked and the new Recovery Drive Reversal will give him better ways to fight back than before.
Merciless Yoga's start-up is now faster when performed out of Yoga Flame, which should make it easier to put together combos.
His Standing Medium Kick adjustment means that after it is blocked, it'll be harder for light attacks to counter attack. Depending on the opponent it proved to be an extremely difficult to use the move, so we've made adjustments so that counterattacks will not reach him unless they're performed up close.
His Drive Reversal will now knock down on the first hit, and we've also made it so Dhalsim is no longer at a one-sided disadvantage when projectiles clash.
cammy
Cammy has received a wide range of changes with this update. Everything from her status after an attack, to reviewing her special attack abilities, as well as her combo routes and command inputs, etc. have been adjusted.
Her forward throw now puts her slightly further away from the opponent after it hits. At the corner of the screen, it's still possible for her to move forward and set up a strike/throw mixup on her opponent, but her ability to dig in deep with light attacks has been mitigated.
Cannon Strike's hurtbox while the move is being performed has been significantly changed. Up until now the hurtbox was smaller immediately after the move started, making it very hard for opponents to hit her with zoning attacks, but during the active frames her hurtbox would become much bigger, which caused her to lose to low attacks that she should have been able to avoid.
With this update, the hurtbox immediately after the attack is performed is now expanded downward, while when the attack hitbox is out, the hurtbox around the foot has been reduced so she won't lose to attacks closer to the ground. Her instant Cannon Strike now loses more often to zoning attacks higher off the ground, so Cammy players will have to think about their opponent's attacks and how they compete with her Cannon Strike, as well as the timing of her own attack.
The timing for when Lift Combination and Assault Blade out of the heavy version of Hooligan Combination switches sides with the opponent is now slower. While it's still possible from the beginning of a combo to switch sides with the opponent, Cannon Strike will no longer hit after turning around, so you won't be able to score a combo that gives you an advantageous situation and damage at the same time.
Finally, when Cammy performed her Super Art level 2 from a low level Cannon Strike, the aerial version of the attack would sometimes be performed unintentionally, so to combat this we have changed the command input from Kick to Punch.
Her forward throw now puts her slightly further away from the opponent after it hits. At the corner of the screen, it's still possible for her to move forward and set up a strike/throw mixup on her opponent, but her ability to dig in deep with light attacks has been mitigated.
Cannon Strike's hurtbox while the move is being performed has been significantly changed. Up until now the hurtbox was smaller immediately after the move started, making it very hard for opponents to hit her with zoning attacks, but during the active frames her hurtbox would become much bigger, which caused her to lose to low attacks that she should have been able to avoid.
With this update, the hurtbox immediately after the attack is performed is now expanded downward, while when the attack hitbox is out, the hurtbox around the foot has been reduced so she won't lose to attacks closer to the ground. Her instant Cannon Strike now loses more often to zoning attacks higher off the ground, so Cammy players will have to think about their opponent's attacks and how they compete with her Cannon Strike, as well as the timing of her own attack.
The timing for when Lift Combination and Assault Blade out of the heavy version of Hooligan Combination switches sides with the opponent is now slower. While it's still possible from the beginning of a combo to switch sides with the opponent, Cannon Strike will no longer hit after turning around, so you won't be able to score a combo that gives you an advantageous situation and damage at the same time.
Finally, when Cammy performed her Super Art level 2 from a low level Cannon Strike, the aerial version of the attack would sometimes be performed unintentionally, so to combat this we have changed the command input from Kick to Punch.
lily
Lily's Crouching Heavy Punch, her main tool in the neutral when dealing with either ground or airborn opponents, had very high proficiency compared to her other attacks, which led to situations where she became a one-note character. To combat this, we've increased the hurtbox on the Crouching Heavy Punch, adding more risk to it when the attack misses.
We looked at improving attacks that didn't see much action in fights, making them easier to use as counterattacks or in combos.
For her Overdrive Condor Wind, due to the attack start-up's change, it can now be used better in combos or as part of a counterattack combo route from a light attack punish counter or a medium attack.
Her Standing Light Kick's overall recovery and advantage were given revisions, and on counterhigh or higher, other attacks will combo, making it easier to use as your fastest response to interrupt the opponent or for a counterattack.
However, this change to recovery means that after a normal hit, if you look to use a Mexican Typhoon immediately after, it will whiff, so be careful when using them in tandem.
We looked at improving attacks that didn't see much action in fights, making them easier to use as counterattacks or in combos.
For her Overdrive Condor Wind, due to the attack start-up's change, it can now be used better in combos or as part of a counterattack combo route from a light attack punish counter or a medium attack.
Her Standing Light Kick's overall recovery and advantage were given revisions, and on counterhigh or higher, other attacks will combo, making it easier to use as your fastest response to interrupt the opponent or for a counterattack.
However, this change to recovery means that after a normal hit, if you look to use a Mexican Typhoon immediately after, it will whiff, so be careful when using them in tandem.
jamie
Jamie had a unique characteristic of being able to have both close-range oppressive power coupled with the ability to break down opponents when his drink level was raised, but there were times when it was difficult for him to raise his drink level to unlock that damage potential with the limited tools available at the start of a match. For this update, we've looked at giving him more ways to raise his drink level and to increase its benefits, so he can show more of his characteristics.
For normal attacks, the advantage on hit for Crouching Medium Punch now allows him to cancel into Overdrive Swagger Step for a combo, etc. This change compensates the short range on the normal attack with a good return, with the added benefit of giving him a chance to raise his drink level.
For special moves, Heavy Swagger Step can no longer be punished even when blocked up close, making it a strong attack with lower risk when canceled into.
The final attack of Bitter Strikes, which is unlocked with drink level, can be canceled into Cancel Drive Rush even if the last attack is blocked, so you can perform that move and cancel into Crouching Light Punch to force the opponent to block it, creating a frame advantage situation to continue your offense.
Finally, Jamie has received a lot of adjustments to make him easier to play, such as Super Art level 1's better start-up, but also received some downward adjustments, such as to his Crouching Heavy Kick, which was difficult for some characters to deal with when they blocked it.
For normal attacks, the advantage on hit for Crouching Medium Punch now allows him to cancel into Overdrive Swagger Step for a combo, etc. This change compensates the short range on the normal attack with a good return, with the added benefit of giving him a chance to raise his drink level.
For special moves, Heavy Swagger Step can no longer be punished even when blocked up close, making it a strong attack with lower risk when canceled into.
The final attack of Bitter Strikes, which is unlocked with drink level, can be canceled into Cancel Drive Rush even if the last attack is blocked, so you can perform that move and cancel into Crouching Light Punch to force the opponent to block it, creating a frame advantage situation to continue your offense.
Finally, Jamie has received a lot of adjustments to make him easier to play, such as Super Art level 1's better start-up, but also received some downward adjustments, such as to his Crouching Heavy Kick, which was difficult for some characters to deal with when they blocked it.
marisa
Marisa's staggering damage output from her strikes is a central core of her character, but the relentless assaults possible after landing her command throw, as well as her powerful table-turning counterattacks, made for a combination that was a little too potent at turning matches completely on their head. With this in mind, we've made her strikes more powerful, to let those traits truly shine, and then we've decreased the advantage frames of her command throw, Enfold, as well as those for her SA3 on hit. We've also adjusted the counter-attack focused moves Scutum and Overdrive Gladius to dial down their damage potential.
In terms of the boosts to her strikes, each of her charged attacks now have greater advantage on contact, with the tweaks meaning that they'll also no longer leave any openings to counters on block. Falx Crusher, which was previously very situational, has also been improved on, which should make it a more attractive option when the moment presents itself and you're after a big return.
In order to ease one of Marisa's weaknesses, where it could be hard to hit retreating opponents with her attacks, we've made adjustments to some moves, such as making it so that the proximity block triggers for Marisa's Standing Heavy Kick and Crouching Heavy Kick activate from the start of the moves to stop retreating opponents in their tracks. This combined with the other buffs to strikes should put them back in the spotlight on the offensive front.
In terms of the boosts to her strikes, each of her charged attacks now have greater advantage on contact, with the tweaks meaning that they'll also no longer leave any openings to counters on block. Falx Crusher, which was previously very situational, has also been improved on, which should make it a more attractive option when the moment presents itself and you're after a big return.
In order to ease one of Marisa's weaknesses, where it could be hard to hit retreating opponents with her attacks, we've made adjustments to some moves, such as making it so that the proximity block triggers for Marisa's Standing Heavy Kick and Crouching Heavy Kick activate from the start of the moves to stop retreating opponents in their tracks. This combined with the other buffs to strikes should put them back in the spotlight on the offensive front.
honda
With Sumo Headbutt and Sumo Smash at his disposal, E. Honda has been a powerhouse when it comes to taking control of the neutral game. Not only were the two attacks difficult to deal with, since Honda remained in a position to pressure opponents into making hasty decisions even after the moves were blocked, those without the right tools to handle them would often find themselves overwhelmed in dull, one-sided scenarios.
The usual go-to strategy for dealing with these two moves had been the Perfect Parry, but with the decreased returns on successful Perfect Parries as of this update we decided that the risk and return had been tipped in a direction that would be difficult to match with how it was previously. So, instead of making further tweaks to Perfect Parries we've opted to make changes to the situations that occur after blocking the moves and for when they miss, lowering the difficulty for opponents to form a response after. We've not simply just lowered the properties of the moves though. Despite the changes mentioned above we've also made some positive changes to the parameters for the moves, as well as making them create better conditions on hit, so that they'll prove to be even more powerful tools in creating more favorable scenarios if used at the right time.
We've also made changes to other moves that were overshadowed by the two staples, opening up the potential options on hand. As well as adding another path to bank some Sumo Spirit, you can also now cancel into the Sumo Spirit version of Hundred Hand Slap from certain kick normals. With this, the overhead Crouching Medium Kick gains even more potential to open up opponents to damaging combos and should prove as a great new choice for dealing with opponents on the retreat.
Overdrive Teppo Triple Slap's second hit on opponents not in the air now produces a simple knockback, so its +5 advantage on counter hit it should be easier to use to kick off combos now. Whether you're using it as part of an attack sequence or as an option for interrupting your opponent's assault, you should find the move more useful than it's ever been.
The usual go-to strategy for dealing with these two moves had been the Perfect Parry, but with the decreased returns on successful Perfect Parries as of this update we decided that the risk and return had been tipped in a direction that would be difficult to match with how it was previously. So, instead of making further tweaks to Perfect Parries we've opted to make changes to the situations that occur after blocking the moves and for when they miss, lowering the difficulty for opponents to form a response after. We've not simply just lowered the properties of the moves though. Despite the changes mentioned above we've also made some positive changes to the parameters for the moves, as well as making them create better conditions on hit, so that they'll prove to be even more powerful tools in creating more favorable scenarios if used at the right time.
We've also made changes to other moves that were overshadowed by the two staples, opening up the potential options on hand. As well as adding another path to bank some Sumo Spirit, you can also now cancel into the Sumo Spirit version of Hundred Hand Slap from certain kick normals. With this, the overhead Crouching Medium Kick gains even more potential to open up opponents to damaging combos and should prove as a great new choice for dealing with opponents on the retreat.
Overdrive Teppo Triple Slap's second hit on opponents not in the air now produces a simple knockback, so its +5 advantage on counter hit it should be easier to use to kick off combos now. Whether you're using it as part of an attack sequence or as an option for interrupting your opponent's assault, you should find the move more useful than it's ever been.
aki
The unique Toxic Blossom system, and the firepower it brings, is a large part of her A.K.I.'s charm, but the groundwork of first poisoning an opponent and then managing to hit them with a Toxic Blossom triggering move has meant that A.K.I. had to work harder than other characters to really take chunks out of an opponent.
Even though the characteristics of Toxic Blossom could lead to some explosive damage in the right circumstances, it also required A.K.I. to make offensive pushes on a poisoned opponent to unleash that potential, and with a limited number of moves available for triggering it, it became easy for wary opponents to be on the lookout for those moves and deal with them appropriately. This left an impression of instability in A.K.I.'s damage potential.
With that in mind, this update brings a bunch of tweaks to improve on A.K.I. across the board. In particular, her poison inflicting attacks have been made easier to use, increasing A.K.I.'s opportunities to use Toxic Blossom to its full potential.
One other factor that contributed to the instability with A.K.I.'s output was that her high damage Toxic Blossom combos tended to burn through the Drive Gauge quickly, leaving her with very little to work with on the resource front. With the new adjustments there should be more opportunities to use Standing Light Kick to Medium Serpent Lash, reducing the need to hit the Drive Gauge so much for combo options, meaning she'll have more resources on hand for when she really needs them.
Even though the characteristics of Toxic Blossom could lead to some explosive damage in the right circumstances, it also required A.K.I. to make offensive pushes on a poisoned opponent to unleash that potential, and with a limited number of moves available for triggering it, it became easy for wary opponents to be on the lookout for those moves and deal with them appropriately. This left an impression of instability in A.K.I.'s damage potential.
With that in mind, this update brings a bunch of tweaks to improve on A.K.I. across the board. In particular, her poison inflicting attacks have been made easier to use, increasing A.K.I.'s opportunities to use Toxic Blossom to its full potential.
One other factor that contributed to the instability with A.K.I.'s output was that her high damage Toxic Blossom combos tended to burn through the Drive Gauge quickly, leaving her with very little to work with on the resource front. With the new adjustments there should be more opportunities to use Standing Light Kick to Medium Serpent Lash, reducing the need to hit the Drive Gauge so much for combo options, meaning she'll have more resources on hand for when she really needs them.
ken
While Ken received adjustments to his forward throw in the last update, he still had strong pressure in the corner of the stage, so we've made more adjustments to suppress his strong striking options. On the other hand, we've given him more options for the neutral and combos to compensate.
Chin Buster's return on hit and his ability to follow-up with strong options on block were difficult for opponents to deal with, and even Drive Reversal couldn't solve some situations, so the attack has been weakened.
Heavy Jinrai Kick's forward hurtbox was reduced, so that it's easier for Ken to tap opponents from a slightly further distance, which will increase his options at that range. His Hadoken didn't receive the same treatment as Ryu's, but we did reduce its hurtbox by a little bit.
The Quick Dash version of his Shoryuken now hits multiple times more often, and he's been given a better situation after it hits. This will make it easier to select routes that focus on damage while in the center of the stage.
Quick Dash had an issue where the Overdrive version of an attack would accidentally come out too often, so we've made adjustments so that the Overdrive version will only have priority when a neutral input is detected.
Chin Buster's return on hit and his ability to follow-up with strong options on block were difficult for opponents to deal with, and even Drive Reversal couldn't solve some situations, so the attack has been weakened.
Heavy Jinrai Kick's forward hurtbox was reduced, so that it's easier for Ken to tap opponents from a slightly further distance, which will increase his options at that range. His Hadoken didn't receive the same treatment as Ryu's, but we did reduce its hurtbox by a little bit.
The Quick Dash version of his Shoryuken now hits multiple times more often, and he's been given a better situation after it hits. This will make it easier to select routes that focus on damage while in the center of the stage.
Quick Dash had an issue where the Overdrive version of an attack would accidentally come out too often, so we've made adjustments so that the Overdrive version will only have priority when a neutral input is detected.
deejay
Dee Jay possesses a unique range of movements to fluster opponents and keep them guessing, and that's something that we don't want to change, however, we've opted to tone down his damage output, which was a little too high, and have also made adjustments to weaken some factors that proved hard to deal with for opponents.
While his attack power has been dropped, changes to Face Breaker's damage reaction when hitting opponents in the air, along with changes to its
Considering The Greatest Sobat's lack of invincibility, we've adjusted it so that Dee Jay's left in a better situation whether it hits or is blocked. The risks are now lower when aiming for whiff punishes, and even on a normal hit you'll be in a position to hound the opponent with some wake-up offense. It's also easier to follow up on a Standing Medium Kick counter hit with it. All this adds up to more combo choices that don't rely on the Drive Gauge.
Jackknife Maximum possessed far greater anti-air and counterattack properties than techniques that other characters carried. Of course, it depended on how it was used, but in general we felt its ability to deter opponents was too great, and as a result we've made some adjustments to bring it more in line. While it has been weakened it's use in combos shouldn't be impacted.
While his attack power has been dropped, changes to Face Breaker's damage reaction when hitting opponents in the air, along with changes to its
combo count
should open up new combo routes. This should work particularly well as an extra combo option out Overdrive Maximum Strike.Considering The Greatest Sobat's lack of invincibility, we've adjusted it so that Dee Jay's left in a better situation whether it hits or is blocked. The risks are now lower when aiming for whiff punishes, and even on a normal hit you'll be in a position to hound the opponent with some wake-up offense. It's also easier to follow up on a Standing Medium Kick counter hit with it. All this adds up to more combo choices that don't rely on the Drive Gauge.
Jackknife Maximum possessed far greater anti-air and counterattack properties than techniques that other characters carried. Of course, it depended on how it was used, but in general we felt its ability to deter opponents was too great, and as a result we've made some adjustments to bring it more in line. While it has been weakened it's use in combos shouldn't be impacted.
blanka
While we've made some changes to expand Blanka's combo routes and improve the reliability of certain combos, we've also made some adjustments to his hard to deal with moves and attack sequences to add some more risk to justify their rewards.
In terms of combos, links such as Crouching Light Punch to Medium Rolling Attack or combos utilizing Wild Lift, which could be tricky to nail the distance on, have received tweaks to extend the range at which you can successfully combo with them. The hitbox of Overdrive Backstep Rolling's first hit has also been expanded, making it a new viable choice for a damaging combo route that doesn't require any charged input.
Blocked Rock Crusher off of a Drive Rush created a combination unique to Blanka with it being an overhead and leaving him in normal throw range along with a +2 advantage. This made attack sequences that followed it incredibly potent, so the recovery has been adjusted to line up with that of the other characters.
There were also cases where inputting the command for Coward Crouch would result in Wild Lift inadvertently coming out, so we've also made adjustments to stop that from happening.
In terms of combos, links such as Crouching Light Punch to Medium Rolling Attack or combos utilizing Wild Lift, which could be tricky to nail the distance on, have received tweaks to extend the range at which you can successfully combo with them. The hitbox of Overdrive Backstep Rolling's first hit has also been expanded, making it a new viable choice for a damaging combo route that doesn't require any charged input.
Blocked Rock Crusher off of a Drive Rush created a combination unique to Blanka with it being an overhead and leaving him in normal throw range along with a +2 advantage. This made attack sequences that followed it incredibly potent, so the recovery has been adjusted to line up with that of the other characters.
There were also cases where inputting the command for Coward Crouch would result in Wild Lift inadvertently coming out, so we've also made adjustments to stop that from happening.
juri
For Juri we wanted to focus on revising attacks that didn't see much action in a match, and also make adjustments to her combo routes, etc.
We changed the transition timing for the Standing Medium Punch when used in the Death Crest target combo, and on hit you can now cancel into a Super Art, allowing you to score big damage. If Standing Medium Punch is blocked and you anticipate your opponent making a move, hitting with the very tip of a follow-up Standing Medium Punch can link into a Super Art.
The normal version of Ankensatsu now links to Standing Light Kick on hit, which provides Juri with some new combo routes whenever she doesn't have Fuha stocked. Light attacks now link into Overdrive Fuhajin, giving Juri way better compatability with her attacks, and providing her with new combo routes that she hasn't had previously.
Other changes made to the chain combo version of her Renko Kicks, and Shiren-sen, making it so it's harder for the second attack to miss if the first attack connects. We made this adjustment so that players can get the damage when using them in combos.
We changed the transition timing for the Standing Medium Punch when used in the Death Crest target combo, and on hit you can now cancel into a Super Art, allowing you to score big damage. If Standing Medium Punch is blocked and you anticipate your opponent making a move, hitting with the very tip of a follow-up Standing Medium Punch can link into a Super Art.
The normal version of Ankensatsu now links to Standing Light Kick on hit, which provides Juri with some new combo routes whenever she doesn't have Fuha stocked. Light attacks now link into Overdrive Fuhajin, giving Juri way better compatability with her attacks, and providing her with new combo routes that she hasn't had previously.
Other changes made to the chain combo version of her Renko Kicks, and Shiren-sen, making it so it's harder for the second attack to miss if the first attack connects. We made this adjustment so that players can get the damage when using them in combos.
guile
Guile's ability to keep firing off Sonic Booms without tapping into the Drive Gauge gave him incredible command over the neutral game. While Drive Parry was a good means of dealing with this previously, the universal changes made to the mechanic for this update have diminished their effectiveness in dealing with Guile here. As such, the hurtboxes for Sonic Boom have been adjusted so that it's easier to deal with the move using jump attacks or space-controlling moves.
On the other hand, Sonic Booms of different strengths will now reduce the opponent's Drive Gauge by different amounts, giving players an incentive to use the previously underutilized Medium version and the fast-moving Heavy version much more. Forcing your opponent to block these should see Guile eat away at the opponent's resources at a greater rate.
Considering the speed at which it came out, Sonic Hurricane (Side) had enormous reach, which put heavy restrictions on the actions available to certain characters once that threat was on the table. As a result, the frontmost part of the move during active frames 1 to 3 will now only hit opponents already tagged in a combo.
The blowback on hit from Overdrive Sonic Blade has also been adjusted so that it's easier to hit opponents with a follow-up Sonic Cross. In addition, the additional input version of Overdrive Sonic Cross will now only use one block of the Drive Gauge instead of two. This combined with the increased wall splat time on hit should see it being used more often to cook up combos.
On the other hand, Sonic Booms of different strengths will now reduce the opponent's Drive Gauge by different amounts, giving players an incentive to use the previously underutilized Medium version and the fast-moving Heavy version much more. Forcing your opponent to block these should see Guile eat away at the opponent's resources at a greater rate.
Considering the speed at which it came out, Sonic Hurricane (Side) had enormous reach, which put heavy restrictions on the actions available to certain characters once that threat was on the table. As a result, the frontmost part of the move during active frames 1 to 3 will now only hit opponents already tagged in a combo.
The blowback on hit from Overdrive Sonic Blade has also been adjusted so that it's easier to hit opponents with a follow-up Sonic Cross. In addition, the additional input version of Overdrive Sonic Cross will now only use one block of the Drive Gauge instead of two. This combined with the increased wall splat time on hit should see it being used more often to cook up combos.
rashid
Rashid's adjustments have been centered on expanding on the chances to use each of his Super Arts.
Using Ysaar with an opponent backed into the corner proved to be such an optimal choice that it kicked off a trend of banking and using the SA gauge solely for that.
With this round of adjustments we've lowered the SA gauge gains while Ysaar is active. In exchange though it's now possible to cancel into Super Arts from Run's branch moves, and you can also now cancel into Altair from Light Eagle Spike, a move that was always easy to work into combos but should now really shine with this more decisive combo finishing option. Hopefully these changes will give Rashid players a more varied range of outlets for using the Super Art gauge.
One potential highlight is that with Backup now able to combo mid-air opponents more easily, Super Rashid Kick, which can deliver uneven results depending on the distance between Rashid and the opponent, can now be turned to as a follow up attack. The extra opportunity for a sure-fire hit with the Super should lead to it being put to use far more often. Also, considering that the timing at which you wind up on the other side of your opponent when using Backup can be hard to pinpoint, we've made it so that the command motion for the SA cancel will always be based on the side Rashid was on at the start of the attack.
Using Ysaar with an opponent backed into the corner proved to be such an optimal choice that it kicked off a trend of banking and using the SA gauge solely for that.
With this round of adjustments we've lowered the SA gauge gains while Ysaar is active. In exchange though it's now possible to cancel into Super Arts from Run's branch moves, and you can also now cancel into Altair from Light Eagle Spike, a move that was always easy to work into combos but should now really shine with this more decisive combo finishing option. Hopefully these changes will give Rashid players a more varied range of outlets for using the Super Art gauge.
One potential highlight is that with Backup now able to combo mid-air opponents more easily, Super Rashid Kick, which can deliver uneven results depending on the distance between Rashid and the opponent, can now be turned to as a follow up attack. The extra opportunity for a sure-fire hit with the Super should lead to it being put to use far more often. Also, considering that the timing at which you wind up on the other side of your opponent when using Backup can be hard to pinpoint, we've made it so that the command motion for the SA cancel will always be based on the side Rashid was on at the start of the attack.
ed
As Ed was the last character released before the balance adjustments, most of his changes this time focused on control revisions, alleviating some of the difficulty with his combos, bug fixes, and the universal changes that other characters received.
For individual changes, the recovery on Ed's Crouching Light Punch has been improved. Initially, we took into account Ed's abilities and his Crouching Light Punch's properties, and set things up so that he wouldn't be too strong when factoring in Drive Rush. However at a -5 frame disadvantage he had no way of following up, and we anticipated that using his light attack would become a veritable weak point, so we have made adjustments to improve on his recovery.
For individual changes, the recovery on Ed's Crouching Light Punch has been improved. Initially, we took into account Ed's abilities and his Crouching Light Punch's properties, and set things up so that he wouldn't be too strong when factoring in Drive Rush. However at a -5 frame disadvantage he had no way of following up, and we anticipated that using his light attack would become a veritable weak point, so we have made adjustments to improve on his recovery.
Input Recognition
- 調整 The Input Recognition Frame, which is the number of frames within which you must press the attack button after a special move command is inputted in order for the game to recognize you are performing a special move, has been adjusted per command.
1. For ↓↘→ or ↓↙← commands while standing on the ground, the Input Recognition Frame has been changed from 11 to 9 frames.
This means the attack button must be pressed within 9 frames of the final → or ← command being input for it to be recognized and have the special move be performed.
For ↓↘→ or ↓↙← commands while in the air, the Input Recognition Frame remains at 11 frames.
2. For ←↙↓↘→ or →↘↓↙← commands, the Input Recognition Frame has been changed from 12 frames to 9 frames.
Mid-air ↓↘→ and ↓↙← Command Moves
- 調整 Considering the fastest possible input necessary for instant aerial commands, the input difficulty has been eased slightly, and ↓↙← + K commands can now be performed using any downward direction (↙ or ↓ or ↘) followed by ↙← + K.
This can be performed by inputting ↙ > Neutral > ↙ > ←+Kick
↓↓+ Button Commands
- 調整 If Medium Punch+Medium Kick are input between a double Down tap, no command will be performed.
This adjustment was made so that if you immediately double tap Down after a Cancel Drive Rush from a crouching attack, a double Down command move will not be performed by accident.
Jump Landing Hurtboxes
- 調整 The following characters have had their hurtbox while landing from a jump moved upwards to match other characters, as it was previously lower and caused unanticipated attacks to hit them.
Chun-Li, Dhalsim, Lily, A.K.I.
Stun Timing Adjustments
- 不具合修正 Fixed an issue where if an opponent in Burnout blocks a Drive Impact a certain distance away from the corner of the screen, and the player performs a technique just before stun occurs, no combo scaling would be applied on the combo after the stun.
Drive Parry
- 調整 1. Throw hurtbox has been expanded while the technique is being performed.
2. Hurtbox from the 3rd frame and later has been expanded
3. The shortest possible active parry hitbox time has changed from 8 frames to 12 frames.
4. Recovery after the active frames has changed from 29 frames to 33 frames.
5. After absorbing an attack, the time until the Drive Gauge starts to auto regenerate has changed from 60 frames to 20 frames.
Perfect Parry
- 調整 The overall gauge fluctuation from a counter attack after a Perfect Parry has been reduced. This adjustment is not just for the first attack, but affects all attacks until the combo ends.
1. Super Art gauge increase has changed from 100% to 80% for both the attacker and damage-taker.
2. Drive gauge increase for the attacker has changed from 100% to 50%
3. Drive gauge decrease for the damage-taker has changed from 100% to 50%
Drive Rush
- 調整 Expanded the attack and throw hurtboxes of the Parry Drive Rush so that they're no longer smaller than the ones for a Drive Parry.
Drive Impact
- 調整 Buffer input window has changed from 5 frames to 10 frames to ensure easier movement immediately after the recovery ends for cases where the Punish Counter cutscene is not triggered.
Drive Reversal
- 調整 1. Recovery on block has changed from -8 to -6 frames
2. Attack hitbox has expanded downward so techniques with a low profile can no longer avoid this attack.
3. Pushback distance on close-range block is now almost equal for all characters.
Note: Certain character updates to pushback on block, collision pushboxes, hurtboxes and distance traveled are being made. - 不具合修正 Damage no longer increases on counter hit.
Recovery Drive Reversal
- 調整 Drive Reversal can now be performed during the recovery from a knockdown.
While the command is still the same (→+HP+HK), you can simply perform it early and hold down the input to perform the technique on recovery.
Note: This version of the Drive Reversal will not darken the screen or stop time, and the attack start-up is 18 frames, which is 2 frames faster than the normal Drive Reversal.
Light Attack (Standing/Crouching)
- 調整 Initial scaling has changed from 10% to 20%.
Cross-Up Capable Jumping Light Attacks
- 調整 Because every character has a different hit and block recovery against their opponent, we've matched the longest advantage time, so some character's jumping weak attack on block or guard will have an additional 1 frame of recovery.
This change applies to Luke, Jamie, Marisa, Lily, Juri, Ryu, E. Honda, Guile, Ken and A.K.I.
Assisted Combo 1
调整 Combo has now changed to the following.
- When Super Art gauge is empty
Crouching Light Kick > Crouching Light Punch > Overdrive Flash Knuckle > Medium Rising Uppercut
- During Burnout
Crouching Light Kick > Crouching Light Punch > Light Flash Knuckle
- When Super Art gauge is empty
Crouching Light Kick > Crouching Light Punch > Overdrive Flash Knuckle > Medium Rising Uppercut
- During Burnout
Crouching Light Kick > Crouching Light Punch > Light Flash Knuckle
Assisted Combo 2
调整 1. Changed so that Overdrive Flash Knuckle cancels into Super Art 2 from the second hit.
2. Combo has now changed to the following.
- When Super Art gauge is less than 2 bars
Crouching Medium Punch > Overdrive Flash Knuckle > Medium Rising Uppercut
- During Burnout
Crouching Medium Punch > Light Flash Knuckle
2. Combo has now changed to the following.
- When Super Art gauge is less than 2 bars
Crouching Medium Punch > Overdrive Flash Knuckle > Medium Rising Uppercut
- During Burnout
Crouching Medium Punch > Light Flash Knuckle
Assisted Combo 3
调整 Combo has now changed to the following.
- When Super Art gauge is full
Standing Heavy Punch > Overdrive Sand Blast > Pale Rider
- When Super Art gauge is less than 3 bars
Standing Heavy Punch > Overdrive Sand Blast > Fatal Shot
- During Burnout when Super Art gauge is full
Standing Heavy Punch > Medium Sand Blast > Pale Rider
- When Super Art gauge is full
Standing Heavy Punch > Overdrive Sand Blast > Pale Rider
- When Super Art gauge is less than 3 bars
Standing Heavy Punch > Overdrive Sand Blast > Fatal Shot
- During Burnout when Super Art gauge is full
Standing Heavy Punch > Medium Sand Blast > Pale Rider
Scrapper(Backwards Throw)
共通调整 Distance increased between characters when the opponent is thrown into the corner.
Standing Medium Kick
调整 1. Start up changed from 7 to 8 frames.
2. Recovery changed from 20 to 19 frames.
2. Recovery changed from 20 to 19 frames.
Standing Heavy Punch
调整 1. Advantage on hit changed from -1 to +1 frame.
2. Collision pushbox on hit has been expanded upward.
Note: This adjustment has been made to make it more difficult for Luke to swap sides when hitting an opponent in the air.
2. Collision pushbox on hit has been expanded upward.
Note: This adjustment has been made to make it more difficult for Luke to swap sides when hitting an opponent in the air.
Standing Heavy Kick
调整 1. Active frames changed from 6 to 7 frames.
2. Recovery changed from 17 to 16 frames.
3. Forward attack hitbox reduced during active frames 1 - 2.
4. Camera shake added if the attack is blocked on the final active frame.
Note: This was added to make it easier to understand when Luke has an advantage.
2. Recovery changed from 17 to 16 frames.
3. Forward attack hitbox reduced during active frames 1 - 2.
4. Camera shake added if the attack is blocked on the final active frame.
Note: This was added to make it easier to understand when Luke has an advantage.
Crouching Light Punch
调整 Forward attack hitbox reduced.
Crouching Medium Punch
调整 1. Initial scaling of 15% added.
2. Forward attack hitbox reduced.
2. Forward attack hitbox reduced.
Crouching Medium Kick
调整 The body hurtbox has been expanded forward during frames 19 - 29, only for when the attack misses.
Crouching Heavy Punch
调整 1. Combo scaling changed from 10% to 15%
2. Attack hitbox reduced to make it harder to hit opponents directly above Luke.
3. Attack hitbox on the 1st active frame has been expanded forward.
4. Upper body hurtbox during frames 7 - 8 of the technique has been expanded.
5. The central axis of the character now moves according to the visual appearance of the technique.
Note: There may be some side effects to this, such as Luke moving forward slightly when canceling into a special move, or finding himself more susceptible to cross-ups.
2. Attack hitbox reduced to make it harder to hit opponents directly above Luke.
3. Attack hitbox on the 1st active frame has been expanded forward.
4. Upper body hurtbox during frames 7 - 8 of the technique has been expanded.
5. The central axis of the character now moves according to the visual appearance of the technique.
Note: There may be some side effects to this, such as Luke moving forward slightly when canceling into a special move, or finding himself more susceptible to cross-ups.
Jumping Heavy Punch
调整 Hurtbox has been expanded downward from the 9th frame of the technique.
Note: This expanded hurtbox is invincible to projectiles.
Note: This expanded hurtbox is invincible to projectiles.
Jumping Heavy Kick
调整 Hurtbox has been expanded downward from the 10th frame of the technique.
Note: This expanded hurtbox is invincible to projectiles.
Note: This expanded hurtbox is invincible to projectiles.
Outlaw Kick (← + Heavy Kick)
调整 1. Advantage on Punish Counter has changed from 19 to 17 frames.
2. Pushback on Punish Counter has been increased.
2. Pushback on Punish Counter has been increased.
Nose Breaker (Crouching Medium Kick > ↓ + Heavy Punch)
共通调整 When using Classic controls, pressing Heavy Kick at the same time will cause the second attack to not come out.
Fatal Shot (↓↘→ + Two Punches > Two Punches)
调整 1. Damage changed from 700 to 1000.
2. Super Art gauge increase changed from 400 to 1000.
3. Drive gauge decrease changed from 2000 to 7000 on Punish Counter.
2. Super Art gauge increase changed from 400 to 1000.
3. Drive gauge decrease changed from 2000 to 7000 on Punish Counter.
Medium Flash Knuckle (↓↙← + Medium Punch)
调整 Pressing the button rapidly after this attack is performed will make it harder for the hold button version to be performed by accident.
Charged Medium Flash Knuckle (↓↙← + Medium Punch (Hold))
调整 Reduced recovery by 4 frames when this attack hits super armor.
Perfect/Charged Heavy Flash Knuckle (↓↙← + Heavy Punch (Hold))
调整 Increased knockdown time by 1 frame on hit.
Overdrive Flash Knuckle (↓↙← + Two Punches)
调整 Increased knockdown time by 10 frames on hit.
DDT (↓↙← + Two Punches > Two Punches)
调整 1. Damage changed from 2000 to 2500.
2. Super Art gauge increase changed from 1500 to 3000.
2. Super Art gauge increase changed from 1500 to 3000.
Normal/Overdrive No Chaser (↓↘→ + Kick/Two Kicks > Punch)
调整 1. Active frames changed from 7 to 10 frames.
2. Recovery changed from 19 to 16 frames.
2. Recovery changed from 19 to 16 frames.
SA3/CA Pale Rider
调整 1. Attack hitbox during a combo on an opponent has been expanded upward.
2. Invincibility no longer extends when performing the attack from long range.
2. Invincibility no longer extends when performing the attack from long range.
Assisted Combo 2
调整 1. At Drink level 4 Overdrive Freeflow Strikes > The Devil's Song cancel timing is hard set to the 2nd attack.
2. Combo has now changed to the following.
- Basic
Standing Medium Kick > Overdrive Freeflow Strikes > The Devil's Song > Senei Kick > Ransui Haze > Medium Swagger Step > Swagger Hermit Punch
- Super Art gauge is less than 2 bars
Standing Medium Kick > Overdrive Freeflow Strikes 1 > Overdrive Freeflow Strikes 2 > Overdrive Freeflow Strikes 3
- During Burnout
Standing Medium Kick > Heavy Freeflow Strikes 1 > Freeflow Strikes 2 > Freeflow Strikes 3
2. Combo has now changed to the following.
- Basic
Standing Medium Kick > Overdrive Freeflow Strikes > The Devil's Song > Senei Kick > Ransui Haze > Medium Swagger Step > Swagger Hermit Punch
- Super Art gauge is less than 2 bars
Standing Medium Kick > Overdrive Freeflow Strikes 1 > Overdrive Freeflow Strikes 2 > Overdrive Freeflow Strikes 3
- During Burnout
Standing Medium Kick > Heavy Freeflow Strikes 1 > Freeflow Strikes 2 > Freeflow Strikes 3
Assisted Combo 3
调整 Combo has now changed to the following during Burnout.
Standing Heavy Kick > Medium Swagger Step > Getsuga Saiho
Standing Heavy Kick > Medium Swagger Step > Getsuga Saiho
Wheel Punch (Backward Throw)
共通调整 1. Increased distance after hit.
2. Advantage after hit changed from +38 to +26 frames
2. Advantage after hit changed from +38 to +26 frames
Standing Medium Punch
调整 Advantage on block changed from +1 to +2.
Standing Medium Kick
调整 Advantage on hit changed from +1 to +2.
Crouching Medium Punch
调整 1. Advantage on hit changed from +3 to +5.
2. Advantage on block changed from ±0 to -1.
2. Advantage on block changed from ±0 to -1.
Crouching Medium Kick
调整 Hurtbox on the feet expanded upwards between frames 18 - 27 only when the attack misses.
Crouching Heavy Kick
调整 1. When the first attack is blocked, the second attack changes to a high attack.
2. Recovery changed from 28 to 29 frames when the attack is blocked.
3. Disadvantage on block changed from -10 to -11.
4. Reduced
2. Recovery changed from 28 to 29 frames when the attack is blocked.
3. Disadvantage on block changed from -10 to -11.
4. Reduced
combo count
additional value for the first attack. Jumping Heavy Kick
调整 Hurtbox present around the feet on the last frame of start-up removed.
Tensei Kick (↓ + Two Kicks)
修复问题 Fixed an issue where Luminous Dive Kick could not be performed using simple inputs after a jump cancel when The Devil's Song was active during Drink level 1 - 3 while using Modern controls.
Drink Level 4 Hermit's Elbow (← + Heavy Punch)
调整 Pushback reduced.
Falling Star Kick (→ + Medium Kick)
调整 1. Cancel window for Full Moon Kick extended by 1 frame.
2. Added 1 frame of hitstop and blockstun.
2. Added 1 frame of hitstop and blockstun.
Bitter Strikes (Light Punch > Light Kick > Medium Punch)
调整 1. Expanded the first attack's hitbox forward.
2. The cancel timing when using a Drive Rush on the second attack is now 1 frame earlier.
3. 2 frames of recovery added to the defender on block for the second attack.
4. Recovery when only the second attack is blocked changed from 21 to 23 frames.
Note: Advantage on block has not changed.
2. The cancel timing when using a Drive Rush on the second attack is now 1 frame earlier.
3. 2 frames of recovery added to the defender on block for the second attack.
4. Recovery when only the second attack is blocked changed from 21 to 23 frames.
Note: Advantage on block has not changed.
Immediate Ransui Haze (→ + Heavy Kick > ← + Heavy Kick > Heavy Punch)
调整 1. Damage changed from 700 to 850.
2. Combo scaling of 20% added.
3. Start-up changed from 17 to 15 frames.
4. Total technique frame length changed from 48 to 46 frames.
5. Extended Ransui Haze buffer input grace period.
2. Combo scaling of 20% added.
3. Start-up changed from 17 to 15 frames.
4. Total technique frame length changed from 48 to 46 frames.
5. Extended Ransui Haze buffer input grace period.
Drink Level 0-3 Normal Freeflow Strikes (↓↘→ + Punch > → + Punch > → + Punch)
调整 1. Drive gauge increase from the three attacks changed from 700 to 1500.
2. Drive gauge decrease when blocking the three attacks changed from 1500 to 2500.
3. Input buffer start period when going to the third attack changed from frame 2 to frame 7.
2. Drive gauge decrease when blocking the three attacks changed from 1500 to 2500.
3. Input buffer start period when going to the third attack changed from frame 2 to frame 7.
共通调整 While using Classic controls, attack will not be performed after the second attack if Medium or Heavy Kick are pressed at the same time.
Drink Level 4 Normal Freeflow Strikes (↓↘→ + Punch > → + Punch > → + Punch)
调整 1. Hitbox for the 1st hit of the first attack expanded forward.
2. Drive gauge increase for the first attack changed from 1400 (700x2) to 3000 (1500x2).
3. Drive gauge increase for the second attack changed from 1400 (700x2) to 1000 (500x2).
4. Drive gauge increase for the third attack changed from 2100 (700x3) to 1500 (500x3).
5. Input buffer start period when going to the third attack changed from frame 2 to frame 7.
2. Drive gauge increase for the first attack changed from 1400 (700x2) to 3000 (1500x2).
3. Drive gauge increase for the second attack changed from 1400 (700x2) to 1000 (500x2).
4. Drive gauge increase for the third attack changed from 2100 (700x3) to 1500 (500x3).
5. Input buffer start period when going to the third attack changed from frame 2 to frame 7.
共通调整 While using Classic controls, attack will not be performed after the second attack if Medium or Heavy Kick are pressed at the same time.
Drink Level 4 Medium/Heavy Freeflow Strikes (↓↘→ + Medium/Heavy Punch > → + Punch > → + Punch)
修复问题 Fixed an issue where the input buffer starting frame for the next attack differed from other strengths.
Drink Level 0-3 Overdrive Freeflow Strikes (↓↘→ + Two Punches > → + Punch > → + Punch)
调整 1. Advantage when the first attack hits changed from ±0 to +1.
2. Drive gauge reduction when blocking the three attacks changed from 1500 to 2500.
3. Hits after the second attack are no longer subject to combo scaling.
4. Input buffer start period when going to the third attack changed from frame 2 to frame 7.
2. Drive gauge reduction when blocking the three attacks changed from 1500 to 2500.
3. Hits after the second attack are no longer subject to combo scaling.
4. Input buffer start period when going to the third attack changed from frame 2 to frame 7.
共通调整 While using Classic controls, attack will not be performed after the second attack if Medium or Heavy Kick are pressed at the same time.
Drink Level 4 Overdrive Freeflow Strikes (↓↘→ + Two Punches > → + Punch > → + Punch)
调整 1. Hitbox for the 1st hit of the first attack expanded forward.
2. Hits after the second attack are no longer subject to combo scaling.
3. Input buffer start period when going to the third attack changed from frame 2 to frame 7.
2. Hits after the second attack are no longer subject to combo scaling.
3. Input buffer start period when going to the third attack changed from frame 2 to frame 7.
共通调整 While using Classic controls, attack will not be performed after the second attack if Medium or Heavy Kick are pressed at the same time.
Normal Freeflow Kicks (↓↘→ + Punch > → + Kick > → + Kick)
调整 1. Drive gauge increase for the second and third attack increased from 700 to 1000.
2. Drive gauge reduction when blocking the three attacks changed from 1500 to 2500.
3. Input buffer start period when going to the third attack changed from frame 2 to frame 7.
2. Drive gauge reduction when blocking the three attacks changed from 1500 to 2500.
3. Input buffer start period when going to the third attack changed from frame 2 to frame 7.
共通调整 While using Classic controls, attack will not be performed after the second attack if Medium or Heavy Kick are pressed at the same time.
Overdrive Freeflow Kicks (↓↘→ + Two Punches > → + Kick > → + Kick)
调整 1. Drive gauge reduction when blocking the three attacks changed from 1500 to 2500.
2. Input buffer start period when going to the third attack changed from frame 2 to frame 7.
2. Input buffer start period when going to the third attack changed from frame 2 to frame 7.
共通调整 While using Classic controls, attack will not be performed after the second attack if Medium or Heavy Kick are pressed at the same time.
Heavy Swagger Step (↓↙← + Heavy Punch)
调整 1. Recovery changed from 17 to 16 frames.
2. Disadvantage on block changed from -5 to -3 frames.
3. Increased knockdown time by 2 frames on hit.
2. Disadvantage on block changed from -5 to -3 frames.
3. Increased knockdown time by 2 frames on hit.
Overdrive Swagger Step (↓↙← + Two Punches)
调整 Increased knockdown time by 3 frames when attack hits a mid-air opponent.
Light Arrow Kick (→↓↘ + Light Kick)
调整 1. Initial scaling of 30% added.
2. Start-up changed from 6 to 5 frames.
3. Transition attack hitbox after initial hit expanded forward.
2. Start-up changed from 6 to 5 frames.
3. Transition attack hitbox after initial hit expanded forward.
Normal/Overdrive Luminous Dive Kick (↓↙← + Kick/Two Kicks during a forward jump)
调整 1. Pushback on block reduced.
2. Hurtbox around the feet now comes out on the 6th frame of the technique instead of the 10th.
3. Reduced the hurtbox around the feet from the 13th frame of the technique.
2. Hurtbox around the feet now comes out on the 6th frame of the technique instead of the 10th.
3. Reduced the hurtbox around the feet from the 13th frame of the technique.
Normal/Overdrive Bakkai (↓↘→ + Kick/Two Kicks)
调整 Projectile invincibility has been extended until the final attack's active frames are finished.
Normal Tenshin (→↘↓↙← + Kick)
修复问题 Fixed an issue where the internal
combo count
starting value would be added even though the opponent was standing on the ground after the hit. Overdrive Tenshin (→↘↓↙← + Two Kicks)
调整 1. Removed Immediate Scaling.
2. Added Intial Scaling of 30%
Note: Tweaked the attack so that combo scaling is applied from the first follow-up attack.
2. Added Intial Scaling of 30%
Note: Tweaked the attack so that combo scaling is applied from the first follow-up attack.
Normal/Overdrive Swagger Hermit Punch (↓↙← + Punch/Two Punches > → + Punch)
共通调整 While using Classic controls, attack will not be performed if Medium or Heavy Kick are pressed at the same time.
SA1 Breakin'
調整・不具合修正 1. Start-up changed from 10 to 8 frames.
2. Added a new hitbox from frames 8 - 10 of the technique.
3. Attack hitbox for the first and second attack that is only applied when an opponent is in a combo has been expanded.
4. Reduced forward movement when the screen darkens, and increased forward movement after the screen transition is over.
5. The 1st frame of the technique was completely invincible, and this has been changed to be only strike and throw invincible.
2. Added a new hitbox from frames 8 - 10 of the technique.
3. Attack hitbox for the first and second attack that is only applied when an opponent is in a combo has been expanded.
4. Reduced forward movement when the screen darkens, and increased forward movement after the screen transition is over.
5. The 1st frame of the technique was completely invincible, and this has been changed to be only strike and throw invincible.
SA3/CA Getsuga Saiho
调整 Collision pushbox at the beginning of the technique has been expanded upwards, making it more difficult for Jamie to pass underneath airborne opponents.
Modern Controls
调整 Dégagé can now be performed with ↓↙←+Attack.
Assisted Combo 2
调整 Combo has now changed to the following during Burnout.
Standing Medium Kick > Heavy Rond-point
Standing Medium Kick > Heavy Rond-point
Assisted Combo 3
调整 Combo has now changed to the following.
- Basic
Révérence > Overdrive Renversé > Grand Fouetté > Révérence > Heavy Renversé > Pas de Deux
- During Burnout
Révérence > Heavy Rond-point
- Basic
Révérence > Overdrive Renversé > Grand Fouetté > Révérence > Heavy Renversé > Pas de Deux
- During Burnout
Révérence > Heavy Rond-point
Uchi Mata (Backwards Throw)
共通调整 Increased distance after hit.
Drive Impact
修复问题 Fixed an issue where if both players are Manon and perform a Drive Impact at the same time, a clash would not occur.
Standing Medium Punch
调整 Adjusted À Terre's transition timing from frames 7 - 13 to frames 11 - 13.
Standing Medium Kick
调整 Pushback on hit reduced.
Standing Heavy Kick
调整 Input buffer will now be read from 8 frames before recovery ends.
Crouching Light Punch
调整 Advantage on hit changed from +2 to +3 frames.
Crouching Medium Punch
调整 Hurtbox expanded forward from frames 21 - 22 when the attack misses.
Crouching Light Kick
调整 1. Downward hitbox reduced.
Note: Adjustment made so this attack does not hit attacks with invincibility around the feet.
2. Pushback on hit and block reduced.
Note: Adjustment made so this attack does not hit attacks with invincibility around the feet.
2. Pushback on hit and block reduced.
Crouching Medium Kick
调整 1. Advantage on hit changed from +2 to +3 frames.
2. Pushback on hit reduced.
2. Pushback on hit reduced.
Tomoe Derrière (↘ + Heavy Kick)
调整 Increased
combo count
upper limit. À Terre (Medium Punch > Medium Kick)
共通调整 While using Classic controls, attack will not be performed if Medium Punch is pressed at the same time as the second input.
En Haut (← + Medium Kick > Medium Kick)
调整 1. Pushback on the first attack reduced.
2. Ground bound effect added when the second attack hits an airborne opponent.
3. Added a new attack hitbox to the second attack that is only applied when an opponent is in a combo, making it easier to hit opponents that are above Manon.
2. Ground bound effect added when the second attack hits an airborne opponent.
3. Added a new attack hitbox to the second attack that is only applied when an opponent is in a combo, making it easier to hit opponents that are above Manon.
Révérence (← + Heavy Punch)
调整 1. Advantage on block changed from -3 to +1.
2. Pushback on hit reduced.
2. Pushback on hit reduced.
Normal Grand Fouetté (↓↘→ + Punch > Kick)
调整 Camera shake added during Punish Counter.
Overdrive Grand Fouetté (↓↘→ + Two Punches > Kick)
调整 Start-up changed from 11 to 10 frames.
Normal Rond-point (↓↘→ + Kick)
调整 The second attack can no longer be canceled into Super Art 3/Critical Art.
Heavy Rond-point (↓↘→ + Heavy Kick)
调整 The horizontal blowback when the second attack hits an airborne opponent has been reduced.
Overdrive Rond-point (↓↘→ + Two Kicks)
调整 1. The first attack can now be canceled into Super Art 2/3/Critical Art.
2. Damage distribution changed from 400+400 to 500+300.
Note: If only the second attack hits, the damage remains at 400
3. The attack hitbox for only when an opponent is standing on the ground has been expanded forward.
2. Damage distribution changed from 400+400 to 500+300.
Note: If only the second attack hits, the damage remains at 400
3. The attack hitbox for only when an opponent is standing on the ground has been expanded forward.
Normal/Overdrive Manège Doré (→↘↓↙← + Punch/Two Punches)
调整 1. The attack's input recognition frames have been shortened overall.
2. Attack will no longer be performed with a ↘↓↙← input.
3. After performing a forward input, the attack will no longer be performed if it next goes through a neutral or back input.
2. Attack will no longer be performed with a ↘↓↙← input.
3. After performing a forward input, the attack will no longer be performed if it next goes through a neutral or back input.
SA1 Arabesque
調整・不具合修正 1. Added a new attack hitbox that is only applied when an opponent is in a combo, making it easier to hit opponents that are above Manon.
2. The 1st frame of the technique was completely invincible, and this has been changed to be only strike and throw invincible.
2. The 1st frame of the technique was completely invincible, and this has been changed to be only strike and throw invincible.
SA2 Étoile
调整 1. Final attack damage changed from 850 to 950.
2. Added a new attack hitbox to the third attack that is only applied when an opponent is in a combo, making it easier to hit opponents that are below Manon.
3. Expanded the collision pushbox upward during frames 58 - 80.
2. Added a new attack hitbox to the third attack that is only applied when an opponent is in a combo, making it easier to hit opponents that are below Manon.
3. Expanded the collision pushbox upward during frames 58 - 80.
SA3/CA Pas de Deux
调整 1. Damage now changes depending on Manon's Medal level.
Super Art 3
Medal level 1: 4000
Medal level 2: 4100
Medal level 3: 4200
Medal level 4: 4400
Medal level 5: 4600
Critical Art
Medal level 1: 4500
Medal level 2: 4600
Medal level 3: 4700
Medal level 4: 4900
Medal level 5: 5100
2. Hurtbox expanded forward between frames 9 - 62 when the attack msises.
Super Art 3
Medal level 1: 4000
Medal level 2: 4100
Medal level 3: 4200
Medal level 4: 4400
Medal level 5: 4600
Critical Art
Medal level 1: 4500
Medal level 2: 4600
Medal level 3: 4700
Medal level 4: 4900
Medal level 5: 5100
2. Hurtbox expanded forward between frames 9 - 62 when the attack msises.
Assisted Combo 2
调整 Combo has now changed to the following.
- When Super Art gauge has less than 1 bar
Standing Medium Kick > Overdrive Vagabond Edge > Jump cancel > Jumping Medium Punch > Aerial Bushin Senpukyaku
- During Burnout
Standing Medium Kick > Medium Vagabond Edge
- When Super Art gauge has less than 1 bar
Standing Medium Kick > Overdrive Vagabond Edge > Jump cancel > Jumping Medium Punch > Aerial Bushin Senpukyaku
- During Burnout
Standing Medium Kick > Medium Vagabond Edge
Bell Ringer(Backwards Throw)
共通调整 Distance increased between characters when the opponent is thrown into the corner.
Standing Light Kick
调整 Reduced pushback.
Standing Medium Kick
调整 Super Art gauge increase changed from 500 to 700.
Crouching Medium Punch
调整 1. Damage changed from 450 to 500.
2. Pushback reduced.
2. Pushback reduced.
Bushin Tiger Fangs (Medium Punch > Heavy Punch)
共通调整 When using Classic controls, pressing Heavy Kick at the same time as the second input will cause the second attack to not come out.
Bushin Prism Strikes (Light Punch > Medium Punch)
共通调整 When using Classic controls, pressing Medium Kick at the same time as the second input will cause the second attack to not come out.
Normal/Overdrive Sprint (↓↘→ + Kick/Two Kicks)
调整 Adjusted Kimberly's behavior so that she will not automatically transition into Arc Step when she comes in contact with the opponent if forward is being held in Classic controls or the SP button is being held in Modern Controls.
Normal/Overdrive Bushin Hojin Kick (↓↘→ + Kick/Two Kicks > Kick, after Arc Step)
修复问题 Added a new attack hitbox that is only applied when an opponent is in a combo, and fixed an issue where Bushin Hojin Kick would not combo properly after Arc Steps hits from a distance.
Overdrive Torso Cleaver (↓↘→ + Two Kicks > Light Kick)
调整 Opponent's Drive gauge reduction on block changed from 4000 to 6000.
Light Vagabond Edge (↓↘→ + Light Punch)
调整 1. Active frames changed from 2 to 3 frames.
2. Recovery changed from 22 to 21 frames.
3. Disadvantage on block changed from -6 to -5 frames.
4. Updated so attack range does not change during active frames 1 - 2.
Note: Properties tweaked so attack can hit easier on active frame 3.
2. Recovery changed from 22 to 21 frames.
3. Disadvantage on block changed from -6 to -5 frames.
4. Updated so attack range does not change during active frames 1 - 2.
Note: Properties tweaked so attack can hit easier on active frame 3.
Normal Bushin Senpukyaku (↓↙← + Kick)
调整 1. Anti-air invincibility timing has changed from when the hitbox first appears to now occur 1 frame before the hitbox appears.
2. From frame 1 of the technique until the attack hitbox appears, the hurtbox on the head is reduced downwards.
2. From frame 1 of the technique until the attack hitbox appears, the hurtbox on the head is reduced downwards.
Medium/Heavy Bushin Senpukyaku (↓↙← + Medium/Heavy Kick)
修复问题 Fixed an issue where the hitbox on the third attack should have expanded if the first or second attack hit, but did not on counter or Punish Counter.
Normal/Overdrive Bushin Senpukyaku (↓↙← + Kick/Two Kicks)
修复问题 Fixed an issue where damage was reduced when landing a hit during the active frames of the first attack.
Overdrive Bushin Senpukyaku (↓↙← + Two Kicks)
调整 1. Can be canceled into Super Art 2 during the fourth attack.
2. Damage changed for the second, third, and fourth attacks from 180 to 200.
3. First attack's hitbox expanded forward.
4. Added more time to the fourth attack's blowback.
5. Increased
2. Damage changed for the second, third, and fourth attacks from 180 to 200.
3. First attack's hitbox expanded forward.
4. Added more time to the fourth attack's blowback.
5. Increased
combo count
limit. Overdrive Nue Twister (↓↘→ + Punch, during a jump)
调整 1. Changed combo scaling from 10% to 20%
2. Increased
2. Increased
combo count
limit. Hidden Variable (↓↙← + Punch/Two Punches)
调整 Changed attack activation priority so that Hidden Variable has higher priority than Bushin Senpukyaku.
Note: This also applies to the Overdrive version.
Note: This also applies to the Overdrive version.
SA1 Bushin Beats/Bushin Thunderous Beats
調整・不具合修正 1. Adjusted so that Shuriken Bomb stocks are only used when the follow-up command is input after the attack's initial hit. The follow-up command is as follows.
Classic: Hold Kick button
Modern: Hold Light Attack, SP, or Heavy Attack
2. Start-up changed from 12 to 10 frames.
3. Collision pushbox expanded upwards.
4. The 1st frame of the technique was completely invincible, and this has been changed to be only strike and throw invincible.
5. The seventh attack's Drive gauge reduction is 4100 no matter if the follow-up is used or not.
Classic: Hold Kick button
Modern: Hold Light Attack, SP, or Heavy Attack
2. Start-up changed from 12 to 10 frames.
3. Collision pushbox expanded upwards.
4. The 1st frame of the technique was completely invincible, and this has been changed to be only strike and throw invincible.
5. The seventh attack's Drive gauge reduction is 4100 no matter if the follow-up is used or not.
SA1 Bushin Thunderous Beats
调整 1. Damage on the final attack changed from 200 to 400.
2. Drive gauge reduction on the final attack changed from 4000 to 1.
Note: This adjustment was made to ensure that the opponent's Drive gauge recovery doesn't start earlier than intended.
2. Drive gauge reduction on the final attack changed from 4000 to 1.
Note: This adjustment was made to ensure that the opponent's Drive gauge recovery doesn't start earlier than intended.
SA2 Bushin Scramble/Soaring Bushin Scramble
調整・不具合修正 1. Damage changed from 2600 to 2800.
2. Attack hitbox expanded.
3. A hurtbox was added as the 1st frame of the technique was completely invincible.
Note: Kimberly moves during the screen transition, so the property of avoiding attacks close to the ground has not changed.
4. Fixed an issue where the Drive gauge would recover during the cutscene when used in a combo that utilized Drive Rush.
2. Attack hitbox expanded.
3. A hurtbox was added as the 1st frame of the technique was completely invincible.
Note: Kimberly moves during the screen transition, so the property of avoiding attacks close to the ground has not changed.
4. Fixed an issue where the Drive gauge would recover during the cutscene when used in a combo that utilized Drive Rush.
SA3/CA Bushin Ninjastar Cypher
调整 Added a new attack hitbox that is only applied when an opponent is in a combo, allowing Kimberly to hit opponents in front of her easier.
Assisted Combo 2
调整 Combo has now changed to the following during Burnout.
Medium Two Hitter > Medium Gladius
Medium Two Hitter > Medium Gladius
Marisa Style
调整 It is now harder for the hold button version of heavy attacks to be performed by accident when rapidly pressing the heavy attack button after one of these techniques are performed.
Ponte Milvio (Backwards Throw)
共通调整 Distance increased between characters when the opponent is thrown into the corner.
Drive Reversal
修复问题 Fixed an issue where the advantage on this move when forcing an opponent in Burnout to block it differed from other characters.
Jumping Heavy Attacks (Charged/While Charging)
调整 Landing recovery reduced by 3 frames.
Charged Standing Heavy Punch
调整 1. Recovery on hit and block changed from 22 to 21 frames.
2. Advantage on hit changed from +6 to +7 frames.
3. Advantage on block changed from +3 to +4 frames.
2. Advantage on hit changed from +6 to +7 frames.
3. Advantage on block changed from +3 to +4 frames.
Normal/Charged Standing Heavy Kick
调整 1. Proximity block trigger startup changed from 4 frames prior to the end of the attack startup to the 2nd frame of the technique.
2. Removed the hurtbox around the feet that appeared before the non-hold version's hitbox appeared.
2. Removed the hurtbox around the feet that appeared before the non-hold version's hitbox appeared.
Crouching Medium Punch
调整 Expanded the hurtbox around the feet between frames 21 - 26 of the technique.
Normal/Charged Crouching Heavy Punch
调整 Proximity block trigger startup changed from 4 frames prior to the end of the attack startup to the 2nd frame of the technique.
Charged Crouching Heavy Punch
调整 Disadvantage on block changed from -5 to -3 frames.
Normal/Charged Crouching Heavy Kick
调整 Proximity block trigger startup changed from 4 frames prior to the end of the attack startup to the 2nd frame of the technique.
Charged Crouching Heavy Kick
调整 1. Recovery on hit and block changed from 23 to 20 frames.
2. Advantage on hit changed from +32 to +35 frames.
3. Disadvantage on block changed from -6 to -3 frames.
4. Changed the opponent's damage reaction when hit while in the air.
2. Advantage on hit changed from +32 to +35 frames.
3. Disadvantage on block changed from -6 to -3 frames.
4. Changed the opponent's damage reaction when hit while in the air.
Jumping Heavy Punch
调整 Active frames changed from 5 to 7 frames.
Light Two Hitter (Light Punch > Light Punch)
调整 Combo scaling changed from 25% to 15%
Falx Crusher (→ + Heavy Kick > → + Heavy Kick)
调整 1. Increased forward movement before attack startup.
2. Increased juggle state time on hit.
3. Increased upward juggle state on hit.
4. Increased
5. Reduced
6. Input buffer time changed from 5 frames to 9 frames.
2. Increased juggle state time on hit.
3. Increased upward juggle state on hit.
4. Increased
combo count
's initial value.5. Reduced
combo count
's additional value.6. Input buffer time changed from 5 frames to 9 frames.
共通调整 When using Classic controls, pressing Heavy Punch at the same time as the second input will cause the second attack to not come out.
Overdrive Normal/Charged Gladius (↓↘→ + Two Punches)
调整 Initial scaling of 30% added.
Overdrive Quadriga (↓↘→ + Two Kicks)
调整 1. Pushback increased.
2. Input buffer time changed from 5 to 10 frames.
2. Input buffer time changed from 5 to 10 frames.
Normal/Overdrive Phalanx (→↓↘ + Punch/Two Punches)
调整 Cannot recover backwards on Punish Counter.
Overdrive Phalanx (→↓↘ + Two Punches)
调整 Advantage on block changed from +2 to +4 frames.
Normal/Overdrive Scutum (↓↙← + Kick/Two Kicks)
调整 1. Now capable of breaking super armor.
2. Disadvantage on block changed from -5 to -3 frames.
2. Disadvantage on block changed from -5 to -3 frames.
Enfold (↓↙← + Kick > Light Punch + Light Kick)
调整 Advantage on hit changed from +20 to +18 frames.
SA1 Javelin of Marisa
調整・不具合修正 1. Attack hitbox on successful counter expanded downwards.
2. Fixed an issue where the Drive gauge would recover during the cutscene when used in a combo that utilized Drive Rush.
3. The 1st frame of the technique was completely invincible, and this has been changed to be only strike and throw invincible.
2. Fixed an issue where the Drive gauge would recover during the cutscene when used in a combo that utilized Drive Rush.
3. The 1st frame of the technique was completely invincible, and this has been changed to be only strike and throw invincible.
SA2 Meteorite
調整・不具合修正 1. Adjusted so the pushback is not applied to the second attack when it hits in the air.
2. Second attack's hitbox expanded forward.
3. Collision pushbox when jumping in the air expanded downwards.
4. Fixed an issue where the Drive gauge would recover during the cutscene when used in a combo that utilized Drive Rush.
2. Second attack's hitbox expanded forward.
3. Collision pushbox when jumping in the air expanded downwards.
4. Fixed an issue where the Drive gauge would recover during the cutscene when used in a combo that utilized Drive Rush.
SA3 Goddess of the Hunt
调整 Advantage on hit changed from +19 to +14 frames.
CA Goddess of the Hunt
调整 1. Changed distance from opponent after the attack hits so that it matches Super Art 3.
2. Advantage on hit changed from +19 to +14 frames.
2. Advantage on hit changed from +19 to +14 frames.
Assisted Combo 1
调整 Combo has now changed to the following during Burnout.
Crouching Light Kick > Crouching Light Punch > Heavy Tomahawk Buster
Crouching Light Kick > Crouching Light Punch > Heavy Tomahawk Buster
Assisted Combo 2
调整 Combo has now changed to the following.
- Basic
Crouching Medium Kick > Overdrive Condor Wind > Thunderbird
- During Burnout
Crouching Medium Kick > Light Condor Spire
- Basic
Crouching Medium Kick > Overdrive Condor Wind > Thunderbird
- During Burnout
Crouching Medium Kick > Light Condor Spire
Falling Cliff(Backwards Throw)
共通调整 Distance increased between characters when the opponent is thrown into the corner.
Drive Reversal
调整 Adjusted so Lily is always considered to be in a standing state during the technique.
Standing Light Punch
调整 1. Attack startup changed from 6 to 5 frames.
2. Technique length changed from 16 to 15 frames.
2. Technique length changed from 16 to 15 frames.
Standing Light Kick
调整 1. Recovery changed from 12 to 8 frames.
2. Advantage on hit changed from +1 to +5 frames.
3. Disadvantage on block changed from -4 to -1 frames.
4. Rapid cancel timing changed from frames 10 - 16 to frames 10 - 12.
5. Cancel Drive Rush activation frames when the attack misses changed from frames 9 - 13 to frames 9 - 11.
2. Advantage on hit changed from +1 to +5 frames.
3. Disadvantage on block changed from -4 to -1 frames.
4. Rapid cancel timing changed from frames 10 - 16 to frames 10 - 12.
5. Cancel Drive Rush activation frames when the attack misses changed from frames 9 - 13 to frames 9 - 11.
Crouching Medium Kick
调整 1. Attack startup changed from 10 to 9 frames.
2. Technique length changed from 30 to 29 frames.
2. Technique length changed from 30 to 29 frames.
Crouching Heavy Punch
调整 Hurtbox from frame 33 expanded forward.
Crouching Heavy Kick
调整 1. Knockback time for when the first attack hits while on the ground increased.
2. Second attack now becomes a high attack when the first attack is blocked.
2. Second attack now becomes a high attack when the first attack is blocked.
Normal/Overdrive Mexican Typhoon (360 + Punch/Two Punches)
调整 1. Immediate scaling changed from 20% to 10%.
2. Hurtbox around the head expanded during frames 11 - 42.
2. Hurtbox around the head expanded during frames 11 - 42.
Medium Condor Wind (↓↙← + Medium Punch)
调整 Reduced pushback.
Overdrive Condor Wind (↓↙← + Two Punches)
调整 1. Attack startup changed from 21 to 19 frames.
2. Technique length changed from 47 to 45 frames.
Note: Data is for the fastest attack transition.
3. When the button is released between frames 6 - 15, Lily will still transition to the fastest version even if the button is pressed again.
2. Technique length changed from 47 to 45 frames.
Note: Data is for the fastest attack transition.
3. When the button is released between frames 6 - 15, Lily will still transition to the fastest version even if the button is pressed again.
Overdrive Windclad Tomahawk Buster (→↓↘ + Two Punches)
调整 Added a new attack hitbox on frame 5 that is only applied when an opponent is in a combo, allowing the first attack to hit easier when used in a combo.
Heavy/Overdrive Windclad Condor Spire (↓↘→ + Heavy Kick/Two Kicks)
调整 Increased horizontal blowback on hit.
SA1 Breezing Hawk
調整・不具合修正 1. Attack startup changed from 13 to 10 frames.
2. Technique length changed from 104 to 101 frames.
3. The 1st frame of the technique was completely invincible, and this has been changed to be only strike and throw invincible.
2. Technique length changed from 104 to 101 frames.
3. The 1st frame of the technique was completely invincible, and this has been changed to be only strike and throw invincible.
SA2 Thunderbird
调整 1. Damage for the final attack of the normal version changed from 1800 to 1900.
2. Damage for the final attack of the Windclad version changed from 1600 to 1700.
2. Damage for the final attack of the Windclad version changed from 1600 to 1700.
SA2 Soaring Thunderbird
调整 1. Damage for the final attack of the normal version changed from 1800 to 1900.
2. Damage for the final attack of the Windclad version changed from 1600 to 1700.
3. Attack startup is faster only when canceled from Overdrive Condor Spire.
2. Damage for the final attack of the Windclad version changed from 1600 to 1700.
3. Attack startup is faster only when canceled from Overdrive Condor Spire.
Modern Controls
调整 When using the SP button for simplified inputs, you can now press ↙ or ↓ or ↘ to determine where Triglav will appear.
Assisted Combo 2
调整 Combo has now changed to the following.
- Basic
Standing Medium Kick > Overdrive Stribog > Lovushka > Malice > Heavy Departure > Medium Stribog
- Super Art gauge has less than 2 bars full
Standing Medium Kick > Overdrive Stribog > Heavy Triglav
- During Burnout
Standing Medium Kick > Medium Stribog
- Basic
Standing Medium Kick > Overdrive Stribog > Lovushka > Malice > Heavy Departure > Medium Stribog
- Super Art gauge has less than 2 bars full
Standing Medium Kick > Overdrive Stribog > Heavy Triglav
- During Burnout
Standing Medium Kick > Medium Stribog
Assisted Combo 3
調整・不具合修正 1. Delayed the activation for Triglav, and fixed an in issue where Super Art 3 Interdiction would not hit an opponent that was in a wall splat state.
2. Combo has now changed to the following during Burnout.
Standing Heavy Punch > Light Torbalan > Interdiction
2. Combo has now changed to the following during Burnout.
Standing Heavy Punch > Light Torbalan > Interdiction
Uragan (Backwards Throw)
共通调整 1. Increased distance after hit when close to the corner
2. Advantage after hit changed from +36 to +29 frames
2. Advantage after hit changed from +36 to +29 frames
Standing Medium Kick
调整 Hurtbox around the feet reduced from frame 2 of the technique until the end of the attack's active frames.
Standing Heavy Kick
调整 Increased pushback on block.
Crouching Medium Punch
调整 Hurtbox around the feet between frames 7 - 24 expanded.
Crouching Medium Kick
调整 1. Attack hitbox reduced downwards.
Note: Adjustment made so this attack does not hit attacks with invincibility around the feet.
2. Hurtbox around the feet between frames 26 - 28 of the technique expanded forward.
Note: Adjustment made so this attack does not hit attacks with invincibility around the feet.
2. Hurtbox around the feet between frames 26 - 28 of the technique expanded forward.
Crouching Heavy Kick
调整 Hurtbox around the feet between frames 16 - 30 expanded forward.
Jumping Heavy Punch
修复问题 Fixed an issue where the hurtbox from the beginning of the technique did not expand downward.
Guillotinna (→ + Medium Kick)
修复问题 Fixed an issue where the damage on the 2nd active frame was lower than planned.
Grom Strelka (← + Medium Punch > Medium Punch)
调整 1. Hurtbox around the feet from the first attack's start-up until the technique is finished expanded.
2. Combo scaling of 20% added to the second attack.
2. Combo scaling of 20% added to the second attack.
共通调整 When using Classic controls, pressing Medium Kick at the same time will cause the attack to not come out.
Zilant Mid (Heavy Kick > Heavy Punch > Heavy Punch)
共通调整 When using Classic controls, pressing Heavy Kick at the same time as the last input will cause the last attack to not come out.
Zilant Low (Heavy Kick > Heavy Punch > Heavy Kick)
共通调整 When using Classic controls, pressing Heavy Punch at the same time as the last input will cause the last attack to not come out.
Overdrive Triglav (↓↓ + Punch)
调整 Initial scaling of 20% added.
Normal/Overdrive Stribog (↓↘→ + Punch/Two Punches)
修复问题 Added 8 fixed frames of hitstop when clashing with a projectile.
Heavy Stribog (↓↘→ + Heavy Punch)
调整 3 frames of recovery added when this technique is Perfect Parried.
Note: If the first attack is Perfect Parried but the second attack hits, the recovery will not change.
Note: If the first attack is Perfect Parried but the second attack hits, the recovery will not change.
Overdrive Stribog (↓↘→ + Two Punches)
调整 1. The first attack can be canceled into Super Art 2/3/Critical Art.
2. Attack startup changed from 22 to 19 frames.
3. Technique length changed from 55 to 52 frames.
4. Damage changed from 300 + 500 to 600 + 400.
5. The blowback time on the first attack when it hits is increased.
6. The knockback time when the first attack is blocked changed from 16 to 23 frames.
Note: This also applies to when the first attack is canceled into a Super Art, etc.
7. The blowback time on the second attack when it hits is increased, making it easier to add a follow-up attack.
8. 3 frames of recovery added when this technique is Perfect Parried.
Note: If the first attack is Perfect Parried but the second attack hits, the recovery will not change.
2. Attack startup changed from 22 to 19 frames.
3. Technique length changed from 55 to 52 frames.
4. Damage changed from 300 + 500 to 600 + 400.
5. The blowback time on the first attack when it hits is increased.
6. The knockback time when the first attack is blocked changed from 16 to 23 frames.
Note: This also applies to when the first attack is canceled into a Super Art, etc.
7. The blowback time on the second attack when it hits is increased, making it easier to add a follow-up attack.
8. 3 frames of recovery added when this technique is Perfect Parried.
Note: If the first attack is Perfect Parried but the second attack hits, the recovery will not change.
Normal/Overdrive Departure (↓↙← + Punch/Two Punches)
调整 Increased
combo count
addition value. Overdrive Departure (↓↙← + Two Punches)
修复问题 Fixed an issue where this technique could not be performed during a jump transition.
Overdrive Torbalan (↓↘→ + Two Kicks)
调整 1. The first attack can be canceled into Super Art 2/3/Critical Art.
2. Initial scaling of 20% added.
2. Initial scaling of 20% added.
Normal/Overdrive Embrace (↓↙← + Kick/Two Kicks)
调整 1. Changed so that it can hit an opponent in knockback state, and to allow combos from Drive Rush Standing Heavy Punch, etc.
2. Expanded attack hitbox inward, making it harder to pass through with techniques with high movement values like Drive Rush, etc.
3. Immediate scaling of 25% added.
2. Expanded attack hitbox inward, making it harder to pass through with techniques with high movement values like Drive Rush, etc.
3. Immediate scaling of 25% added.
SA1 Chornobog
修复问题 1. Added 8 fixed frames of hitstop when clashing with a projectile.
2. The 1st frame of the technique was completely invincible, and this has been changed to be only strike and throw invincible.
2. The 1st frame of the technique was completely invincible, and this has been changed to be only strike and throw invincible.
SA2 Lovushka
調整・不具合修正 1. Technique length changed from 8 to 13 frames.
Note: The timing from the end of the recovery until the first attack starts up has not been changed.
2. Hurtbox expanded forward.
3. Complete invincibility on the 1st frame of the technique has been removed.
Note: The timing from the end of the recovery until the first attack starts up has not been changed.
2. Hurtbox expanded forward.
3. Complete invincibility on the 1st frame of the technique has been removed.
SA3 Interdiction
调整 1. Advantage on hit changed from 44 to 23 frames.
2. Distance added between opponent after attack hits.
2. Distance added between opponent after attack hits.
Assisted Combo 1
修复问题 Fixed an issue where if the second attack was blocked, even if the player continued to input the Assisted Combo, the third attack would not be performed.
Assisted Combo 2
调整 1. Technique performed when pressing AUTO+Medium Attack changed from Kyosesho to Crouching Medium Punch.
2. Combo has now changed to the following to match with the change from #1.
- Basic
Kyosesho > Overdrive Fuhajin > Sakkai Fuhazan has now changed toCrouching Medium Punch > Overdrive Fuhajin > Sakkai Fuhazan
- During Burnout
Crouching Medium Punch > Medium Fuhajin
2. Combo has now changed to the following to match with the change from #1.
- Basic
Kyosesho > Overdrive Fuhajin > Sakkai Fuhazan has now changed to
- During Burnout
Crouching Medium Punch > Medium Fuhajin
Assisted Combo 3
调整 Combo has now changed to the following during Burnout.
Standing Heavy Punch > Go Ohsatsu > Kaisen Dankai Raku
Standing Heavy Punch > Go Ohsatsu > Kaisen Dankai Raku
Shadow Kick Throw(Backwards Throw)
共通调整 Distance increased between characters when the opponent is thrown into the corner.
Crouching Light Kick
调整 Attack hitbox reduced downwards.
Note: Adjustment made so this attack does not hit attacks with invincibility around the feet.
Note: Adjustment made so this attack does not hit attacks with invincibility around the feet.
Normal/Chain Combo Crouching Medium Kick
调整 1. Hurtbox around the feet after frame 22 of the technique expanded upward only when the attack misses.
2. Hurtbox around the feet remains until the end of recovery only when the attack misses.
2. Hurtbox around the feet remains until the end of recovery only when the attack misses.
Normal/Chain Combo Jumping Medium Punch
调整 Damage changed from 700 to 500.
Note: Chain combo damage changed from 500 to 300.
Note: Chain combo damage changed from 500 to 300.
Chain Combo Renko Kicks (→ + Heavy Punch)
调整 1. Reduced the horizontal blowback from when the first attack hits.
2. Added a new attack hitbox to the second attack that is only applied when an opponent is in a combo, making it easier to hit opponents after the first attack.
2. Added a new attack hitbox to the second attack that is only applied when an opponent is in a combo, making it easier to hit opponents after the first attack.
Normal/Chain Combo Korenzan (← + Heavy Kick)
调整 Changed the hit effect on the second attack when it lands on a mid-air opponent from a knockdown slam to a ground bound.
Death Crest (Medium Punch > ← + Heavy Punch > Heavy Punch)
调整 1. Only the second attack can be canceled into a Super Art on hit.
2. Delayed the transition timing from the first Medium Punch attack.
3. Added 1 frame of recovery to the first attack and to the recovery of the opponent's block so that the first two attacks must be blocked.
Note: The advantage on block has not changed.
4. Adjusted the opponent's blowback on the first and second attacks.
2. Delayed the transition timing from the first Medium Punch attack.
3. Added 1 frame of recovery to the first attack and to the recovery of the opponent's block so that the first two attacks must be blocked.
Note: The advantage on block has not changed.
4. Adjusted the opponent's blowback on the first and second attacks.
Normal/Overdrive Fuhajin (↓↙← + Kick/Two Kicks)
调整 Added 8 fixed frames of hitstop when clashing with a projectile.
Overdrive Fuhajin (↓↙← + Two Kicks)
调整 1. Changed attack startup from 16 to 12 frames.
2. Changed active frames from 4 to 6 frames.
3. Changed recovery from 25 to 21 frames.
4. Changed technique length from 42 to 38 frames.
2. Changed active frames from 4 to 6 frames.
3. Changed recovery from 25 to 21 frames.
4. Changed technique length from 42 to 38 frames.
Normal Ankensatsu (↓↘→ + Medium Kick)
调整 1. Added initial scaling of 20% and combo scaling of 20%.
2. Changed advantage on hit from +3 to +5.
3. Increased pushback.
2. Changed advantage on hit from +3 to +5.
3. Increased pushback.
Overdrive Go Ohsatsu (↓↘→ + Medium Kick + Heavy Kick)
调整 When canceling from a normal attack or special move into this attack, the transition timing from the third attack into Overdrive Saihasho/Ankensatsu is now 1 frame earlier.
Note: This change is made to give this technique the same properties as using a Fuha stock to transition from Overdrive Saihasho/Ankensatsu to Overdrive Go Ohsatsu.
Note: This change is made to give this technique the same properties as using a Fuha stock to transition from Overdrive Saihasho/Ankensatsu to Overdrive Go Ohsatsu.
Normal/Overdrive Shiren-sen (↓↙← + Kick/Two Kicks, during a jump)
调整 1. Juri now follows the opponent after the blowback.
2. Attack hitbox has expanded overall.
3. Collision pushbox expanded up and down only when the attack hits.
2. Attack hitbox has expanded overall.
3. Collision pushbox expanded up and down only when the attack hits.
SA1 Sakkai Fuhazan
調整・不具合修正 1. Updated so the recovery of the button hold version is no longer 1 frame shorter than the normal version's.
2. Hurtbox on 1st frame after the screen transition ends was expanded backwards.
2. Hurtbox on 1st frame after the screen transition ends was expanded backwards.
SA3/CA Kaisen Dankai Raku
调整 1. Adjusted so that the hurtbox on block or whiff matches the visual appearance of the attack.
2. Recovery for the defender on block changed from 25 to 20 frames.
Note: Advantage on block has not changed.
2. Recovery for the defender on block changed from 25 to 20 frames.
Note: Advantage on block has not changed.
Assisted Combo 2
调整 Combo has now changed to the following during Burnout.
Crouching Medium Punch > Double Rolling Sobat
Crouching Medium Punch > Double Rolling Sobat
Assisted Combo 3
调整 Combo has now changed to the following during Burnout.
Face Breaker > Double Rolling Sobat > Weekend Pleasure
Face Breaker > Double Rolling Sobat > Weekend Pleasure
Flip Throw (Backwards Throw)
共通调整 Distance increased between characters when the opponent is thrown into the corner.
Standing Heavy Punch
调整 Initial scaling of 20% added.
Crouching Medium Kick
调整 1. Hurtbox on the body during frames 19 - 30 expanded forward only when the attack misses.
2. Attack hitbox expanded during active frames 1 - 3, matching the one from active frame 4.
2. Attack hitbox expanded during active frames 1 - 3, matching the one from active frame 4.
Crouching Heavy Kick
调整 Unified the upward blowback hit effect on Punish Counter on a mid-air opponent, as the effect differed depending on the location of the hit.
Threebeat Combo (Light Punch > Medium Kick > Medium Kick)
调整 1. Changed the Modern control input to Light > Medium > Medium.
2. Extended the final attack's input period by 2 frames.
3. Changed the advantage on hit for the final attack from +2 to +3 frames.
2. Extended the final attack's input period by 2 frames.
3. Changed the advantage on hit for the final attack from +2 to +3 frames.
Face Breaker (← + Heavy Kick)
調整・不具合修正 1. Reduced the blowback time when the first attack hits a mid-air opponent.
2. The Super Art increase on block was the same as the increase on hit, so it's been changed from 1000 to 500.
3. The Super Art increase when only the second attack hits a mid-air opponent on counter hit was half of the expected value, so it's been changed from 500 to 1000.
2. The Super Art increase on block was the same as the increase on hit, so it's been changed from 1000 to 500.
3. The Super Art increase when only the second attack hits a mid-air opponent on counter hit was half of the expected value, so it's been changed from 500 to 1000.
Knee Shot (↓ + Light Kick, during a jump)
调整 1. Reduced the attack hitbox, making it more difficult to hit opponents above Dee Jay.
2. Dee Jay is considered in a Punish Counter state from the 2nd active frame and after.
2. Dee Jay is considered in a Punish Counter state from the 2nd active frame and after.
Overdrive Air Slasher (Charge ←, → + Two Punches)
调整 1. Added initial scaling of 20%.
2. Increased the
2. Increased the
combo count
upper limit on the second attack. Heavy Jackknife Maximum (Charge ↓, ↑ + Heavy Kick)
调整 Speed of the attack is now reduced when the second attack misses.
Medium/Heavy/Overdrive Jackknife Maximum (Charge ↓, ↑ + Medium Kick/Heavy Kick/Two Kicks)
调整 1. The mid-air hitbox now appears on the 5th frame of the attack instead of the 4th frame.
2. Reduced the forward attack hitbox on the first attack, and adjusted so that the reduced part of the hitbox can only hit an opponent already in a combo.
3. Reduced collision pushbox downward until the 5th frame.
4. Expanded the collision pushbox upward when the attack hits.
2. Reduced the forward attack hitbox on the first attack, and adjusted so that the reduced part of the hitbox can only hit an opponent already in a combo.
3. Reduced collision pushbox downward until the 5th frame.
4. Expanded the collision pushbox upward when the attack hits.
Double Rolling Sobat (↓↘→ + Heavy Kick)
调整 Increased the
combo count
upper limit. Overdrive Double Rolling Sobat (↓↘→ + Two Kicks)
调整 1. Expanded the collision pushbox upward between frames 21 - 34.
2. Increased initial
3. Increased
2. Increased initial
combo count
value for the first attack.3. Increased
combo count
upper limit. Normal Funky Slicer (↓↙← + Kick > Light Kick)
调整 1. Added initial scaling of 20%.
2. Recovery changed from 22 to 25 frames for when the attack misses or hits super armor.
3. Reduced the lower part of the attack hitbox, and the reduced portion is now an additional hitbox that only hits opponents already in a combo.
Note: This adjustment was made so that this attack doesn't hit opponents using an attack with invincibility around the feet.
2. Recovery changed from 22 to 25 frames for when the attack misses or hits super armor.
3. Reduced the lower part of the attack hitbox, and the reduced portion is now an additional hitbox that only hits opponents already in a combo.
Note: This adjustment was made so that this attack doesn't hit opponents using an attack with invincibility around the feet.
Normal/Overdrive Waning Moon (↓↙← + Kick/Two Kicks > Medium Kick)
共通调整 When using Classic controls, pressing Medium Punch at the same time as the second input will cause the second attack to not come out.
Normal Maximum Strike (↓↙← + Kick > Heavy Kick)
共通调整 1. When using Classic controls, pressing Heavy Punch at the same time as the second input will cause the second attack to not come out.
2. Added anti-air invincibility to the body between frames 15 - 19.
2. Added anti-air invincibility to the body between frames 15 - 19.
Overdrive Maximum Strike (↓↙← + Two Kicks > Heavy Kick)
共通调整 1. When using Classic controls, pressing Heavy Punch at the same time as the second input will cause the second attack to not come out.
2. Added combo scaling of 20%.
2. Added combo scaling of 20%.
Normal/Overdrive Juggling Sway (↓↙← + Kick/Two Kicks > → + Punch > ← + Punch)
共通调整 When using Classic controls, pressing Medium or Heavy Kick at the same time as the second or third inputs will cause those attacks to not come out.
SA1 The Greatest Sobat
調整・不具合修正 1. Damage changed from 1800 to 2000.
2. Recovery changed from 45 to 33 frames.
3. Disadvantage on block changed from -24 to -12 frames.
4. Increased pushback on block.
5. Increased
6. Fixed an issue where the frame meter displayed this move as completely invincible on the 1st frame.
2. Recovery changed from 45 to 33 frames.
3. Disadvantage on block changed from -24 to -12 frames.
4. Increased pushback on block.
5. Increased
combo count
upper limit.6. Fixed an issue where the frame meter displayed this move as completely invincible on the 1st frame.
SA2 Sunrise Festival
調整・不具合修正 1. Fixed an issue where only the opponent's hitstop became shorter when the first attack was blocked.
2. Added a new attack hitbox to the first attack that is only applied when an opponent is in a combo, making it easier to hit opponents that are launched high.
3. Expanded the attack hitbox of the second and third attack.
4. After following up after the hit, Dee Jay's Super Art gauge increase until the combo ends is changed to 70%.
5. Fixed an issue where it was possible to cancel with a normal or special move on the fifth attack of Marvelous Sunrise Festival 2 frames before recovery ends.
2. Added a new attack hitbox to the first attack that is only applied when an opponent is in a combo, making it easier to hit opponents that are launched high.
3. Expanded the attack hitbox of the second and third attack.
4. After following up after the hit, Dee Jay's Super Art gauge increase until the combo ends is changed to 70%.
5. Fixed an issue where it was possible to cancel with a normal or special move on the fifth attack of Marvelous Sunrise Festival 2 frames before recovery ends.
Assisted Combo 2
调整 1. The third attack, Super Art 2 Shin Hashogeki will now automatically charge to level 2.
2. Combo has changed to the following during Burnout:
Crouching Medium Punch > Medium Hashogeki
2. Combo has changed to the following during Burnout:
Crouching Medium Punch > Medium Hashogeki
Assisted Combo 3
调整 Combo has changed to the following.
Solar Plexus Strike > Crouching Medium Punch > Medium Hashogeki > Shin Shoryuken
Solar Plexus Strike > Crouching Medium Punch > Medium Hashogeki > Shin Shoryuken
Somersault Throw(Backwards Throw)
共通调整 Distance increased between characters when the opponent is thrown into the corner.
Standing Light Punch
调整 Pushback on hit reduced.
Standing Light Kick
调整 1. Pushback on hit reduced.
2. Pushback on block reduced.
3. Proximity block trigger hitbox expanded to the same size as the attack hitbox.
2. Pushback on block reduced.
3. Proximity block trigger hitbox expanded to the same size as the attack hitbox.
Standing Medium Kick
调整 Super Art gauge increase changed from 500 to 700.
Standing Heavy Punch
调整 Advantage on hit changed from +3 to +4 frames.
Crouching Light Punch
调整 Pushback on hit reduced.
Crouching Medium Punch
调整 1. Attack active frames changed from 3 to 4 frames.
2. Recovery changed from 14 to 13 frames.
2. Recovery changed from 14 to 13 frames.
Crouching Heavy Punch
调整 1. Damage from the 2nd active frame and later changed to 800 to match the 1st active frame.
2. Super Art gauge increase changed from 1000 to 1200.
3. Drive gauge reduction on block changed from -6000 to -7500.
4. Drive gauge reduction during Punish Counter changed from -8000 to -10000.
2. Super Art gauge increase changed from 1000 to 1200.
3. Drive gauge reduction on block changed from -6000 to -7500.
4. Drive gauge reduction during Punish Counter changed from -8000 to -10000.
Jumping Medium Punch
调整 Forward attack hitbox expanded on the second attack to match the size of the first attack.
Collarbone Breaker (→ + Medium Punch)
调整 1. Advantage on hit changed from +2 to +3 frames.
2. Disadvantage on block changed from -3 to -1 frames.
2. Disadvantage on block changed from -3 to -1 frames.
Solar Plexus Strike (→ + Heavy Punch)
调整 1. Removed initial scaling.
2. Advantage on block changed from +1 to +3 frames.
3. Knockback time when the first attack hits an opponent changed from 15 to 25 frames.
*Affects situations such as trading hits with the opponent, etc.
2. Advantage on block changed from +1 to +3 frames.
3. Knockback time when the first attack hits an opponent changed from 15 to 25 frames.
*Affects situations such as trading hits with the opponent, etc.
Whirlwind Kick (→ + Heavy Kick)
调整 1. Increased pushback on block.
2. When the opponent blocks this at the corner of the stage, Ryu experiences pushback on block.
3. Foot invincibility time changed from 13 - 19 to 13 - 20 frames.
4. Hurtbox from frames 13 - 20 reduced upwards.
2. When the opponent blocks this at the corner of the stage, Ryu experiences pushback on block.
3. Foot invincibility time changed from 13 - 19 to 13 - 20 frames.
4. Hurtbox from frames 13 - 20 reduced upwards.
Axe Kick (← + Heavy Kick)
调整 1. Ground bound effect added when the second attack hits an airborne opponent.
2. Increased second attack's
2. Increased second attack's
combo count
additional value. Fuwa Triple Strike (Medium Punch > Light Kick > Heavy Kick)
调整 1. The third attack is no longer performed if the second attack misses.
2. The third attack can now be canceled into Denjin Charge.
Note: The cancel command for this is ↓ + Punch for Classic controls, and ↓ + Attack for Modern controls.
3. Disadvantage on block changed from -7 to -4.
2. The third attack can now be canceled into Denjin Charge.
Note: The cancel command for this is ↓ + Punch for Classic controls, and ↓ + Attack for Modern controls.
3. Disadvantage on block changed from -7 to -4.
High Double Strike (Heavy Punch > Heavy Kick)
调整 The second attack can be canceled into Denjin Charge.
Note: The cancel command for this is ↓ + Punch for Classic controls, and ↓ + Attack for Modern controls.
Note: The cancel command for this is ↓ + Punch for Classic controls, and ↓ + Attack for Modern controls.
共通调整 When using Classic controls, pressing Heavy Punch at the same time will cause the attack to not come out.
Normal Hadoken (↓↘→ + Punch)
调整 1. The advantage and disadvantage on hit has changed to the following.
Light: From -1 to +1
Medium: From -3 to -1
Heavy: From -5 to -3
2. Reduced the forward hurtbox between the time before and immediately after activation.
Light: From -1 to +1
Medium: From -3 to -1
Heavy: From -5 to -3
2. Reduced the forward hurtbox between the time before and immediately after activation.
Denjin Charge Hadoken (↓↘→ + Punch)<br>Denjin Charge Hashogeki (↓↙← + Punch)
调整 Adjusted so that when Ryu has a Denjin Charge stocked, the Denjin Charge version will only be performed when using the Heavy or Overdrive versions of the techniques. Pressing Light or Medium buttons will perform the normal version and not use the Denjin Charge stocked.
Light/Medium Hashogeki (↓↙← + Light/Medium Punch)
调整 Reduced pushback on hit.
Denjin Charge Hashogeki (↓↙← + Heavy Punch)
調整・不具合修正 1. Attack startup changed from 21 to 20 frames.
2. Recovery on hit or whiff changed from 18 to 19 frames.
3. Fixed an issue where if the attack is blocked on either the 1st active frame, or the 2nd active frame or later, the recovery would be greatly different.
2. Recovery on hit or whiff changed from 18 to 19 frames.
3. Fixed an issue where if the attack is blocked on either the 1st active frame, or the 2nd active frame or later, the recovery would be greatly different.
Medium/Heavy/Overdrive Normal or Denjin Charge Hashogeki (↓↙← + Medium Punch/Heavy Punch/Two Punches)
调整 Drive gauge decrease on block changed from -4000 to -6000.
Overdrive Denjin Charge Hashogeki (↓↙← + Two Punches)
调整 Damage changed from 1000 to 800.
Light Tatsumaki Senpu-kyaku (↓↙← + Light Kick)
调整 1. Damage changed from 800 to 900.
2. Super Art gauge increase changed from 1000 to 1200.
3. Drive gauge increase changed from 2000 to 3000.
4.
5.
6.
2. Super Art gauge increase changed from 1000 to 1200.
3. Drive gauge increase changed from 2000 to 3000.
4.
combo count
initial value increased.5.
combo count
additional value increased.6.
combo count
upper limit increased. Medium Tatsumaki Senpu-kyaku (↓↙← + Medium Kick)
调整 1. Damage changed from 900 to 1000.
2. Super Art gauge increase changed from 1000 to 1300.
3. Drive gauge increase changed from 2000 to 3500.
4.
5.
6.
2. Super Art gauge increase changed from 1000 to 1300.
3. Drive gauge increase changed from 2000 to 3500.
4.
combo count
initial value increased.5.
combo count
additional value increased.6.
combo count
upper limit increased. Heavy Tatsumaki Senpu-kyaku (↓↙← + Medium Kick)
调整 1. Damage changed from 1000 to 1200.
2. Super Art gauge increase changed from 1000 to 1400.
3. Drive gauge increase changed from 2000 to 4000.
4.
5.
6.
2. Super Art gauge increase changed from 1000 to 1400.
3. Drive gauge increase changed from 2000 to 4000.
4.
combo count
initial value increased.5.
combo count
additional value increased.6.
combo count
upper limit increased. Overdrive Aerial Tatsumaki Senpu-kyaku (↓↙← + Two Kicks, during a jump)
調整・不具合修正 1. Added a new attack hitbox that goes up, down and forward, that is only applied when an opponent is in a combo.
2. Collision pushbox expanded upward only when the attack hits.
3. Increased
2. Collision pushbox expanded upward only when the attack hits.
3. Increased
combo count
upper limit on the final attack, and fixed an issue where only the final attack would not hit in certain situations. Light High Blade Kick (↓↘→ + Light Kick)
调整 1. Damage changed from 1000 to 1100.
2. Attack startup changed from 15 to 14 frames.
3. Attack active frames changed from 9 to 6 frames.
4. Overall technique length changed from 45 to 41 frames.
5. Blowback time on hit increased.
6. Super Art gauge increase changed from 1200 to 1400.
7. Drive gauge increase changed from 2000 to 3000.
8. Drive gauge decrease on block changed from -4000 to -6000.
2. Attack startup changed from 15 to 14 frames.
3. Attack active frames changed from 9 to 6 frames.
4. Overall technique length changed from 45 to 41 frames.
5. Blowback time on hit increased.
6. Super Art gauge increase changed from 1200 to 1400.
7. Drive gauge increase changed from 2000 to 3000.
8. Drive gauge decrease on block changed from -4000 to -6000.
Medium High Blade Kick (↓↘→ + Medium Kick)
调整 1. Damage changed from 1100 to 1200.
2. Super Art gauge increase changed from 1200 to 1400.
3. Drive gauge increase changed from 3000 to 3500.
2. Super Art gauge increase changed from 1200 to 1400.
3. Drive gauge increase changed from 3000 to 3500.
Heavy High Blade Kick (↓↘→ + Heavy Kick)
调整 Super Art gauge increase changed from 1200 to 1400.
Overdrive High Blade Kick (↓↘→ + Two Kicks)
调整 1. Combo scaling changed from 20% to 15%
2. Attack startup changed from 18 to 17 frames.
3. Overall technique length changed from 55 to 54 frames.
4. Blowback when hitting a mid-air opponent reduced.
2. Attack startup changed from 18 to 17 frames.
3. Overall technique length changed from 55 to 54 frames.
4. Blowback when hitting a mid-air opponent reduced.
SA1 Normal or Denjin Charge Shinku Hadoken
調整・不具合修正 1. Attack startup changed from 8 to 7 frames.
2. Expanded the attack hitbox that only appears when an opponent is in a combo from the 3rd active frame and after inward.
3. Fixed an issue where there should have been an attack hitbox only when an opponent is in a combo on the final hit of the Denjin Charge version.
4. The 1st frame of the technique was completely invincible, and this has been changed to be only strike and throw invincible.
5. Can now be performed even if an Overdrive Hadoken is still on the screen.
2. Expanded the attack hitbox that only appears when an opponent is in a combo from the 3rd active frame and after inward.
3. Fixed an issue where there should have been an attack hitbox only when an opponent is in a combo on the final hit of the Denjin Charge version.
4. The 1st frame of the technique was completely invincible, and this has been changed to be only strike and throw invincible.
5. Can now be performed even if an Overdrive Hadoken is still on the screen.
SA2 Shin Hashogeki
调整 1. Damage has changed to the following.
Normal (level 1): From 2600 to 2800
Normal (level 2): From 2800 to 2900
Denjin Charge (level 1): From 3000 to 3200
Denjin Charge (level 2): From 3200 to 3300
2. Removed projectile clash hitbox.
Normal (level 1): From 2600 to 2800
Normal (level 2): From 2800 to 2900
Denjin Charge (level 1): From 3000 to 3200
Denjin Charge (level 2): From 3200 to 3300
2. Removed projectile clash hitbox.
SA3 Shin Shoryuken
调整 1. Non-cinematic version damage changed from 2600 to 3600.
2. Expanded the attack hitbox upward from the 3rd active frame and later.
3. Attack now comes out faster only when canceled into from a Heavy Shoryuken.
2. Expanded the attack hitbox upward from the 3rd active frame and later.
3. Attack now comes out faster only when canceled into from a Heavy Shoryuken.
Assisted Combo 2
调整 Combo changed to the following during Burnout.
Divine Kick > Medium Yoga Flame
Divine Kick > Medium Yoga Flame
Assisted Combo 3
调整 Combo changed to the following during Burnout.
Standing Heavy Kick > Heavy Yoga Fire > Merciless Yoga
Standing Heavy Kick > Heavy Yoga Fire > Merciless Yoga
Yoga Throw(Backwards Throw)
共通调整 Distance increased between characters when the opponent is thrown into the corner.
Drive Reversal
调整 1. The first attack's hit effect changed from a knockback to a blowback knockdown.
2. Advantage on hit changed from 23 to 24 frames.
2. Advantage on hit changed from 23 to 24 frames.
Standing Medium Kick
调整 Hurtbox around the feet on frame 30 reduced.
Standing Heavy Kick
调整 1. Advantage on hit changed from +1 to +3.
2. Pushback on hit reduced.
2. Pushback on hit reduced.
Crouching Medium Kick
调整 1. Damage reaction from the 8th active frame and after has been changed.
Note: This was done so that it's easier to understand when Dhalsim is at a +4 frame advantage or more.
2. Pushback on hit reduced.
Note: This was done so that it's easier to understand when Dhalsim is at a +4 frame advantage or more.
2. Pushback on hit reduced.
Yoga Mummy (↓ + Light Punch, during a jump)
调整 1. Mid-air hit effect changed from mid-air recovery to blowback knockdown.
2.
2.
combo count
upper limit increased. Agile Kick (↙ + Light Kick)
调整 Upward attack hitbox reduced.
Note: This adjustment was made so that this attack doesn't hit opponents using an attack with invincibility around the feet.
Note: This adjustment was made so that this attack doesn't hit opponents using an attack with invincibility around the feet.
Normal Charged Yoga Fire (↓↘→ + Punch)
调整 1. Attack start up changed from 45 to 43 frames.
2. Overall technique length changed from 77 to 73 frames.
Note: Recovery on block has not changed.
2. Overall technique length changed from 77 to 73 frames.
Note: Recovery on block has not changed.
Overdrive Yoga Blast (→↘↓↙← + Two Kicks)
调整 1. Initial scaling removed.
2.
2.
combo count
additional value reduced. Overdrive Yoga Comet (→↘↓↙← + Two Punches, during a jump)
调整 Projectile no longer disappears before it hits the ground.
SA2 Yoga Sunburst
调整 1. Increased the amount of chip damage sustained while in Burnout according to power level.
Level 1: 750
Level 2: 850
Level 3: 950
2. While using Modern or Dynamic controls, the trajectory of the projectile can be changed via directional input after the move is performed.
Level 1: 750
Level 2: 850
Level 3: 950
2. While using Modern or Dynamic controls, the trajectory of the projectile can be changed via directional input after the move is performed.
SA3/CA Merciless Yoga
调整 Attack startup is faster only when canceling from Yoga Flame.
Assisted Combo 2
调整 Combo has now changed to the following.
- Super Art gauge has less than 2 bars full
Standing Medium Punch > Standing Light Punch > Overdrive Spiral Arrow > Heavy Cannon Spike
- During Burnout
Standing Medium Punch > Standing Light Punch > Medium Spiral Arrow
- Super Art gauge has less than 2 bars full
Standing Medium Punch > Standing Light Punch > Overdrive Spiral Arrow > Heavy Cannon Spike
- During Burnout
Standing Medium Punch > Standing Light Punch > Medium Spiral Arrow
Assisted Combo 3
调整 Combo has now changed to the following.
- Super Art gauge has less than 3 bars full
Swing Combination > Overdrive Cannon Strike > Medium Cannon Spike
- During Burnout
Swing Combination > Heavy Cannon Strike
- Super Art gauge has less than 3 bars full
Swing Combination > Overdrive Cannon Strike > Medium Cannon Spike
- During Burnout
Swing Combination > Heavy Cannon Strike
Rough Landing (Forward Throw)
调整 Distance increased between characters after the throw.
Delta Throw(Backwards Throw)
共通调整 Distance increased between characters when the opponent is thrown into the corner.
Standing Medium Punch
调整 Reduced pushback.
Standing Medium Kick
调整 Forward hurtbox around the feet reduced from frame 7 of the technique until the active frames end.
Standing Heavy Kick
调整 1. Disadvantage on block changed from -4 to -3.
2. Pushback on block reduced.
2. Pushback on block reduced.
Delayed Ripper (→ + Heavy Kick)
调整 Drive Rush cancel timing is now 2 frames faster.
Lift Combination (← + Middle Punch > Heavy Kick)
共通调整 When using Classic controls, pressing Heavy Punch at the same time as the second input will cause the second attack to not come out.
Swing Combination (Heavy Punch > Heavy Kick)
调整 1. Changed the cancel timing from standing Heavy Punch from 8 - 10 frames to 8 - 12 frames.
2. Damage changed from 200 + 600 to 400 + 400.
3. Changed combo scaling when canceling the first attack into a special move from 15% to 10%.
4. Reduced the first and second attack's
5. Second attack can now be canceled into a special move.
6. First and second attack are now processed individually, and combo scaling is now applied.
7. Combo scaling of 20% added to second attack.
8. Reduced blowback time of the second attack.
9. Pushback on hit no longer occurs on the second attack if done near the corner of the stage.
2. Damage changed from 200 + 600 to 400 + 400.
3. Changed combo scaling when canceling the first attack into a special move from 15% to 10%.
4. Reduced the first and second attack's
combo count
upper limit.5. Second attack can now be canceled into a special move.
6. First and second attack are now processed individually, and combo scaling is now applied.
7. Combo scaling of 20% added to second attack.
8. Reduced blowback time of the second attack.
9. Pushback on hit no longer occurs on the second attack if done near the corner of the stage.
共通调整 When using Classic controls, pressing Heavy Punch at the same time as the second input will cause the second attack to not come out.
Light Spiral Arrow (↓↘→ + Light Kick)
调整 Reduced
combo count
additional value. Charged Heavy Spiral Arrow (↓↘→ + Heavy Kick)
调整 The timing for the fastest hold version of the attack has changed from releasing the button on frame 16 to releasing it within frames 16 - 17.
Medium/Heavy Quick Spin Knuckle (↓↙← + Medium/Heavy Punch)
调整 1. Technique's projectile invincibility changed from starting from frame 6 to starting from frame 9.
2. Projectile invincibility now continues until 1 frame before the attack startup ends.
2. Projectile invincibility now continues until 1 frame before the attack startup ends.
Overdrive Quick Spin Knuckle (↓↙← + Two Punches)
调整 Technique's projectile invincibility changed from starting from frame 3 to starting from frame 9.
Heavy Hooligan Combination (↓↘→ + Heavy Punch)
调整 Collision pushbox expanded upward from frames 7 - 23.
Overdrive Reverse Edge (↓↘→ + Two Punches > ↓ + Kick)
调整
combo count
additional value for the first and second attacks reduced. Overdrive Fatal Leg Twister (↓↘→ + Two Punches > Light Punch + Light Kick)
调整 Initial scaling changed from 20% to 30%.
Normal/Overdrive Cannon Strike (↓↙← + Kick/Two Kicks, during a forward jump)
调整 1. Hurtbox around feet from frames 1 - 10 expanded.
2. Hurtbox around feet from frames 11 until landing reduced.
2. Hurtbox around feet from frames 11 until landing reduced.
SA1 Spin Drive Smasher
修复问题 The 1st frame of the technique was completely invincible, and this has been changed to be only strike and throw invincible.
SA2 Killer Bee Spin/Aerial Killer Bee Spin
調整・不具合修正 1. Classic control input changed from ↓↙←↓↙←+K to ↓↙←↓↙←+P.
2. Damage when hitting an opponent on the ground changed from 2800 to 3000.
3. Fixed an issue where the Drive gauge would recover during the cutscene when used in a combo that utilized Drive Rush.
4. A hurtbox was added as the 1st frame of the technique was completely invincible.
Note: Cammy moves during the screen transition, so the property of avoiding attacks close to the ground has not changed.
2. Damage when hitting an opponent on the ground changed from 2800 to 3000.
3. Fixed an issue where the Drive gauge would recover during the cutscene when used in a combo that utilized Drive Rush.
4. A hurtbox was added as the 1st frame of the technique was completely invincible.
Note: Cammy moves during the screen transition, so the property of avoiding attacks close to the ground has not changed.
Assisted Combo 2
调整 Combo during Burnout has changed to the following.
Standing Medium Punch > Nightshade Pulse > Nightshade Chaser
Standing Medium Punch > Nightshade Pulse > Nightshade Chaser
Assisted Combo 3
调整 Combo has changed to the following.
- Basic
Standing Heavy Kick > Overdrive Serpent Lash > Standing Light Kick > Toxic Wreath > Claws of Ya Zi
- During Burnout
Standing Heavy Kick > Light Serpent Lash > Claws of Ya Zi
- Basic
Standing Heavy Kick > Overdrive Serpent Lash > Standing Light Kick > Toxic Wreath > Claws of Ya Zi
- During Burnout
Standing Heavy Kick > Light Serpent Lash > Claws of Ya Zi
Gluttony (Backwards Throw)
共通调整 Distance increased between characters when the opponent is thrown into the corner.
Standing Medium Punch
调整 Hurtbox around the arms during the active frames reduced.
Standing Heavy Punch
调整 1. Cancel window into Target Combo delayed by 1 frame.
2. Disadvantage on block changed from -5 to -4 frames.
3. Attack hitbox expanded downward.
2. Disadvantage on block changed from -5 to -4 frames.
3. Attack hitbox expanded downward.
Standing Light Kick
调整 1. Attack startup changed from 5 to 4 frames.
2. Recovery changed from 11 to 12 frames.
3. Advantage on hit changed from +4 to +3 frames.
4. Disadvantage on block changed from -2 to -3 frames.
2. Recovery changed from 11 to 12 frames.
3. Advantage on hit changed from +4 to +3 frames.
4. Disadvantage on block changed from -2 to -3 frames.
Standing Medium Kick
调整 1. Attack startup changed from 9 to 8 frames.
2. Overall technique length changed from 28 to 27 frames.
3. Pushback on hit reduced.
2. Overall technique length changed from 28 to 27 frames.
3. Pushback on hit reduced.
Standing Heavy Kick
调整 1. Hurtbox around the front of the feet during the 1st active frame reduced.
2. Made the hurtbox around the torso anti-air invincible from the 2nd active frame until the end of the active frames.
2. Made the hurtbox around the torso anti-air invincible from the 2nd active frame until the end of the active frames.
Crouching Medium Punch
调整 Recovery when the attack misses changed from 21 to 18 frames, and recovery on block and hit unified.
Crouching Medium Kick
调整 1. Advantage on hit changed from +4 to +5 frames.
2. Advantage on block changed from -3 to +1 frames.
2. Advantage on block changed from -3 to +1 frames.
Crouching Heavy Kick
调整 1. Active frames changed from 5 to 6 frames.
2. Recovery changed from 21 to 20 frames.
3. Hurtbox on the front of the feet reduced.
4. Movement distance back and forth during the technique increased.
Note: Position when the technique ends has not change.
5. Horizontal blowback on Punish Counter reduced.
2. Recovery changed from 21 to 20 frames.
3. Hurtbox on the front of the feet reduced.
4. Movement distance back and forth during the technique increased.
Note: Position when the technique ends has not change.
5. Horizontal blowback on Punish Counter reduced.
Jumping Heavy Kick
调整 1. Active frames changed from 5 to 8 frames.
2. Hurtbox added during recovery to match visual.
2. Hurtbox added during recovery to match visual.
Hun Dun (Light Punch > Light Punch)
调整 Advantage on hit changed from ±0 to +1 frames.
Light Serpent Lash (↓↘→ + Light Punch)
调整 1. Attack hitbox expanded forward.
2. The horizontal blowback on hit during Toxic Blossom is reduced.
3. Hit effect on Punish Counter changed to backwards crumple, regardless of whether the opponent is in a normal state or Toxic Blossom has been triggered.
Note: If Toxic Blossom is triggered, the window for a possible follow-up attack is longer.
2. The horizontal blowback on hit during Toxic Blossom is reduced.
3. Hit effect on Punish Counter changed to backwards crumple, regardless of whether the opponent is in a normal state or Toxic Blossom has been triggered.
Note: If Toxic Blossom is triggered, the window for a possible follow-up attack is longer.
Heavy Serpent Lash (↓↘→ + Heavy Punch)
调整 1. The timing for when the hurtbox around the head is reduced changed from the 6th frame to the 4th frame.
2. Input buffer now allowed starting from 10 frames before recovery ends.
2. Input buffer now allowed starting from 10 frames before recovery ends.
Overdrive Serpent Lash (↓↘→ + Two Punches)
修复问题 During a mid-air combo, the second attack would sometimes miss if the opposite was at a high enough elevation, so the attack hitbox for the second attack has been expanded upward.
Normal Nightshade Pulse (↓↙← + Light Punch)
调整 Can now be canceled into Overdrive Snake Step from the 36th frame of the technique until the end of the recovery frames.
Overdrive Nightshade Chaser (↓↙← + Two Punches > → + Punch)
调整 Hit effect when the opponent is not in the air changed from knockback to blowback knockdown.
Toxic Wreath (↓↙← + Heavy Punch)
调整 1. Damage distribution changed from 400+400 to 200+600.
2. Second attack's active frames changed from 7 to 9 frames.
2. Second attack's active frames changed from 7 to 9 frames.
Normal Cruel Fate (↓↙← + Kick)
调整 1. Can be canceled into Super Art level 3/Critical Art after landing on either hit or block.
2. Pushback on block of the heavy version increased.
2. Pushback on block of the heavy version increased.
Overdrive Cruel Fate (↓↙← + Two Kicks)
调整 1. Can be canceled into Super Art level 3/Critical Art after landing on either hit or block when the hit throw version is not triggered.
2. Second attack's hitbox expanded downward.
2. Second attack's hitbox expanded downward.
Venomous Fang (↓ + Two Punches > Punch)
调整 Projectile invincibility extended until the end of the attack's active frames.
Heel Strike (↓ + Two Punches > Kick)
调整 1. First attack's hitbox expanded forward.
2. Added an attack hitbox to the second attack that is only used when the opponent is in a combo, allowing players to string together combos more easily.
2. Added an attack hitbox to the second attack that is only used when the opponent is in a combo, allowing players to string together combos more easily.
Entrapment (↓ + Two Punches > Light Punch + Light Kick)
调整 Removed immediate scaling.
Light Snake Step (↓↘→ + Light Kick)
调整 Technique now moves backwards.
SA1 Deadly Implication
調整・不具合修正 1. Expanded attack hitbox.
2. The 1st frame of the technique was completely invincible, and this has been changed to be only strike and throw invincible.
3. Fixed an issue that caused attacks after the first attack hits to miss in certain situations.
2. The 1st frame of the technique was completely invincible, and this has been changed to be only strike and throw invincible.
3. Fixed an issue that caused attacks after the first attack hits to miss in certain situations.
SA2 Tainted Talons
调整 Changed final attack damage from 800 to 1000.
Modern Controls
调整 Changed the move performed with Jumping Light Attack from Jumping Light Kick to Jumping Light Punch.
Assisted Combo 2
调整 Combo changed to the following during Burnout.
Rising Kick > Heavy Arabian Cyclone > Rolling Assault
Rising Kick > Heavy Arabian Cyclone > Rolling Assault
Sunset Drop (Backwards Throw)
共通调整 1. Increased distance after hit.
2. Advantage after hit changed from +27 to +24 frames
2. Advantage after hit changed from +27 to +24 frames
Drive Impact
修复问题 Fixed an issue where the hurtbox before and after absorbing an attack with super armor was different.
Arabian Skyhigh Version Jumping Heavy Kick
修复问题 Fixed an issue where Rashid would be invincible after hitting a mid-air opponent with this attack.
Arabian Skyhigh Version Blitz Strike (↓ + Light Punch, during a jump)
调整 Reduced
combo count
's additional value. Run (→, hold →)
调整 Changed transition timing for Backup and Tempest Moon to be 2 frames faster.
Backup (→ + Punch, during Run)
调整 1. Will now hit mid-air opponents.
2. Second attack can be canceled into a Super Art.
3. Reduced
2. Second attack can be canceled into a Super Art.
3. Reduced
combo count
additional value. Tempest Moon (→ + Kick, during Run)
调整 Can now be canceled into a Super Art.
Rising Kick (Medium Punch > Heavy Kick)
共通调整 When using Classic controls, pressing Heavy Punch at the same time as the second input will cause the second attack to not come out.
Air Current Boosted Light Spinning Mixer (↓↘→ + Light Punch)
修复问题 Removed anti-air invincibility from frames 3 - 5 of the technique.
Normal/Air Current Boosted Light Eagle Spike (↓↙← + Light Kick)
调整 Attack can now be canceled into Super Art level 3 when landing back on the ground, but only on hit.
Wing Stroke (← + Kick, during Arabian Cyclone)
共通调整 While using Classic controls, attack will not be performed if Medium or Heavy Punch are pressed at the same time.
Rolling Assault and Nail Assault (→ + Kick, during Arabian Cyclone and Kick, during Rolling Assault)
共通调整 While using Classic controls, attack will not be performed if Medium or Heavy Punch are pressed at the same time.
SA1 Super Rashid Kick
修复问题 The 1st frame of the technique was completely invincible, and this has been changed to be only strike and throw invincible.
SA2 Ysaar
调整 After Ysaar is activated, Rashid will not gain any Super Art gauge until the active frames of the whirlwind are over.
Modern Controls
调整 While Lightning Beast is activated, when using the SP button for easy inputs to cancel from a normal move etc. to Rolling Attack/Vertical Rolling Attack, you can perform the attacks without having to charge back or down-back.
Assisted Combo 2
调整 Combo has changed to the following during Burnout.
Wild Edge > Crouching Medium Kick > Medium Rolling Attack
Wild Edge > Crouching Medium Kick > Medium Rolling Attack
Assisted Combo 3
调整 Combo has changed to the following.
Standing Heavy Punch > Coward Crouch > Wild Lift > Medium Rolling Attack > Grand Shave Cannonball
Standing Heavy Punch > Coward Crouch > Wild Lift > Medium Rolling Attack > Grand Shave Cannonball
Jungle Flip (Backwards Throw)
共通调整 Distance increased between opponents when Blanka's back is to the corner.
Drive Reversal
调整 Blanka is considered to be in a standing state during the length of the technique.
Standing Medium Punch
调整 Hurtbox around the arms from frames 10 - 12 reduced.
Crouching Light Punch
调整 Advantage on hit changed from +4 to +5 frames.
Crouching Medium Punch
调整 Expanded the hurtbox from frames 19 - 28 forward.
Crouching Medium Kick
调整 1. 2 frames of recovery added on block or when the attack misses.
Note: Advantage on block will not change.
2. Hurtbox around the body from frames 13 - 28 expanded only when the attack misses.
Note: Advantage on block will not change.
2. Hurtbox around the body from frames 13 - 28 expanded only when the attack misses.
Rock Crusher (→ + Medium Punch)
调整 Disadvantage on block changed from -2 to -3 frames.
Coward Crouch (↓ + Two Punches)
调整 Input period for transition attacks changed from the starting on the 1st frame to starting on the 6th frame.
Wild Lift (↓ + Two Punches > Punch)
调整 Attack hitbox expanded forward.
Medium Rolling Attack (Charge ←, → + Medium Punch)
调整 Attack hitbox added only when the opponent is in a combo, allowing Blanka to string combos together more easily.
Overdrive Rolling Attack (Charge ←, → + Two Punches)
调整 1. Hitbox for when Blanka is considered to be on the ground when the attack is blocked has been made 4 frames faster.
2. Hurtbox for when Blanka is considered on the ground is now a standing hurtbox.
2. Hurtbox for when Blanka is considered on the ground is now a standing hurtbox.
Overdrive Backstep Rolling Attack (→↘↓↙← + Two Kicks)
调整 First attack's hitbox expanded forward.
Overdrive Aerial Rolling Attack (Charge ←, → + Two Punches, during a jump)
调整 1. Landing recovery increased by 5 frames.
2. The upper part of the hitbox will no longer hit the back of enemies.
2. The upper part of the hitbox will no longer hit the back of enemies.
Blanka-chan Bomb (↓↓ + Punch)
调整 1. Added 20% of initial scaling.
2. Changed combo scaling from 10% to 20%.
2. Changed combo scaling from 10% to 20%.
SA1 Normal/Lightning Beast Shout of Earth
修复问题 The 1st frame of the technique was completely invincible, and this has been changed to be only strike and throw invincible.
Assisted Combo 2
调整 Combo has changed to the following when the Super Arts gauge has less than 1 bar full.
Double Shot > Heavy Somersault Kick
Double Shot > Heavy Somersault Kick
Assisted Combo 3
调整 Combo has changed to the following during Burnout.
Recoil Cannon > Heavy Sonic Boom > Crossfire Somersault
Recoil Cannon > Heavy Sonic Boom > Crossfire Somersault
Judo Throw (Backwards Throw)
共通调整 Distance increased between opponents when Guile's back is to the corner when this throw hits.
Standing Heavy Punch
调整 Initial scaling of 20% added.
Crouching Medium Punch
调整 1. Recovery changed from 13 to 16 frames only when the attack misses.
2. Hurtbox from frames 20 - 24 expanded forward only when the attack misses.
2. Hurtbox from frames 20 - 24 expanded forward only when the attack misses.
Jumping Medium Kick
调整 Damage changed from 500 to 600.
Reverse Spin Kick (→ + Heavy Kick)
调整 Hit effect during a mid-air counter hit changed from mid-air recovery to blowback knockdown.
Recoil Cannon (Medium Punch > ← + Heavy Punch)
共通调整 While using Classic controls, the second attack will not be performed if Heavy Kick is pressed at the same time as the second input.
Double Shot (↓ + Medium Punch > ↓ + Medium Punch)
调整 Horizontal blowback on hit reduced.
共通调整 While using Classic controls, the second attack will not be performed if Medium Kick is pressed at the same time as the second input.
Phantom Cutter (↓ + Heavy Kick > ↘ + Heavy Kick)
调整 Blowback distance on Punish Counter changed to match the distance on normal hit.
Normal Sonic Boom (Charge ←, → + Punch)
调整 1. Drive gauge reduction on block changed to the following.
Medium version: From -2500 to -4000
Heavy version: From -2500 to -3000
2. Hurtbox around the arms now comes out on the 8th frame.
3. Hurtbox around the arms from frames 8 - 39 expanded upward.
Medium version: From -2500 to -4000
Heavy version: From -2500 to -3000
2. Hurtbox around the arms now comes out on the 8th frame.
3. Hurtbox around the arms from frames 8 - 39 expanded upward.
Overdrive Sonic Boom (Charge ←, → + Two Punches)
调整 Initial scaling of 20% added.
Overdrive Sonic Blade Version Overdrive Sonic Boom (↓↙← + Two Punches > → + Two Punches)
调整 Drive gauge consumption when performing the move changed from 20000 to 10000.
Overdrive Sonic Blade (↓↙← + Two Punches)
调整 1. Horizontal blowback on hit reduced.
2. Blowback time on hit increased.
2. Blowback time on hit increased.
Normal Sonic Cross (↓↙← + Punch > → + Punch)
调整 1. Drive gauge reduction on block change and redistributed to the following.
Light version: From 2500+1000=3500 to 1500+2000=3500
Medium version: From 2500+1000=3500 to 3000+2000=5000
Heavy version: From 2500+1000=3500 to 2000+2000=4000
2. Hurtbox around the arms now comes out on the 8th frame instead of the 9th frame.
3. Hurtbox around the arms from frames 8 - 39 expanded upward.
Light version: From 2500+1000=3500 to 1500+2000=3500
Medium version: From 2500+1000=3500 to 3000+2000=5000
Heavy version: From 2500+1000=3500 to 2000+2000=4000
2. Hurtbox around the arms now comes out on the 8th frame instead of the 9th frame.
3. Hurtbox around the arms from frames 8 - 39 expanded upward.
共通调整 While using Classic controls, attack will not be performed if Medium or Heavy Kick are pressed at the same time as a Punch of the same strength for either inputs.
Overdrive Sonic Cross (↓↙← + Two Punches > → + Punch)
调整 1. Wallsplat time after attack hits increased by 3 frames.
2. Fixed an issue where when Overdrive Sonic Blade hit in the corner of the stage, the transition Sonic Boom would not change to Sonic Cross.
2. Fixed an issue where when Overdrive Sonic Blade hit in the corner of the stage, the transition Sonic Boom would not change to Sonic Cross.
共通调整 While using Classic controls, the attack will not be performed if Medium or Heavy Kick are pressed at the same time as a Punch of the same strength for the second input.
Sonic Break (Variation) (Punch, during Solid Puncher) (Punch, during Sonic Boom or Sonic Break)
共通调整 While using Classic controls, attack will not be performed if Medium or Heavy Kick are pressed at the same time as a Punch of the same strength.
SA1 Sonic Hurricane (Up)
修复问题 The 1st frame of the technique was completely invincible, and this has been changed to be only strike and throw invincible.
SA1 Sonic Hurricane (Side)
調整・不具合修正 1. The attack hitbox from active frames 1 - 3 except for the base hitbox portion is now an attack hitbox that is only used when the opponent is in a combo.
2. The 1st frame of the technique was completely invincible, and this has been changed to be only strike and throw invincible.
2. The 1st frame of the technique was completely invincible, and this has been changed to be only strike and throw invincible.
Assisted Combo 2
调整 Combo has changed to the following when the Super Art gauge is less than 2 bars.
Chin Buster > Quick Dash > Quick Dash Dragonlash Kick > Heavy Shoryuken
Chin Buster > Quick Dash > Quick Dash Dragonlash Kick > Heavy Shoryuken
Assisted Combo 3
调整 Combo has changed to the following during Burnout.
Standing Heavy Punch > Medium Jinrai Kick > Kazekama Shin Kick > Shinryu Reppa
Standing Heavy Punch > Medium Jinrai Kick > Kazekama Shin Kick > Shinryu Reppa
Hell Wheel(Backwards Throw)
共通调整 Distance increased between characters when the opponent is thrown into the corner.
Standing Light Kick
修复问题 Fixed the proximity block trigger as it had a wider width than the attack hitbox. It has been changed to match the width of the attack hitbox.
Crouching Medium Kick
调整 Attack hitbox has been expanded slightly upward so that it can hit opponents in a mid-air spinning juggle state.
Neutral Jumping Heavy Kick
调整 Attack active frames changed from 4 to 6 frames.
Quick Dash (Two Kicks)
调整 Given higher priority over Overdrive techniques when the command is input from a neutral state.
Chin Buster (Medium Punch > Heavy Punch)
调整 Cancel timing from standing Medium Punch changed from frames 9 - 13 to frame 9 only.
共通调整 While using Classic controls, the second attack will not be performed if Heavy Kick is pressed at the same time as the second input.
Normal/Overdrive Hadoken (↓↘→ + Punch/Two Punches)
调整 Hurtbox around the arm after the attack is performed has been reduced.
Overdrive Hadoken (↓↘→ + Two Punches)
调整 Initial scaling of 20% added.
Quick Dash Shoryuken (→↓↘ + Punch)
调整 1. Attack startup changed from 9 to 8 frames.
2. 3 frames added to knockdown time on hit.
3. Upward blowback reduced for when the second attack hits.
4. Horizontal blowback reduced for when the fourth and fifth attacks hit.
2. 3 frames added to knockdown time on hit.
3. Upward blowback reduced for when the second attack hits.
4. Horizontal blowback reduced for when the fourth and fifth attacks hit.
Overdrive Tatsumaki Senpu-kyaku (↓↙← + Two Kicks)
调整 1. Final attack damage changed from 600 to 800.
2.
2.
combo count
upper limit increased. Overdrive/Quick Dash Dragonlash Kick (→↓↘ + Two Kicks/Kick)
调整 Input buffer time changed from 5 to 10 frames.
Heavy Jinrai Kick (↓↘→ + Heavy Kick)
调整 1. Hurtbox around the front body from frames 11 - 27 reduced.
2. Attack hitbox expanded forward.
3. Horizontal blowback reduced on hit.
4. Drive gauge reduction on block changed from -3000 to -4000.
5. Proximity block trigger startup changed from frame 18 to frame 13.
2. Attack hitbox expanded forward.
3. Horizontal blowback reduced on hit.
4. Drive gauge reduction on block changed from -3000 to -4000.
5. Proximity block trigger startup changed from frame 18 to frame 13.
Normal Gorai Axe Kick (↓↘→ + Kick > → + Medium Kick)
调整 Hit effect on a mid-air opponent changed from knockdown slam to ground bound, and frame advantage on hit has been increased.
Normal/Overdrive Gorai Axe Kick (↓↘→ + Kick/Two Kicks > → + Medium Kick)
共通调整 While using Classic controls, attack will not be performed if Medium Punch is pressed at the same time as the second input.
Normal/Overdrive Senka Snap Kick (↓↘→ + Kick/Two Kicks > → + Heavy Kick)
调整 Forward movement distance before attack startup increased.
共通调整 While using Classic controls, attack will not be performed if Heavy Punch is pressed at the same time as the second input.
Kasai Thrust Kick (↓↘→ + Two Kicks > → + Kick > → + Kick)
共通调整 While using Classic controls, attack will not be performed if Medium or Heavy Punch are pressed at the same time as a Kick of the same strength for the second or third inputs.
SA1 Dragonlash Flame
修复问题 The 1st frame of the technique was completely invincible, and this has been changed to be only strike and throw invincible.
SA2 Shippu Jinrai-kyaku
調整・不具合修正 1. Damage on final hit changed from 500 to 600.
2. Complete invincibility on frame 1 has been removed.
2. Complete invincibility on frame 1 has been removed.
Backwards Walk
调整 Movement speed has been reduced.
Assisted Combo 2
調整・不具合修正 1. Fixed an issue where after the jump cancel, the Assisted Combo would end before Chun-Li lands.
2. Combo has been changed to the following.
- Super Art gauge has less than 1 bar
Crouching Medium Punch > Overdrive Lightning Kicks > Lightning Kick Barrage
- During Burnout
Crouching Medium Punch > Medium Lightning Kicks
2. Combo has been changed to the following.
- Super Art gauge has less than 1 bar
Crouching Medium Punch > Overdrive Lightning Kicks > Lightning Kick Barrage
- During Burnout
Crouching Medium Punch > Medium Lightning Kicks
Assisted Combo 3
调整 Combo has been changed to the following.
- Basic
Crouching Heavy Punch > Serenity Stream > Forward Strike > Overdrive Spinning Bird Kick > Medium Lightning Kicks > Soten Ranka
- During Burnout
Crouching Heavy Punch > Serenity Stream > Forward Strike > Medium Spinning Bird Kick
- Basic
Crouching Heavy Punch > Serenity Stream > Forward Strike > Overdrive Spinning Bird Kick > Medium Lightning Kicks > Soten Ranka
- During Burnout
Crouching Heavy Punch > Serenity Stream > Forward Strike > Medium Spinning Bird Kick
Taiji Fan (Backwards Throw)
共通调整 Increased distance after hit.
Standing Light Punch
调整 Hurtbox around the feet from frames 9 - 13 expanded.
Standing Heavy Punch
调整 1. Hurtbox around the feet and head from frames 5 - 12 reduced.
2. Hurtbox around the arms during the attack's active frames reduced.
3. Disadvantage on block changed from -4 to -3 frames.
4. Pushback on block increased.
2. Hurtbox around the arms during the attack's active frames reduced.
3. Disadvantage on block changed from -4 to -3 frames.
4. Pushback on block increased.
Standing Heavy Kick
调整 Initial scaling of 20% added.
Crouching Medium Kick
调整 Hurtbox from frames 14 - 28 expanded forward when the attack misses.
Jumping Light Punch and Jumping Light Kick
调整 Increased blowback time when hitting an opponent in mid-air.
Swift Thrust (← or → + Medium Punch)
调整 1. Special move cancel timing changed from frames 7 - 11 to frames 7 - 9.
2. Drive Rush cancel timing changed from frame 11 to frame 9.
3. Pushback on hit reduced.
2. Drive Rush cancel timing changed from frame 11 to frame 9.
3. Pushback on hit reduced.
Lotus Fist (↓↙← + Punch > Heavy Punch)
调整 Changed opponent's reaction when the second attack hits or is blocked.
Yoso Kick (1) (↓ + Medium Kick, during a jump)
调整 Pushback on hit on Punish Counter increased.
Yoso Kick (1 - 3) (↓ + Medium Kick, during a jump)
修复问题 Fixed an issue where jumping attacks could not be performed after being Drive Parried and then jumping backwards.
Overdrive Kikoken (Charge ←, → + Two Punches)
调整 Initial scaling of 20% added.
Normal/Overdrive Hazanshu (↓↙← + Kick/Two Kicks)
调整 Changed projectile invincibility timing from the 6th frame to the 7th frame.
Normal Aerial Hundred Lightning Kicks (↓↘→ + Kick, during a neutral or forward jump)
调整 1. Increased landing recovery by 3 frames when the attack misses.
2. Expanded hurtbox downward.
Note: Expanded portion of the hurtbox is projectile invincible.
2. Expanded hurtbox downward.
Note: Expanded portion of the hurtbox is projectile invincible.
Light Aerial Hundred Lightning Kicks (↓↘→ + Kick, during a neutral or forward jump)
调整 Expanded the collision pushbox downward on hit so that the characters will not switch sides when the opponent is walking forward and gets hit.
Overdrive Aerial Hundred Lightning Kicks (↓↘→ + Two Kicks, during a neutral or forward jump)
调整 1. Damage changed from 200x5+300 (1300) to 250x5+350 (1600).
2. Reduced landing recovery by 10 frames.
3. Increased knockdown time on hit by 7 frames.
4. Reduced blowback time on hit.
5. Reduced horizontal blowback on hit.
6. Expanded hurtbox downward.
Note: Expanded portion of the hurtbox is projectile invincible.
2. Reduced landing recovery by 10 frames.
3. Increased knockdown time on hit by 7 frames.
4. Reduced blowback time on hit.
5. Reduced horizontal blowback on hit.
6. Expanded hurtbox downward.
Note: Expanded portion of the hurtbox is projectile invincible.
SA1 Aerial Kikosho
调整 Final attack damage changed from 600 to 800.
SA1 Kikosho/Aerial Kikosho
修复问题 The 1st frame of the technique was completely invincible, and this has been changed to be only strike and throw invincible.
SA2 Hoyoku-sen
调整 Changed Super Art gauge increase for Chun-Li from 100% to 70% for follow-up combos after this hits, until the combo ends.
Edmond Honda
Assisted Combo 2
調整・不具合修正 1. Fixed an issue where the second attack of Overdrive Teppo Triple Slap would cancel into Super Art 2 Ultimate Killer Head Ram.
2. Combo has now changed to the following during Burnout.
Crouching Medium Punch > Light Hundred Hand Slap
2. Combo has now changed to the following during Burnout.
Crouching Medium Punch > Light Hundred Hand Slap
Assisted Combo 3
调整 Combo has now changed to the following during Burnout.
Standing Heavy Kick > Heavy Hundred Hand Slap > The Final Bout
Standing Heavy Kick > Heavy Hundred Hand Slap > The Final Bout
Tawara Throw (Backwards Throw)
共通调整 Distance increased between characters when the opponent is thrown into the corner.
Standing Medium Punch
调整 1. Advantage on hit changed from +4 to +6 frames.
2. Increased distance traveled forward before attack starts up.
2. Increased distance traveled forward before attack starts up.
Standing Medium Kick
调整 Reduced the hurtbox around the feet from frame 7.
Standing Heavy Punch
调整 Increased knockdown time on Punish Counter by 12 frames.
Crouching Medium Kick
调整 Advantage on hit changed from +5 to +6 frames.
Crouching Heavy Kick
调整 Blowback time increased when the back hitbox on the 2nd hit connects with a mid-air opponent, and reduced horizontal blowback.
Jumping Medium Punch
调整 Hit effect when hitting a mid-air opponent changed from mid-air recovery to blowback knockdown.
Double Slaps (Light Punch > Medium Punch)
共通调整 When using Classic controls, pressing Medium Kick at the same time as the second input will cause the second attack to not come out.
Toko Shizume (Medium Punch > ↘ + Heavy Kick)
调整 1. Can be canceled into Sumo Spirit on hit.
Note: The cancel command for this is ↓ + Heavy Kick for Classic controls, and ↓ + Medium Attack for Modern controls.
2. Special move cancel timing before the attack starts up changed from the 15th frame to the 14th frame.
Note: The cancel command for this is ↓ + Heavy Kick for Classic controls, and ↓ + Medium Attack for Modern controls.
2. Special move cancel timing before the attack starts up changed from the 15th frame to the 14th frame.
共通调整 When using Classic controls, pressing Heavy Punch at the same time as the second input will cause the second attack to not come out.
Normal/Sumo Spirit Hundred Hand Slap (↓↙← + Punch)
调整 Attack hitbox on the second attack and after expanded forward.
Sumo Spirit Hundred Hand Slap (↓↙← + Punch)
调整 Can now be canceled into from crouching Light Kick, standing Medium Kick, and crouching Medium Kick.
Sumo Spirit Medium/Heavy Hundred Hand Slap (↓↙← + Medium/Heavy Punch)
调整 1. Pushback on hit reduced when the final attack hits a standing opponent.
2. Horizontal blowback reduced when the final attack hits a mid-air opponent.
2. Horizontal blowback reduced when the final attack hits a mid-air opponent.
Light/Medium Sumo Headbutt (Charge ←, → + Light/Medium Punch)
调整 1. Damage during active frames 1 - 4 changed from 1300 to 1400.
2. Disadvantage on block changed from -4 to -3.
3. Pushback on block reduced.
4. Pushback on block during Burnout increased.
5. Added an attack hitbox to the 4th active frame that is only used when the opponent is in a combo, allowing players to string together combos more easily.
6. Forward distance moved after block increased.
2. Disadvantage on block changed from -4 to -3.
3. Pushback on block reduced.
4. Pushback on block during Burnout increased.
5. Added an attack hitbox to the 4th active frame that is only used when the opponent is in a combo, allowing players to string together combos more easily.
6. Forward distance moved after block increased.
Heavy Sumo Headbutt (Charge ←, → + Heavy Punch)
调整 1. Damage during active frames 1-4 changed from 1400 to 1500.
2. Disadvantage on block changed from -4 to -3.
3. Pushback on block reduced.
Note: Pushback on block during Burnout has not changed.
4. Forward distance moved after block increased.
5. Distance moved forward when switching sides with opponent is reduced.
2. Disadvantage on block changed from -4 to -3.
3. Pushback on block reduced.
Note: Pushback on block during Burnout has not changed.
4. Forward distance moved after block increased.
5. Distance moved forward when switching sides with opponent is reduced.
Normal Sumo Smash (Charge ↓, ↑ + Kick)
调整 1. No longer possible to recover backwards from the second attack after hit.
2. Pushback on block for the second attack increased.
3. Drive gauge reduction on for the second attack on block changed from -8000 to -10000.
2. Pushback on block for the second attack increased.
3. Drive gauge reduction on for the second attack on block changed from -8000 to -10000.
Overdrive Sumo Smash (Charge ↓, ↑ + Two Kicks)
调整 1. No longer possible to recover backwards from the second attack after hit.
2. Holding down the Kick button (or Attack in Modern) will affect when the 2nd attack comes out.
3. The attack hitbox for the second attack that is only used when an opponent is in a combo has expanded upwards.
4. Advantage on block for the second attack changed from +1 to +2 frames.
2. Holding down the Kick button (or Attack in Modern) will affect when the 2nd attack comes out.
3. The attack hitbox for the second attack that is only used when an opponent is in a combo has expanded upwards.
4. Advantage on block for the second attack changed from +1 to +2 frames.
Normal/Overdrive Teppo Triple Slap (↓↘→ + Kick/Two Kicks > Punch)
共通调整 While using Classic controls, the second attack will not be performed if Medium or Heavy Kick are pressed at the same time as the second input.
Overdrive Teppo Triple Slap (↓↘→ + Two Kicks > Punch)
调整 1. Hit effect for the second attack when it hits a standing opponent changed from a blowback knockdown to knockback.
2. Timing when transitioning to the final attack is now 1 frame faster.
Note: This adjustment has been made due to the changes to the second attack on hit.
3. Input buffer time changed from 5 to 10 frames.
2. Timing when transitioning to the final attack is now 1 frame faster.
Note: This adjustment has been made due to the changes to the second attack on hit.
3. Input buffer time changed from 5 to 10 frames.
Normal/Overdrive Taiho Cannon Lift (↓↘→ + Kick/Two Kicks > ↓ + Punch)
共通调整 While using Classic controls, the second attack will not be performed if Medium or Heavy Kick are pressed at the same time as the second input.
Normal/Overdrive Oicho Throw (→↘↓↙← + Kick/Two Kicks)
调整 Hurtbox on the head from frames 9 - 46 expanded.
Neko Damashi (↓↓ + Punch)
修复问题 Added 8 fixed frames of hitstop when clashing with a projectile.
SA1 Show of Force
調整・不具合修正 1. Attack hitbox expanded downwards.
2. The 1st frame of the technique was completely invincible, and this has been changed to be only strike and throw invincible.
2. The 1st frame of the technique was completely invincible, and this has been changed to be only strike and throw invincible.
SA2 Ultimate Killer Head Ram
修复问题 Fixed an issue where the Drive gauge would recover during the cutscene when used in a combo that utilized Drive Rush.
SA3/CA The Final Bout
调整 Adjusted damage distribution during the cinematic version, and also adjusted minimum damage so that it will not go below 50% when used in a combo.
Modern Controls
调整 Changed the attacks performed to the following.
Standing Light Attack: From Standing Light Punch to Standing Light Kick
Crouching Light Attack: From Crouching Light Kick to Crouching Light Punch
→+Heavy Attack: From Headbutt to Cyclone Wheel Kick
Standing Light Attack: From Standing Light Punch to Standing Light Kick
Crouching Light Attack: From Crouching Light Kick to Crouching Light Punch
→+Heavy Attack: From Headbutt to Cyclone Wheel Kick
Assisted Combo 1
调整 1. Pressing AUTO+Light attack will now perform Crouching Light Kick instead of Standing Light Kick.
2. To go along with the above change, combo has now changed to the following.
- Basic
Standing Light Kick > Double Lariat > Crouching Light Kick > Standing Light Punch > Overdrive Double Lariat
- During Burnout
Crouching Light Kick > Standing Light Punch > Double Lariat
2. To go along with the above change, combo has now changed to the following.
- Basic
Standing Light Kick > Double Lariat > Crouching Light Kick > Standing Light Punch > Overdrive Double Lariat
- During Burnout
Crouching Light Kick > Standing Light Punch > Double Lariat
Assisted Combo 2
调整 Combo has changed to the following.
- Basic
Crouching Medium Punch > Overdrive Double Lariat > Cyclone Lariat
- During Burnout
Crouching Medium Punch > Double Lariat
- Basic
Crouching Medium Punch > Overdrive Double Lariat > Cyclone Lariat
- During Burnout
Crouching Medium Punch > Double Lariat
Assisted Combo 3
调整 Combo has changed to the following.
- Basic
Headbutt > Overdrive Double Lariat > Bolshoi Storm Buster
- During Burnout
Headbutt > Double Lariat
- Basic
Headbutt > Overdrive Double Lariat > Bolshoi Storm Buster
- During Burnout
Headbutt > Double Lariat
Capture Suplex (Backwards Throw)
共通调整 Increased distance after hit.
Standing Light Kick
调整 Pushback on hit reduced.
Standing Medium Punch
调整 1. Pushback on hit reduced.
2. Super Art gauge increase changed from 500 to 700.
2. Super Art gauge increase changed from 500 to 700.
Standing Medium Kick
调整 1. Damage changed from 800 to 900.
2. Attack hitbox expanded forward.
3. Super Art gauge increase changed from 700 to 900.
4. Drive gauge increase changed from 2500 to 3000.
5. Drive gauge reduction on block changed from 5000 to 6000.
6. Drive gauge reduction on Punish Counter changed from 6000 to 8000.
2. Attack hitbox expanded forward.
3. Super Art gauge increase changed from 700 to 900.
4. Drive gauge increase changed from 2500 to 3000.
5. Drive gauge reduction on block changed from 5000 to 6000.
6. Drive gauge reduction on Punish Counter changed from 6000 to 8000.
Charged Standing Heavy Punch
调整 1. Damage changed from 1000 to 1400.
2. Drive gauge increase changed from 5000 to 6000
3. Drive gauge reduction on block changed from 8000 to 10000.
4. Drive gauge reduction on Punish Counter changed from 12000 to 13000.
5. Super armor hitbox during the active frames of the attack expanded up to the hurtbox on the arms.
6. Camera shake effect added on Punish Counter.
2. Drive gauge increase changed from 5000 to 6000
3. Drive gauge reduction on block changed from 8000 to 10000.
4. Drive gauge reduction on Punish Counter changed from 12000 to 13000.
5. Super armor hitbox during the active frames of the attack expanded up to the hurtbox on the arms.
6. Camera shake effect added on Punish Counter.
Standing Heavy Kick
调整 Camera shake effect added on Punish Counter.
Crouching Medium Punch
调整 1. Pushback on hit reduced.
2. Super Art gauge increase changed from 500 to 800.
3. Drive gauge increase changed from 2500 to 3000.
4. Drive gauge reduction on block changed from 5000 to 6000.
5. Drive gauge reduction on Punish Counter changed from 6000 to 8000.
2. Super Art gauge increase changed from 500 to 800.
3. Drive gauge increase changed from 2500 to 3000.
4. Drive gauge reduction on block changed from 5000 to 6000.
5. Drive gauge reduction on Punish Counter changed from 6000 to 8000.
Crouching Medium Kick
调整 1. Advantage on hit changed from +2 to +3 frames.
2. Pushback on hit reduced.
3. Super Art gauge increase changed from 600 to 700.
4. Drive gauge reduction on Punish Counter changed from 6000 to 8000.
2. Pushback on hit reduced.
3. Super Art gauge increase changed from 600 to 700.
4. Drive gauge reduction on Punish Counter changed from 6000 to 8000.
Crouching Heavy Punch
调整 1. Hit effect on Punish Counter is now a ground bound.
2. Attack startup changed from 12 to 11 frames.
3. Active frames changed from 8 to 9 frames.
4. Disadvantage on block changed from -19 to -20 frames.
5. Increased distance moved forward during technique.
6. Increased blowback time when hitting with the base of the attack.
7. Buffered inputs are now allowed 10 frames before the attack recovers.
2. Attack startup changed from 12 to 11 frames.
3. Active frames changed from 8 to 9 frames.
4. Disadvantage on block changed from -19 to -20 frames.
5. Increased distance moved forward during technique.
6. Increased blowback time when hitting with the base of the attack.
7. Buffered inputs are now allowed 10 frames before the attack recovers.
Crouching Heavy Kick
调整 1. Hurtbox around the foot before the attack startup (11th frame) removed.
2. Forward hurtbox during active frames reduced.
2. Forward hurtbox during active frames reduced.
Charged Jumping Heavy Kick
修复问题 Fixed an issue where the combo hit display would not count correctly.
Hellstab (↘ + Medium Punch)
调整 1. Super Art gauge increase changed from 600 to 700.
2. Drive gauge increase changed from 2500 to 3000.
2. Drive gauge increase changed from 2500 to 3000.
Headbutt (→ + Heavy Punch)
调整 1. Damage changed from 900 to 1000.
2. Advantage on hit changed from +6 to +7 frames.
3. Super Art gauge increase changed from 500 to 1000.
4. Drive gauge increase changed from 3500 to 4000.
5. Drive gauge reduction on block changed from 6000 to 8000.
6. Drive gauge reduction on Punish Counter changed from 8000 to 11000.
2. Advantage on hit changed from +6 to +7 frames.
3. Super Art gauge increase changed from 500 to 1000.
4. Drive gauge increase changed from 3500 to 4000.
5. Drive gauge reduction on block changed from 6000 to 8000.
6. Drive gauge reduction on Punish Counter changed from 8000 to 11000.
Knee Hammer (→ + Medium Kick)
调整 1. Damage changed from 600 to 700.
2. Recovery changed from 14 to 13 frames.
3. Advantage on hit changed from ±0 to +1 frames.
4. Disadvantage on block changed from -4 to -3 frames.
5. Pushback on hit reduced.
6. Super Art gauge increase changed from 700 to 800.
7. Drive gauge increase changed from 2500 to 3000.
8. Drive gauge reduction on block changed from 5000 to 6000.
2. Recovery changed from 14 to 13 frames.
3. Advantage on hit changed from ±0 to +1 frames.
4. Disadvantage on block changed from -4 to -3 frames.
5. Pushback on hit reduced.
6. Super Art gauge increase changed from 700 to 800.
7. Drive gauge increase changed from 2500 to 3000.
8. Drive gauge reduction on block changed from 5000 to 6000.
Cyclone Wheel Kick (→ + Heavy Kick)
调整 1. Disadvantage on block changed from -12 to -9 frames.
2. Added a new attack hitbox that is only applied when an opponent is in a combo during active frames 3-4, making it easier to hit opponents below than Zangief.
3. Hurtbox around the feet during recovery expanded forward.
4. Pushback on block increased.
5. Super Art gauge increase changed from 1000 to 1200.
6. Drive gauge increase change from 3500 to 4500.
7. Drive gauge decrease on block changed from 4000 to 6000.
8. Now moves back during recovery.
2. Added a new attack hitbox that is only applied when an opponent is in a combo during active frames 3-4, making it easier to hit opponents below than Zangief.
3. Hurtbox around the feet during recovery expanded forward.
4. Pushback on block increased.
5. Super Art gauge increase changed from 1000 to 1200.
6. Drive gauge increase change from 3500 to 4500.
7. Drive gauge decrease on block changed from 4000 to 6000.
8. Now moves back during recovery.
Smetana Dropkick (↘ + Heavy Kick)
调整 1. Super Art gauge increase changed from 1000 to 1200.
2. Drive gauge increase changed from 2000 to 4000.
3. Drive gauge decrease on block changed from 6000 to 8000.
4. Drive gauge decrease on Punish Counter changed from 10000 to 11000.
5. Camera shake effect added on Punish Counter.
2. Drive gauge increase changed from 2000 to 4000.
3. Drive gauge decrease on block changed from 6000 to 8000.
4. Drive gauge decrease on Punish Counter changed from 10000 to 11000.
5. Camera shake effect added on Punish Counter.
Flying Headbutt (↑ + Heavy Punch, during a neutral jump)
调整 1. Damage changed from 800 to 900.
2. Super Art gauge increase changed from 1000 to 1200.
3. Drive gauge increase changed from 2000 to 3000.
2. Super Art gauge increase changed from 1000 to 1200.
3. Drive gauge increase changed from 2000 to 3000.
Machine Gun Chops (Medium Punch > Medium Punch > Medium Punch)
调整 1. First attack pushback on hit reduced.
2. First attack hitbox expanded forward.
2. First attack hitbox expanded forward.
Power Stomps (↓↓ + Medium Kick > Medium Kick > Medium Kick)
调整 Second attack can be canceled into a special move.
共通调整 While using Classic controls, the final attack will not be performed if Medium Punch is pressed at the same time as the last input.
Normal Double Lariat (Two Punches)
调整 1. Damage changed from 1200 to 1400.
2. Super Art gauge increase changed from 1150 to 1600.
3. Drive gauge increase changed from 2000 to 4000.
4. Final attack's
5. Final attack's
2. Super Art gauge increase changed from 1150 to 1600.
3. Drive gauge increase changed from 2000 to 4000.
4. Final attack's
combo count
initial value decreased.5. Final attack's
combo count
additional value decreased. Overdrive Double Lariat (Three Punches)
调整 1. First attack's damage changed from 500 to 700.
2. Super Art gauge increase changed from 1150 to 1600.
3. Input buffer time changed from 5 to 8 frames.
2. Super Art gauge increase changed from 1150 to 1600.
3. Input buffer time changed from 5 to 8 frames.
Normal Screw Piledriver (360 + Punch)
调整 1. Super Art gauge increase changed from 3300 to 4000.
2. Drive gauge increase changed from 5000 to 7000.
2. Drive gauge increase changed from 5000 to 7000.
Overdrive Screw Piledriver (360 + Two Punches)
调整 Super Art gauge increase changed from 3300 to 4000.
Normal Borscht Dynamite (360 + Kick, during a jump)
调整 1. Opponents who are defenseless in the air can now be grabbed.
Note: Follow-up attack limitation is much stricter than for the Overdrive version.
2. Combo scaling of 20% added.
3. When used during a combo, the attack hitbox has been expanded to be the same size as the Overdrive version.
4. Super Art gauge increase changed from 3300 to 4000.
Note: Follow-up attack limitation is much stricter than for the Overdrive version.
2. Combo scaling of 20% added.
3. When used during a combo, the attack hitbox has been expanded to be the same size as the Overdrive version.
4. Super Art gauge increase changed from 3300 to 4000.
Overdrive Borscht Dynamite (360 + Two Kicks, during a jump)
调整 Super Art gauge increase changed from 3300 to 4000.
Normal Russian Suplex (→↘↓↙← + Kick)
调整 1. Super Art gauge increase changed from 3300 to 5000.
2. Drive gauge increase changed from 5000 to 7000.
2. Drive gauge increase changed from 5000 to 7000.
Overdrive Russian Suplex (→↘↓↙← + Two Kicks)
调整 Super Art gauge increase changed from 5000 to 6500.
Normal/Overdrive Siberian Express (→↘↓↙← + Kick/Two Kicks)
调整 Super Art gauge increase changed from 3300 to 4000.
Overdrive Siberian Express (→↘↓↙← + Two Kicks)
调整 Forward movement speed increased when absorbing an attack with the far range version of this attack.
Tundra Storm (↓↓ + Heavy Kick)
调整 1. Counter hitbox expanded inwards.
2. After a successful counter, the active frames of the hitbox that grabs the opponent is changed from 2 to 3 frames.
3. Adjusted so that this does not work against attacks from behind.
2. After a successful counter, the active frames of the hitbox that grabs the opponent is changed from 2 to 3 frames.
3. Adjusted so that this does not work against attacks from behind.
Assisted Combo 1
调整 Combo has changed to the following.
Standing Light Punch > Standing Light Punch > Medium Psycho Blitz
Standing Light Punch > Standing Light Punch > Medium Psycho Blitz
Assisted Combo 2
调整 Combo has changed to the following.
- Super Art gauge has 1 stock
Body Blow Combination > Overdrive Psycho Flicker > Heavy Psycho Uppercut
- During Burnout
Body Blow Combination > Heavy Psycho Uppercut
- Super Art gauge has 1 stock
Body Blow Combination > Overdrive Psycho Flicker > Heavy Psycho Uppercut
- During Burnout
Body Blow Combination > Heavy Psycho Uppercut
Rib Crusher (Backwards Throw)
共通调整 Distance increased between characters when the opponent is thrown into the corner.
Standing Heavy Punch
调整 Adjusted so that it's harder for the hold button version to be performed by accident when pressing the button rapidly after this attack is performed.
Crouching Light Punch
调整 Disadvantage on block changed from -5 to -3 frames.
Crouching Medium Punch
调整 Hurtbox around the body from frames 19 - 29 expanded forward only when the attack misses.
Level 2 Psycho Knuckle (Hold Heavy Punch)
修复问题 Added 8 fixed frames of hitstop when clashing with a projectile.
Normal Uncharged Psycho Flicker (↓↘→ + Kick)
调整 Expanded inward the attack hitbox that only appears when an opponent is in a combo.
SA1 Psycho Storm
修复问题 Fixed an issue where the second hit and after would not hit an opponent during certain situations even when the first hit connected.
SA3/CA Psycho Chamber
修复问题 Fixed an issue where when performed in certain situations, the range of the attack would stretch out forward more than usual.
With this update we've added some balance adjustments to a few characters. These were made with the following objectives in mind.
- Improve characters that could not fully express their individual potential.
- Improve techniques that were clearly difficult to use.
- Weaken elements that controlled an opponent's action too severely.
1. Improve characters that could not fully express their individual potential.
Most of these adjustments focused on Jamie and Ryu.
Jamie is a character whose potential improves the higher his drink level gets, but there was a lot of work required to unlock that potential, and it was difficult for him to show what he was capable of. For this update, we looked to alleviate this issue by increasing the number of ways he can increase his drink level.
While Ryu looks like a character that has been carefully balanced when viewed in a vacuum, he has very few elements to his gameplan that stick out, and in the "standard character" category, his individuality is a bit thin. To address this point, we've made adjustments so that it's easier to make use of his Hadoken, and increased the number of ways players can incorporate his Hashogeki into their gameplan.
Jamie is a character whose potential improves the higher his drink level gets, but there was a lot of work required to unlock that potential, and it was difficult for him to show what he was capable of. For this update, we looked to alleviate this issue by increasing the number of ways he can increase his drink level.
While Ryu looks like a character that has been carefully balanced when viewed in a vacuum, he has very few elements to his gameplan that stick out, and in the "standard character" category, his individuality is a bit thin. To address this point, we've made adjustments so that it's easier to make use of his Hadoken, and increased the number of ways players can incorporate his Hashogeki into their gameplan.
2. Improve techniques that were clearly difficult to use.
We've improved techniques that were difficult to connect with in combos or were unreliable as anti-air techniques.
3. Weaken elements that controlled an opponent's action too severely.
We primarily looked at techniques that were very strong as defensive measures for characters. We felt that in the neutral and while on defense, there were some techniques that were low risk but yielded a high return. Therefore we've weakened those techniques that controlled an opponent's action too severely.
Regarding Ken's throw, while this is an offensive attack, he winds up in an ideal situation no matter where he is, which creates too much pressure, particularly for characters that don't have any invincible attacks. In order to alleviate this situation, when his throw lands in the corner of the screen, we've made it so that he is in a slightly worse situation after the throw.
We feel that the adjustments made during this update cover more area than previous battle adjustments, but we looked to even out the balance of the game without changing anything dramatically. This means that there are some characters that have absolutely no changes, and some characters that were only weakened, but we are looking at performing an overall balance adjustment in the future that will also affect characters not touched with this update. We appreciate your patience as we work towards that.
Regarding Ken's throw, while this is an offensive attack, he winds up in an ideal situation no matter where he is, which creates too much pressure, particularly for characters that don't have any invincible attacks. In order to alleviate this situation, when his throw lands in the corner of the screen, we've made it so that he is in a slightly worse situation after the throw.
We feel that the adjustments made during this update cover more area than previous battle adjustments, but we looked to even out the balance of the game without changing anything dramatically. This means that there are some characters that have absolutely no changes, and some characters that were only weakened, but we are looking at performing an overall balance adjustment in the future that will also affect characters not touched with this update. We appreciate your patience as we work towards that.
Modern Controls
- Fixed an issue where if a player using Modern Controls would perform a special move using the SP button, scaling would not be applied to that special move if its activation overlapped with screen darkening from an opponent's Drive Rush.
Modern and Dynamic Controls
- Added an option to allow for normal throws to be mapped to its own button under Control Settings.
Please note that it will be automatically assigned to the LT Button as a default setting.
Armor
- Fixed an issue where when an attack with super armor properties, like a Drive Impact, etc., is in the middle of a hit stop due to absorbing an attack, an attack with Armor Break properties would not cause an armor break in that situation.
Drive Rush
- Fixed an issue where if both players performed a Drive Rush at the same time, one player's movement would be 1 frame slower.
Perfect Parry
- Fixed an issue where under specific conditions, a Perfect Parry would occur even though the Drive Parry absorbed the attack after the 3rd frame of its start up.
Input Buffering
- Fixed an issue with the input buffer, as the input buffer time for a reversal after blocking an attack should change depending on the block's recovery, but for Drive Reversals and some other attacks, it was not properly set.
Crouching Medium Punch
- 3 frames of recovery added when the attack misses.
- The size of the feet hurtboxes between frames 6 - 24 has been expanded.
- The size of the arm hurtbox from frame 19 onwards has been expanded.
Aerial Flash Knuckle
- The landing recovery for when this move is performed at the peak of a jump and misses has been extended by 7 frames.
- Changed the trajectory for when this move is performed at the peak of a jump and misses.
- The size of the feet hurtboxes has been expanded from frame 16 until the end of the move.
Note: No changes have been made to the charged version.
Vulcan Blast (SA1)
The size of the body hurtbox between frames 1 - 5 has been expanded.
Back Shaver (Forward Throw)
This forward throw has had a follow-up attack added that raises your Drink Level.
Continue to hold down the throw input after the throw connects to perform the follow-up.
Continue to hold down the throw input after the throw connects to perform the follow-up.
Breakin' (SA1)
- The damage of the normal version has been changed from 2100 to 2200.
- The damage of the follow-up version has been changed from 1750 to 1850.
Note: The damage now matches the Drink Level 2 version of the move. - Pushback on hit is no longer applied when this move lands on an opponent in the corner.
- Will now down an opponent for 5 frames longer than before.
The Devil's Song (SA2)
If the Drink Level has been raised prior to activation of this move, the Drink Level will now return to that value when the effect of this move ends.
Overdrive Tenshin
- Fixed an issue where the collision pushbox on a knocked down opponent would disappear if there was no follow-up attack after the attack connects.
- Fixed an issue where the opponent's knockdown time was shorter than normal version when Overdrive Tenshin is used in a combo but no follow-up attack is performed.
En Haut
Adjusted so that this move has greater inertia when performed out of a Drive Rush.
Étoile (Super Art Level 2)
- The 1st and 2nd hit now have a blowback effect when hitting a mid-air opponent, and following attacks now connect easier on the opponent.
- After the 2nd hit, if the 3rd attack does not connect, the opponent's knockdown period will be extended. With this change, even if the 3rd attack doesn't connect, it will be more difficult for opponents to counter attack Manon.
Stribog (Modern Controls)
When JP's Embrace cannot be performed because one of his projectile is on-screen, pressing Back+SP Button in Modern Controls would cause nothing to be performed. To offset this, JP's Neutral+SP Button special move, Stribog, will be performed instead.
Standing Heavy Punch
- The size of the foot hurtbox during the active frames has been expanded.
- The size of the hurtbox for after the active frames has been expanded.
Crouching Heavy Punch
The invincibility to mid-air attacks that this move applied to the upper body has been removed.
Normal/Overdrive Amnesia
- Adjusted the immediate scaling value from 15% to 60%.
- Now has an initial scaling value of 50%.
- Performing SA3 on a knocked back opponent will now cause the projectile generated from catching an opponent's attack with this move to detonate quicker.
- After successfully catching an opponent's attack with this move, JP's SA gauge will now not increase until either the generated projectile is gone, or until the current combo ends.
- The Drive Gauge increase for Drive Parrying or Perfect Parrying the Overdrive version of this move has been changed from 2500 x 2 to 5000 x 2.
- Fixed an issue resulting in unintended behavior for the projectile when on the edge of the screen.
- Fixed an issue where the projectile would not disappear when this move clashed with an opponent's SA.
Normal/Overdrive Departure
- Now has an initial scaling value of 20%.
- The Drive Gauge increase for Drive Parrying or Perfect Parrying the normal version of this move has been changed from 5000 to 7500.
- The Drive Gauge increase for Drive Parrying or Perfect Parrying the Overdrive version of this move has been changed from 2500 x 2 to 3500 x 2.
Funky Slicer
- The knockback on block has been decreased.
- The size of the hurtbox after the active frames has been expanded.
Overdrive Shoryuken
Changed the first hit's effect from a knockback to a blowback.
Solar Plexus Strike
The proximity block detection hitbox has been expanded to the edge of the attack's hitbox between frames 2 - 18.
Note: If an opponent is inputting a direction away from you while in the proximity block detection hitbox area then they will block, rather than move away from you.
Note: If an opponent is inputting a direction away from you while in the proximity block detection hitbox area then they will block, rather than move away from you.
Light Hashogeki
- Recovery on block has been adjusted from -4 frames to -3 frames.
- The knockback on block has been decreased.
- The knockback on block while in burnout has been increased.
- The distance covered between the end of the active frames and the end of recovery has been decreased.
Medium Hashogeki
- The attack hitbox has been expanded forward.
- The projectile clash hitbox has been expanded forward.
Heavy Hashogeki
- The attack hitbox has been expanded forward.
- The projectile clash hitbox has been expanded forward.
- The knockback on block has been decreased.
- The distance covered between the end of the active frames and the end of recovery has been decreased.
Overdrive Hashogeki
- The attack hitbox has been expanded forward.
- The projectile clash hitbox has been expanded forward.
- The knockback on block has been decreased.
- The knockback on hit has been decreased.
Denjin Charge Hashogeki
- The attack hitbox has been expanded forward.
- The projectile clash hitbox has been expanded forward.
- The knockback on block has been decreased.
- The damage of the Overdrive version has been changed from 600 to 1000.
- The distance covered between the end of the active frames and the end of recovery has been decreased.
Hadoken
The size of the hurtbox around the arms has been reduced.
Shinku Hadoken (SA1)
The size of the hurtbox around the arms has been reduced.
Modern Controls Lightning Beast (Super Art Level 2)
Fixed an issue where Blanka would perform Electric Thunder instead of Vertical Rolling attack when Super Art Level 2 is active or the player is charging down, and cancels a normal attack with down-back+SP Button.
Ground Shave Cannonball (Super Art Level 3/CA)
Fixed an issue where the attack's reach would extend forward more than usual when performed in specific situations.
Standing Light Punch
- The size of the arm hurtbox between frames 2 - 6 has been expanded.
- The size of the arm hurtbox between frames 7 - 8 has been decreased.
Knee Strikes (Forward Throw)
Has been adjusted so that if this throw connects on an opponent in the corner some distance will be placed between the players after the throw finishes.
Overdrive Aerial Tatsumaki Senpu-kyaku
- The landing recovery for when this attack misses has been extended by 7 frames.
- The collision pushbox has been adjusted to make it more difficult for opponents to jump over this move.
Standing Light Punch
The size of the hurtboxes around the arms and legs between frames 2 - 8 have been expanded.
Aerial Hundred Lightning Kicks
Now has an initial scaling value of 20%.
Overdrive Double Lariat
- Adjusted so that the second attack hits opponents not in the air 1 frame earlier.
- Adjusted so that the second attack knocks down the opponent for an additional 1 frame if it hits when they are not in the air.
- Adjusted the hit reaction to the first attack when it hits an opponent not in the air so that it is possible for SA3 to connect after.
- Adjusted so that the first attack's blow back distance is reduced when hitting a mid-air opponent.
- The distance traveled initially when the move is performed has been increased.
Aerial Russian Slam (SA1)
The hitbox has been expanded downward.
Cyclone Lariat (Super Art Level 2)
Extended the collision pushbox upwards while the screen is dark.
Please note that due to the change to Overdrive Double Lariat's blowback effect, this should mitigate situations where it's difficult to perform combos.
Please note that due to the change to Overdrive Double Lariat's blowback effect, this should mitigate situations where it's difficult to perform combos.
Yoga Teleport
Fixed an issue where certain inputs would cause Dhalsim's reappearance position to be different from normal.
Heavy Yoga Flame
Fixed an issue where if the attack landed as a Counter or Punish Counter, the 2nd hit of the attack would deal the same damage as a normal hit.
After Wall Jumps
Fixed an issue where performing certain techniques after a wall jump would not put Rashid into a Forced Knockdown state even after getting hit with an attack.
Standing Light Punch
- The size of the hurtbox around the arms between frames 2 - 8 has been expanded.
- The size of the hurtbox around the arms between frames 9 - 11 has been decreased.
Overdrive Spinning Mixer
The third attack is now invincible to mid-air attacks until the end of its active frames.
Ysaar (Super Art Level 2)
Fixed an issue where the whirlwind wouldn't display as intended when lingering in its final stage.
Standing Medium Punch
The number of active frames for this attack has been adjusted from 3 frames to 5 frames.
Crouching Light Punch
The attack hitbox has been expanded forward.
Overdrive Snake Step
Fixed an issue where the normal version of Snake Step would be performed instead of the Overdrive Version when inputting Back+AUTO+SP Button while A.K.I.'s Nightshade Pulse is on the screen.
Assisted Combo
- Fixed an issue that caused the Assisted Combo input buffer start timing to be 1 frame slower than expected.
With this fix, another issue that caused Chun-Li and Kimberly's Assisted Combos to not continue when attempting a jump cancel at the same time a button was pressed is also fixed.
Taunt
- There was an issue that caused a Taunt to be performed when canceling into a special move from a normal attack, etc., when the player mistakenly hit other buttons at the same time. It has been fixed so that special moves cannot be canceled by Taunts on the 1st frame of the attack.
Perfect Parry
- Fixed an issue where invincibility time was shortened when specific actions were taken after a successful Perfect Parry.
Wake-up recovery input buffer
-
- Changed the input buffer time when recovering from 4 frames to 7 frames.
- Fixed an issue where if the opponent performs a Super Art, if certain attacks are input immediately after the screen darkens, once the screen transition is finished, the move will be performed.
- Changed the input buffer time when recovering from 4 frames to 7 frames.
Tensei Kick (↓+2 Kicks)
Can no longer be canceled by taunts on the 1st frame of the attack.
Javelin of Marisa (Super Art Level 2)
Fixed an issue where the attack start up is 1 frame faster when the button is released with specific timing.
Air Throw
Fixed an issue where if a mid-air throw was attempted after warping via Departure: Window, JP would not have the Punish Counter/Forced Knockdown property attached to him.
Bylina (→+Heavy Kick)
- Fixed an issue where if the 2nd attack was blocked low, it could not be canceled.
- Fixed an issue where if the 2nd attack's active part on hit caused the cancel to be 1 frame slower.
Embrace (↓↙←+Kick)
Fixed an issue where the attack would not hit an opponent facing backward.
Feng Shui Engine (Super Art level 2)
Fixed an issue where while Feng Shui Engine is active, Drive Gauge recovery amount was different from normal depending on time elapsed.
■On ground (Normal)
Every frame: changed from 50 to 40
■Mid-air (Normal, Burnout)
Every frame: changed from 10 to 20
■On ground (Normal)
Every frame: changed from 50 to 40
■Mid-air (Normal, Burnout)
Every frame: changed from 10 to 20
Speedy Maracas (↓↓+2 Punches)
- Fixed an issue where a Punish Counter property was added after the 2nd frame of the technique when the command was input by plinking the Punch buttons, causing the game to recognize it as a canceled activation.
- During Modern controls, Speedy Maracas could not be performed if the player attempted to plink the command as Down+Medium Attack > Heavy Attack.
*Plinking: Quickly pressing two or more buttons exactly one frame apart - Fixed an issue where the technique would not end even if the button was released when the player had 1 bar of Super Art gauge or less.
- Fixed an issue when using Modern controls where the button required to continue the technique was different depending on the amount of Super Art gauge.
Fatal Leg Twister (↓↘→+Punch > Light Punch+Light Kick)
Fixed an issue where a mid-air opponent would look they were being thrown when specific attacks hit.
Collarbone Breaker (→+Medium Punch)
The amount of Drive Gauge obtained by the opponent when 2nd attack was blocked was changed from 625 to 1250.
Please note that if the 1st attack is blocked, the 2nd attack is considered a high attack.
Please note that if the 1st attack is blocked, the 2nd attack is considered a high attack.
Edmond Honda
Ultimate Killer Head Ram (Super Art Level 2)
Fixed an issue where if you performed the attack with the SP Button while using Modern controls, the charge time would be 5 frames longer.
Rock Crusher (→+Medium Punch)
The amount of Drive Gauge obtained by the opponent when 2nd attack was blocked was changed from 1250 to 625.
Please note that if the 1st attack is blocked, the 2nd attack is considered a high attack.
Please note that if the 1st attack is blocked, the 2nd attack is considered a high attack.
Standing Heavy Punch
- Fixed an issue where Blanka's recovery would be extended when this attack collides with an opponent's Drive Parry, Perfect Parry or super armor.
*The extended recovery when this attack misses is by design. - Fixed an issue where the special move input buffer timing was earlier than expected when Super Art 2 is active.
Standing Light Kick
Fixed an issue where while Lightning Beast is active, the hurtbox in front of the character before an attack starts gets hit by an opponent's cross-up attack.
Standing Medium Kick
Fixed an issue where while Lightning Beast is active, the special move cancel input buffer timing is earlier.
Crouching Light Punch
Fixed an issue where while Lightning Beast is active, the hurtbox in front of the character before an attack starts gets hit by an opponent's cross-up attack.
Crouching Medium Punch
Fixed an issue where while Lightning Beast is active, the hurtbox at the feet is smaller than normal.
Jumping Medium Punch
Fixed an issue where while Lightning Beast is active, the collision pushbox would not expand when the attack hits.
Overdrive Rolling Attack (Charge ←, →+2 Punches)
Fixed an issue where while Lightning Beast is active, the input buffer to cancel into Rolling Cannon would not work.
Heavy Rolling Attack (Charge ←, →+Heavy Punch)
Fixed an issue where while Lightning Beast is active, the bounce back distance became shorter when the attack was Perfect Parried.
Vertical Rolling Attack (Charge ↓,↑+Kick)
Fixed an issue where while Lightning Beast is active, the input buffer to cancel into Rolling Cannon would not work.
Overdrive Backstep Rolling Attack (↓↙←+2 Kicks)
Fixed an issue where while Lightning Beast is active, the active frames of the first attack would be 2 frames shorter.
Lightning Beast (Super Art Level 2)
Fixed an issue where while Lightning Beast is active, Drive Gauge recovery amount was different from normal depending on time elapsed.
■On ground (Normal)
Every frame: changed from 50 to 40
■Mid-air (Normal, Burnout)
Every frame: changed from 10 to 20
■On ground (Normal)
Every frame: changed from 50 to 40
■Mid-air (Normal, Burnout)
Every frame: changed from 10 to 20
Solid Puncher (Super Art Level 2)
Fixed an issue where while Solid Puncher is active, Drive Gauge recovery amount was different from normal depending on time elapsed.
■On ground (Normal)
Every frame: changed from 50 to 40
■Mid-air (Normal, Burnout)
Every frame: changed from 10 to 20
■On ground (Normal)
Every frame: changed from 50 to 40
■Mid-air (Normal, Burnout)
Every frame: changed from 10 to 20
Backward Throw
Fixed an issue where the animation during a throw was off when performed on big characters.
Lotus Fist (↓↙←+Punch > Heavy Punch)
The amount of Drive Gauge obtained by the opponent when 2nd attack was blocked was changed from 1250 to 2500.
Please note that if the 1st attack is blocked, the 2nd attack is considered a high attack.
Please note that if the 1st attack is blocked, the 2nd attack is considered a high attack.
Jumping Medium Punch
Fixed an issue where the 1st attack was considered a high attack between the 3rd and 4th active frames.
Ysaar (Super Art Level 2)
- Fixed an issue where if you performed a boostable special move on the final state of the tornado, you could not boost a special move again afterwards.
- Fixed an issue where if you kicked the tornado during its final state with Arabian Cyclone, it would move at the same speed as before it was kicked.
Crouching Heavy Kick
Fixed an issue where the attack was given a low hit property from frames 2 - 5. This has been fixed to a high hit property.
Chi Wen (→+Heavy Punch)
Fixed an issue where A.K.I.'s recovery would increase when her techniques are Perfect Parried.
Light Serpent Lash (↓↘→+Light Punch)
Fixed an issue where A.K.I.'s recovery would increase when her techniques are Perfect Parried.
Medium Serpent Lash (↓↘→+ Medium Punch)
Fixed an issue where a move would not be performed if Down was input during a successful command input when using Modern controls.
Medium Snake Step (Neutral+SP)
Fixed an issue where Medium Snake Step would be performed when certain commands other than the SP Button were input when using Modern controls.
Overdrive Snake Step (Assist+Neutral+SP)
When using Modern controls, pressing the SP Button by itself performed Snake Step. However, the canceled version of Overdrive Snake Step would be performed after Nightshade Pulse even if you were holding a direction input.
Due to this, if the player attempted to repeatedly press the button while inputting Overdrive Nightshade Pulse, Overdrive Snake Step would unintentionally be performed. Due to this, the canceled version of Overdrive Snake Step can only be performed with no direction input.
Due to this, if the player attempted to repeatedly press the button while inputting Overdrive Nightshade Pulse, Overdrive Snake Step would unintentionally be performed. Due to this, the canceled version of Overdrive Snake Step can only be performed with no direction input.
Entrapment (↓+2 Punches > Light Punch+Light Kick)
- Fixed an issue where the hit effect would not be displayed on Punish Counter.
- Fixed an issue where a mid-air opponent would look they were being thrown when specific attacks hit.
Overdrive Cruel Fate (↓↙←+2 Kicks)
Fixed an issue where immediately after A.K.I. jumps over the opponent, the command input would be the opposite of the original direction.
Assisted Combos
- The following tweaks have been made in order to improve Assist Combo controls.
- Each Assisted Combo's input reception timing has been adjusted due to some Assisted Combos accepting inputs too quickly, and others having very small input windows that made them difficult to perform.
- Made an adjustment so that when special move cancels are allowed, Assisted Combos will also be allowed. This is due to Assisted Combo input reception being too short and thus not allowing for cancels during the active frames of an attack.
Please note that due to this adjustment, if your Assisted Combo input is too late, then there are situations where you won't be able to connect to the special move that you cancel into. - Fixed an issue where if you stopped an Assisted Combo midway through and then tried to perform another Assisted Combo of the same strength as soon as possible, the buffered input would not work.
- Fixed an issue where if you stopped an Assisted Combo midway through and then tried to perform another Assisted Combo of a different strength, that Assisted Combo may not be performed properly.
- Made an adjustment to prevent rapid cancel attacks from being performed when pressing the Light Attack button while the Assist button is being held. This adjustment was made as it was difficult to perform Light Assisted Combos from rapid cancel attacks.
- Each Assisted Combo's input reception timing has been adjusted due to some Assisted Combos accepting inputs too quickly, and others having very small input windows that made them difficult to perform.
Forward Dash/Back Dash
-
- Fixed an issue where inputting forward three times would result in two forward dashes being performed.
- Increased the buffer input window from 4 frames to 7 frames.
- Fixed an issue where inputting forward three times would result in two forward dashes being performed.
Input recognition frames
- In order to reduce unintentional Super Art activations, the input recognition frames* of certain Super Art commands have been shortened. Due to this adjustment, players must input their commands faster or the Super Art may not be performed.
Adjusted Super Art Commands are as follows:- ↓↘→↓↘→
- ↓↙←↓↙←
*Input recognition frames are the number of frames you must input the next command in order for the game to recognize you are performing a specific attack.
ex. In the case of the ↓↘→↓↘→ command, there are 9 input recognition frames between the first Down input and the next Down-Forward input, meaning if 10 frames pass between those inputs, the first Down input will be reset and the Super Art will not be performed.
Gauge gain on Perfect Parry
- When perfect parrying certain multi-hitting attacks, there were cases where the Drive Gauge consumption was more than the Drive Gauge gain, so adjustments have been made. Perfect parrying strike attacks will now give an increase of 10,000 (1 block) while perfect parrying Super Arts will give an increase of 20,000 (2 blocks).
Considering the ease of parrying them, projectiles other than Super Arts will be kept in their current state.
For a list of moves affected by this adjustment, please refer to each character's section.
Attacks hitting an opponent behind the player
- Fixed an issue where some attacks attacks could unintentionally hit an opponent behind the character.
For a list of moves affected by this adjustment, please refer to each character's section.
Drive Gauge gain during Burnout
- Due to a value setting error, there were some attacks that when blocked during Burnout, only increased the Drive Gauge by half of what would be consumed when blocking it normally (the same as overhead or low attacks). This has been corrected with this update.
For a list of moves affected by this adjustment, please refer to each character's section.
Chip damage during Burnout
- Due to a value setting error, outside of Super Art attacks, there were some attacks that when blocked during Burnout only chipped 1/4 of the original damage value. This has been corrected with this update.
For a list of moves affected by this adjustment, please refer to each character's section.
Drive Impact
- Fixed an issue where stopping a Drive Impact with another Drive Impact after absorbing a hit via armor would result in the two Drive Impacts canceling each other out.
Drive Parry
-
- Fixed an issue where performing a Drive Parry from a crouching position would result in a different Drive Gauge consumption timing compared to one done from a standing position.
- Fixed an issue where performing a Drive Parry from a crouching position with certain characters and holding the parry would result in increased Drive Gauge consumption. This has been fixed to match what happens when performing a Drive Parry from a standing position.
■Characters Affected- Luke
- Kimberly
- Zangief
- Dee Jay
- Rashid
- Guile
- E. Honda
- Fixed an issue where performing a Drive Parry from a crouching position would result in a different Drive Gauge consumption timing compared to one done from a standing position.
Perfect Parry
- Fixed an issue where if an upward direction (up, up-left, or up-right) was input after perfect parrying a projectile, the character would perform a jump even if the upward directional input was released before the character exited their recovery state.
Jump attack landing recovery
- Fixed an issue where after having your jumping attack perfect parried, the timing for when you're next able to perform a standing attack was 1 frame later than intended.
Please note that no changes were made to Perfect Parries for this issue.
Overdrive No Chaser (↓↘→+2 Kicks, Punch)
The amount of Super Art gauge gained on block was not half of the amount gained on hit, so it has been adjusted from 500 to 600.
Shared adjustment: Chip damage during Burnout
The amount of chip damage done when an opponent blocks the following attack during Burnout has been adjusted.
- Light Flash Knuckle (↓↙←+Light Punch)
- Perfect version 2nd hit: From 75 to 50
Shared adjustment: Drive Gauge gain during Burnout
The Drive Gauge increase gained by the opponent when they block the following attacks during Burnout has been adjusted.
■Light Flash Knuckle (↓↙←+Light Punch)
Perfect version 2nd hit: From 0 to 500
■Fatal Shot (↓↘→+2 Punches, 2 Punches)
From 0 to 500
■Light Flash Knuckle (↓↙←+Light Punch)
Perfect version 2nd hit: From 0 to 500
■Fatal Shot (↓↘→+2 Punches, 2 Punches)
From 0 to 500
Shared adjustment: Gauge gain on Perfect Parry
The Drive Gauge increase from a Perfect Parry of the following moves has been adjusted.
- Perfect and max charge versions of Light/Medium/Heavy Flash Knuckle (↓↙←+Punch)
- Overdrive Rising Uppercut (→↓↘+2 Punches)
- Vulcan Blast
- Eraser
Drive Impact
Fixed an issue that would cause the opponent to not take damage during the hit scene of a Drive Impact in certain circumstances.
Forward/Backward walk
Fixed an issue where Jamie would not move on the 1st frame of a forward or backward movement if he was at drink level 4.
Tensei Kick (↓+2 Kicks)
Fixed an issue where if The Devil's Song had been activated, Tensei Kick on its fastest input started up 1 frame slower.
Ransui Haze (→+Heavy Kick, ←+Heavy Kick, Punch)
Fixed an issue where after The Devil's Song has run out and the player uses Ransui Haze to raise their drink level, the base attack level would not increase.
Shared adjustment: Attacks hitting with an opponent behind you
Fixed an issue where the following attacks would hit an opponent behind Jamie.
- Standing Light Kick (rapid cancel version)
- Breakin'
- Getsuga Saiho
Shared adjustment: Drive Gauge gain during Burnout
The Drive Gauge increase gained by the opponent when they block the following attacks during Burnout has been adjusted.
■Crouching Medium Kick
From 1000 to 2000
■Crouching Medium Kick
From 1000 to 2000
Shared adjustment: Gauge gain on Perfect Parry
The Drive Gauge increase from a Perfect Parry of the following moves has been adjusted.
- Standing Heavy Punch
- Crouching Heavy Kick
- Ransui Haze (→+Heavy Kick, ←+Heavy Kick, Punch)
- Freeflow Strikes (drink level 4) (↓↘→+Punch)
- Bakkai (↓↘→+K)(↓↘→+K)
- Breakin'
- Getsuga Saiho
Drive Impact
Fixed an issue where a Drive Impact clash would occur even if Manon's Drive Impact was activated 1 frame later than the opponent's.
Heavy/Overdrive Rond-point (↓↘→+Kick)
- The 2nd hit of the Heavy version on Punish Counter had an incorrect damage value assigned to it, so it has been changed from 600 to 480.
- Fixed an issue where it was possible to cancel the end of the Heavy or Overdrive version when it was blocked.
Overdrive Renverse (↓↘→+2 Punches)
Fixed an issue where the recovery difference was 1 frame slower after hit when Manon medal level was 3 or 4.
Arabesque (SA1)
Fixed an issue where certain moves and this move would miss each other when both active. This attack will now not pass through an opponent until it hits them.
Shared adjustment: Drive Gauge gain during Burnout
The Drive Gauge increase gained by the opponent when they block the following attack during Burnout has been adjusted.
■Arabesque
From 1250 to 2500
■Arabesque
From 1250 to 2500
Shared adjustment: Attacks hitting with an opponent behind you
Fixed an issue where the following attacks would hit an opponent behind Manon.
- Standing Light Kick
- Pas de Deux
Shared adjustment: Gauge gain on Perfect Parry
The Drive Gauge increase from a Perfect Parry of the following moves has been adjusted.
- Light/Medium Dégagé (↓↙←+Kick)
- Rond-point (↓↘→+Kick)
- Étoile
Light Punch, Medium Punch
The amount of Super Art gauge gained on block was not half of the amount gained on hit, so it has been adjusted from 150 to 200.
Medium/Heavy/Overdrive Vagabond Edge (↓↘→+Punch)
The amount of Drive Gauge lost when an opponent blocked the 2nd hit of this attack had an older value, so it has been adjusted from 2000 to 4000.
Bushin Beats (SA1)<br />Bushin Thunderous Beats (SA1)<br />Bushin Scramble (SA2) <br />Soaring Bushin Scramble (SA2) <br />Bushin Ninjastar Cypher (SA3/CA)
Fixed an issue where if certain attacks hit an opponent while they were in stun and had a full Drive Gauge, they would recover from Burnout upon getting hit.
- Bushin Beats
- Bushin Thunderous Beats
- Bushin Scramble
- Soaring Bushin Scramble
- Bushin Ninjastar Cypher
Shared adjustment: Drive Gauge gain during Burnout
The Drive Gauge increase gained by the opponent when they block the following attacks during Burnout has been adjusted.
■Neck Hunter (↓↘→+Kick, Heavy Kick)
From 2000 to 4000
■Overdrive Neck Hunter (↓↘→+2 Kicks, Heavy Kick)
From 1250 x 2 to 2500 x 2
■Shadow Slide (↓↘→+Kick, Medium Kick)
From 2000 to 4000
■Overdrive Shadow Slide (↓↘→+2 Kicks, Medium Kick)
From 1250 x 2 to 2500 x 2
■Neck Hunter (↓↘→+Kick, Heavy Kick)
From 2000 to 4000
■Overdrive Neck Hunter (↓↘→+2 Kicks, Heavy Kick)
From 1250 x 2 to 2500 x 2
■Shadow Slide (↓↘→+Kick, Medium Kick)
From 2000 to 4000
■Overdrive Shadow Slide (↓↘→+2 Kicks, Medium Kick)
From 1250 x 2 to 2500 x 2
Shared adjustment: Gauge gain on Perfect Parry
The Drive Gauge increase from a Perfect Parry of the following moves has been adjusted.
- Normal/Overdrive Arc Step (↓↘→+Kick)
- Overdrive Torso Cleaver (↓↘→+2 Kicks, Light Kick)
- Overdrive Shadow Slide (↓↘→+2 Kicks, Medium Kick)
- Overdrive Neck Hunter(↓↘→+2 Kicks, Heavy Kick)
- Normal/Overdrive Aerial Bushin Senpukyaku (in mid-air, ↓↙←+Kick)
Modern Controls
Fixed an issue where you couldn't cancel Gladius from a normal or unique attack using Forward+Special Move button.
Caelum Arc (↓+Heavy Punch during a vertical jump)
- Fixed an issue where if you hit an opponent from behind, the recovery would be much longer.
- On hit: From 27 frames to 19 frames
- On block: From 23 frames to 15 frames
- Fixed an issue where if you forced an opponent to block from behind, their orientation would be reversed if they were in Burnout.
- Fixed an issue where you could cancel the landing recovery with another move.
Dimachaerus (↓↙←+Punch)
Fixed an issue where the Super Art gauge gain on block was not half of what it was on hit.
Javelin of Marisa (SA1, charged version)
Fixed an issue where damage would increase on counter or Punish Counter only during the 5th and 6th active frames of the attack.
Shared adjustment: Drive Gauge gain during Burnout
The Drive Gauge increase gained by the opponent when they block the following attacks during Burnout has been adjusted.
■Crouching Heavy Kick
From 1500 to 3000
■Charged Crouching Heavy Kick
From 4000 to 8000
■Charged Jumping Heavy Punch
From 3000 to 6000
■Charged Jumping Heavy Kick
From 3000 to 6000
■Charged Caelum Arc (↓+Heavy Punch during a vertical jump)
From 3000 to 6000
■Novacula Swipe (→+Medium Punch, Heavy Punch)
From 2500 to 5000
■Crouching Heavy Kick
From 1500 to 3000
■Charged Crouching Heavy Kick
From 4000 to 8000
■Charged Jumping Heavy Punch
From 3000 to 6000
■Charged Jumping Heavy Kick
From 3000 to 6000
■Charged Caelum Arc (↓+Heavy Punch during a vertical jump)
From 3000 to 6000
■Novacula Swipe (→+Medium Punch, Heavy Punch)
From 2500 to 5000
Shared adjustment: Attacks hitting with an opponent behind you
Fixed an issue where the following attacks would hit an opponent behind Marisa.
- Gladius (↓↘→+P)
- Phalanx (→↓↘+P)
- Quadriga (↓↘→+K)
Shared adjustment: Gauge gain on Perfect Parry
The Drive Gauge increase from a Perfect Parry of the following move has been adjusted.
- Meteorite
Jumping
Fixed an issue where it was possible to perform special moves or Super Arts (except for 360 command throws) until the 5th frame of Lily's jump.
Thunderbird (SA2)<br />Soaring Thunderbird (SA2)
- Adjusted the Drive Gauge gain when parrying the Windclad version of Thunderbird and Soaring Thunderbird, as it was less than when parrying the normal version of those moves.
- This attack would miss more than expected when incorporated into mid-air combos, so the hitbox of the attack has been expanded upwards only when hitting an opponent already reeling from damage, allowing for multiple hits to land easier.
Shared adjustment: Drive Gauge gain during Burnout
The Drive Gauge increase gained by the opponent when they block the following attack during Burnout has been adjusted.
■Great Spin (↓+Heavy Punch during a jump)
From 2000 to 4000
■Great Spin (↓+Heavy Punch during a jump)
From 2000 to 4000
Shared adjustment: Gauge gain on Perfect Parry
The Drive Gauge increase from a Perfect Parry of the following moves has been adjusted.
- Crouching Heavy Punch
- Crouching Heavy Kick
- Overdrive/Windclad/Overdrive Windclad Tomahawk Buster (→↓↘+Punch)
- Overdrive/Windclad/Overdrive Windclad Condor Dive (2 Punches during a jump)
- Breezing Hawk
- Thunderbird
- Soaring Thunderbird
Overdrive Embrace (↓↙←+2 Kicks)
Fixed an issue where JP would still be able to move around during the cutscene when a projectile with a long trade time pierces and hits him.
Heavy Stribog (↓↘→+Heavy Punch)
Fixed an issue where JP's Drive Gauge increase gain would only be half when the first attack is blocked by the opponent while they are in Burnout.
Chornobog (SA1)
No Drive Gauge was gained when parrying the first attack, so it has been redistributed as follows.
No changes were made for when only the 2nd attack is parried.
- 1st attack: From 0 to 10,000
- 2nd attack: From 20,000 to 10,000
No changes were made for when only the 2nd attack is parried.
Lovushka (SA2)
Fixed an issue where the final attack would come out when JP is hit by an attack with a short knockback time immediately after performing this move.
Interdiction (SA3/CA)
Fixed an issue where if this attack hits an opponent while they were in stun and had a full Drive Gauge, they would recover from Burnout upon getting hit.
Shared adjustment: Attacks hitting with an opponent behind you
Fixed an issue where the following attacks would hit an opponent behind JP.
- Standing Light Kick
- Stribog (↓↘→+Punch)
Shared adjustment: Drive Gauge gain during Burnout
The Drive Gauge increase gained by the opponent when they block the following attacks during Burnout has been adjusted.
■Medium/Heavy Torbalan (↓↘→+Kick)
From 1250 to 2500
■Lovushka (2nd - 4th hit)
From 500 to 1000
■Medium/Heavy Torbalan (↓↘→+Kick)
From 1250 to 2500
■Lovushka (2nd - 4th hit)
From 500 to 1000
Shared adjustment: Gauge gain on Perfect Parry
The Drive Gauge increase from a Perfect Parry of the following moves has been adjusted.
- Bylina (→+Heavy Kick)
- Chornobog
- Lovushka
Modern Controls
Fixed an issue where the rapid cancel version of crouching light attack would be performed when attempting to perform Assist Combo 1 from crouching light attack while Feng Shui Engine was active.
Assisted Combo 3
Fixed an issue where 2 blocks of Drive Gauge were used when transitioning into Overdrive Go Ohsatsu from Overdrive Ankensatsu via Assist Combo.
Shared adjustment: Attacks hitting with an opponent behind you
Fixed an issue where the following attack would hit an opponent behind.
- Feng Shui Engine's initial forward charge
Senkai Kick (SA2 boosted) (→+Medium Kick)
When Senkai Kick connected as a chain combo while Feng Shui Engine was active, the Drive Gauge fluctuations would not be in accordance with the chain combo value, so they have been fixed to the following values.
■Drive Gauge gain on hit
From 500 to 375
■Drive Gauge loss on block
From 1250 to 625
■Drive Gauge loss on Punish Counter
From 2000 to 1250
■Drive Gauge gain on hit
From 500 to 375
■Drive Gauge loss on block
From 1250 to 625
■Drive Gauge loss on Punish Counter
From 2000 to 1250
Shared adjustment: Gauge gain on Perfect Parry
The Drive Gauge increase from a Perfect Parry of the following moves has been adjusted.
- Standing Medium Kick
- Renko Kicks (→+Heavy Punch)
- Korenzan (←+Heavy Kick)
- Normal/Overdrive Tensenrin (→↓↘+Punch)
- Boosted/Overdrive Go Ohsatsu (→↓↘+Heavy Kick)
- Sakkai Fuhazan
Assisted Combo 1
Fixed an issue where the Quick Rolling Sobat would not be performed by pressing forward and the Special Move button from the first hit.
Assisted Combo 3
Fixed an issue where Maximum Strike would have additional scaling added to it if the 3rd attack's input was late.
Overdrive Air Slasher (Charge ←, →+2 Punches)
Implemented a fix so only Overdrive Air Slasher is performed when holding back and using the Special Move button in Modern Controls. Previously, if a charge was ready, Overdrive Jus Cool or Overdrive Double Rolling Sobat could not be performed.
Speedy Maracas (↓↓+2 Punches)
- In Street Fighter 6, when going from a Punish Counter state and transitioning to a move that can absorb attacks, the player is essentially in a Punish Counter state from the beginning. This is to prevent players from making mistakes during their combo selection, etc. when aiming for an opponent's recovery period.
By transitioning from Air Slasher to Speedy Maracas, Air Slasher's Punish Counter state was being overwritten by a Counter state, so we have fixed this issue so the transition to Speedy Marcas will be in a Punish Counter state. - Fixed an issue so when Air Slasher hits on Counter/Punish Counter, is parried, or runs into Super Armor, you cannot transition into Speedy Maracas.
Marvelous Sunrise Festival (SA2) <br />Headliner Sunrise Festival (SA2)
Fixed an issue where the first frame of the normal attack could not be kara-canceled*.
*Kara Cancel: Canceling the start up of a move into another move.
*Kara Cancel: Canceling the start up of a move into another move.
Drive Reversal
Updated the hurtbox to match the appearance of the attack from the end of its active frames to the end of the attack. Originally, the hurtbox was too small compared to the reach of the attack, making it extremely difficult to counter attack compared to other characters.
Shared adjustment: Drive Gauge gain during Burnout
The Drive Gauge increase gained by the opponent when they block the following attacks during Burnout has been adjusted.
■Normal/Overdrive Funky Slicer (↓↙←+Kick, Light Kick)
From 2000 to 4000
■Normal/Overdrive Waning Moon (↓↙←+Kick, Medium Kick)
From 2000 to 4000
■Normal/Overdrive Funky Slicer (↓↙←+Kick, Light Kick)
From 2000 to 4000
■Normal/Overdrive Waning Moon (↓↙←+Kick, Medium Kick)
From 2000 to 4000
Shared adjustment: Chip damage during Burnout
The amount of chip damage done when an opponent blocks the following attacks during Burnout has been adjusted.
■Machine Gun Uppercut (↓↙←+Punch)
Light: From 200 to 37
Medium: From 200 to 25
Heavy: From 200 to 25
Overdrive: From 200 to 25
■Quick Rolling Sobat (↓↘→+Medium Kick)
From 200 to 250
■Double Rolling Sobat (↓↘→+Heavy Kick)
From 150 x 2 to 175 x 2
■Medium/Heavy Jackknife Maximum (Charge ↓, ↑+Kick)
From 125 to 150
■Machine Gun Uppercut (↓↙←+Punch)
Light: From 200 to 37
Medium: From 200 to 25
Heavy: From 200 to 25
Overdrive: From 200 to 25
■Quick Rolling Sobat (↓↘→+Medium Kick)
From 200 to 250
■Double Rolling Sobat (↓↘→+Heavy Kick)
From 150 x 2 to 175 x 2
■Medium/Heavy Jackknife Maximum (Charge ↓, ↑+Kick)
From 125 to 150
Shared adjustment: Attacks hitting with an opponent behind you
Fixed an issue where the following attacks would hit an opponent behind Dee Jay.
- Standing Light Kick
- 1st hit of Machine Gun Uppercut (↓↙←+Punch)
- 1st hit of Sunrise Festival
- Weekend Pleasure
Shared adjustment: Gauge gain on Perfect Parry
The Drive Gauge increase from a Perfect Parry of the following moves has been adjusted.
- Face Breaker (←+Heavy Kick)
- Double Rolling Sobat (↓↘→+Heavy Kick)
- Overdrive Rolling Sobat (↓↘→+2 Kicks)
- Marvelous Sunrise Festival
- Headliner Sunrise Festival
Lifting Uppercut (←+Medium Punch)
Fixed an issue where, when an opponent's wake-up overlaps with the latter half of the active frames of this attack, a crouching opponent is able to block certain parts of the attack that they normally should not be able to.
Killer Bee Spin (SA2) <br />Aerial Killer Bee Spin (SA2)
- Fixed an issue where Drive Gauge consumption while connecting with this attack while standing on the ground was more than other level 2 Super Arts.
- During a mid-air hit the Drive Gauge decrease was small even during its biggest attack, so the final hit now drains 3700 instead of 3000.
Killer Bee Spin (SA2)<br />Aerial Killer Bee Spin (SA2) <br />Delta Red Assault (SA3/CA)
Fixed an issue where if these attacks hit an opponent while they were in stun and had a full Drive Gauge, they would recover from Burnout upon getting hit.
- Killer Bee Spin
- Aerial Killer Bee Spin
- Delta Red Assault
Shared adjustment: Drive Gauge gain during Burnout
The Drive Gauge increase gained by the opponent when they block the following attacks during Burnout has been adjusted.
■Delayed Ripper (→+Heavy Kick)
From 4000 to 2000
■Swing Combination (Heavy Punch, Heavy Kick)
2nd hit: From 4000 to 2000
■Razor's Edge Slicer (↓↘→+Punch, No input)
Normal version: From1500 to 3000
Charged version: From 2500 to 5000
Overdrive version: From 2500 to 5000
■Reverse Edge (↓↘→+Punch, ↓+Kick)
Normal version: From 2000 to 4000
Charged version: From 3000 to 6000
Overdrive version: From 4000 to 8000
■Delayed Ripper (→+Heavy Kick)
From 4000 to 2000
■Swing Combination (Heavy Punch, Heavy Kick)
2nd hit: From 4000 to 2000
■Razor's Edge Slicer (↓↘→+Punch, No input)
Normal version: From1500 to 3000
Charged version: From 2500 to 5000
Overdrive version: From 2500 to 5000
■Reverse Edge (↓↘→+Punch, ↓+Kick)
Normal version: From 2000 to 4000
Charged version: From 3000 to 6000
Overdrive version: From 4000 to 8000
Shared adjustment: Gauge gain on Perfect Parry
The Drive Gauge increase from a Perfect Parry of the following moves has been adjusted.
- Heavy/Overdrive/Charged Spiral Arrow (↓↘→+Kick)
- Overdrive/Charged Razor's Edge Slicer (↓↘→+Punch, No input)
- Overdrive/Charged Reverse Edge (↓↘→+Punch,↓+Kick)
- Spin Drive Smasher
- Killer Bee Spin
- Aerial Killer Bee Spin
Crouching Heavy Punch
Fixed an issue where the animation would go back if the attack hit on the 2nd active frame.
Fuwa Triple Strike (Medium Punch, Light Kick, Heavy Kick)
- The Drive Gauge decrease for the final hit on Punish Counter has been changed from 0 to 10,000.
- The 2nd hit of this string was increasing the opponent's Drive Gauge by 2,000 on Punish Counter, but this has been changed so it now decreases their Drive Gauge by 2,000 instead.
High Double Strike
The Drive Gauge decrease on Punish Counter has been changed from 0 to 10,000.
Shin Hashogeki (SA2)
Applies only when using Shin Hashogeki charged to Level 2 or 3 during a juggle combo.
There was a situation where the attack hitbox would not hit an opponent if the player was right under them, so the following adjustments have been made to alleviate the issue.
There was a situation where the attack hitbox would not hit an opponent if the player was right under them, so the following adjustments have been made to alleviate the issue.
- The pushbox has been expanded upwards from the time the button is released until the end of the attack's active frames.
- The attack's hitbox has been expanded inwards.
Shared adjustment: Drive Gauge gain during Burnout
The Drive Gauge increase gained by the opponent when they block the following attacks during Burnout has been adjusted.
■Jumping Medium Punch
2nd hit: From 1500 to 750
■Collarbone Breaker (→+Medium Punch)
2nd hit: From 1250 to 625
■Known Issue
When only the 2nd hit of Collarbone Breaker lands the attack is considered a mid-level/overhead hit, but in this situation the 625 Drive Gauge increase for when the move is considered a high level hit is applied. This issue is scheduled to be resolved in the next update.
■Jumping Medium Punch
2nd hit: From 1500 to 750
■Collarbone Breaker (→+Medium Punch)
2nd hit: From 1250 to 625
■Known Issue
When only the 2nd hit of Collarbone Breaker lands the attack is considered a mid-level/overhead hit, but in this situation the 625 Drive Gauge increase for when the move is considered a high level hit is applied. This issue is scheduled to be resolved in the next update.
Shared adjustment: Gauge gain on Perfect Parry
The Drive Gauge increase from a Perfect Parry of the following moves has been adjusted.
- Jumping Medium Punch
- Collarbone Breaker (→+Medium Punch)
- Solar Plexus Strike (→+Heavy Punch)
- Axe Kick (←+Heavy Kick)
- Overdrive Shoryuken (→↓↘+2 Punches)
- Medium/Heavy/Overdrive Tatsumaki Senpu-kyaku (↓↙←+Kick)
- Shinku Hadoken
- Shin Shoryuken
Shared adjustment: Attacks hitting with an opponent behind you
Fixed an issue where the following attacks would hit an opponent behind Ryu.
- Standing Light Kick
- 2nd hit of Fuwa Triple Strike
- Final hit of Shin Shoryuken
Edmond Honda
Standing Heavy Punch
Fixed an issue where the distance covered when using this move out of a Drive Rush with Sumo Spirit stocked was much greater than intended.
Crouching Heavy Punch
Fixed an issue where the distance covered when using this move out of a Drive Rush with Sumo Spirit stocked was much smaller than intended.
Shared adjustment: Drive Gauge gain during Burnout
The Drive Gauge increase gained by the opponent when they block the following attacks during Burnout has been adjusted.
■Powerstomp (↘+Heavy Kick)
From 2500 to 5000
■Harai Kick (→+Heavy Kick)
From 3000 to 6000
■Toko Shizume (Medium Punch, ↘+Heavy Kick)
From 2500 to 5000
■Sumo Splash (Charge ↓, ↑+Kick)
2nd hit: From 4000 to 8000
■Powerstomp (↘+Heavy Kick)
From 2500 to 5000
■Harai Kick (→+Heavy Kick)
From 3000 to 6000
■Toko Shizume (Medium Punch, ↘+Heavy Kick)
From 2500 to 5000
■Sumo Splash (Charge ↓, ↑+Kick)
2nd hit: From 4000 to 8000
Shared adjustment: Gauge gain on Perfect Parry
The Drive Gauge increase from a Perfect Parry of the following moves has been adjusted.
- Overdrive Sumo Headbutt (Charge ←, →+2 Punches)
- Teppo Triple Slap (↓↘→+Kick, Punch)
- Taiho Cannon Lift (↓↘→+K,↓+Punch)
- Hundred Hand Slap (↓↙←+P)
- Ultimate Killer Headram
- The Final Bout
Crouching Heavy Kick
Adjusted the Super Art gauge gain on block from 600 to 500.
Rock Crusher (→+Medium Punch)
Adjusted the Super Art gauge gain on block from 500 (250/250) to 250 (125/125).
Double Knee Bombs (→+Medium Kick)
Adjusted the Super Art gauge gain on block from 500 (250/250) to 250 (125/125).
Overdrive Aerial Rolling Attack (Charge ←, →+2 Punches during a jump)
Adjusted the Super Art gauge when blocking the first hit from 650 to 450.
Overdrive Backstep Rolling Attack (→↘↓↙←+2 Kicks)
- Adjusted the opponent's Drive Gauge gain when parrying the first attack from 5000 to 10000.
- Adjusted the opponent's Drive Gauge gain when parrying the 2nd and 3rd attacks from 2500 to 5000.
Shared adjustment: Attacks hitting with an opponent behind you
Fixed an issue where the following attacks would hit an opponent behind Blanka.
- Standing Heavy Kick
- Double Knee Bomber (→+Medium Kick)
- 1st attack of Overdrive Backstep Rolling Attack (→↘↓↙←+2 Kicks)
- SA2 boosted Light Rolling Attack (Charge ←, →+Light Punch)
- Ground Shave Cannonball
Shared adjustment: Gauge gain on Perfect Parry
The Drive Gauge increase from a Perfect Parry of the following moves has been adjusted.
- Rock Crusher (→+Medium Punch)
- Double Knee Bomber (→+Medium Kick)
- Overdrive Backstep Rolling Attack (→↘↓↙←+2 Kicks)
Crouching Light Kick
Fixed an issue where the attack couldn't be rapid canceled if it was absorbed by super armor.
Double Shot (↓+Medium Punch, ↓+Medium Punch)
Fixed an issue where the advantage on block was 5 frames more than blocking it normally if the opponent blocked this attack while in Burnout.
Overdrive Sonic Cross (↓↙←+2 Punches)
Adjusted the opponent's Drive Gauge gain when parrying this attack from 5100 to 5000.
Sonic Hurricane (SA1)
- Adjusted the opponent's Drive Gauge gain when blocking this attack from 2520 to 2500.
- Fixed an issue where the Heavy version's projectile clash hitbox was significantly different from its visual appearance.
Crossfire Somersault (SA3/CA)
Fixed an issue where if this attack hits an opponent while they were in stun and had a full Drive Gauge, they would recover from Burnout upon getting hit.
Shared adjustment: Gauge gain on Perfect Parry
The Drive Gauge increase from a Perfect Parry of the following moves has been adjusted.
- Overdrive Somersault Kick (Charge ↓, ↑+2 Kicks)
- Sonic Hurricane
Drive Reversal
Fixed an issue where Ken's invincibility would last longer than other characters on hit.
Shoryuken (Quick Dash version) (2 Kicks, →↓↘+Punch)
The amount of Super Art gauge gained by blocking the 1st and 2nd hit was not half of the amount gained on hit, so it has been adjusted from 300 to 200.
Overdrive Hadoken (↓↘→+2 Punches)
On Punish Counter, the opponent's Drive Gauge decrease was handled differently from other projectiles, so the values have been adjusted.
- 1st hit: From 5000 to 2500
- 2nd hit: From 0 to 2500
Shared adjustment: Drive Gauge gain during Burnout
The Drive Gauge increase gained by the opponent when they block the following attacks during Burnout has been adjusted.
■Thunder Kick (2 Kicks, Medium Kick)
From 1250 to 2500
■Normal/Overdrive Kazekama Shin Kick (↓↘→+Kick, Light Kick)
From 1500 to 3000
■Normal/Overdrive Gorai Axe Kick (↓↘→+Kick, Medium Kick)
From 1250 to 2500
■Thunder Kick (2 Kicks, Medium Kick)
From 1250 to 2500
■Normal/Overdrive Kazekama Shin Kick (↓↘→+Kick, Light Kick)
From 1500 to 3000
■Normal/Overdrive Gorai Axe Kick (↓↘→+Kick, Medium Kick)
From 1250 to 2500
Shared adjustment: Chip damage during Burnout
The amount of chip damage done when an opponent blocks the following attack during Burnout has been adjusted.
■Light Dragonlash Kick (→↓↘+Light Kick)
250 > 237
■Light Dragonlash Kick (→↓↘+Light Kick)
250 > 237
Shared adjustment: Attacks hitting with an opponent behind you
Fixed an issue where the following attacks would hit an opponent behind Ken.
- Forward Step Kick (2 Kicks, Heavy Kick)
- Jinrai Kick (↓↘→+Kick)
- Medium/Heavy Tatsumaki Senpu-kyaku (↓↙←+Kick)
- Forward attack hitbox on the Quick Dash version of Tatsumaki Senpu-kyaku
- Dragonlash Flame
Shared adjustment: Gauge gain on Perfect Parry
The Drive Gauge increase from a Perfect Parry of the following moves has been adjusted.
- Medium/Heavy/Overdrive/Quick Dash Shoryuken (→↓↘+Punch)
- Medium/Heavy/Overdrive/Quick Dash Tatsumaki Senpu-kyaku (↓↙←+Kick)
- Shippu Jinrai-kyaku
- Shinryu Reppa
Jumping Heavy Punch
Jumping Heavy Punch's damage was 800 on grounded opponents and 500 on airborne opponents, but the damage on counter/Punish Counter on airborne opponents was set to the grounded damage of 960, so it has been adjusted to 600.
Lotus Punch (↓↙←+Punch, Heavy Punch)
- The hurtbox on the head unintentionally shrank between frames 3 - 28, so it has been expanded
- The 2nd hit was considered a high attack if the first attack whiffed, but it has been fixed to now be a mid-level/overhead attack. The 2nd hit is still a high attack if the 1st attack hits.
Overdrive Tensho Kicks (↓↓+2 Kicks)
Fixed an issue where Chun-Li would move a considerable distance upon landing if the players switched sides when the 2nd attack hit.
Kikosho (SA1)
Fixed an issue where hits except for the final one would not kill an airborne opponent.
Hoyoku-sen (SA2)
Fixed an issue where the Assist Combo would be interrupted if the next input was performed with specific timing, after performing Hoyoku-sen via Assist Combo.
Soten Ranka (SA3)
The Drive Gauge decrease when blocking the 2nd hit and later attacks was 0, so those values have been adjusted.
■Super Art 3
1st hit: From 7500 to 6500
2nd and 3rd hit: From 0 to 500
■Critical Art
1st hit: From 10000 to 9000
2nd and 3rd hit: From 0 to 500
■Super Art 3
1st hit: From 7500 to 6500
2nd and 3rd hit: From 0 to 500
■Critical Art
1st hit: From 10000 to 9000
2nd and 3rd hit: From 0 to 500
Shared adjustment: Chip damage during Burnout
The amount of chip damage done when an opponent blocks the following attack during Burnout has been adjusted.
■Medium Spinning Bird Kick (Charge ↓, ↑+Medium Kick)
From 275 to 300
■Medium Spinning Bird Kick (Charge ↓, ↑+Medium Kick)
From 275 to 300
Shared adjustment: Drive Gauge gain during Burnout
The Drive Gauge increase gained by the opponent when they block the following attack during Burnout has been adjusted.
■Lotus Fist (↓↙←+Punch, Heavy Punch)
2nd hit: From 2500 to 1250
■Known Issue
The 2nd hit of Lotus Fist is considered a mid-level/overhead hit when the only that hit lands, but in this situation the Drive Gauge increase of 1250, for when the move is considered a high level hit, is applied. This issue is scheduled to be resolved in the next update.
■Lotus Fist (↓↙←+Punch, Heavy Punch)
2nd hit: From 2500 to 1250
■Known Issue
The 2nd hit of Lotus Fist is considered a mid-level/overhead hit when the only that hit lands, but in this situation the Drive Gauge increase of 1250, for when the move is considered a high level hit, is applied. This issue is scheduled to be resolved in the next update.
Shared adjustment: Attacks hitting with an opponent behind you
Fixed an issue where the following attacks would hit an opponent behind Chun-Li.
- Lightning Kicks (↓↘→+Kick)
- Lightning Kick Barrage (↓↘→+2 Kicks, 2 Kicks)
- Hazanshu (↓↙←+Kick)
- Spinning Bird Kick (Charge ↓, ↑+Kick)
- Soten Ranka
Shared adjustment: Gauge gain on Perfect Parry
The Drive Gauge increase from a Perfect Parry of the following moves has been adjusted.
- Crouching Heavy Punch
- Lotus Fist (↓↙←+Punch, Heavy Punch)
- Lightning Kicks (↓↘→+Kick)
- Lightning Kick Barrage (↓↘→+2 Kicks, 2 Kicks)
- Aerial Lightning Kicks (in mid-air, ↓↘→+Kick)
- Spinning Bird Kick (Charge ↓, ↑+Kick)
- Drive Reversal
- Kikosho
- Aerial Kikosho
- Hoyoku-sen
- Soten Ranka
Smetana Dropkick (↘+Heavy Kick)
The amount of Drive Gauge lost when an opponent blocked this attack was unintentionally set at a low value, so it has been corrected from 3000 to 6000.
Borscht Dynamite (360+Kick while jumping)
- This attack would come out unexpectedly when attempting to do a jumping attack, so the input recognition frames* have been changed from 20 to 12.
- Fixed an issue where the amount of Super Art gauge gain on Punish Counter was 150 less than on normal hit.
*Input recognition frame is the the number of frames you must input the next command in order for the game to recognize you are performing a specific attack.
ex. When performing a Hadoken (↓↘→+Punch), you must input Down then Down-Forward within a certain number of frames for the game to recognize the input. This is known as the Input recognition frame.
Overdrive Double Lariat (3 Punches)
Adjusted the amount of Super Art gauge gain on the 2nd hit and after from 300 to 250.
Aerial Russian Slam (SA1)
- Fixed an issue where Drive Gauge loss would be 60 less on hit when using Modern Controls' Special button to perform the move.
- Fixed an issue where if this attack hits an opponent while they were in stun and had a full Drive Gauge, they would recover from Burnout upon getting hit.
Cyclone Lariat (SA2)
- Made the following adjustments as the opponent would fly over Zangief during a mid-air hit, causing attacks after the 2nd hit to miss.
- When the attack hitbox connects, the pushbox will expand upwards.
- Attack hitboxes from the 2nd attack and later will have their range expanded upwards.
- Fixed an issue where the attack's effect would remain when interrupted by an opponent's attack on startup.
- Fixed the opponent's reaction animation on the final hit.
Shared adjustment: Drive Gauge gain during Burnout
The Drive Gauge increase gained by the opponent when they block the following attacks during Burnout has been adjusted.
■Crouching Medium Kick
From 2500 to 5000
■Smetana Dropkick (↘+Heavy Kick)
From 1500 to 3000
■Crouching Medium Kick
From 2500 to 5000
■Smetana Dropkick (↘+Heavy Kick)
From 1500 to 3000
Shared adjustment: Attacks hitting with an opponent behind you
Fixed an issue where the following attack would hit an opponent behind Zangief.
- Standing Light Kick
Shared adjustment: Gauge gain on Perfect Parry
The Drive Gauge increase from a Perfect Parry of the following moves has been adjusted.
- Normal/Overdrive Double Lariat (2 Punches)
- Cyclone Lariat
Standing Medium Kick
The amount of Super Art gauge gain on Punish Counter was higher than on a normal hit, so it's been adjusted from 700 to 500 to match.
Jumping Medium Kick
The attack property for the tip of the attack has been corrected to be a mid-level/Overhead instead of a high attack.
Jumping Heavy Punch
Fixed an issue where the recovery frame difference does not change if an opponent blocks this attack while in Burnout.
Aerial Yoga Teleport (← or →+3 Punches or 3 Kicks while jumping)
- Fixed an issue where Dhalsim would gain Super Art gauge upon activation.
- Fixed an issue where after performing the Punch version, if Dhalsim does nothing while in mid-air, the landing timing would be 1 frame slower compared to the Kick version.
Heavy Yoga Flame (→↘↓↙←+Heavy Punch)
Fixed an issue where projectile clash would only occur twice.
Yoga Arch (↓↘→+Kick)
Fixed an issue where Initial Scaling and Combo Scaling would be applied when the opponent is only hit by the detonation from the projectile landing on the ground.
Overdrive Yoga Comet (→↘↓↙←+2 Punches while jumping)
Fixed an issue where Dhalsim couldn't cancel into other mid-air special moves before landing if the player plinked* the two attack buttons by 1 frame when performing the attack.
*Plinking: Quickly pressing two or more buttons exactly one frame apart
*Plinking: Quickly pressing two or more buttons exactly one frame apart
Yoga Sunburst (SA2)
Fixed an issue where the fireball could not be seen if only the final attack missed.
Shared adjustment: Gauge gain on Perfect Parry
The Drive Gauge increase from a Perfect Parry of the following moves has been adjusted.
- Overdrive Yoga Blast (→↘↓↙←+2 Kicks)
- Drive Reversal
- Yoga Inferno
- Yoga Sunburst
Forward Dash
- Fixed the beginning animation as it was difficult to visually recognize the technique.
- Fixed an issue where the technique's overall frame data would change depending on the inputs during the technique.
- Fixed an issue where after recovery frames end and Rashid is thrown, Rashid would not be able to perform a throw escape.
Desert Slider (Light Punch+Light Kick during a jump)
Drive Gauge gain on hit was too small, so it has been adjusted from 1600 to 2000.
Light Spinning Mixer (air current boosted) (↓↘→+Light Punch)
Drive Gauge gain on block was different from a normal hit, so it has been adjusted from 2000 to 900.
Medium Spinning Mixer (air current boosted) (↓↘→+Medium Punch)
- Made the following adjustments as the damage on Punish Counter was 120%.
- 1st - 2nd hit: From 360 to 240
- 3rd - 10th hit: From 240 to 120
- Made the following adjustments as the Drive Gauge gain on Punish Counter differed from normal hit.
- 1st - 2nd hit: From 0 to 150
- 3rd - 10th hit: From 200 to 150
- Final hit: From 200 to 500
Overdrive Spinning Mixer (air current boosted) (↓↘→+2 Punches)
- Made the following adjustments as the damage on Punish Counter was 120%.
- 1st - 2nd hit: From 360 to 240
- 3rd - 10th hit: From 240 to 120
- Adjusted the Super Art gauge gain after the 3rd hit on Punish Counter as it was more than a normal hit. The value was changed from 100 to 50.
- Fixed an issue where Rashid's Drive Gauge would increase when a hit after the 3rd hit landed as a Punish Counter.
- Adjusted the Drive Gauge increase when parrying this move from 12,000 to 10,000.
Overdrive Eagle Spike (air current boosted) (↓↙←+2 Kicks)
Fixed an issue where if Ysaar is placed behind the opponent and Rashid performs Overdrive Eagle Spike, the Eagle Spike would not hit the opponent and go through them instead.
Overdrive Arabian Skyhigh (↓↙←+2 Kicks during a forward jump)
Fixed an issue where Rashid's Drive Gauge would increase when this attack was blocked.
Tempest Moon (air current boosted) (→+Kick during Run)
Made the following adjustments to Drive Gauge increase on parry.
- 1st hit: From 10000 to 5000
- 2nd - 3rd hit: From 5000 to 2500
Drive Impact
Fixed an issue where under certain conditions, when the Drive Impact hit cutscene occurs, the opponent would not take any damage.
Super Art gauge gain on block
The amount of Super Art gauge gained on block for the following attacks was not half of the amount gained on hit, so they have been adjusted.
■Flapping Spin (→+Medium P)
From 500 to 250
■Spinning Mixer (air current boosted) (↓↘→+Punch)
Light: From 550 to 400
Medium: From 350 to 225 (When the opponent blocks this standing)
Heavy: From 50 to 55
■Eagle Spike (↓↙←+Kick)
Medium: From 500 to 550
Heavy: From 500 to 600
Overdrive: From 500 to 250 (Only when the opponent is in Burnout)
■【Eagle Spike (air current boosted) (↓↙←+K)
Medium/Heavy: From 500 to 600
■Assault Nail (↓↙←+Punch, →Kick, Kick)
From 250 to 150
■Arabian Skyhigh (↓↙←+Kick during a forward jump)
From 500 to 250
■Light/Medium/Heavy Arabian Cyclone (↓↙←+Punch)
From 600 to 300
■Tempest Moon (→+Kick during Run)
From 600 to 300
■Flapping Spin (→+Medium P)
From 500 to 250
■Spinning Mixer (air current boosted) (↓↘→+Punch)
Light: From 550 to 400
Medium: From 350 to 225 (When the opponent blocks this standing)
Heavy: From 50 to 55
■Eagle Spike (↓↙←+Kick)
Medium: From 500 to 550
Heavy: From 500 to 600
Overdrive: From 500 to 250 (Only when the opponent is in Burnout)
■【Eagle Spike (air current boosted) (↓↙←+K)
Medium/Heavy: From 500 to 600
■Assault Nail (↓↙←+Punch, →Kick, Kick)
From 250 to 150
■Arabian Skyhigh (↓↙←+Kick during a forward jump)
From 500 to 250
■Light/Medium/Heavy Arabian Cyclone (↓↙←+Punch)
From 600 to 300
■Tempest Moon (→+Kick during Run)
From 600 to 300
Shared adjustment: Chip damage during Burnout
The amount of chip damage done when an opponent blocks the following attacks during Burnout has been adjusted.
■Assault Nail (↓↙←+Punch, →Kick, Kick)
From 200 to 150
■Arabian Skyhigh (↓↙←+Kick during a forward jump)
Light: From 200 to 150
Medium: From 225 to 175
Heavy: From 250 to 200
■Overdrive Arabian Cyclone (↓↙←+2 Punches)
From 200+25 to 100+100
■Medium Whirlwind Shot (↓↘→+Medium Kick)
1st hit fully charged: From 150 to 100
■Spinning Mixer (air current boosted) (↓↘→+Punch)
Heavy: From 25 to 31
Overdrive 1st and 2nd hit: From 75 to 50
Overdrive 3rd hit and after: From 100 to 25
■Assault Nail (↓↙←+Punch, →Kick, Kick)
From 200 to 150
■Arabian Skyhigh (↓↙←+Kick during a forward jump)
Light: From 200 to 150
Medium: From 225 to 175
Heavy: From 250 to 200
■Overdrive Arabian Cyclone (↓↙←+2 Punches)
From 200+25 to 100+100
■Medium Whirlwind Shot (↓↘→+Medium Kick)
1st hit fully charged: From 150 to 100
■Spinning Mixer (air current boosted) (↓↘→+Punch)
Heavy: From 25 to 31
Overdrive 1st and 2nd hit: From 75 to 50
Overdrive 3rd hit and after: From 100 to 25
Shared adjustment: Gauge gain on Perfect Parry
The Drive Gauge increase from a Perfect Parry of the following moves has been adjusted.
- Jumping Heavy Punch
- Flapping Spin (→+Medium P)
- Tempest Moon (→+Kick during Run)
- Light/Medium/Overdrive Spinning Mixer (↓↘→+Punch)
- Arabian Cyclone (↓↙←+Punch)
- Ysaar
Changes to Assist Button behavior
- We have updated the Assist button behavior so that it no longer inputs all strength levels when pressing it while the Attack button is being pressed at the same time. With this change, safe throw escapes are no longer possible at all using the Assist button.
Please note that no changes have been made when pressing the Assist button first.
Fixed an issue where if the player inputs Emergency Stop while holding down the Assist button, an Assisted Combo would be performed inadvertently after Emergency Stop.
Surprise Forward Hop<br />Surprise Backwards Hop
Fixed an issue where it was possible to perform a throw escape by inputting Surprise Forward Hop or Surprise Back Hop when being thrown.
Crouching Heavy Punch
The recovery on this attack was accidentally set to -4 frames due to fixing another issue. It has now been reverted back to -5 frames.
Rock Crusher
Due to fixing another issue, the second hit of this attack registered as a mid-level overhead even if the first attack hit or was blocked. It has now been fixed so that the second hit will register as a high attack when the first attack hits or is blocked.
Fixed an issue where an opponent's anti-air attack wouldn't hit Rashid when the opponent would move forward slightly as Rashid grabs the edge of the screen during a wall jump.
Drive Parry
-
- Fixed an issue where medium kick would suddenly be performed when a parry input was buffered or input during a time freeze and then released before the player was able to perform the parry.
- The above issue also occurred during a Drive Rush or Super Art time freeze, and has also been fixed for those cases.
- Fixed an issue where medium kick would suddenly be performed when a parry input was buffered or input during a time freeze and then released before the player was able to perform the parry.
Power Up Super Arts
- Fixed an issue where character behavior would become unnatural if hit by certain attacks at the exact moment that the power-up boost provided by this Super Art expired.
Assisted Combo (1st hit)
-
- Fixed an issue where buffered Assist Combo inputs would not register in certain situations.
- Fixed an issue where the 2nd attack of an Assist Combo would be performed even though only the first input had been performed.
- Fixed an issue where buffered Assist Combo inputs would not register in certain situations.
Cancel Drive Rush
- In order to make it easier to perform a Cancel Drive Rush, adjustments have been made that allow the technique to be performed using the inputs below.
■Classic Controls
(Neutral or Forward) + Medium Punch + Medium Kick
■Modern Controls
(Neutral or Forward) + Parry button
Please note that no changes have been made to the forward, forward input or Parry Drive Rush.
Cancelable Light Attacks
- Adjustments have been made so that a Cancel Drive Rush can activate even when a light attack whiffs.
This is an adjustment being added in conjunction with the additional Cancel Drive Rush inputs. The relaxing of the Drive Rush inputs paired too well with low-risk light attacks, and would have had a huge impact on fights if left as is. This adjustment has been made to address that.
Please note that this adjustment is not just for the newly added Drive Rush inputs. The forward, forward input will also activate a Drive Rush on a light attack whiff.
Minor Bug Fixes
- Minor miscellaneous issues were fixed.
Modern Controls
Fixed an issue where certain Overdrive attacks would not be performed if manually inputted while holding down the Assist button. The attacks that could not be performed are the following:
- Sand Blast
- Rising Uppercut
- Flash Knuckle
- Aerial Flash Knuckle
Overdrive Avenger
Adjusted the hitstop values on the super armor hitbox due to certain attacks causing an unusual hitstop variance to occur when super armor is activated.
Crouching Light Attack
Attacks with 4 frames of start up couldn't come out when using Modern Controls, so crouching light attack has been changed from crouching light kick to crouching light punch.
Throw Escape
Fixed an issue where inputting a throw 1 frame after inputting a Drive Parry would allow you to perform a throw escape.
Bushin Ninjastar Cypher (Level 3 Super Art)
Fixed an issue where Kimberly's level 3 Super Art would hit opponents behind her.
When playing with Modern Controls<br />Enfold (Down+Punch) during Scutum (Forward+Special)
■Modern Controls only
During Scutum's counter attack phase, inputting down, even if the Special Move button is held, would cause you to leave the Scutum stance. This made it difficult to perform Enfold, since it also requires a down input.
We've fixed this issue so that the Scutum stance will continue to be held if you are holding down the Special Move button during the counter attack phase, even if down is input.
During Scutum's counter attack phase, inputting down, even if the Special Move button is held, would cause you to leave the Scutum stance. This made it difficult to perform Enfold, since it also requires a down input.
We've fixed this issue so that the Scutum stance will continue to be held if you are holding down the Special Move button during the counter attack phase, even if down is input.
Modern Controls
Fixed an issue where certain Overdrive attacks would not be performed if manually inputted while holding down the Assist button. The attacks that could not be performed are the following:
- Condor Wind
- Tomahawk Buster
- Windclad Condor Dive
Overdrive Condor Dive
Fixed an issue where Overdrive Condor Dive could be performed during a backwards jump when plinking* the inputs.
*Plinking: Quickly pressing two or more buttons exactly one frame apart
*Plinking: Quickly pressing two or more buttons exactly one frame apart
Soaring Thunderbird (Level 2 Super Art)
Fixed an issue where level 2 Super Art Soaring Thunderbird could not be performed during a backwards jump when plinking* the inputs.
*Plinking: Quickly pressing two or more buttons exactly one frame apart
*Plinking: Quickly pressing two or more buttons exactly one frame apart
Soaring Thunderbird (Level 2 Super Art)
Fixed an issue where an opponent would not be KO'd if the move connected in mid-air from the 2nd hit.
Modern Controls
Fixed an issue where certain Overdrive attacks would not be performed if manually inputted while holding down the Assist button. The attacks that could not be performed are the following:
- Torbalan
Boosted Saihasho<br />Boosted Ankensatsu<br />Boosted Go Ohatsu
Fixed an issue where these moves could be kara canceled* on their 1st frame with a level 3 Super Art/Critical Art if they had followed up a boosted version of a different strength move (Saihasho/Ankensatsu/Go Ohatsu).
*Kara Cancel: Canceling the start up of a move into another move.
*Kara Cancel: Canceling the start up of a move into another move.
Modern Controls
Fixed an issue where certain Overdrive attacks would not be performed if manually inputted while holding down the Assist button. The attacks that could not be performed are the following:
- Air Slasher
- Jackknife Maximum
Back Throw
Fixed an issue where the Super Art gauge gain on Punish Counter was the same as a normal hit.
Face Breaker (Back+Heavy Kick)
Fixed an issue where opponents suffered a greater Drive Gauge loss on a Punish Counter when in the air, compared to when they were standing on the ground.
Cannon Strike (Heavy version)
Fixed an issue where manually inputting heavy Cannon Strike immediately after jumping would result in a jumping heavy attack coming out instead.
Overdrive Quick Spin Knuckle
Fixed an issue that resulted in an opponent's attack coming out in the wrong direction if they input it while switching sides due to this move.
Along with this fix, there have been some minor changes made to the behavior of others moves* that can get you behind opponents.
*Overdrive Quick Spin Knuckle, Surprise Forward Hop, etc.
Along with this fix, there have been some minor changes made to the behavior of others moves* that can get you behind opponents.
*Overdrive Quick Spin Knuckle, Surprise Forward Hop, etc.
Modern Controls
Fixed an issue where certain Overdrive attacks would not be performed if manually inputted while holding down the Assist button. The attacks that could not be performed are the following:
- Aerial Tatsumaki Senpu-kyaku
Drive Impact
Fixed an issue where unnecessary combo scaling was added in certain situations, resulting in lowered damage.
Edmond Honda
Crouching Light Punch (rapid cancel version)
Fixed an issue where E. Honda could perform a kara cancel* on the 1st frame of the rapid cancel version of crouching light punch.
*Kara Cancel: Canceling the start up of a move into another move.
*Kara Cancel: Canceling the start up of a move into another move.
The Final Bout (Level 3 Super Art)
Fixed an issue that gave E. Honda much higher Drive Gauge gain upon a successful parry compared to other characters.
Charging Attacks with Modern Controls
There was an unintentional difference between Modern and Classic controls in the charge time required for commands to be completed or to be charged, so this difference has been fixed. The affected attacks are as follows.
■Rolling Attack, Aerial Rolling Attack (Normal and Overdrive)
■Vertical Rolling Attack (Normal and Overdrive)
*Input recognition frame is the the number of frames you must input the next command in order for the game to recognize you are performing a specific attack.
ex. When performing a Hadoken (down, down-forward, forward+Punch), you must input Down then Down-Forward within a certain number of frames for the game to recognize the input. This is known as the Input recognition frame.
■Rolling Attack, Aerial Rolling Attack (Normal and Overdrive)
- Time to charge has changed from 50 frames to 40 frames.
- Input recognition frame has changed from 0 frames to 10 frames.
■Vertical Rolling Attack (Normal and Overdrive)
- Time to charge has changed from 50 frames to 40 frames.
- Input recognition frame has changed from 0 frames to 10 frames.
*Input recognition frame is the the number of frames you must input the next command in order for the game to recognize you are performing a specific attack.
ex. When performing a Hadoken (down, down-forward, forward+Punch), you must input Down then Down-Forward within a certain number of frames for the game to recognize the input. This is known as the Input recognition frame.
Back Throw
Fixed an issue where the Super Art gauge gain on Punish Counter was the same as a normal hit.
Jumping Medium Punch
Fixed an issue where cancels using mid-air special moves would not work if this move was Drive Parried by the opponent.
Aerial Rolling Attack
Fixed an issue where recovery was different if an opponent in Burnout blocked a heavy Aerial Rolling Attack.
Rock Crusher (Forward+Medium Punch)
Updated the active frame attack hitbox from a high to mid.
■Known Issue
With this adjustment, this move's second attack will always be a mid-level overhead attack, but will change to a high level attack if the first attack hits or is blocked. We are looking to fix this issue in the next update.
■Known Issue
With this adjustment, this move's second attack will always be a mid-level overhead attack, but will change to a high level attack if the first attack hits or is blocked. We are looking to fix this issue in the next update.
Crouching Heavy Punch
Fixed an issue that caused an opponent's behavior to become erratic when crouching Heavy Punch is blocked.
■Known Issue
With the above adjustment, the recovery on block has unintentionally changed from -5 to -4 frames. We are looking to fix this issue in the next update.
■Known Issue
With the above adjustment, the recovery on block has unintentionally changed from -5 to -4 frames. We are looking to fix this issue in the next update.
Charging Attacks with Modern Controls
There was an unintentional difference between Modern and Classic controls in the charge time required for commands to be completed or to be charged, so this difference has been fixed. The affected attacks are as follows.
■Kikoken
■Overdrive Kikoken
*Input recognition frame is the the number of frames you must input the next command in order for the game to recognize you are performing a specific attack.
ex. When performing a Hadoken (down, down-forward, forward+Punch), you must input Down then Down-Forward within a certain number of frames for the game to recognize the input. This is known as the Input recognition frame.
■Kikoken
- Time to charge has changed from 45 frames to 50 frames.
- Input recognition frame has changed from 0 frames to 10 frames.
■Overdrive Kikoken
- Input recognition frame has changed from 0 frames to 10 frames.
*Input recognition frame is the the number of frames you must input the next command in order for the game to recognize you are performing a specific attack.
ex. When performing a Hadoken (down, down-forward, forward+Punch), you must input Down then Down-Forward within a certain number of frames for the game to recognize the input. This is known as the Input recognition frame.
Forward, Back and Mid-air Throws
Fixed a phenomenon where charge input directions would reverse during the throws.
Serenity Stream
Fixed a phenomenon where canceling certain attacks into Serenity Stream and then quickly inputting Serenity Stream > kick would result in Hazanshu suddenly being performed.
Aerial Russian Slam (Level 1 Super Art)
Fixed Zangief's hitbox during his level 1 Super Art animation so that it returns to a hitbox on the ground at the appropriate time, instead of being a mid-air hitbox the entire time.
Drive Gauge
Fixed an issue where Zangief's Drive Gauge would recover slower than other characters when in Burnout.
Agile Kick (Rapid cancel version)
Agile Kick's rapid cancel version command is limited to down-back + Light Kick in Classic Control only, due to difficulties in performing an Agile Kick > Crouching Light Kick chain.
In Modern controls, the rapid cancel attacks differ, so no change has been made due to the large effect it would have.
In Modern controls, the rapid cancel attacks differ, so no change has been made due to the large effect it would have.
Overdrive Yoga Arch
Fixed an issue where the projectiles that disappeared during a level 3 Super Art/Critical Art would reappear after. They will now disappear and not come back.
Overdrive Yoga Comet
Fixed an issue where players would become unable to perform mid-air techniques after an opponent Drive Parries this move.