
ザンギエフ
Zangief — 对策
Key Info
- Command grab character
- 63214789P (Screw Piledriver / SPD) — at close range
- 63214K (Borscht Dynamite) — at close range
- 63214K (Borscht Dynamite) — at long range (different property)
- (In air, close range) 63214789K (Aerial Russian Slam)
- Anti-air normal at 12F startup: LPMPHP (OD Double Lariat)
- SA1 Final Atomic Buster (236236K): jump-read super — does not hit grounded opponents, safe to ignore on oki
- SA2 Cyclone Lariat (236236P): 18F startup, projectile invincible — low oki value, safe to ignore
- SA3 Bolshoi Storm Buster: startup equivalent to -3F — hits even if you press a button or do nothing, as long as you are in throw range. Input back-step or jump in advance to escape
- Plus-on-block move: 6HP
Neutral Game (Focus Points)
- Look for Drive Impact on his HP — if you are watching closely it is doable, so create time to go for it when he keeps mashing HP. If Drive Impact feels too risky, place a c.MK or similar to stuff the HP instead
- Against 63214789P (SPD): neutral jump, forward jump, or back-step — never back-jump
- Back-jump does not give you a punish
- Neutral jump risks getting anti-aired if he is watching
- Back-step is lowest risk, but 6HP can hit you during his pressure sequences — be careful
- Switching between neutral jump and forward jump based on distance is key
- Go for crossup jumps — LPMPHP (Double Lariat) is weak to crossup trajectories, making crossup attacks very effective
- Because startup is 12F, also mix in empty jumps
- Zangief has no OD reversal and SA2 is slow — keep up offensive pressure on his wakeup
- Idling risks a reversal SPD punishing your hesitation
- Keep attacking to drain his Drive Gauge
シベリアンエクスプレス
Counter-strategy for Siberian Express — punish frames, blocking direction, yomi paths for both close-range and far-range versions — to be added.
通常投げ
There are many throw directions, but you really only need to watch out for LPLK and 3LPLK.
- LPLK: +22F on hit / corner throw loop available
- 4LPLK: +8F on hit / command grab is meaty if you don't tech-roll
- 6LPLK: +10F on hit / distance too far for anything to be meaty
- 3LPLK: +28F on hit / Drive Rush oki available
- 1LPLK: +9F on hit
- 2LPLK: +9F on hit
Recommended counters
After LPLK and 3LPLK
- Mix between in-place tech-roll and back tech-roll to read him.
After all other versions
- Any Drive Rush he does leaves an invincible reversal guaranteed.
- Always back tech-roll if you get hit.
- Not back-rolling usually gives Zangief a much stronger oki situation.
Borscht Dynamite(跳跃中)(近身)







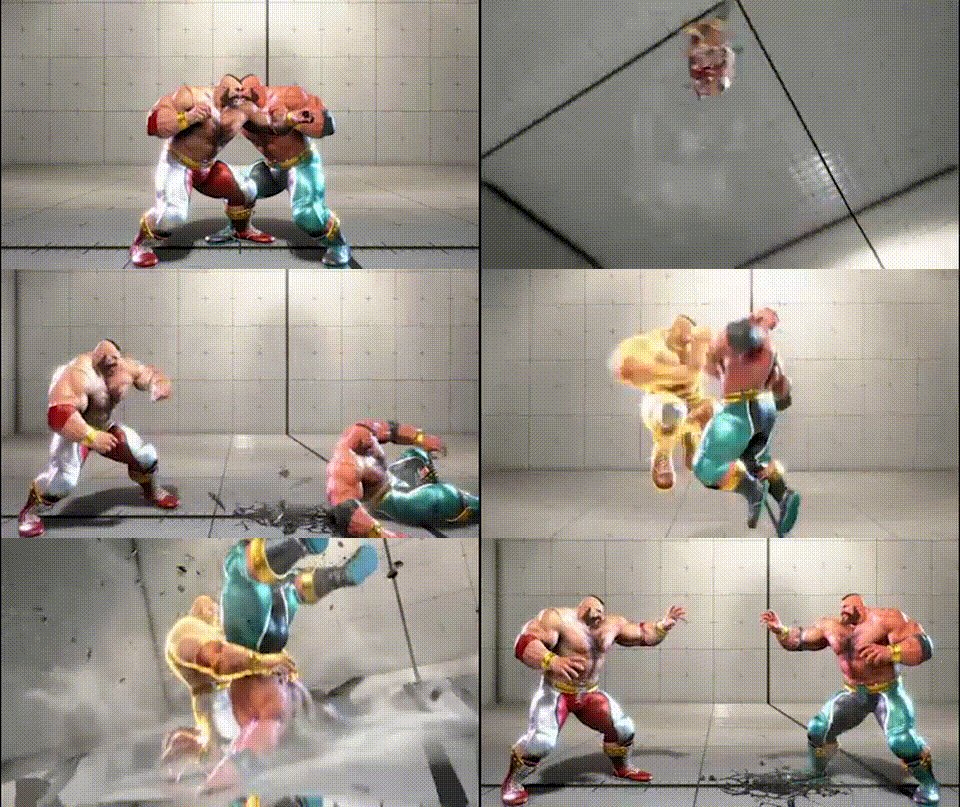
Air command grab. On hit, Zangief is +19F. The situation isn't great for him — without drive-rush he gets no oki. With drive-rush, you have a window where any 7F-or-faster invincible reversal is guaranteed.
Recommended counters
Confirm the rush, fire a 7F-or-faster invincible
Visually confirm Zangief's drive-rush, then commit a wide-hitbox invincible. Look up which moves of yours land here.
- Juri SA1
- Manon SA2
Watch out
Short-range OD invincibles whiff
OD invincibles with short reach get whiff-punished by 2LP or HP. Pick reach over speed here.
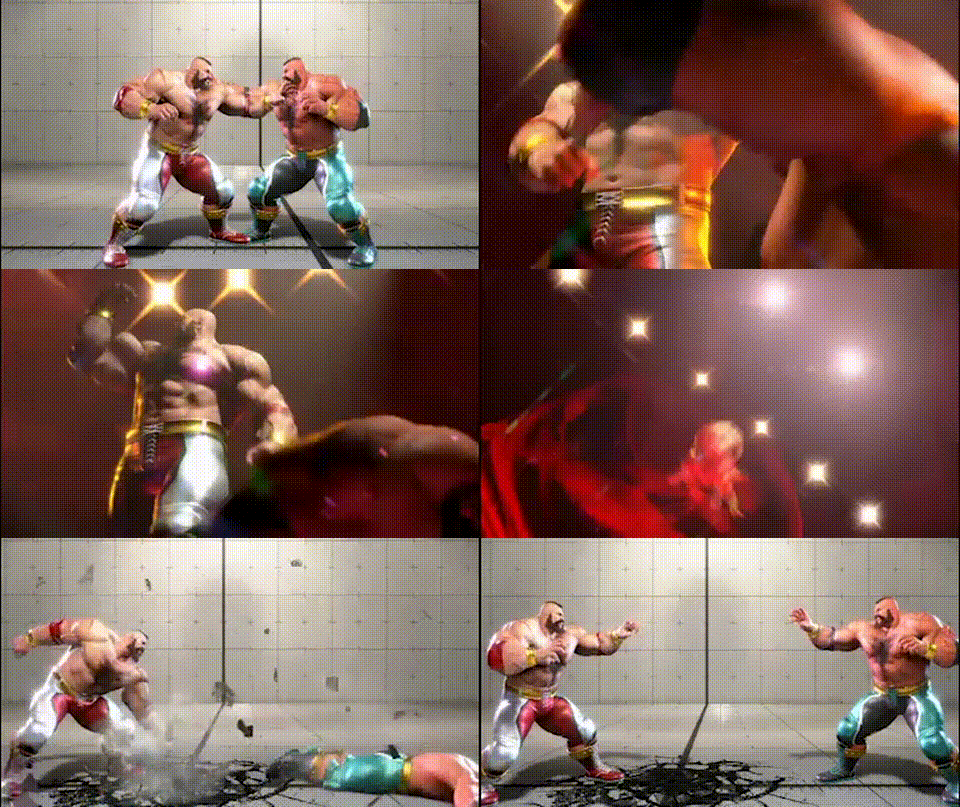
A command-grab Super Art with -3F startup. It grabs regardless of whether the opponent is attacking or standing still, as long as they are within throw range.
The recommended counters are: use a move with throw-invincible properties as a meaty, or go for a safe jump.
Recommended counters
- As oki pressure
- Use a meaty that has throw-invincible properties.
- Safe jump
- When your jump attack is about to connect, buffer an up or back-dash input.
- If you have the input buffered and Zangief activates SA3, you will sail over it.
Screw Piledriver(近身)
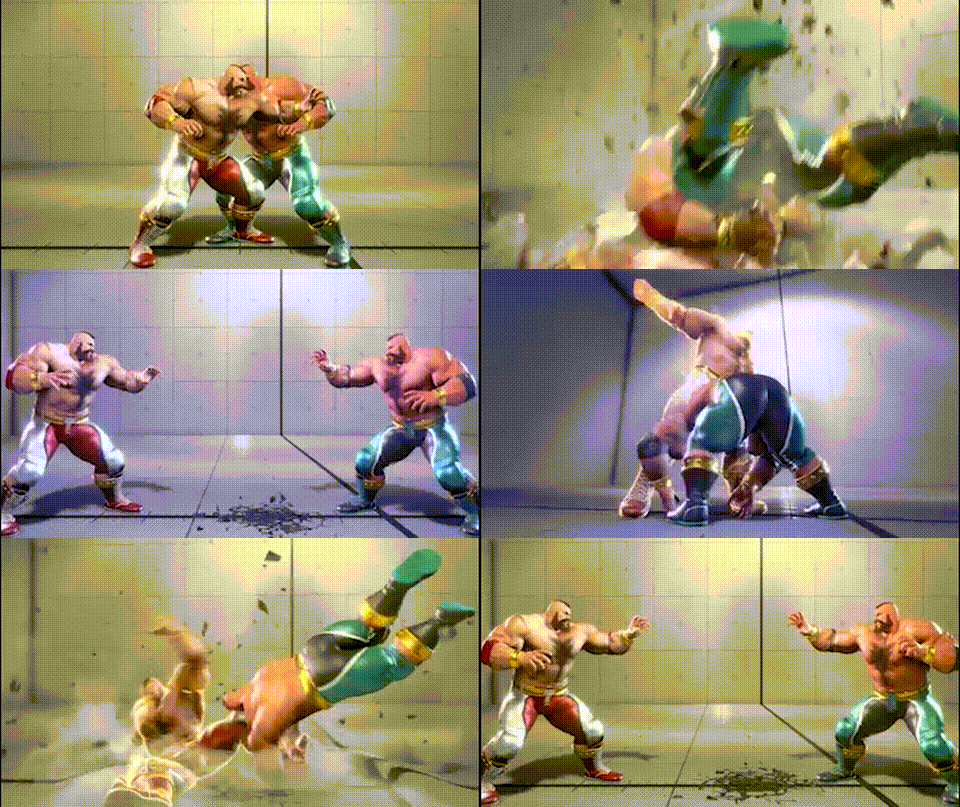
If you read a command grab, never back-jump — most characters can't punish on landing from a back jump. If your character has a normal that reaches from a back jump, then back-jump is fine; otherwise neutral-jump, forward-jump, or back-dash to evade. Back-dash is ideal because it doesn't get caught by Zangief's shimmy anti-airs.
Hit advantage:
- 63214789LP: +30F
- 63214789MP / HP / PP: +28F
Recommended counters
Drive-rush → LK oki
LK lands meaty but can't combo without a cancel-rush — Zangief branches into block-string (rush MP), counter-mash (rush 6HP), or command grab (63214789P). Once you see the LK, drive-reversal has very high EV. Zangief usually uses this with 5–6 bars of drive gauge, so check his D-gauge before committing.
Drive-rush → 2HK oki
2HK is meaty but Drive Impact punishes it. Distance prevents him from meatying late active frames, so on block it's always -9F. Use any 9F-or-faster long-reach normal for the punish.
Drive-rush → 6HK overhead oki
Overhead option — Drive Impact punishes. -5F on block but distance prevents punishes. After 63214789LP there's a 5F gap, so a 4F mash beats it. After other strengths there's a 7F gap, so a 6F mash maximizes return.
Fuzzy back-walk vs meaty 63214789LP
63214789LP is not meaty, so back-walk whiffs it. If Zangief only meaty-strikes, fuzzy-jump is also viable.
Watch out
Drive-rush → delayed MP
Common option that beats fuzzy reactions and gives Zangief good frames on block. It also crushes the fuzzy-jump option above. Once Zangief shows this option, mash a fast button for max return.
Drive-rush → delayed 6MK
Has a low-profile, so a crouch-MK mash gets punish-countered. Also crushes fuzzy actions. Once you see this option, mash for max return — the timing is feel-based for Zangief, so the strength he picks is up to him.
Russian Suplex(近身)
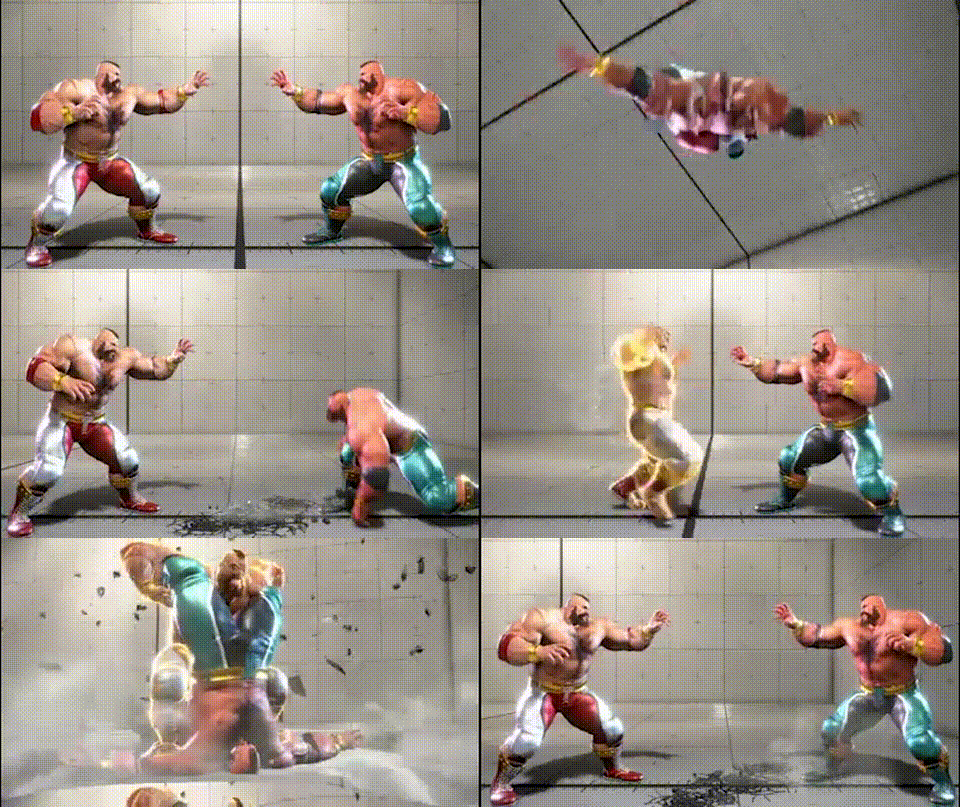
Counter-strategy for Russian Suplex — punish frames, blocking direction, yomi paths — to be added.

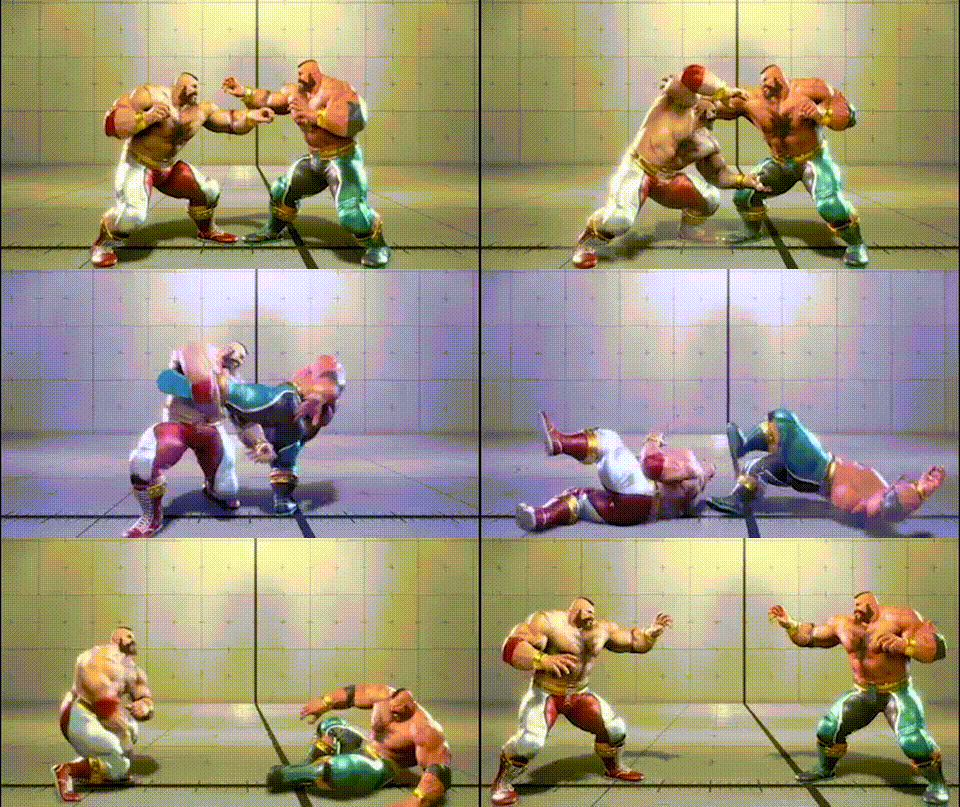
Counter-strategy for Tundra Storm — punish frames, blocking direction, yomi paths — to be added.
2LPと2LKとLP
Zangief's light-button strings.
Recommended counters
Light cancel strings such as 2LK → 2LP are true blockstrings. After blocking 2LP, 2LK, or LP, the safest option is to mash a 4F button — it looks ugly, but it works.
- Mash a 4F light
- Because the string is a true blockstring, your 4F button will land as a counter-hit only if Zangief cancels into Screw Piledriver or Drive Rush — punishing both at once.
Watch out
Zangief can delay his light-cancel timing to crush your reversal mash. When he does this there is a visible gap — use Just Parry to add risk to this option.
63214789P
First rule: if you read a command grab, never back-jump. Some characters can punish Zangief on landing from a back jump — if yours can, back-jump is fine. Otherwise, use neutral jump, forward jump, or back-dash to escape. Back-dash is the lowest-risk option as long as you aren't getting poked out of it.
- 63214789LP
- Low damage
- Short reach
- 63214789MP
- 63214789HP
- High damage
- Wide reach
- 63214789PP
- High damage
- Wide reach
Recommended counters
Hit advantage after each version:
- 63214789LP: +30F
- 63214789MP: +28F
- 63214789HP: +28F
- 63214789PP: +28F
Oki options after the grab:
- Drive-rush → LK
- Lands meaty but requires a cancel-rush to combo — creating multiple branches:
- True blockstring: rush → MP
- Crush counter: rush → 6HP
- Command grab: 63214789P
- Once you see the LK, Drive Reversal has very high expected value — try it.
- Zangief usually uses this option with 5–6 bars of drive gauge. Check his gauge first.
- The clip records:
- Rush → 2HK
- Rush → LK → cancel-rush → MP (true blockstring)
- Lands meaty but requires a cancel-rush to combo — creating multiple branches:
- Drive-rush → 2HK
- Lands meaty, but Drive Impact is guaranteed.
- Distance makes late-active meaty impossible, so on block it is always -9F.
- Punish with any long-reaching normal 9F or faster.
- Drive-rush → 2MK
- Lands meaty but has no follow-up combo.
- Used simply to close distance.
- Drive-rush → 6HK (overhead)
- Overhead option — Drive Impact is guaranteed.
- -5F on block, but distance prevents a punish.
- After 63214789LP there is a 5F gap — a 4F mash wins.
- After other strengths there is a 7F gap — a 6F mash maximizes return.
- 63214789LP meaty
- Not actually meaty — back-walk will whiff it.
- If Zangief only uses meaty strikes, fuzzy-jump is also viable.
- The clip records:
- Rush → 2HK
- Rush → LK → cancel-rush → MP
- Rush → 63214789P
Watch out
- Drive-rush → delayed MP
- Widely used because it beats fuzzy reactions and leaves Zangief at advantage on block.
- It also shuts down the fuzzy-jump described above.
- Once you see this option, mash a fast button for max return.
- Drive-rush → delayed 6MK
- Has a low-profile, so a crouching MK mash gets punish-countered.
- Fuzzy actions are also beaten.
- Once you see this option, mash for max return.
- The delay amount is up to Zangief's feel, so which strength he picks is random.
63214K
The move's properties change based on distance. The situation after this move is very favorable — Screw Piledriver and 6MK are both meaty.
- [Close] 63214K
- Screen swap
- Zangief is +26F
- [Close] 63214KK
- Screen swap
- Zangief is +27F
- 63214K (far)
- Zangief is +29F
- 63214KK (far)
- Zangief is +29F
Recommended counters
Unlike after Screw Piledriver, the situation here is extremely good for Zangief:
- Drive Rush does not make any invincible reversal guaranteed
- Screw Piledriver (63214789P) is meaty
- Strike options are also meaty
This is a pure guessing game — just do your best to read him.

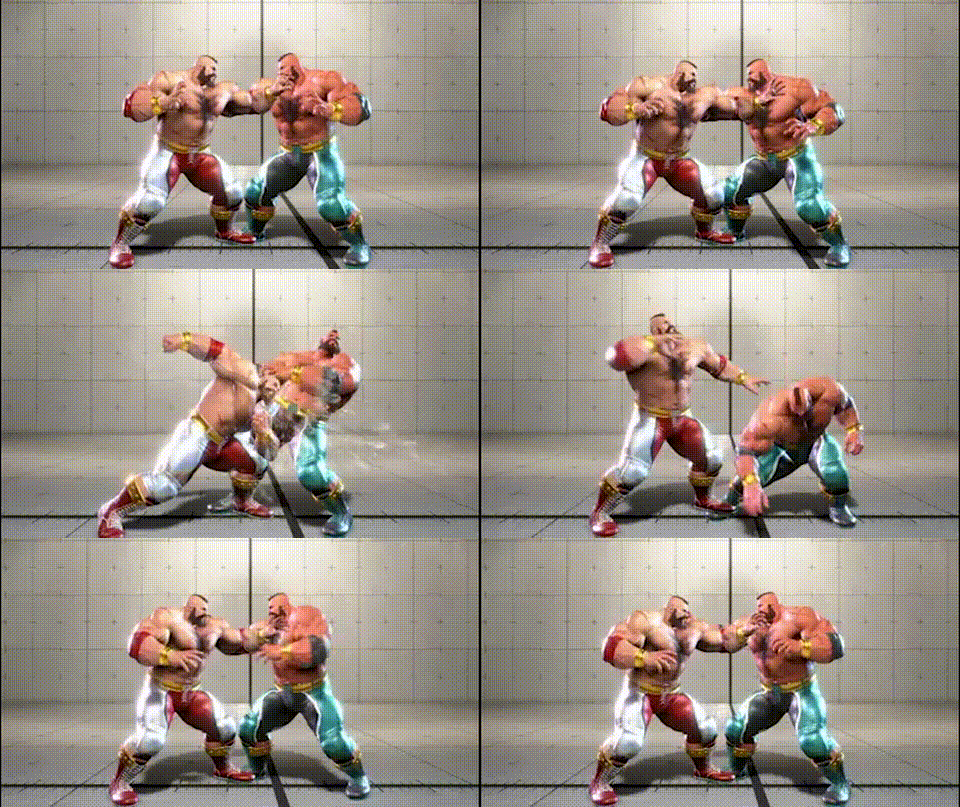
After Headbutt on block, Zangief is +4F. The follow-up is a three-way mix between 63214789HP, 3MP, and 6HP. Making the most of the mix-up window when you win is critical.
Recommended counters
- After eating a Headbutt
- The main branches are 63214789P, 3MP, and 6HP.
- Back-dash gets caught by 6HP → 6HP.
- Neutral jump risks getting anti-aired by LP/MP/HP.
- Back jump risks giving Zangief return with 236236K.
- If you read 63214789P or 6HP, go for a forward jump.
- Zangief has a hard time attaching risk to this option.
- The main branches are 63214789P, 3MP, and 6HP.
- After eating a Drive-rush → 6HP
- Forward jump is also recommended here.
- On HP you escape into a juggle state.
- On other strike options the jump doesn't leak because they are true blockstrings.
- 63214789P is dodged cleanly.
- The clip records: 6HP / 63214789HP / 3MP.
- Forward jump is also recommended here.

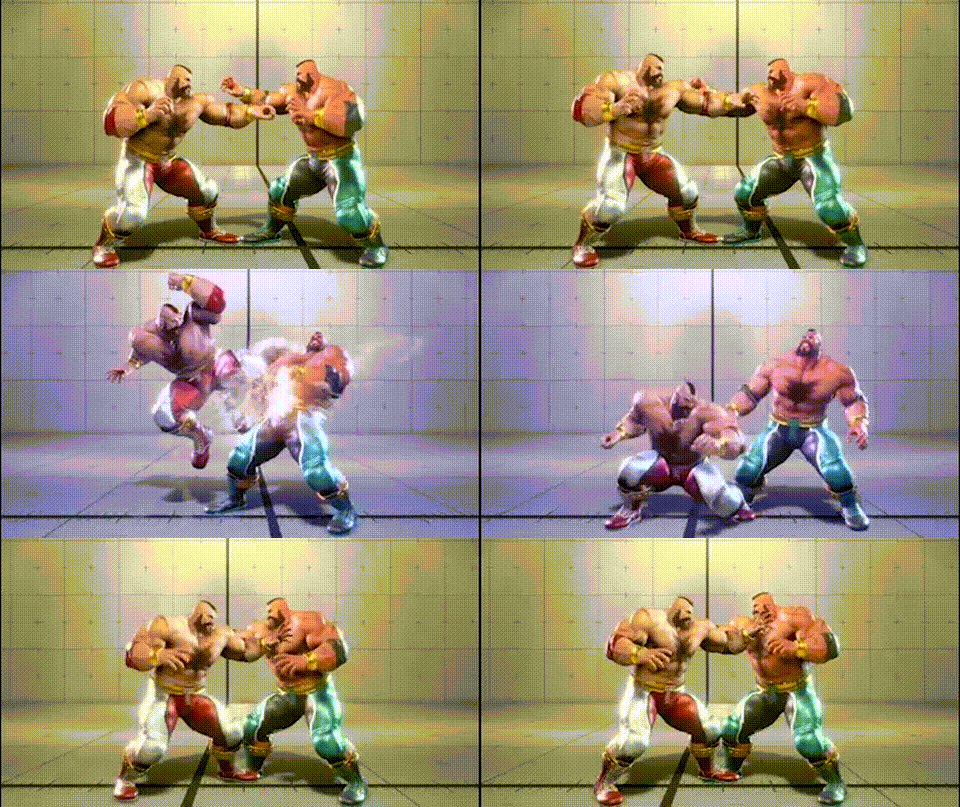
When the active frames hit late (tip range), Knee Hammer can leave Zangief at advantage. Check the distance after blocking to judge who has the frame lead.
Unlike other characters, there is no screen shake on advantage, so build up your sense of distance through repeated matches.
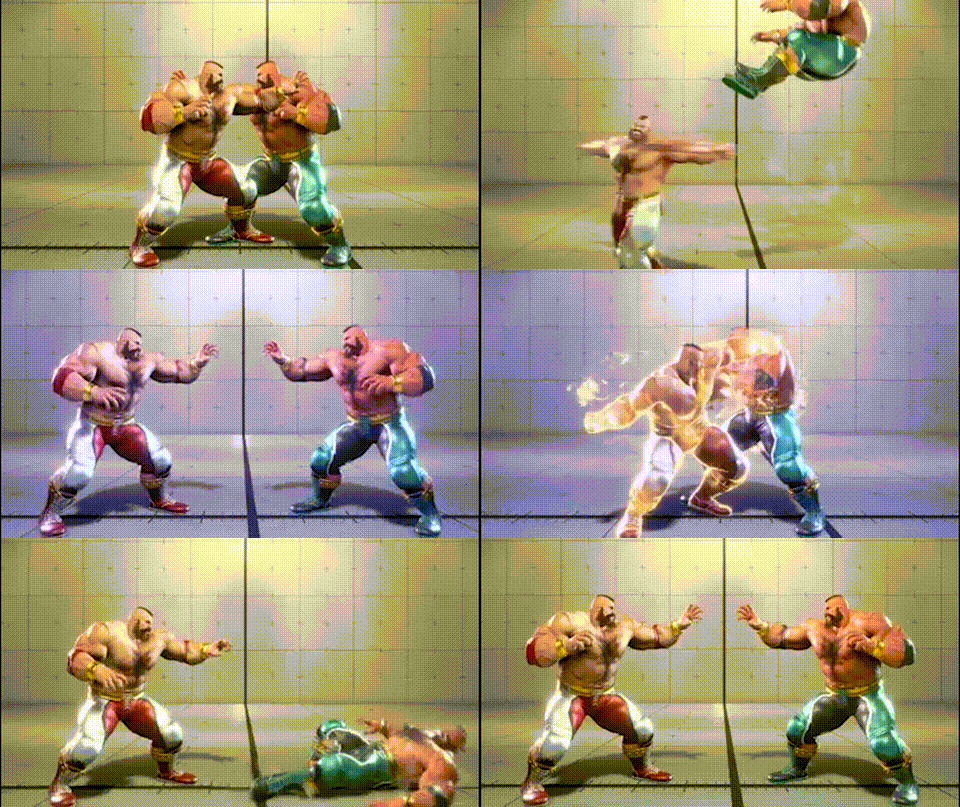
Double Lariat (PP) is used as anti-air and as a combo ender. 15F startup, +27F on hit. In neutral, the move can't catch crossups, so crossup-leaning jumps are an extremely strong forcing option. Startup isn't fast either, so always keep "empty jump" in your toolkit.
Recommended counters
Refusing oki after PP hit
A back-rise leaves Zangief with almost no oki. HP and 2HK reach but aren't meaty. If you see the drive-rush, mash a fast button or just throw out a Drive Impact — both work cleanly. Zangief knows this, so he'll mix in rush → forward jump to bait those options.
The recommended response is mash sweep + watch for the jump (anti-air on react). The clip records:
- rush → forward jump
- rush → HP (recorded at max range)
- rush → (held) HP
Watch out
Sweep-mash gets beaten by delayed 6MK
Mashing sweep loses to delayed 6MK — but 6MK isn't meaty here, and you can walk back to whiff it. Against Zangiefs who use this option, look for a whiff-punish on 6MK instead.