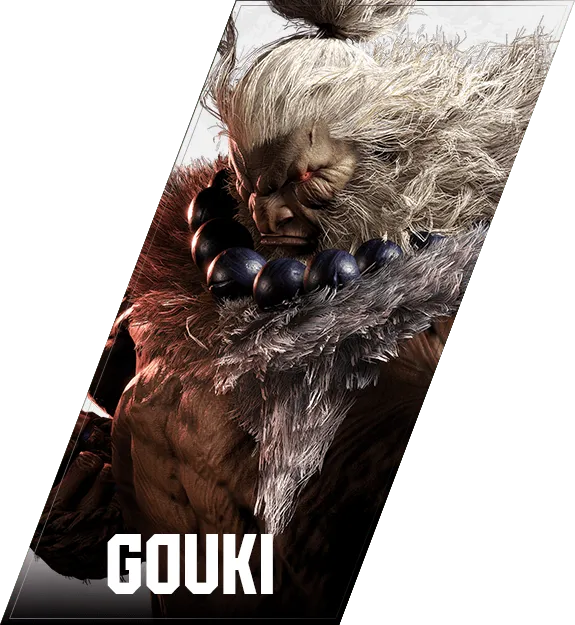

豪鬼
Akuma — 对策
Key Info
- Active-frames overhead into combo
- 6MP
- Defense
- OD invincible with 6F startup: 623PP
- If you play Luke or Kimberly, avoid Rush after throw — they have fast OD reversals
- Anti-air invincible with 5F startup: 623LP
- SA1 (236236P) has 14F startup — no projectile invincibility
- SA3 (214214P) has 9F startup — projectile invincible
- SA2 (236236K) has 8F startup
- OD invincible with 6F startup: 623PP
- Moves that are plus on block
- HK
- 236PP
- 236LP(Lv2), 236LP(Lv3)
- 236MP(Lv2), 236MP(Lv3)
- 236HP(Lv2), 236HP(Lv3)
Neutral Game (Focus Points)
- Dealing with 236P (Gohadoken)
- Do not reversal jump after blocking — you will get anti-aired
- Jumping on a successful Just Parry is fine
- Always buffer a heavy attack with Parry so you can follow up when Just Parry lands
- Do not reversal jump after blocking — you will get anti-aired
- Dealing with HK
- Blocking it lets Akuma start his offense at +2F
- HK does not hit crouching opponents
- If you crouch and make it whiff, retaliate with a medium or heavy attack — not a light
- 214P (Gohadou)
- If you cannot distinguish the strength, start from a 4F light into a Punish Counter route
- (Jump forward) 236P (Zanku Hadoken)
- When using an invincible anti-air special, wait and pull it out after the fireball passes
- Going early will clash with the fireball
- Jumping forward in response to Akuma's air fireball approach is also effective
- This puts Akuma in an airborne hurt state — pick the best route for your character
- When using an invincible anti-air special, wait and pull it out after the fireball passes
- Accept midscreen throws
- After a midscreen LPLK, Akuma's situation is not strong
- He cannot use Rush for okizeme either — accept the reset and return to neutral
- After a midscreen LPLK, Akuma's situation is not strong
阿修羅閃空
Ashura Senku has no invincibility window and the recovery is exploitable. Against the forward version, read the reappearance spot and pre-emptively place anti-airs or whiff-punish normals; against the backward version, take the meter advantage and recommit with drive rush or fireballs. Stay alert for the LPLK follow-up in the read.
空中竜巻斬空脚(前跳中)



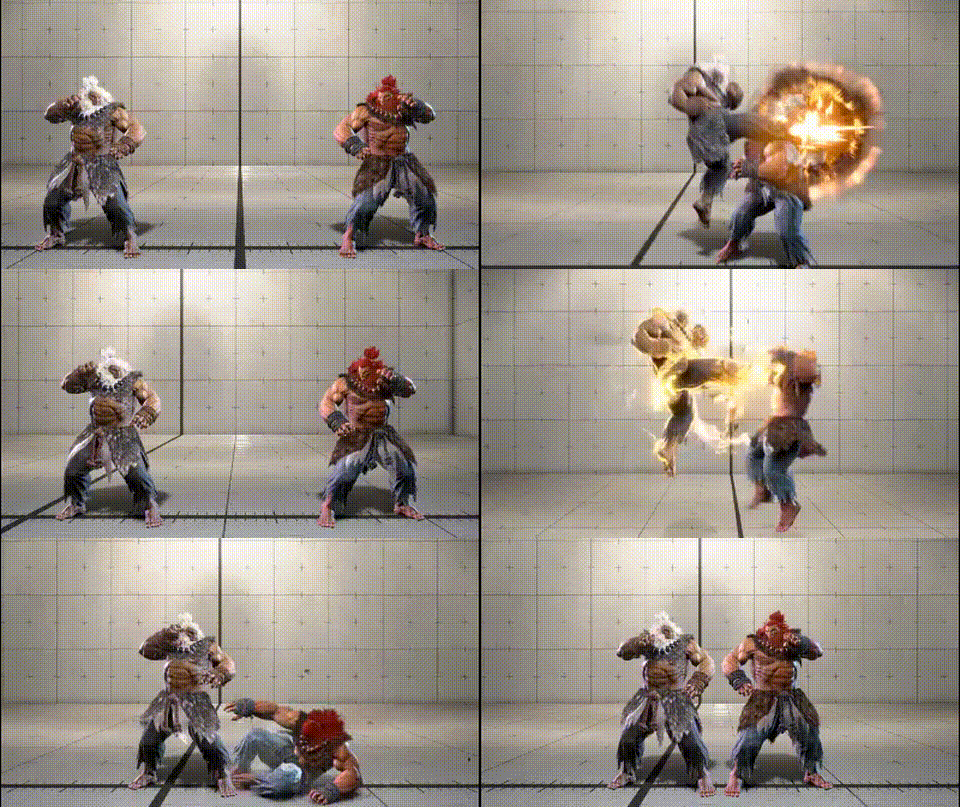
Counter-strategy for Aerial Tatsumaki Zanku-kyaku — punish frames, blocking direction, yomi paths — to be added.
斬空波動拳(前跳中)


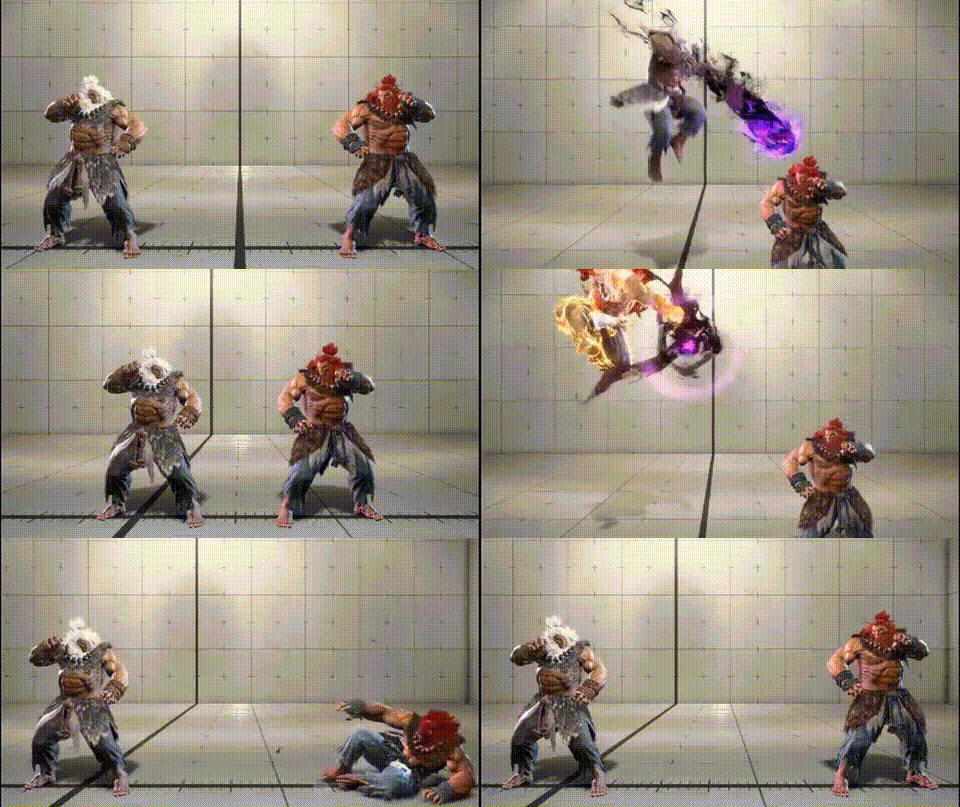
Recommended counters
Your answer depends on your character's anti-air toolkit — research what works for your cast.
Characters with an invincible reversal anti-air
Wait for the jump to drop in before firing. An early reversal eats the air-fireball clean.
Characters without an invincible reversal anti-air
Forward-jumping into Akuma's forward jump is a strong return. Reading his jump and jumping yourself is also effective.
If neither option suits you, fall back on air-to-air normals.
Recommended counters
214LK
- Only connects against standing opponents
- On hit, combo into 2HK
- The follow-up situation is weak, so most informed Akuma players avoid it — you don't need to memorize it
214MK
- Grounded hit leaves Akuma at +41F; a forward jump can be anti-aired by a 5F Shoryuken — keep that in mind
- Only connects against standing opponents
- Akuma can shimmy with forward dash + micro-walk on the ensuing oki
214HK
- On hit it becomes a tech-mixup situation — memorize the options
- Quick-rise: no walking shimmy if Akuma uses drive rush; without rush there is still oki
- Back-rise: no oki at all if Akuma did not use drive rush
Recommended counters
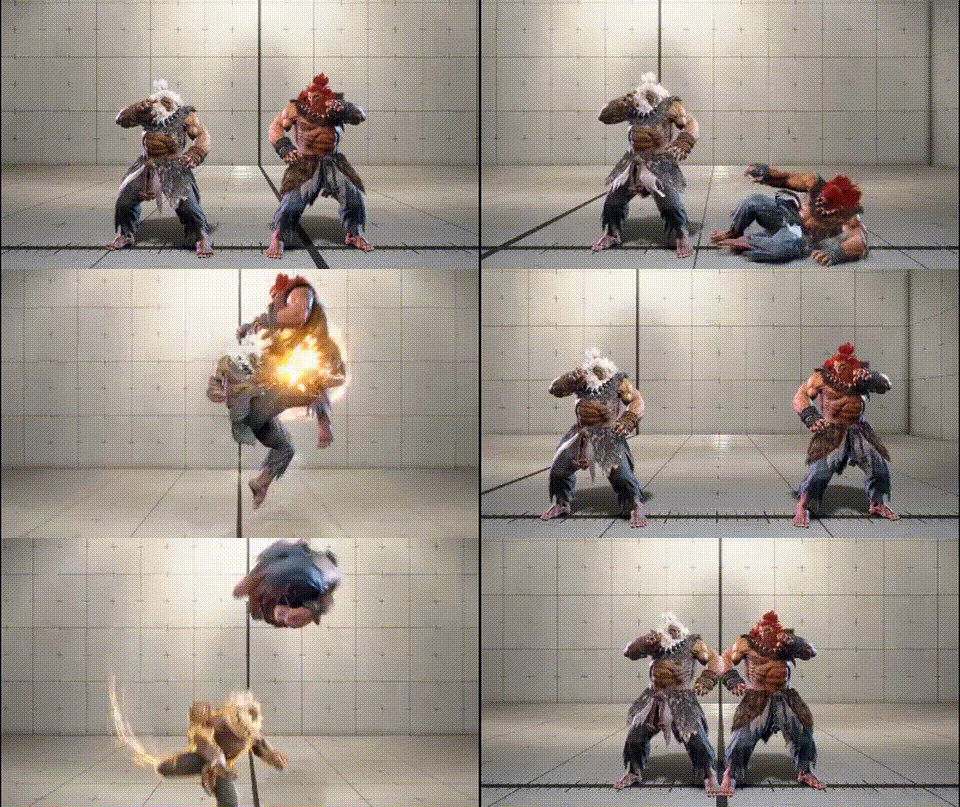
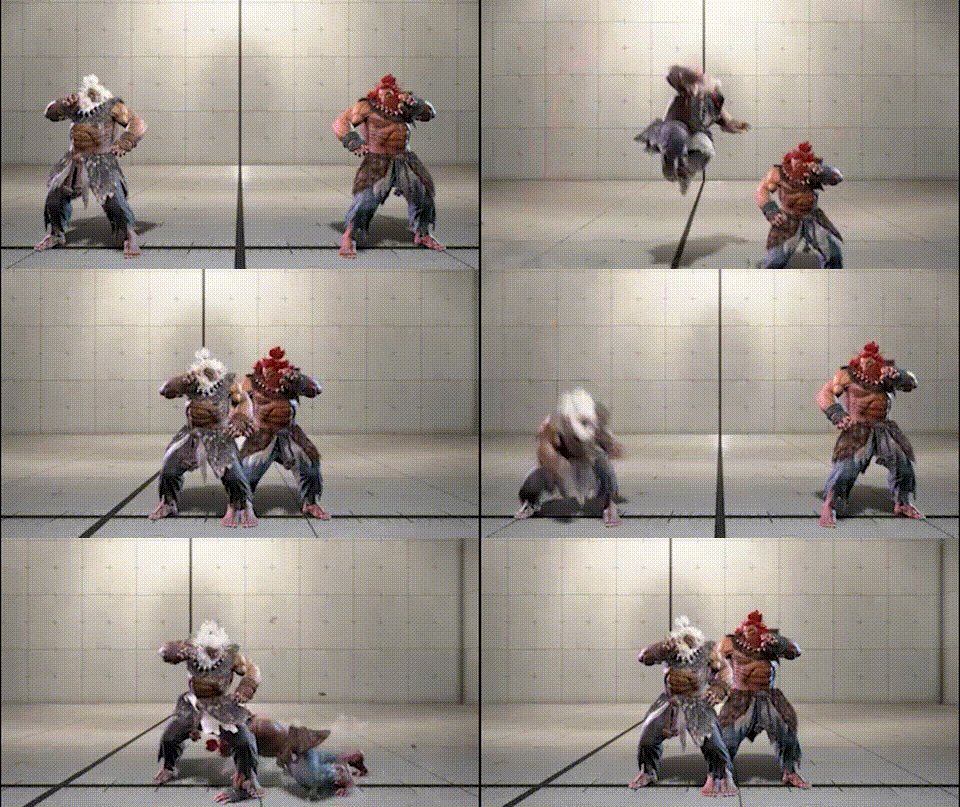
A reversal anti-air would be ideal, but the 236K→2 feint and 236LK make it unreliable. Indulging the feint mind-game in ranked is a waste of mental stack — fuzzy jab is the recommended answer. By pressing jab at the timing that would block 236K→K, you also cover 236K→P. Pulling it off every round is hard, but use it when you can.
The clip below records each derivative — 236K→(no follow-up), 236K→P, 236K→K, 236K→2 — and shows the fuzzy answering all of them:
Remember: once it's blocked, Akuma is already plus, so air-to-air the leap whenever possible.
Caution
The fuzzy only works against Akumas who do not delay the derivative. If they delay it, your fuzzy timing is off — but that also widens your air-to-air window, so commit to air-to-air instead.
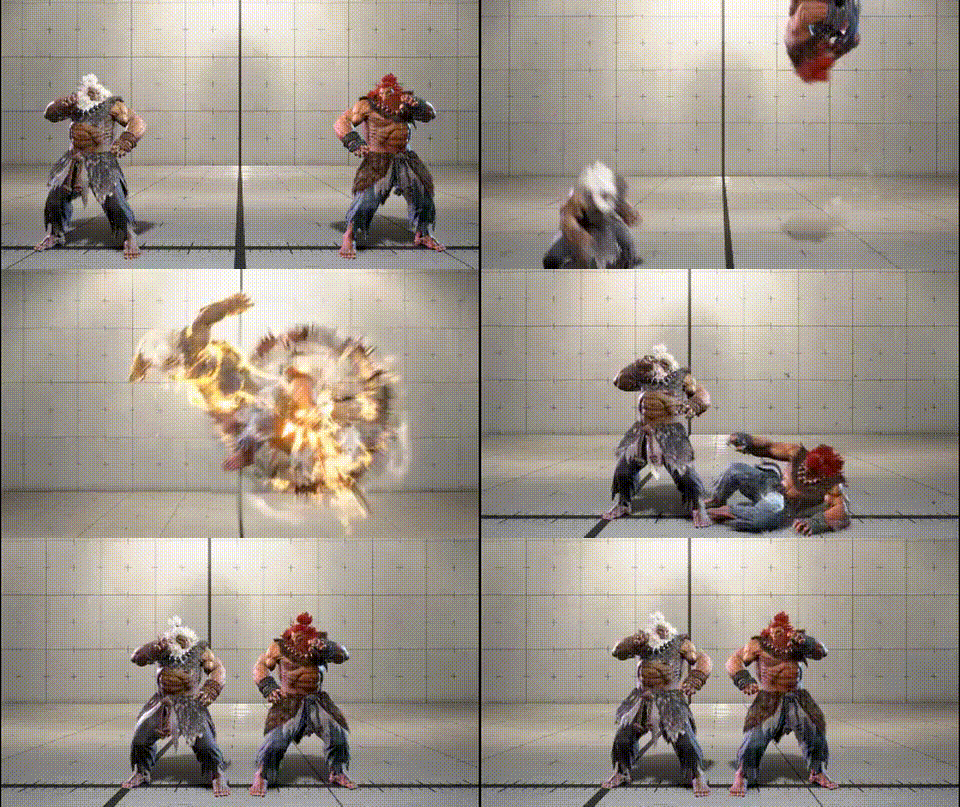
Counter-strategy for Demon Gou Rasen — punish frames, blocking direction, yomi paths — to be added.
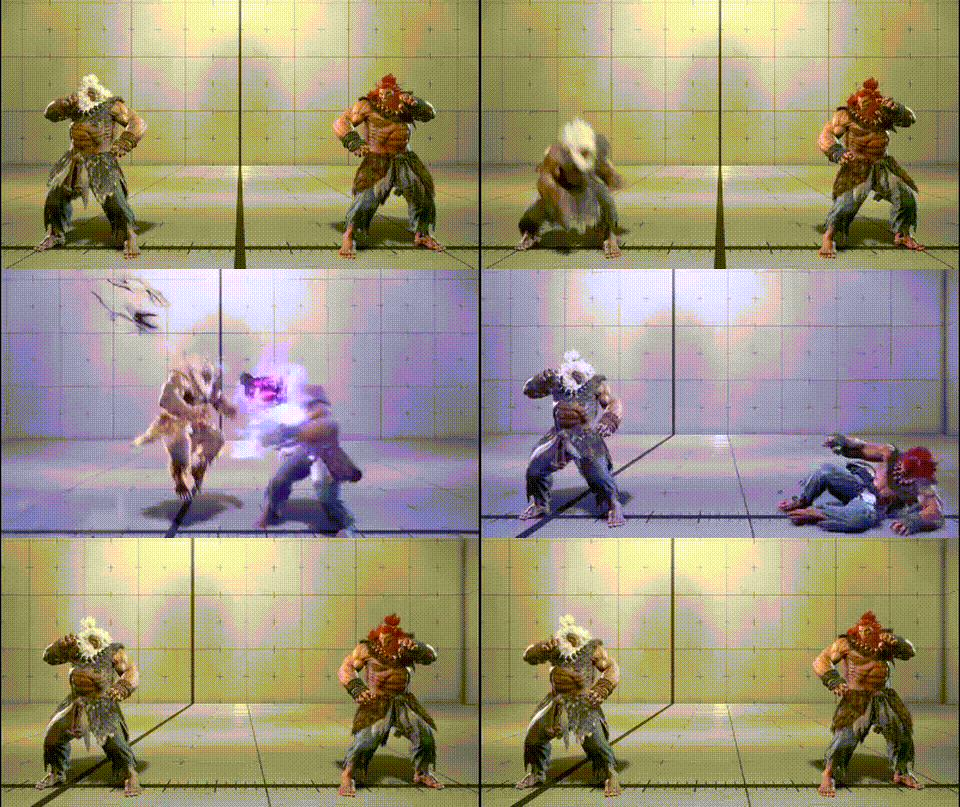
Counter-strategy for Demon Gou Zanku — punish frames, blocking direction, yomi paths — to be added.
百鬼豪斬 (无输入)
(无输入)
Recommended counters
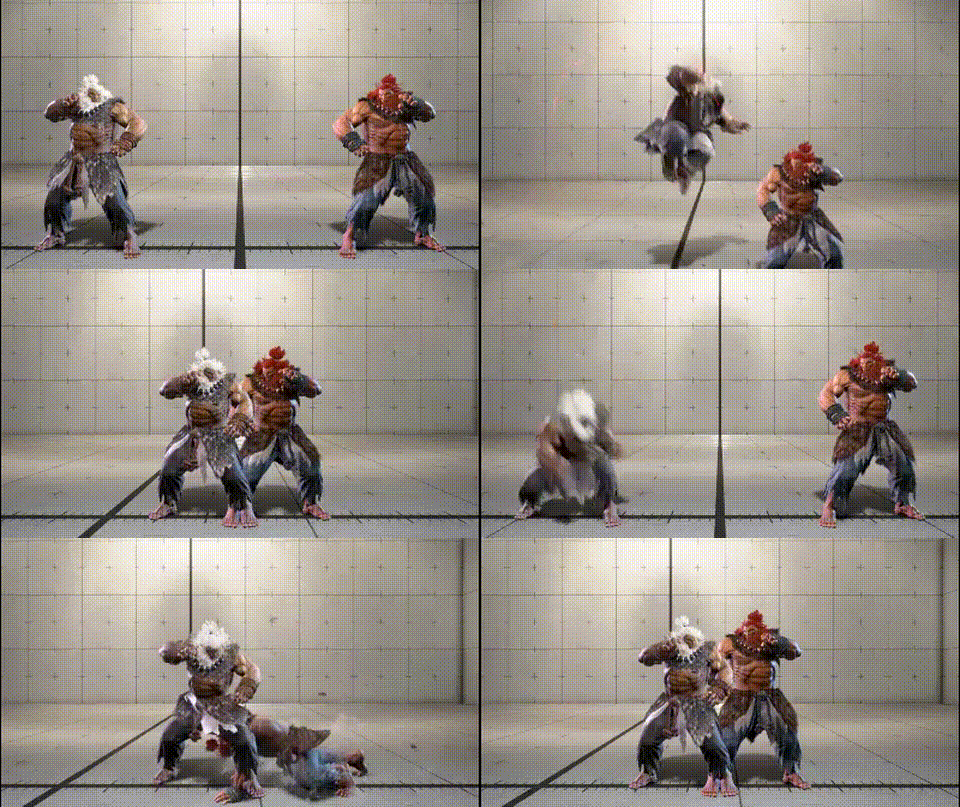
236K→(no follow-up) is a low sweep that hits on landing. Even on block Akuma is +2, so he acts first. The same fuzzy-jab option that covers 236K→P / 236K→K also handles this case.
The clip below records each derivative — 236K→(no follow-up), 236K→P, 236K→K, 236K→2 — and shows the fuzzy answering all of them:
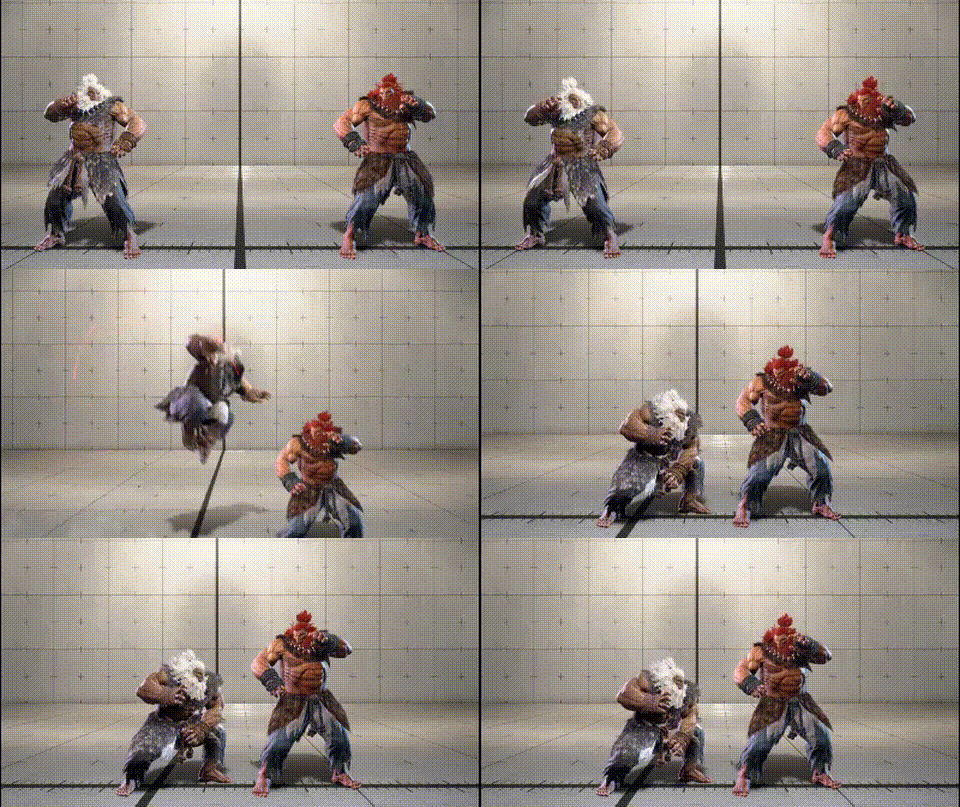
Recommended counters
236K→2 is a landing-cancel feint that does no follow-up — the main reason a reversal anti-air fails here. The realistic answer is fuzzy jab, which covers it together with the other derivatives (236K→P / 236K→K / no follow-up).
The clip below records each derivative — 236K→(no follow-up), 236K→P, 236K→K, 236K→2 — and shows the fuzzy answering all of them:
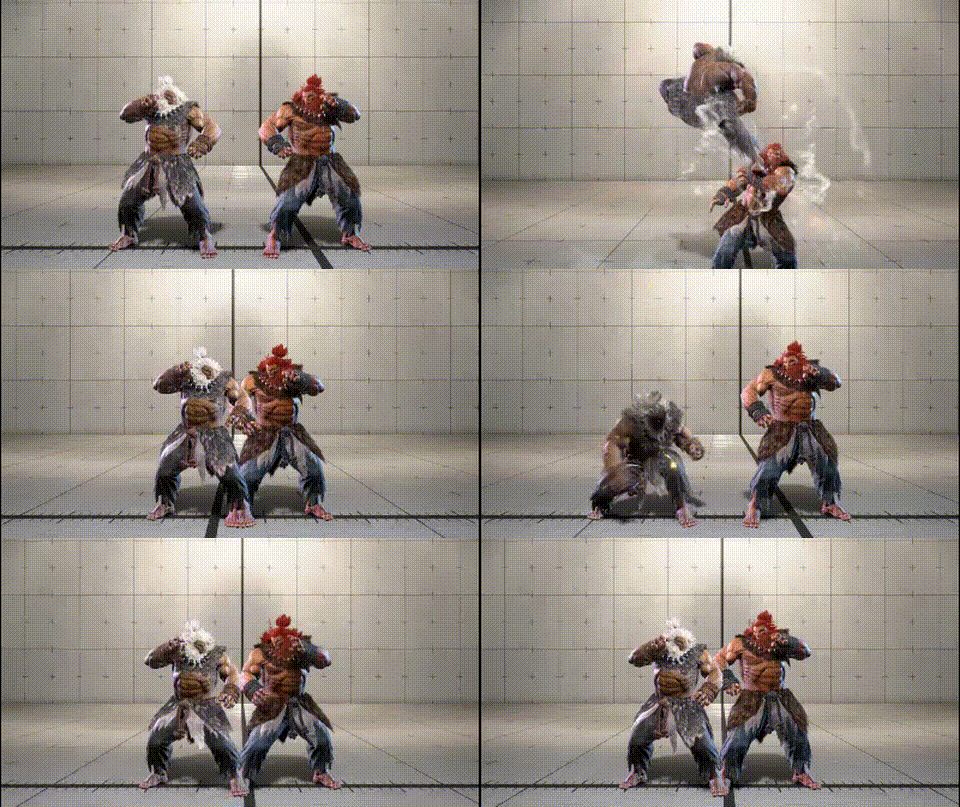
Recommended counters
236K→K is the dive-kick derivative whose angle changes with the button strength. Pressing jab at the timing that would block 236K→K acts as a fuzzy that simultaneously covers 236K→P and the no-follow-up case.
The clip below records each derivative — 236K→(no follow-up), 236K→P, 236K→K, 236K→2 — and shows the fuzzy answering all of them:
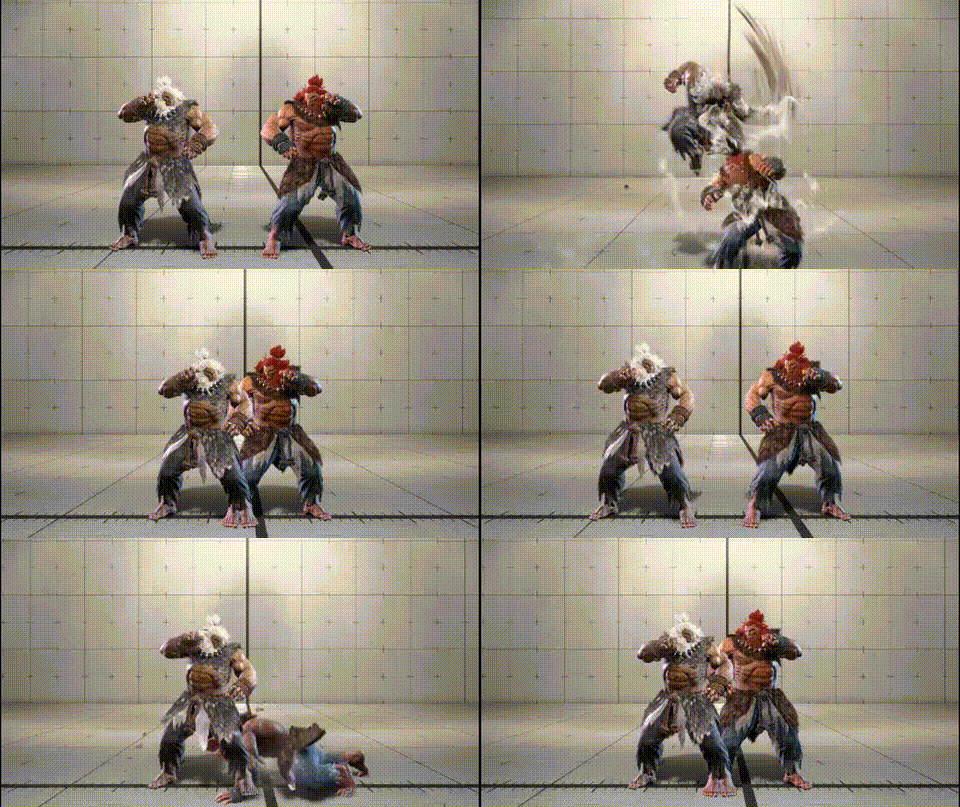
Recommended counters
236K→P is the overhead chop derivative. Stand-block to cover it, and pair it with fuzzy jab to handle the other derivatives (236K→K / →2 / no follow-up) at the same time. Pressing jab at the 236K→K block timing also covers 236K→P cleanly.
The clip below records each derivative — 236K→(no follow-up), 236K→P, 236K→K, 236K→2 — and shows the fuzzy answering all of them:
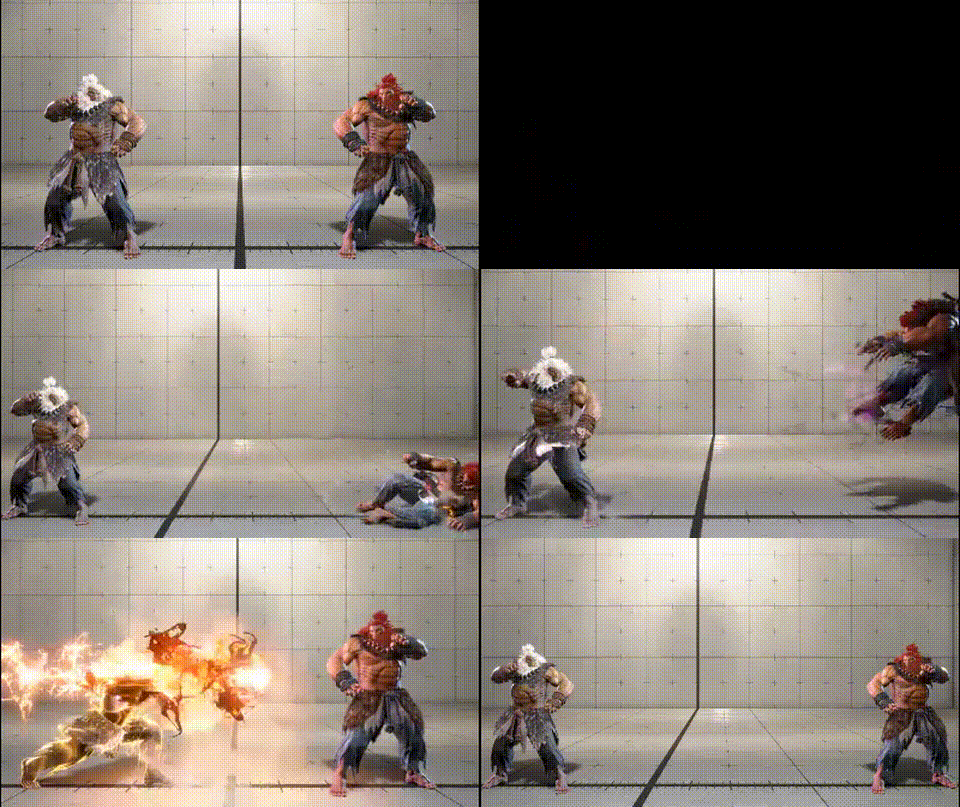
Recommended counters
Gou Hadoken's properties shift between Lv1 / Lv2 / Lv3 depending on the hold. The default answer is just-parry, but over-fixating on parry feeds you into 6KKK→LPLK.
Strength-based responses
- 236LP(Lv1) — even on a successful just-parry there is no guaranteed punish, so go back to neutral
- 236HP(Lv1) — buffer drive rush or a heavy normal into the parry
- Never reversal-jump after blocking the fireball (only forward-jump if you actually get the just-parry)
- Always buffer a heavy normal into your parry input so you cash in when it hits
Caution
Over-fixating on the just-parry leads straight into 6KKK→LPLK. Keep parry as one tool among many — accept that forward-jump and projectile-invincible reads are also valid options.


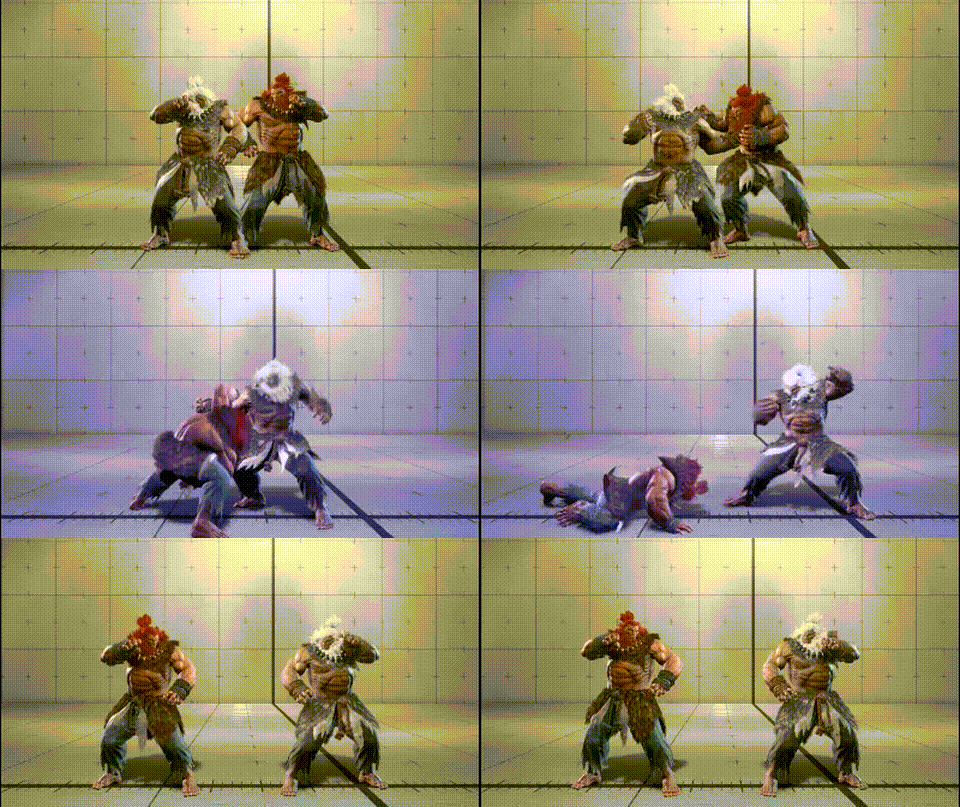
After the throw, Akuma is at +14F advantage. On quick-rise, only HP connects as a meaty. On back-rise, even with Drive Rush, no move lands as a meaty.
Recommended counters
Back-rise is the stable option.
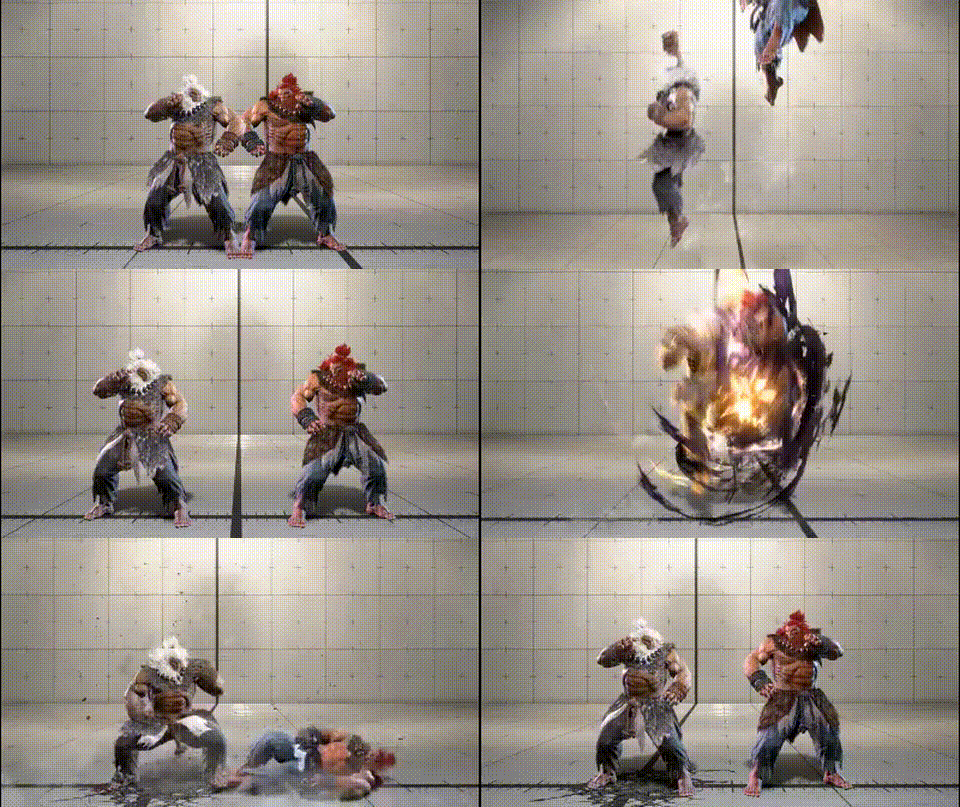
On-block frame data for Gou Shoryuken (623P)
Normal versions
- 623LP (Light Gou Shoryuken)
- Akuma is -23F on block — large punish window
- 623MP (Medium Gou Shoryuken)
- Akuma is -30F on block — very large punish window
- 623HP (Heavy Gou Shoryuken)
- Akuma is -36F on block — very large punish window
- 623PP (OD Gou Shoryuken)
- Akuma is -39F on block — largest punish window
Recommended counters
All versions are deeply minus on block — always punish with your longest combo. The relatively good frame data makes this a dangerous anti-air; avoid reckless jumps.
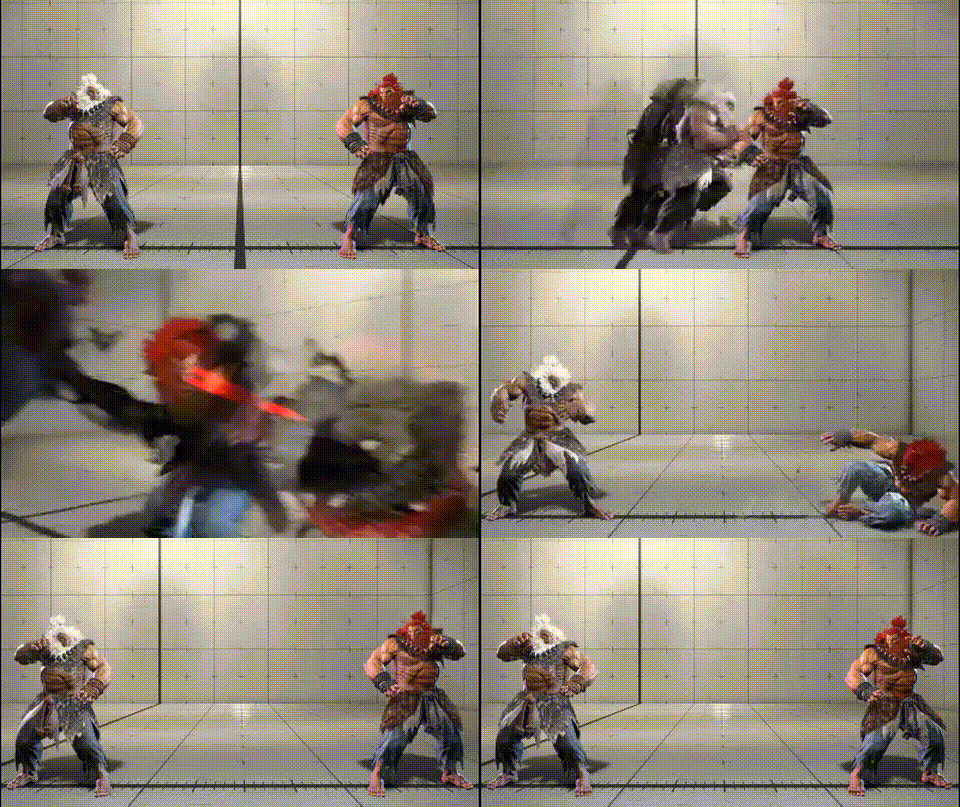
Counter-strategy for Oboro Throw — punish frames, blocking direction, yomi paths — to be added.

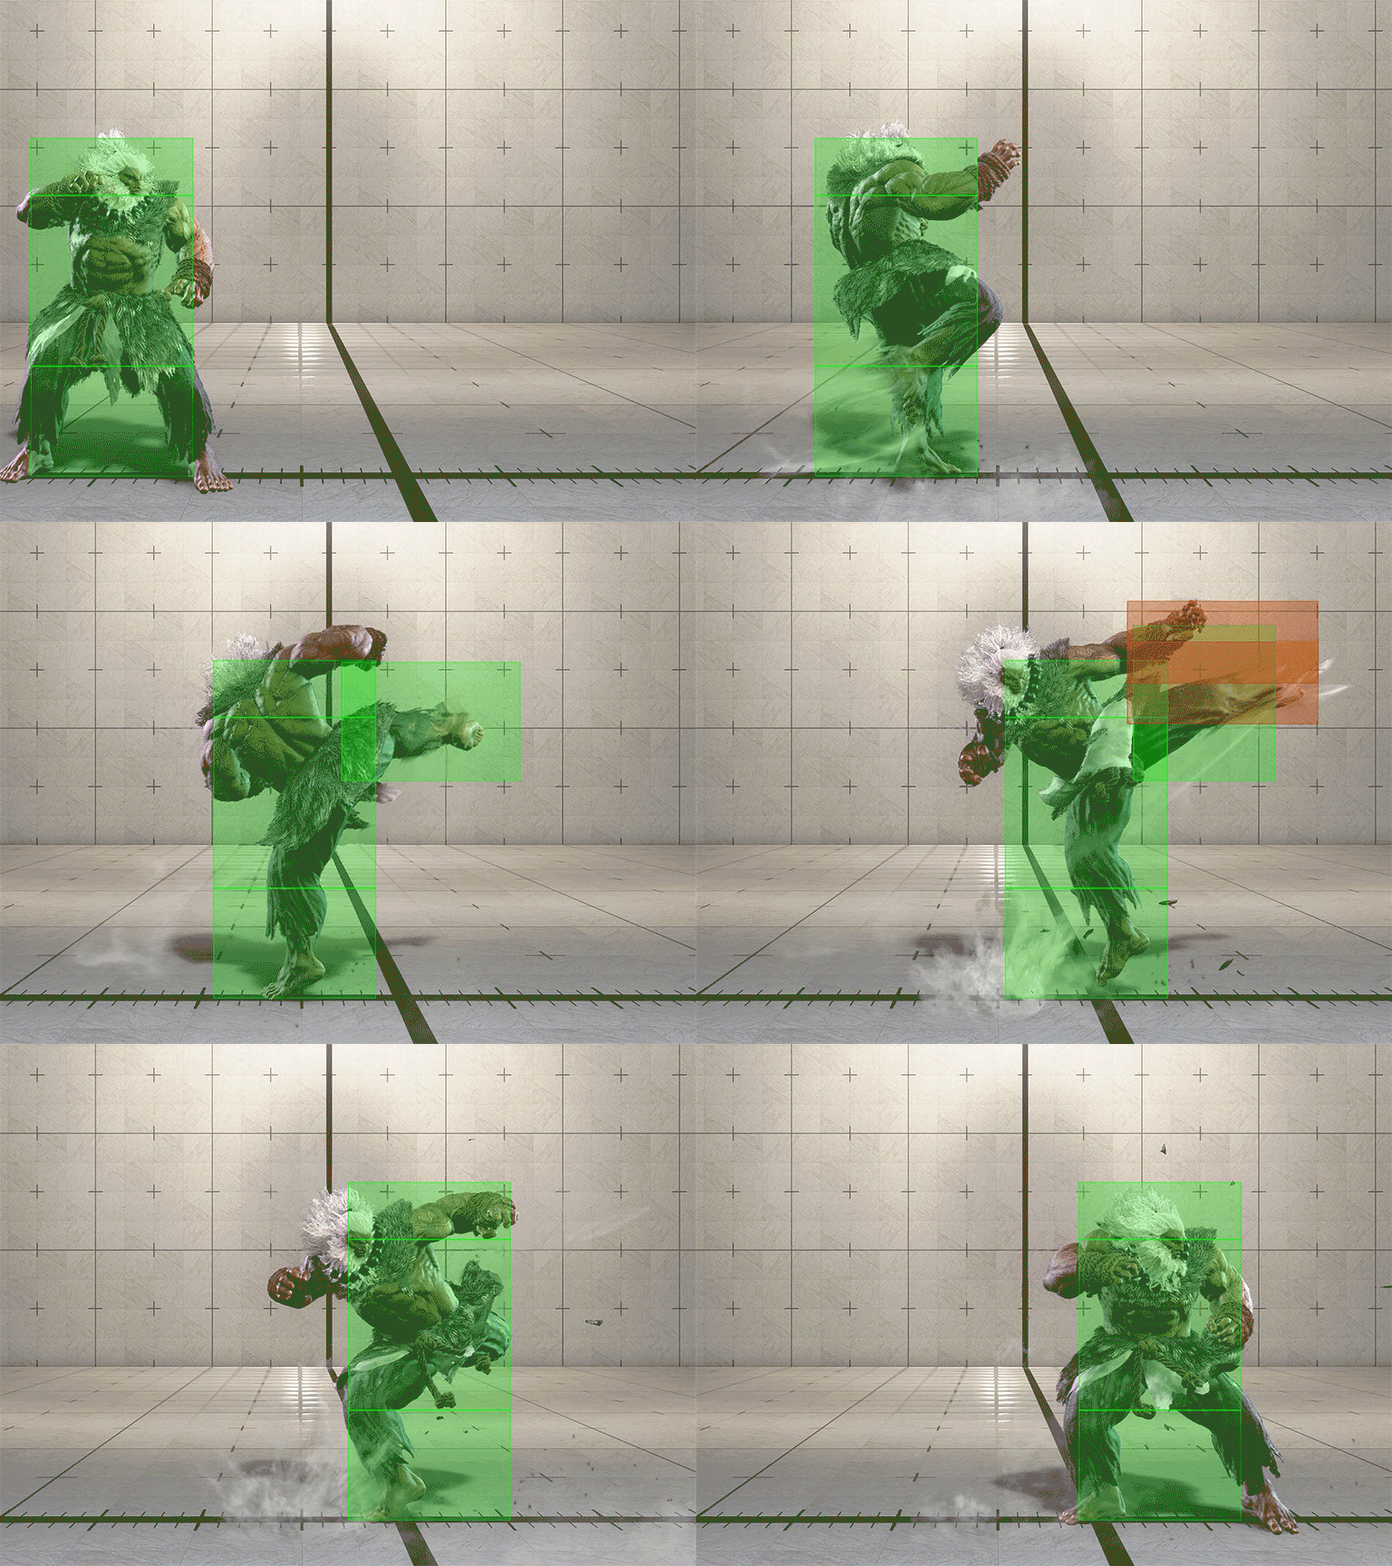
A normal that leaves Akuma at +3F on block — walking shimmy is not an option after blocking this move.
Recommended counters
After blocking, keep in mind that you cannot walk for a shimmy. Note that if Akuma throws and you tech it, HP becomes a guaranteed punish on his recovery after the throw, so even a throw-tech is risky.
If your character has a short punishable window, the following options are recommended:
- Parry
- Akuma's normal throw position after a midscreen throw is unfavorable for him
- Even a Punish Counter throw leaves him in a poor position — accept the situation and aim for a comeback read
If you successfully crouching-blocked, Akuma is at -13F, so hit back with a strong punish combo.
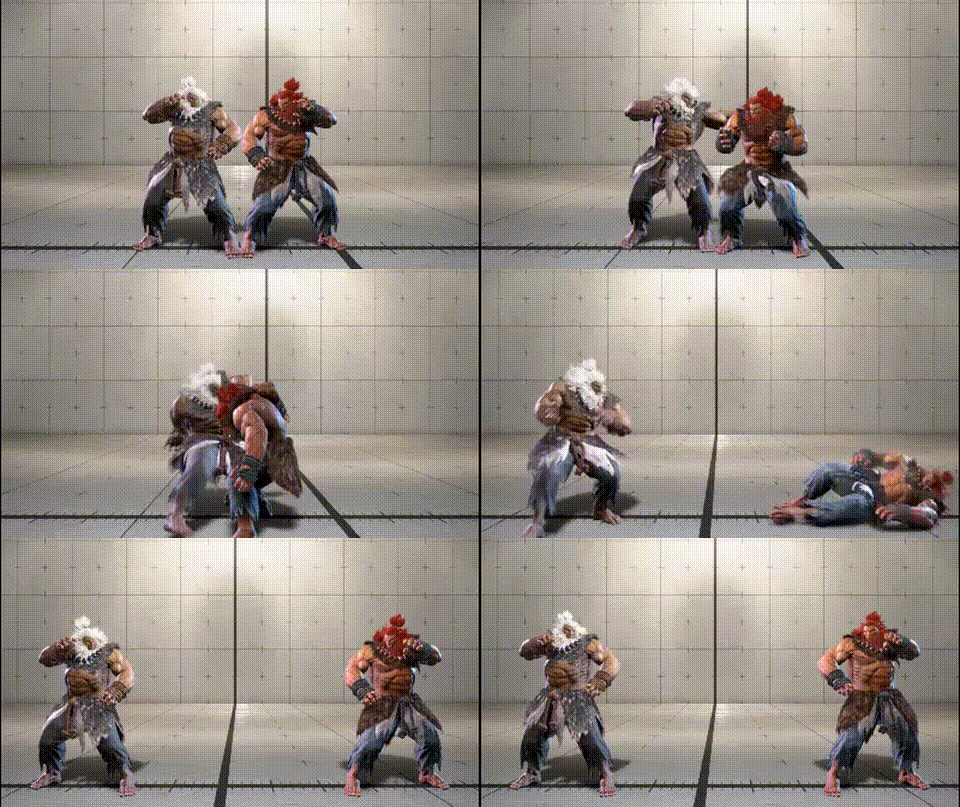
After the throw, Akuma is at +28F advantage. In the midscreen, taking a back-rise leaves Akuma with no wake-up pressure.
Recommended counters
Take the back-rise — it is the stable option in midscreen.