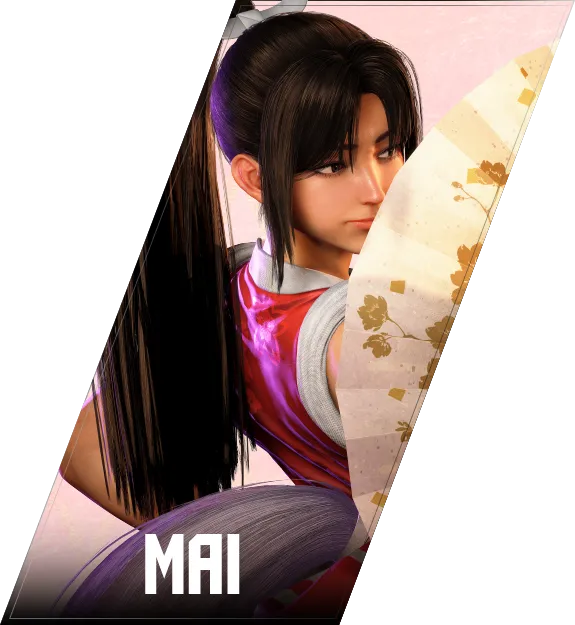

舞
Mai — 角色使用
[ガード時]ドライブリバーサル
Use Drive Reversal during block stun to escape pressure by spending 2 Drive Gauge bars. The full invincibility on frames 1–22 makes it a reliable escape from block strings. Note that it deals only recoverable damage, so the opponent can recover that health over time. Use it primarily to reset neutral when Mai is in a dangerous block string situation rather than as a primary damage tool.
[起き上がり時]ドライブリバーサル
Use Drive Reversal on wakeup to beat meaty attacks when Mai is under wake-up pressure. The 20F of full invincibility covers most meaty timings. It deals only recoverable damage, so the opponent will regain the health over time — use it as an escape tool to reset neutral rather than relying on it for damage. Mix it with other wakeup options (block, reversal special) so the opponent cannot anticipate it.
キャンセルドライブラッシュ
Cancel Drive Rush is the backbone of Mai's combo extensions. Cancel 2MK or 2MP into Drive Rush on hit, then continue with MP → HP → Hissatsu Shinobi Bachi for high-damage confirms. Costs 3 Drive Gauge bars, so use it selectively on solid hit-confirms rather than on block.
ジャストパリィ
Perfect Parry stops Mai's opponent cold and creates a huge punish window. After landing a Perfect Parry, confirm into MP → HP → Hissatsu Shinobi Bachi or a Super Art for maximum damage. Because the opponent cannot cancel, even moves that are normally safe become fully punishable after a Perfect Parry.
ドライブインパクト
Use Drive Impact to absorb incoming attacks and force a crumple or wall splat. Against opponents who rely on long block strings, a well-timed Drive Impact can interrupt and lead to high-damage combos from the crumple state. Near the corner, a wall splat opens up extended corner combos. Be cautious of opponents who hold their own Drive Impact in response.
ドライブパリィ
Use Drive Parry to absorb incoming attacks and cancel into Drive Rush on frame 4 for a combo extension. Holding the button extends the parry window, useful against multi-hit attacks. Be aware that you are a Punish Counter target for the entire duration — only use it when you have read the opponent's attack, not as a neutral tool.
パリィドライブラッシュ
Parry Drive Rush activates by pressing forward twice during Drive Parry. It costs Drive Gauge but gives Mai a safe way to close distance and start offense after absorbing an attack. Cancel into MP or 2MP on frame 9 to begin a combo. Compared to Cancel Drive Rush, Parry Drive Rush does not require a normal cancel, making it useful to start pressure from a neutral parry read.
ムササビの舞
Use Musasabi no Mai as a surprise aerial attack or after dodging a projectile to punish from the air. Its unique descending angle makes the timing hard to read. On wake-up, mix it with regular jump-ins to threaten cross-up and front-side ambiguity.
前方ステップ
Use Forward Step (66) to close distance quickly without spending Drive Gauge. It is Mai's fastest way to approach without committing to a Drive Rush. Forward Step into a throw or low attack is a common mix-up after the opponent becomes conditioned to block projectiles. Because it has no invincibility, avoid using it against active attacks — time it for when the opponent is recovering from a whiff or projectile.
後方ステップ
Use Back Step (44) to escape throw attempts and create distance. The throw invincibility on frames 1–15 makes it a reliable escape from tick-throw setups. After back-stepping out of a throw, the opponent is left in recovery — punish with a forward dash into a normal or with Kachousen from the new distance. Avoid over-relying on it as opponents can condition you and punish the back-step with a meaty attack.
Jumping Heavy Kick
Use 隼蹴撃 when you have a clear jump-in opportunity against a grounded opponent. High damage on hit makes it worth using when you can guarantee the jump will connect. Confirm into a strong ground normal chain for maximum damage.
Jumping Heavy Punch
Use 刃扇天翔刺し on confirmed jump-ins where you need maximum damage. The downward angle makes it reliable for connecting on crouching opponents. Confirm into your strongest ground combo to maximize the damage window.
Jumping Light Kick
Use 翔脚 for cross-up attempts or as a meaty aerial attack. Its downward angle on certain jump arcs can cross behind the opponent, creating left-right mix-up situations on wake-up.
Jumping Medium Kick
Use 前蹴り as your primary jump-in attack. The active frames and hitbox angle give it strong priority against most ground anti-air normals. On hit, confirm into 2MP or MP for a ground combo.
Jumping Medium Punch
Use 天仰扇 as your go-to air-to-air button. Its upward hitbox covers the arc above Mai and reaches opponents jumping away. Mix it with jump-ins using 前蹴り to vary your aerial attack angles and make it harder for opponents to react consistently.
Yume Zakura
Use 夢桜 to punish opponents who repeatedly try to anti-air with a standing normal or those who back-dash on your jump-in. Mix it with jump attacks so the opponent cannot simply hold up-back to avoid your aerial offense.
(ホールド)236PP→6P
Details on how Mai uses the held OD Kachousen follow-up to be added.
CA Shiranui Ryuu: Enbu Ada Zakura
Use the CA as a comeback mechanic when Mai is in critical health. The enhanced damage makes it one of the highest-damage reversals available at low health. Use it as a reversal when cornered or to end a punish combo for the highest possible damage output when HP is low.
SA3 Shiranui Ryuu: Enbu Ada Zakura
Use SA3 as a reversal when cornered or as a combo finisher for maximum damage. Its invincible startup makes it a reliable get-out-of-jail option when the opponent is pressing their advantage. In corner combos, ending with SA3 deals some of the highest damage in Mai's toolkit.
[強化版] [空中] OD Musasabi no Mai
Notes on how Mai uses [強化版] [空中] OD Musasabi no Mai — combo routes, pressure, pokes — to be added.
OD Ryuuenbu
Notes on how Mai uses OD Ryuuenbu — combo routes, pressure, pokes — to be added.
SA2 Chou Hissatsu Shinobi Bachi
Use Boosted SA2 as a ground-based combo ender for high damage. It connects after strong hit-confirm routes like MP → HP → OD Hissatsu Shinobi Bachi → Boosted SA2. Best reserved for punish combos or situations where you have a reliable hit-confirm.
SA1 Kagerou no Mai
Use SA1 Kagerou no Mai at the end of anti-air combos or as a hit-confirm Super Art from ground combos. Its fast startup makes it reliable in combos starting from 2MP or MP → HP. Save gauge for matches where you expect to land anti-air confirms frequently.
Midare Kachousen
Notes on how Mai uses Midare Kachousen — combo routes, pressure, whiff punishes — to be added.
Sori Geri
Use 反り蹴り to score knockdowns and begin wake-up pressure sequences. Its low trajectory makes it difficult to spot, but the large recovery means it is punishable on block or whiff. Only use it when confident the opponent will be hit or from a safe distance.
Crouching Heavy Punch
Use 回転扇打 to anti-air diagonal jump-ins or as a combo ender in certain launch routes. Its spinning hitbox gives it coverage against approaches from multiple angles. Cancel into a special move on hit for maximum damage.
Crouching Light Kick
Use 摺り蹴り as a low attack to begin pressure strings. On hit it can be chained into 2LP or 2MP for an extended light combo. The low hit forces opponents to crouch-guard, making it useful for opening up mix-up opportunities.
Crouching Light Punch
Use 龍尾髪 to contest reversal attempts from close range. Chain into 2LK for a light combo starter, or use it as a tick-throw tool by cancelling into a throw after hit or block.
Crouching Medium Kick
Use 捌き蹴り as a core mid-range poke. On hit, cancel into Drive Rush and confirm into MP → HP → Hissatsu Shinobi Bachi. The combination of range, speed, and Drive Rush synergy makes this one of Mai's best neutral tools.
Crouching Medium Punch
Use 背面ひじ打ち as a cancel target for Drive Rush to extend combos. On hit you can cancel into Drive Rush then continue with MP → HP → special. Also works as a close-range anti-poke due to its forward-moving hitbox.
Fuusha Kuzushi
Use 風車崩し when you want to switch sides or put the opponent in the corner. The different knockdown angle compared to the forward throw changes your available wake-up pressure options, so choose based on screen position.
Senkotsu Uchi
Use 扇骨打ち to break opponent's crouching guard. The overhead property means crouching opponents will be hit, enabling a combo follow-up. Mix it into your pressure after establishing a ground threat to force the opponent to stand-guard.
Standing Heavy Kick
Use 背面蹴り as a far-range whiff punish or to end combos when you have already confirmed a hit. Its large hitbox makes it dangerous to throw out carelessly, so reserve it for clear punish opportunities.
Standing Heavy Punch
Use 大扇打 as the second hit in the MP → HP chain, then cancel into Hissatsu Shinobi Bachi or OD Ryuenbu for damage. Mai will frequently cancel into 236P after this move to create a mix-up situation.
Jumping Light Punch
Use 翔扇打 when jumping to contest the opponent's air buttons. Its quick startup makes it reliable in air-to-air situations. On a jump-in hit confirm, chain into standing normals for a ground combo.
Standing Light Kick
Use 飛燕脚 to apply pressure after landing in close range. It can be chained into itself or followed by a throw attempt. The short active window means it functions best as part of a meaty setup or block string rather than a standalone poke.
Standing Light Punch
Use 扇打 as your primary close-range jab. It is fast enough to contest reversals and cancel into Kachousen or Drive Rush on hit. The reach is short, so use it inside your opponent's guard rather than as a poke.
Shiranui Gourin
Use 不知火剛臨 as part of your mix-up game between meaty attacks and throws. After a throw, position for Musasabi no Mai cross-up or a meaty Kachousen to continue pressure.
Standing Medium Kick
Use 舞蹴撃 to control mid-range space. It can be cancelled into specials on hit for combo extension. Works well as a check-in tool when opponents respect your footsies.
Standing Medium Punch
Use 扇子突き as a key combo piece. On hit, link into HP then cancel into Hissatsu Shinobi Bachi for a basic BnB. Also useful as a mid-range poke thanks to its decent reach. Cancel into Drive Rush on hit to extend combos.
Hoshi Kujaku (1st Hit)
Use the 1st hit of Hoshi Kujaku to close distance while dealing damage. Its forward movement makes it useful for punishing whiffs from mid-range. You can follow up with the 2nd hit or use it standalone for position control.
Hoshi Kujaku (2nd Hit)
Use the 2nd hit of Hoshi Kujaku to complete the two-hit sequence for maximum damage. On hit the follow-up leads to knockdown for wake-up pressure. Commit to the full sequence when you have confirmed the first hit.
[Boosted]SA2 Chou Hissatsu Shinobi Bachi
Use Boosted SA2 as the enhanced combo ender in the same routes as standard SA2, but look for the triggering condition to maximize damage. Its increased output compared to base SA2 makes it worth setting up the boost condition when possible.
[Boosted]SA1 Kagerou no Mai
Use Boosted SA1 in situations where the enhanced version triggers automatically after a Drive Rush confirm. The increased damage output makes it the preferred SA1 ender when the boost condition is met. Practice the specific triggers so you can consistently achieve the powered-up version in matches.
[強化版] H Kachousen
Notes on how Mai uses [強化版] H Kachousen — combo routes, pressure, pokes — to be added.
[強化版] OD Hissatsu Shinobi Bachi
Notes on how Mai uses [強化版] OD Hissatsu Shinobi Bachi — combo routes, pressure, pokes — to be added.
[強化版] OD Kachousen
Notes on how Mai uses [強化版] OD Kachousen — combo routes, pressure, pokes — to be added.
[Boosted]Midare Kachousen
Notes on how Mai uses [Boosted]Midare Kachousen — combo routes, pressure, pokes — to be added.
[強化版] H Hishou Ryuuenjin
Notes on how Mai uses [強化版] H Hishou Ryuuenjin — combo routes, pressure, pokes — to be added.
[強化版] OD Hishou Ryuuenjin
Notes on how Mai uses [強化版] OD Hishou Ryuuenjin — combo routes, pressure, pokes — to be added.
[強化版] [空中] Musasabi no Mai
Use Boosted Air Musasabi no Mai in aerial combo routes when the boost condition is met. The improved properties make it an excellent aerial pressure tool and combo ender. Combine with Musasabi no Mai setups to maximize aerial damage output.
[空中] Musasabi no Mai
Air Musasabi no Mai is performed from a jump and sends Mai diagonally downward. Use it to shift your landing position mid-jump, making it difficult for opponents to time anti-airs. Cancel from Musasabi no Mai into the air version for extended aerial pressure.
SA2 Air Chou Hissatsu Shinobi Bachi
Use Air SA2 as a combo ender following Musasabi no Mai or air-to-air confirms. After landing a jumping attack that knocks the opponent airborne, cancel into Air SA2 for a high-damage finish. Also effective as a surprise attack when the opponent is not expecting an aerial Super Art.
【空中】ODムササビの舞
OD Musasabi no Mai (air version) is Mai's most powerful aerial option. The enhanced properties give better angle and frame data compared to regular versions. Use it for high-reward cross-up setups and as a combo ender from aerial routes to maximize corner carry and damage.
Hien Ren Kyaku (2nd Hit)
Use the 2nd hit of Hien Ren Kyaku to continue the kick chain from the first LK. You can stop here to mix up with the third hit or a throw. The hit advantage on connecting allows for further pressure.
Hien Ren Kyaku (3rd Hit)
Use the 3rd hit of Hien Ren Kyaku to finish the full kick chain. On hit it leads to a knockdown, enabling wake-up pressure. Be cautious about using all three hits on block as the recovery can be punished.