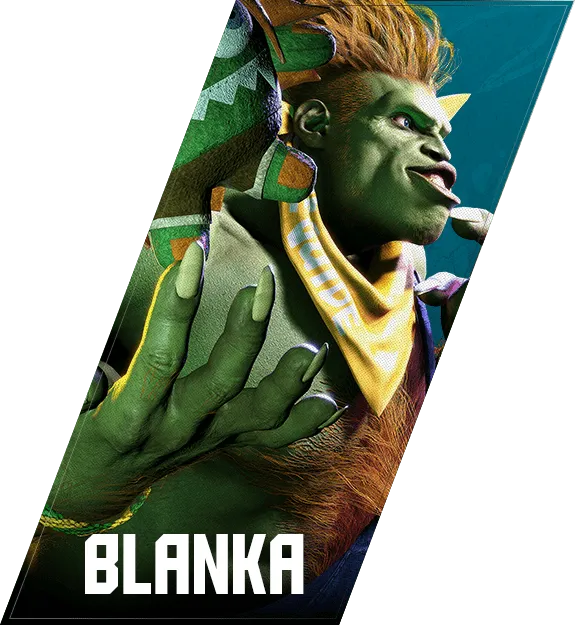

ブランカ
Blanka — 角色使用
Jumping Heavy Punch
Notes on how Blanka uses Jumping Heavy Punch — combo routes, pressure, pokes — to be added.
Jumping Light Punch
Notes on how Blanka uses Jumping Light Punch — combo routes, pressure, pokes — to be added.
Jumping Medium Punch
Notes on how Blanka uses Jumping Medium Punch — combo routes, pressure, pokes — to be added.
Wild Bites
Notes on how Blanka uses Wild Bites — combo routes, pressure, pokes — to be added.
Jumping Light Kick
Notes on how Blanka uses Jumping Light Kick — combo routes, pressure, pokes — to be added.
Jumping Heavy Kick
Notes on how Blanka uses Jumping Heavy Kick — combo routes, pressure, pokes — to be added.
Aerial Rolling Attack
Blanka's aerial mobility tool. Primarily used as a reversal option. Normal versions become unpunishable when hit at low altitude — but remember they are always -3 at best.
- (In air) [4]6LP
- (In air) [4]6MP
- (In air) [4]6HP
- (In air) [4]6PP
Typically used by Blanka after guard pushback from normals.
- LK → LK → 214P → (in air) [4]6HP
- If you try to counter with a mid kick after blocking 214P, you'll get hit
- If you read the aerial rolling, counter with a high-priority heavy normal or place a neutral jump
(In air) [4]6PP leaves Blanka with positive frames on block — advantage increases when hit low. Primarily used as a reversal option on your wake-up. If you chose a shimmy, Blanka maintains pressure on block; if you chose a throw, you'll get hit.
- (In air) [4]6PP
- Throw and shimmy both lose on your wake-up
- If you read it, land a normal meaty or back-dash for a high-reward punish
Raid Jump
Notes on how Blanka uses Raid Jump — combo routes, pressure, pokes — to be added.
Wild Lift
Notes on how Blanka uses Wild Lift — combo routes, pressure, pokes — to be added.
Rolling Cannon
Notes on how Blanka uses Rolling Cannon — combo routes, pressure, whiff punishes — to be added.
CA Ground Shave Cannonball
Notes on how Blanka uses CA Ground Shave Cannonball — combo routes, pressure, pokes — to be added.
Neutral Jumping Heavy Punch
Notes on how Blanka uses Neutral Jumping Heavy Punch — combo routes, pressure, pokes — to be added.
Wild Hunt
Notes on how Blanka uses Wild Hunt — combo routes, pressure, whiff punishes — to be added.
SA2 Lightning Beast
Notes on how Blanka uses SA2 Lightning Beast — combo routes, pressure, pokes — to be added.
Electric Thunder
Notes on how Blanka uses Electric Thunder — combo routes, pressure, whiff punishes — to be added.
Blanka-chan Bomb
Corner doll setups
High (overhead)
- 6MP at the earliest opportunity
Low
- Forward-step → 2MK
Cross-up
- Forward-step → delayed → 6KKK
Throw option
- During SA2, Aerial Rolling Attack → fastest throw
Command grab option
Chip damage option
- HP → 214P → HP → [4]6HP
- Continuous guard (blockstring)
SA3 Ground Shave Cannonball
Notes on how Blanka uses SA3 Ground Shave Cannonball — combo routes, pressure, pokes — to be added.
SA1 Shout of Earth
Notes on how Blanka uses SA1 Shout of Earth — combo routes, pressure, pokes — to be added.
Crouching Heavy Kick
Notes on how Blanka uses Crouching Heavy Kick — combo routes, pressure, pokes — to be added.
Crouching Heavy Punch
Notes on how Blanka uses Crouching Heavy Punch — combo routes, pressure, pokes — to be added.
Crouching Light Kick
Notes on how Blanka uses Crouching Light Kick — combo routes, pressure, pokes — to be added.
Crouching Light Punch
Notes on how Blanka uses Crouching Light Punch — combo routes, pressure, pokes — to be added.
Crouching Medium Kick
Notes on how Blanka uses Crouching Medium Kick — combo routes, pressure, pokes — to be added.
Crouching Medium Punch
Notes on how Blanka uses Crouching Medium Punch — combo routes, pressure, pokes — to be added.
Coward Crouch
Notes on how Blanka uses Coward Crouch — combo routes, pressure, pokes — to be added.
Amazon River Run
Notes on how Blanka uses Amazon River Run — combo routes, pressure, pokes — to be added.
Surprise Back Hop
Notes on how Blanka uses Surprise Back Hop — combo routes, pressure, pokes — to be added.
Jungle Flip
Notes on how Blanka uses Jungle Flip — combo routes, pressure, pokes — to be added.
Wild Edge
Notes on how Blanka uses Wild Edge — combo routes, pressure, pokes — to be added.
[Lightning Beast] H Backstep Rolling Attack
Notes on how Blanka uses H Backstep Rolling Attack — combo routes, pressure, pokes — to be added.
H Backstep Rolling Attack
Notes on how Blanka uses Backstep Rolling Attack — combo routes, pressure, whiff punishes — to be added.
[Lightning Beast] OD Backstep Rolling Attack
Notes on how Blanka uses OD Backstep Rolling Attack — combo routes, pressure, pokes — to be added.
[Lightning Beast] L Backstep Rolling Attack
Notes on how Blanka uses L Backstep Rolling Attack — combo routes, pressure, pokes — to be added.
[Lightning Beast] M Backstep Rolling Attack
Notes on how Blanka uses M Backstep Rolling Attack — combo routes, pressure, pokes — to be added.
Wild Nail
Notes on how Blanka uses Wild Nail — combo routes, pressure, pokes — to be added.
Surprise Forward Hop
Notes on how Blanka uses Surprise Forward Hop — combo routes, pressure, pokes — to be added.
Double Knee Bombs
Notes on how Blanka uses Double Knee Bombs — combo routes, pressure, pokes — to be added.
Rock Crusher
Notes on how Blanka uses Rock Crusher — combo routes, pressure, pokes — to be added.
Standing Heavy Kick
Notes on how Blanka uses Standing Heavy Kick — combo routes, pressure, pokes — to be added.
Standing Heavy Punch
Notes on how Blanka uses Standing Heavy Punch — combo routes, pressure, pokes — to be added.
Standing Light Kick
Notes on how Blanka uses Standing Light Kick — combo routes, pressure, pokes — to be added.
Standing Light Punch
Notes on how Blanka uses Standing Light Punch — combo routes, pressure, pokes — to be added.
Wild Fang
Blanka is +30F after the throw. Blanka runs wake-up pressure using either 6KKK or Drive Rush.
Drive Rush wake-up pressure
- 6MP / 2MK / throw / shimmy are all available
- Neutral rise
- When using Drive Rush, Blanka finds it difficult to walk shimmy
- Blanka must confirm the neutral rise and stop with LK
- If Blanka Drive Rushes frequently after forward throw, opt for neutral rise more often
- If Blanka does not Drive Rush after forward throw, shimmy wake-up pressure becomes available
- When using Drive Rush, Blanka finds it difficult to walk shimmy
- Back rise
- If the opponent does not Drive Rush, no meaty pressure lands
- If Blanka uses 6KKK, wake-up pressure applies
6KKK wake-up pressure
- LK → 214P — reversal attempt-crusher
- LK → 6KKK — cross-up mix-up for free damage
- LK → (close) 236K — even a back-jump leaves enough time for Blanka's rush to connect
- 2MK → 214P — low option; 4F mash is live
- Throw — not a true meaty, but walk throw is possible
- HK — best damage on reversal read; 4F punish on block (may whiff depending on spacing)
Corner judo
Forward step is 11F. Blanka's corner judo is top-tier. Options involving 4MK are especially threatening.
If 4MK hits on your wake-up, a combo dealing 3000 damage follows. Taking an OD invincible reversal is often better than a risky reversal attempt. The main options Blanka takes in corner judo:
- 4MK → LP → 214P
- After blocking up to 214P, the safe return is a normal with strong upward priority (to cover the follow-up aerial rolling)
- Characters with a 7F crouching medium kick can hit Blanka before going airborne — 2MK works for them. 8F or slower will whiff as Blanka is already airborne
- If you read (in air) [4]6HP, neutral jump gives high reward
- 4MK → 4MK
- Drive Gauge drain using the plus frames; Blanka must walk in, giving a window to mash
- 4MK → walk throw
- Throw leveraging the advantage; if Blanka times it well, mashing loses
- Throw
- Blanka at +11 close up, throw again immediately
Also, jumping when Blanka throws a meaty can be answered by 4MK anti-air into corner-swap denial. Some players still forward jump — if you read the throw, back-dash instead.
Standing Medium Kick
Notes on how Blanka uses Standing Medium Kick — combo routes, pressure, pokes — to be added.
Standing Medium Punch
Notes on how Blanka uses Standing Medium Punch — combo routes, pressure, pokes — to be added.
H Vertical Rolling Attack
Notes on how Blanka uses Vertical Rolling Attack — combo routes, pressure, whiff punishes — to be added.
Rolling Attack
Notes on how Blanka uses Rolling Attack — combo routes, pressure, whiff punishes — to be added.
[Lightning Beast] H Vertical Rolling Attack
Notes on how Blanka uses [Lightning Beast] H Vertical Rolling Attack — combo routes, pressure, pokes — to be added.
[Lightning Beast] L Vertical Rolling Attack
Notes on how Blanka uses [Lightning Beast] L Vertical Rolling Attack — combo routes, pressure, pokes — to be added.
[Lightning Beast] M Vertical Rolling Attack
Notes on how Blanka uses [Lightning Beast] M Vertical Rolling Attack — combo routes, pressure, pokes — to be added.
[Lightning Beast] H Aerial Rolling Attack
Notes on how Blanka uses [Lightning Beast] H Aerial Rolling Attack — combo routes, pressure, pokes — to be added.
[Lightning Beast] L Aerial Rolling Attack
Notes on how Blanka uses [Lightning Beast] L Aerial Rolling Attack — combo routes, pressure, pokes — to be added.
[Lightning Beast] M Aerial Rolling Attack
Notes on how Blanka uses [Lightning Beast] M Aerial Rolling Attack — combo routes, pressure, pokes — to be added.
[Lightning Beast] OD Aerial Rolling Attack
Notes on how Blanka uses [Lightning Beast] OD Aerial Rolling Attack — combo routes, pressure, pokes — to be added.
[Lightning Beast]OD Electric Thunder
Notes on how Blanka uses [Lightning Beast]OD Electric Thunder — combo routes, pressure, pokes — to be added.
[Lightning Beast] SA1 Shout of Earth
Notes on how Blanka uses [Lightning Beast] SA1 Shout of Earth — combo routes, pressure, pokes — to be added.
[Lightning Beast] OD Vertical Rolling Attack
Notes on how Blanka uses [Lightning Beast] OD Vertical Rolling Attack — combo routes, pressure, pokes — to be added.
[Lightning Beast] H Rolling Attack
Notes on how Blanka uses [Lightning Beast] H Rolling Attack — combo routes, pressure, pokes — to be added.
[Lightning Beast] L Rolling Attack
Notes on how Blanka uses [Lightning Beast] L Rolling Attack — combo routes, pressure, pokes — to be added.
[Lightning Beast] M Rolling Attack
Notes on how Blanka uses [Lightning Beast] M Rolling Attack — combo routes, pressure, pokes — to be added.
[Lightning Beast] OD Rolling Attack
Notes on how Blanka uses [Lightning Beast] OD Rolling Attack — combo routes, pressure, pokes — to be added.