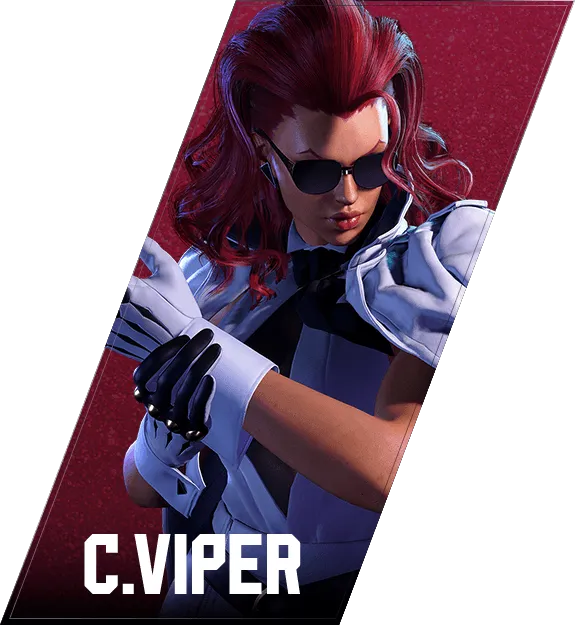

ヴァイパー
C. Viper — 角色使用
[Focus Force]Forward Dash
Notes on how C. Viper uses [Focus Force]Forward Dash — combo routes, pressure, pokes — to be added.
セービングフォース
Lv1
Fastest version — useful as a combo ender or whiff punish. OD version starts even faster and is good for punishes and stuffing mashing.
Lv2
30F startup is slow but damage scales up. Use it during pressure or okizeme as a mid-tier mixup option.
Lv3
At 69F startup it requires the opponent to be locked down. Leverage its top damage and improved -10 on block as a finisher in the corner or after a hard read.
H Tracer Combination
Notes on how C.Viper uses Tracer Combination — combo routes, pressure, whiff punishes — to be added.
ハイジャンプキャンセル
- Combo extension: The core HJC route — Thunder Dash → HJC → Burning Kick → follow-up — achieves damage impossible through standard combo routes.
- SA1 install synergy: During SA1 install, HJC costs no Drive Gauge. This makes C. Viper's aerial offense essentially unlimited for the install duration.
- Overhead mix-up: From a high jump, C. Viper can threaten Burning Kick (overhead) from the air, forcing the opponent to guess high while Seismic Hammer covers low on the ground.
- Drive Gauge management: Each HJC depletes Drive Gauge. Overusing it risks Burnout — keep gauge levels in mind during longer exchanges.
フェイント
Notes on how C.Viper uses Feint — combo routes, pressure, whiff punishes — to be added.
H Aerial Burning Kick
Notes on how C.Viper uses Aerial Burning Kick — combo routes, pressure, whiff punishes — to be added.
起き攻め時
After a knockdown, continue pressure with the appropriate safe-jump timing. Check C. Viper's gauge levels to know which reversals are available, and lock out her options accordingly.
Jumping Heavy Punch
- High-damage jump-in: The go-to jump button when looking for maximum damage from a jump-in combo.
- Punish cross-up: Use when jumping in on the opponent's whiffed move for a full combo.
- Safe jump: Can be timed as a safe jump on wake-up at certain spacings to beat reversal attempts.
Jumping Light Punch
- Air-to-air: Fast startup makes it effective for trading or beating the opponent's anti-air attempts in certain situations.
- Ambiguous cross-up: Use at specific jump arc timings to create left-right ambiguity on wake-up.
- Safe jump-in: Can be used as a low-commitment jump-in that recovers quickly on landing.
Jumping Medium Punch
- Jump-in combo starter: The main jump-in button that combos into standing normals or crouching normals on landing.
- Air-to-air: Decent horizontal reach makes it usable in air-to-air situations.
- Cross-up setup: Can be used at certain timings to create ambiguous left/right situations on wake-up.
Jumping Light Kick
- Air-to-air: Quick startup makes it competitive in the air against the opponent's jump attempts.
- Low-commitment jump-in: Safe on block with fast recovery, letting C. Viper maintain pressure without major risk.
- Okizeme: Can be used as part of safe jump set-ups on wake-up.
Jumping Heavy Kick
- Cross-up: Can cross up crouching opponents at the right spacing, creating left-right mix-up situations.
- Deep jump-in: Angled hitbox allows it to connect deeply for better frame advantage on landing.
- Air-to-ground: Effective when jumping toward a grounded opponent due to the downward hitbox angle.
[Seismic Hammer]Feint
Notes on how C. Viper uses [Seismic Hammer]Feint — combo routes, pressure, pokes — to be added.
CA Hard Luck Rejector
- Maximum damage finisher: When the conditions are met, cancel into CA Hard Luck Rejector for the highest single-hit damage available to C. Viper.
- Comeback reversal: Functions as a powerful reversal in critical moments to swing the match from a losing position.
- Combo route: End HJC combos, Seismic Hammer juggles, or Thunder Dash cancel sequences with CA for maximum output.
(垂直ジャンプ中に)MK
- Anti-approach: Performed on a neutral jump, the downward angle covers space in front of C. Viper to beat opponents walking under the jump arc.
- Air-to-ground pressure: The spike-like trajectory is useful when the opponent is standing still below.
- Burning Kick counter-option: When the opponent expects Burning Kick from the air, neutral jumping MK can catch them anticipating incorrectly.
SA3 Hard Luck Rejector
- Low-health reversal: Only available below 25% HP. Use it to escape dangerous okizeme situations when the install condition is active.
- Combo finisher: When available, cancel into SA3 after Thunder Dash or Seismic Hammer for maximum comeback damage.
- Projectile invincibility: Pass through the opponent's fireballs with SA3 for a punish when at low health.
- Wake-up meaty: With 10F startup, a 9F-or-faster safe jump still beats it — be mindful when applying okizeme at low health.
SA2 Mission Complete
- Reversal: 7F startup allows it to escape many okizeme situations. Projectile invincibility also makes it viable against fireball-heavy opponents.
- Combo ender: Cancel into SA2 after Thunder Dash or in HJC combo routes for high damage.
- Wake-up counter: When the opponent applies safe-jump pressure, use an 8F-or-faster meaty to beat SA2 (7F startup).
Focus Force(Lv1)
- Combo ender: Fastest startup makes it the easiest version to land in combos after a hit confirm.
- Surprise attack: Quick release catches opponents off guard in neutral when they expect a longer charge.
- OD version: OD Focus Force Lv1 starts even faster and adds armor earlier — effective for stuffing mashing and punishing on very short windows.
[Thunder Dash]Feint
- Seismic embed: 214P→K cancels into 623P (Seismic Hammer), creating a low attack after almost any blocked normal. The opponent must crouch-block in response.
- Strike/throw mix-up: After the feint cancel, C. Viper can throw instead of using Seismic Hammer, creating a 50/50 between low and throw.
- Drive Impact bait: Opponents who use Drive Impact to counter feint cancel strings will get counter-hit by C. Viper's own Drive Impact when she reads the attempt.
- HJC extension: Feint cancel into High Jump Cancel (HJC) unlocks advanced combo routes and aerial approaches that are otherwise impossible.
SA1 Limit Decoupler
- Install activation: Activate at a safe moment to enter the install state and begin Drive-Gauge-free HJC offense.
- Combo route: Used in combos as an anti-air Super Art — e.g., HP → SA1 → aerial follow-ups.
- Install pressure: After SA1 lands, immediately start HJC-based offense. The opponent must deal with unlimited aerial mix-up potential without C. Viper depleting her gauge.
- Wake-up safe jump counter: With 8F startup, safe jump with a 9F-or-slower move to avoid the reversal.
Burning Kick
Notes on how C.Viper uses Burning Kick — combo routes, pressure, whiff punishes — to be added.
Double Burn
Notes on how C.Viper uses Double Burn — combo routes, pressure, whiff punishes — to be added.
Knuckled Pursuit
Notes on how C.Viper uses Knuckled Pursuit — combo routes, pressure, whiff punishes — to be added.
High Jump (Neutral)
Notes on how C. Viper uses High Jump (Neutral) — combo routes, pressure, pokes — to be added.
High Jump (Forward)
Notes on how C. Viper uses High Jump (Forward) — combo routes, pressure, pokes — to be added.
Viper Sweep
- Low knockdown: Hits low for a hard knockdown, leading directly into C. Viper's powerful okizeme with Burning Kick (overhead) and Seismic Hammer (low) mix-ups.
- Whiff punish at range: The long reach allows it to punish moves that extend too far.
- Mix-up low option: In okizeme, 2HK is a risky but long-range low option alongside Seismic Hammer.
Crouching Heavy Punch
- Anti-air: Reaches high enough to catch certain jump-ins depending on angle and timing.
- Punish Counter route: On Punish Counter, links into special moves for high-damage punishes.
- Combo filler: Used in specific corner combo routes when launching into High Jump Cancel extensions.
Crouching Light Kick
- Low check: Hits low and is fast enough to interrupt the opponent's attempts to walk or act.
- Combo starter: Chain into 2MP or cancel into Thunder Dash for a close-range light-confirm route.
- Meaty low: Effective as a low meaty on wake-up pressure when the opponent is expecting a throw.
Crouching Light Punch
- Reversal attempt: Fast startup makes it the go-to button to interrupt the opponent's delayed actions at close range.
- Hit confirm start: Chain into 2MP or cancel into Thunder Dash (214P) for a light normal hit confirm.
- Meaty: Use as a tight meaty on wake-up to beat slow reversals.
Crouching Medium Kick
- Drive Rush cancel route: 2MK → Drive Rush → MP → Thunder Dash is one of C. Viper's core mid-screen hit-confirm combos.
- Low poke: Solid range and low hitbox make it excellent for checking opponents in the neutral.
- Knockdown: On hit, can lead into combo routes or oki setups.
Crouching Medium Punch
- Combo link: Appears in post-Burning Kick combos — e.g., Burning Kick → 2MP → Thunder Dash.
- Pressure tool: Cancels cleanly into Thunder Dash or Seismic Hammer after hit or block.
- OD Thunder Dash route: In the corner, 2MP → OD Thunder Dash → High Jump Cancel extends into high-damage combos.
Thunder Cradle
- Space creation: The extra distance compared to High Impulse gives C. Viper a moment to reestablish position before applying okizeme.
- Mix-up variation: Mixing back and forward throws prevents the opponent from reliably choosing an ukemi direction.
- Okizeme: Despite the distance, Drive Rush still closes the gap in time for Burning Kick or Seismic Hammer mix-ups.
Seismic Hammer
Notes on how C.Viper uses Seismic Hammer — combo routes, pressure, whiff punishes — to be added.
Forward Dash
Notes on how C.Viper uses Forward Dash — combo routes, pressure, whiff punishes — to be added.
Double Kick
- Combo extender: Used in specific combo routes to push the opponent toward the corner or to increase damage before a special move finisher.
- Space control: The two-hit motion covers distance and can be used to contest mid-range exchanges.
- Corner carry: Helps move the opponent to the corner where C. Viper's okizeme becomes most threatening.
Viper Elbow
- Overhead mix-up: Hits overhead, so crouching opponents must stand to block it. Use it in okizeme and pressure sequences to threaten the upper guard.
- Late-hit combo: Lands a meaty connect into combo. Timing is strict but gives real combo damage from an overhead.
- Pressure layer: Showing Viper Elbow conditions the opponent to stand block, which in turn opens up Seismic Hammer (low) and Burning Kick high/low guessing.
Standing Heavy Kick
- Whiff punish: Long reach makes it ideal for catching the opponent's whiffed moves from a safe distance.
- Punish Counter starter: On Punish Counter, leads into high-damage combo extensions.
- Corner carry: Use in combos that push the opponent toward the corner.
Standing Heavy Punch
- Combo link: Used after MP in the MP → HP → Thunder Dash core combo. Confirms well into special moves.
- Punish counter route: Punish Counter HP links into Thunder Dash and High Jump Cancel for high-damage extensions.
- Anti-air option: Can beat certain jump-in angles depending on timing.
Standing Light Kick
- Close-range check: Fast startup makes it useful for stopping the opponent from walking into throw range.
- Combo filler: Can be chained into other light normals or cancelled into special moves at close range.
Standing Light Punch
- Pressure starter: Cancels into special moves on hit or block, allowing safe offense with Thunder Dash (214P) or Seismic Hammer (623P).
- Combo filler: Links into 2MP or MP from close range for hit-confirm sequences.
- Reversal attempt stuffing: Quick startup lets it beat out slow mashes from the opponent.
High Impulse
- Okizeme starter: After a forward throw, Drive Rush reaches in time to start wake-up pressure with Burning Kick (overhead), Seismic Hammer (low), and throw mix-ups.
- Throw mix-up: Mix in throws with Seismic Hammer embeds and feint cancels to keep the opponent guessing.
- Corner carry: Use the throw to move the opponent toward the corner where okizeme becomes even stronger.
Standing Medium Kick
- Neutral poke: Good reach to interrupt the opponent's attempts to walk in.
- Drive Rush cancel: 2MK into Drive Rush is a primary hit-confirm route; the standing version can similarly be used for spacing game and cancel setups.
- Space control: Use to keep opponents honest at mid range before transitioning into special moves.
Standing Medium Punch
- Frame advantage on block: MP is plus on block — do not mash after getting hit by it. C. Viper can follow with Seismic Hammer (623P) embed, throw, or feint cancel.
- Combo starter: Cancels into Thunder Dash (214P) or OD Seismic Hammer for full combos.
- Mid-range poke: Solid reach and speed for a medium normal, suitable for contesting the opponent's footsies.
セービングフォース(Lv2)
- Pressure tool: During okizeme or blockstrings, charging to Lv2 while the opponent is in hitstun or blocking gives a damage and advantage boost over Lv1.
- Mix-up layer: Varying between Lv1 and Lv2 release timings makes the charge harder to react to and punish.
- Combo route: In some setups, Lv2 connects into juggle extensions that Lv1 does not.
セービングフォース(Lv3)
- Corner unblockable setup: Near the corner, if the charge timing is hidden in hitstun or a meaty situation, Lv3 forces the opponent to absorb full damage or be completely overwhelmed.
- Hard-read punish: After an armor absorb or a read on the opponent's action, releasing at Lv3 maximizes the return on the risk.
- Guard pressure: Even the threat of Lv3 conditions the opponent to jump or use a reversal, creating new read opportunities.