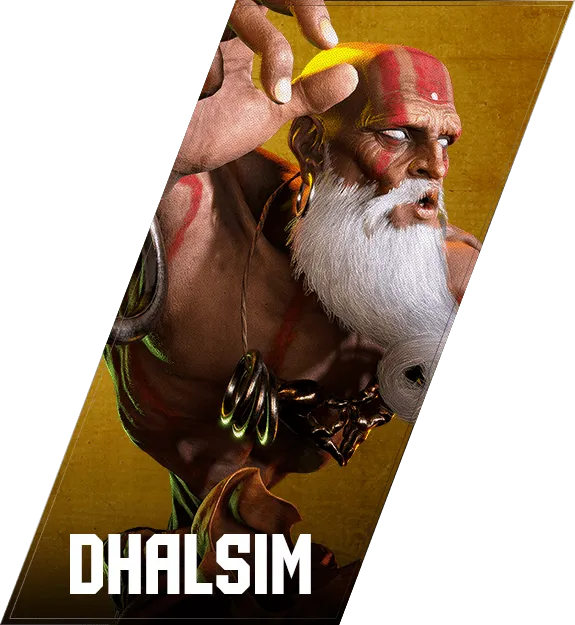

ダルシム
Dhalsim — 角色使用
[ガード時]ドライブリバーサル(ヨガイリュージョン)
Drive Reversal on Guard is part of the Drive System. Use it while blocking to escape pressure. The 1–22F full invincibility makes it reliable as a get-out-of-jail option, especially when Dhalsim is cornered.
[起き上がり時]ドライブリバーサル(ヨガイリュージョン)
Drive Reversal on Wakeup is part of the Drive System. Use it on wakeup to blow through meaty attacks. Note the invincibility is 1–20F (slightly shorter than the on-guard version), so timing and read are important.
キャンセルドライブラッシュ
Cancel Drive Rush is part of the Drive System. Use it to extend combos and create pressure sequences.
ジャストパリィ(打撃)
Perfect Parry is part of the Drive System. A successful Perfect Parry gives a 5F invincible window and forces the opponent into Punish Counter state — convert into a high-damage punish combo.
ジャストパリィ(飛び道具)
Perfect Parry against projectiles is part of the Drive System. Successfully absorbing a fireball with Perfect Parry forces the opponent into Punish Counter state — use the opportunity to advance and start your offense.
ドライブインパクト(ヨガライズ)
Drive Impact is part of the Drive System. The 2-hit armor makes it strong in neutral and against cornered opponents. On Punish Counter or post-armor hit, convert into a high-damage combo using the crumple.
ドライブパリィ
Drive Parry is part of the Drive System. Hold to extend duration and cancel into Drive Rush for a powerful offensive option.
パリィドライブラッシュ
Parry Drive Rush is part of the Drive System. Use it as a powerful offensive starter after a successful Parry.
H Yoga Comet
Notes on how Dhalsim uses Yoga Comet — combo routes, pressure, whiff punishes — to be added.
ヨガフロート
その場
In-place version: 2KK. Float straight up and use air normals to shift the offensive axis. Notes to be added.
前方
Forward version: 3KK. Float forward — use to advance through fireballs or set up air offense. Notes to be added.
H Yoga Blast
Notes on how Dhalsim uses Yoga Blast — combo routes, pressure, whiff punishes — to be added.
前方ステップ
Forward Step is part of the Drive System. Incorporate it into combos and neutral to close distance effectively.
後方ステップ
Back Step is part of the Drive System. Use it to escape throws and manage spacing.
起き攻め時
When pressing Dhalsim on wakeup, expect safe jump opportunities. Adjust your approach based on his gauge and health.
Jumping Heavy Punch
Notes on how Dhalsim uses Jumping Heavy Punch — combo routes, pressure, pokes — to be added.
Yoga Mummy
Notes on how Dhalsim uses Yoga Mummy — combo routes, pressure, pokes — to be added.
Jumping Medium Punch
Notes on how Dhalsim uses Jumping Medium Punch — combo routes, pressure, pokes — to be added.
H Drill Kick
Notes on how Dhalsim uses H Drill Kick — combo routes, pressure, pokes — to be added.
Aerial Yoga Float
Notes on how Dhalsim uses Aerial Yoga Float — combo routes, pressure, whiff punishes — to be added.
L Drill Kick
Notes on how Dhalsim uses L Drill Kick — combo routes, pressure, pokes — to be added.
M Drill Kick
Notes on how Dhalsim uses M Drill Kick — combo routes, pressure, pokes — to be added.
K Aerial Yoga Teleport (Backward)
Notes on how Dhalsim uses K Aerial Yoga Teleport (Backward) — combo routes, pressure, pokes — to be added.
K Aerial Yoga Teleport (Forward)
Notes on how Dhalsim uses K Aerial Yoga Teleport (Forward) — combo routes, pressure, pokes — to be added.
Jumping Light Kick
Notes on how Dhalsim uses Jumping Light Kick — combo routes, pressure, pokes — to be added.
Jumping Heavy Kick
Notes on how Dhalsim uses Jumping Heavy Kick — combo routes, pressure, pokes — to be added.
P Aerial Yoga Teleport (Backward)
Notes on how Dhalsim uses OD Yoga Comet — combo routes, pressure, pokes — to be added.
P Aerial Yoga Teleport (Forward)
Notes on how Dhalsim uses P Aerial Yoga Teleport (Forward) — combo routes, pressure, pokes — to be added.
CA Merciless Yoga
Notes on how Dhalsim uses CA Merciless Yoga — combo routes, pressure, pokes — to be added.
Karma Kick
Notes on how Dhalsim uses Karma Kick — combo routes, pressure, pokes — to be added.
Nirvana Punch
Notes on how Dhalsim uses Nirvana Punch — combo routes, pressure, pokes — to be added.
Agile Kick
Notes on how Dhalsim uses Agile Kick — combo routes, pressure, pokes — to be added.
Thrust Kick
Notes on how Dhalsim uses Thrust Kick — combo routes, pressure, pokes — to be added.
SA2 ヨガサンバースト【Lv1】
Notes on how Dhalsim uses SA2 ヨガサンバースト【Lv1】 — combo routes, pressure, pokes — to be added.
SA2 ヨガサンバースト【Lv2】
Notes on how Dhalsim uses SA2 ヨガサンバースト【Lv2】 — combo routes, pressure, pokes — to be added.
SA2 ヨガサンバースト【Lv3】
Notes on how Dhalsim uses SA2 ヨガサンバースト【Lv3】 — combo routes, pressure, pokes — to be added.
SA1 H Yoga Inferno
Notes on how Dhalsim uses SA1 H Yoga Inferno — combo routes, pressure, pokes — to be added.
SA3 Merciless Yoga
Notes on how Dhalsim uses SA3 Merciless Yoga — combo routes, pressure, pokes — to be added.
SA1 L Yoga Inferno
Notes on how Dhalsim uses SA1 L Yoga Inferno — combo routes, pressure, pokes — to be added.
SA1 M Yoga Inferno
Notes on how Dhalsim uses SA1 M Yoga Inferno — combo routes, pressure, pokes — to be added.
Yoga Arch
弱
L Yoga Arch (236LK) lands closest. Use it for close-range pressure and zoning. Notes to be added.
中
M Yoga Arch lands at mid range — useful as a mid-screen poke. Notes to be added.
強
H Yoga Arch lands farthest — useful for catching backdashes or full-screen pressure. Notes to be added.
OD 強 ヨガアーチ
Used in powerful setplays that create left-right mix-ups and continued pressure.
Yoga Fire
弱
L Yoga Fire (236LP) is the slowest fireball. Use it as a wall to walk behind. Notes to be added.
中
M Yoga Fire (236MP) sits in the middle — combine with pokes and okizeme. Notes to be added.
強
H Yoga Fire (236HP) is the fastest. Use it for whiff punishes and beating other fireballs. Notes to be added.
ホールド版
Hold version: keep the button held to charge. Startup 43F is slow, but it knocks down on hit (800 dmg) and is only -1 on block. Use the visible charge to bait reactions. Notes to be added.
Long Sliding Kick
Notes on how Dhalsim uses Long Sliding Kick — combo routes, pressure, pokes — to be added.
Crouching Heavy Punch
Notes on how Dhalsim uses Crouching Heavy Punch — combo routes, pressure, pokes — to be added.
Yoga Float(immediately)
Notes on how Dhalsim uses Yoga Float(immediately) — combo routes, pressure, pokes — to be added.
Crouching Light Kick
Notes on how Dhalsim uses Crouching Light Kick — combo routes, pressure, pokes — to be added.
Crouching Light Punch
Notes on how Dhalsim uses Crouching Light Punch — combo routes, pressure, pokes — to be added.
Yoga Splash
Notes on how Dhalsim uses Yoga Splash — combo routes, pressure, pokes — to be added.
Crouching Medium Kick
Notes on how Dhalsim uses Crouching Medium Kick — combo routes, pressure, pokes — to be added.
Crouching Medium Punch
Notes on how Dhalsim uses Crouching Medium Punch — combo routes, pressure, pokes — to be added.
3HK
Use this as a surprise low after Yoga Arch, or as a distance-closing tool. The long reach makes it difficult to react to at mid-range.
Yoga Float(Forward)
Notes on how Dhalsim uses Yoga Float(Forward) — combo routes, pressure, pokes — to be added.
Yoga Mountain
Notes on how Dhalsim uses Yoga Mountain — combo routes, pressure, pokes — to be added.
Yoga Lance
Notes on how Dhalsim uses Yoga Lance — combo routes, pressure, pokes — to be added.
K ヨガテレポート(後方)
Notes on how Dhalsim uses K ヨガテレポート(後方) — combo routes, pressure, pokes — to be added.
Yoga Throw
Notes on how Dhalsim uses Yoga Throw — combo routes, pressure, pokes — to be added.
Divine Kick
Notes on how Dhalsim uses Divine Kick — combo routes, pressure, pokes — to be added.
Yoga Uppercut
Notes on how Dhalsim uses Yoga Uppercut — combo routes, pressure, pokes — to be added.
P ヨガテレポート(後方)
Notes on how Dhalsim uses P ヨガテレポート(後方) — combo routes, pressure, pokes — to be added.
Yoga Flame
Notes on how Dhalsim uses Yoga Flame — combo routes, pressure, whiff punishes — to be added.
K Yoga Teleport (Forward)
Notes on how Dhalsim uses K Yoga Teleport (Forward) — combo routes, pressure, pokes — to be added.
P Yoga Teleport (Forward)
Notes on how Dhalsim uses P Yoga Teleport (Forward) — combo routes, pressure, pokes — to be added.
Standing Heavy Kick
Notes on how Dhalsim uses Standing Heavy Kick — combo routes, pressure, pokes — to be added.
Standing Heavy Punch
Notes on how Dhalsim uses Standing Heavy Punch — combo routes, pressure, pokes — to be added.
Standing Light Kick
Notes on how Dhalsim uses Standing Light Kick — combo routes, pressure, pokes — to be added.
Standing Light Punch
Use it to punish a Teleport landing near you when you could not react in time for a heavier button. Can chain into 2LP or link into specials at close range.
Yoga Smash
Notes on how Dhalsim uses Yoga Smash — combo routes, pressure, pokes — to be added.
Standing Medium Kick
Notes on how Dhalsim uses Standing Medium Kick — combo routes, pressure, pokes — to be added.
Standing Medium Punch
Notes on how Dhalsim uses Standing Medium Punch — combo routes, pressure, pokes — to be added.