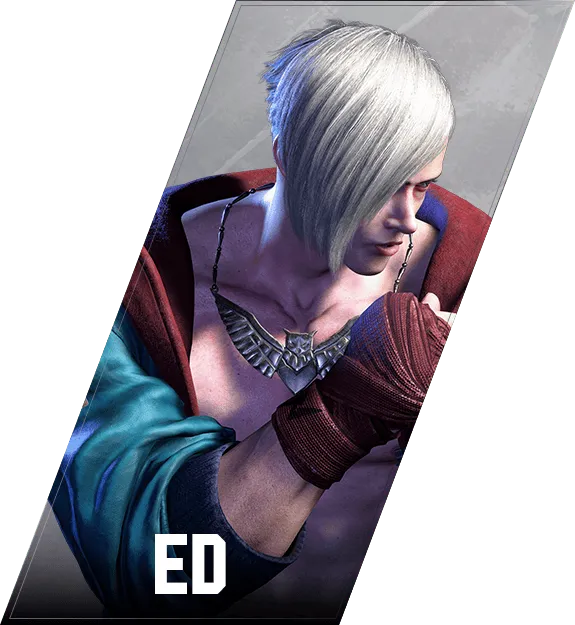

エド
Ed — 角色使用
H Psycho Shoot
Notes on how Ed uses Psycho Shoot — combo routes, pressure, whiff punishes — to be added.
L
Fastest projectile; use as a poke or whiff-punish starter.
M
Different trajectory; useful as a pre-emptive zoning ball.
H
Highest damage / range; apply long-range pressure.
前方ステップ
Use Forward Step (66) to close distance quickly and apply pressure. It is the foundation of Ed's approach game — combine it with Psycho Flicker zoning to confuse opponents about when you will advance.
後方ステップ
Use Back Step (44) to escape throw attempts and reset spacing. The 15-frame throw invincibility window makes it a reliable option when the opponent tries to tick-throw after a blocked string. Combine with Psycho Flicker hold to re-establish mid-range control after stepping back.
(キルステップ(前方)6P
Notes on how Ed uses Kill Switch Break — combo routes, pressure, whiff punishes — to be added.
Jumping Heavy Punch
- Jump-in starter: j.HP → HK → MP→HP → 214HP is Ed's standard jump-in combo route for solid midscreen damage.
- Crossup: j.HP can be used as a crossup attack — mix it with straight jump-ins to keep the opponent guessing the block direction.
- Far jump-in (2MK route): When j.HP hits at the tip or the opponent is crouching, switch to j.HP → 2MK → Kill Switch Chase → 623MP instead of the HK route.
- SA3 extension: j.HP → HK → MP→HP → 214HP → 236236P is the full damage route when SA3 is stocked.
Jumping Light Punch
- Air-to-air: j.LP activates quickly, making it the preferred option for trading or beating the opponent's jump-in with your own air button.
- Quick jump-in: When jumping from very close range, j.LP's early active frames connect more reliably than j.HP, leading into LP or 2LP ground combos.
- Pressure reset: After a jump arc where j.HP would whiff, j.LP can still make contact and maintain offensive momentum.
Jumping Medium Punch
- Vertical jump-in: When jumping straight up or at a steep angle, j.MP's more vertical hitbox reaches opponents that j.HP might not hit cleanly.
- Air-to-air alternative: j.MP can be used as an air-to-air button in exchanges where j.LP is too short and j.HP is too slow.
- Cross-up mix: Mixing j.MP with j.HP during jump-ins varies the hitbox angle slightly, making it harder for opponents to find a consistent block or anti-air timing.
Jumping Heavy Kick
- Horizontal jump-in: j.HK covers a wider horizontal area than j.HP, making it the preferred jump-in when the opponent is slightly farther away horizontally.
- Air-to-air control: j.HK's reach makes it a strong air-to-air tool, capable of intercepting opponents jumping from mid-range.
- Jump-in combo: On hit, j.HK → MP→HP → 214HP is a reliable jump-in route when j.HP's hitbox doesn't connect cleanly.
Jumping Light Kick
- Fast air-to-air: j.LK activates quickly enough to trade favorably or beat other air attacks in close-range air exchanges.
- Early jump-in: Against opponents with slow anti-air options, j.LK can connect before they can react, leading into a ground chain.
- Pressure variation: Mixing j.LK with j.HP during jump-ins varies the timing and hitbox, keeping the opponent's anti-air timing unpredictable.
Jumping Medium Kick
- Air-to-air mid-range: j.MK covers a mid-range angle in the air, useful when j.LK is too short and j.HK overshoots.
- Jump-in at specific spacing: At certain jump distances, j.MK connects more cleanly than other kick options and can lead into ground normals on landing.
- Mix with j.HK: Varying between j.MK and j.HK during jump-ins changes the hitbox slightly, making the correct anti-air harder to identify.
CA Psycho Chamber
- Post-214P cancel: The same routing as SA3 — after Psycho Blitz (214P), CA Psycho Chamber always connects.
- Maximum punish: Against OD reversals or other heavily punishable moves, the CA deals the most damage of any option in Ed's kit.
- Desperation reversal: At low health, you can use the CA as a reversal on wake-up to swing the round when nothing else will save you.
- Combo finisher: Any combo that would normally end in SA3 becomes dramatically more powerful once the CA threshold is reached — prioritize landing one clean hit.
SA2 Psycho Cannon
- Fast punish: At 8 frames, SA2 can punish moves that SA3 might be too slow to catch — for example, landing after a cross-up when the startup window is tight.
- Combo ender: Cancel from any hit-confirmed normal or special into SA2 for strong damage when SA3 is not ready.
- Anti-zoning: The projectile nature of SA2 can beat or trade favorably with slow opponent projectiles. Use it on reaction when you see a slow fireball startup.
SA1 Psycho Storm
- Full-screen punish: If the opponent uses a slow or unsafe move from far away, SA1 can reach them before they recover.
- Combo ender: After a Drive Rush or normal combo, cancel into SA1 for a damage boost when SA3 is not yet active.
- Anti-zoning: While it has no projectile invincibility, the fast activation can beat poorly spaced projectiles on reaction.
SA3 Psycho Chamber
- Post-214P cancel: After any version of Psycho Blitz (214P), SA3 connects consistently. This is the standard high-damage ender.
- Direct combo cancel: HP → 236236P, or MP→HP → 236236P when close, deals solid damage without requiring the 214P setup.
- Anti-air super: SA3's fast activation can be used as an invincible anti-air to shut down jump-ins on reaction.
- Punish: Against heavily unsafe moves (OD reversals, etc.), cancel into SA3 immediately for maximum punish damage.
Psycho Flicker
Notes on how Ed uses Psycho Flicker — combo routes, pressure, whiff punishes — to be added.
L / M / H
Tap versions are pokes / counter-pokes. M deals the most damage with its 3-hit string.
Held version
Pulls the opponent in for a +4 strike/throw mixup; one of Ed's main offensive tools. Cancellable into Kill Rush.
Psycho Spark
Notes on how Ed uses Psycho Spark — combo routes, pressure, whiff punishes — to be added.
Crouching Heavy Kick
- Hard knockdown: On hit, 2HK brings the opponent to the ground, giving Ed time to set up meaty pressure on wake-up.
- Surprise sweep: When the opponent is standing still expecting a throw, 2HK can catch them off guard for a knockdown.
- Avoid on block: 2HK is punishable on block, so only use it when you have a strong read that the opponent will not block low in time.
Low Hook Punch
- Corner combo extension: After OD Psycho Blitz (OD 214P), 2HP picks up the airborne opponent for further juggle damage, leading into 236HK → 214HP or SA3.
- Kill Rush follow-up: After Kill Rush (236KK), 2HP can start an extended juggle sequence for high corner damage.
- Drive Impact combo: After a wall-bounce Drive Impact, 2HP → 236KK → Kill Switch Chase → 214HP delivers heavy damage near the corner.
2HP→HK
- Juggle extension: In corner combos after OD 214P, 2HP→HK can extend the juggle before finishing with 214HP or SA3.
- Damage filler: Use this target combo as a connector between launcher and ender to maximize combo damage without spending extra Drive Gauge.
Crouching Light Kick
- Low mix-up: After LP pressure, 2LK adds a low option that pushes the opponent to maintain crouch-block, opening up throw opportunities.
- Chain combo: LP → 2LK → 623MP (LP→2LK → Psycho Uppercut) is a light-starter combo that delivers a knockdown with a safe-jump follow-up (Kill Rush → +8F).
- Pressure extension: 2LK keeps the blockstring going without spending Drive Gauge, useful when you want to save resources.
Crouching Light Punch
- Pressure string: 2LP → 2LP → 214MP is a clean, low-hitting pressure sequence that forces the opponent to crouch-block before taking a Psycho Blitz.
- Anti-reversal check: 2LP's speed makes it effective for catching late reversals out of blockstrings.
- Hit confirm into combo: On hit, 2LP can chain into 214LP for a minor plus-on-hit extension or into 214MP for a knockdown.
Crouching Medium Kick
- Low poke hit confirm: 2MK → 214MP is Ed's bread-and-butter low-confirm combo. Easy to execute and delivers a solid knockdown.
- Mixup with Psycho Flicker: After a held Psycho Flicker pulls the opponent in at +4, mixing 2MK (low) with throw or HP (high) keeps the opponent guessing.
- After Psycho Flicker held: 2MK is one of Ed's main follow-ups after the held Psycho Flicker pull-in, threatening the low option in the strike/throw mixup.
Crouching Medium Punch
- Drive Rush combo: Cancel Drive Rush → 2MP → MP→HP → 214HP is one of Ed's main damage routes from any range.
- Reversal bait follow-up: After conditioning the opponent to block, 2MP can lead into a throw for mix-up.
- Hit confirm: 2MP → 214MP is a simple hit-confirm combo that delivers a knockdown with minimal execution demands.
Kill Rush (Backward)
Kill Rush (Backward) is the back-step variant of Kill Rush. It retreats while building toward a follow-up attack, giving Ed a way to bait whiffs and then punish with a Kill Switch strike. It is a strong footsies tool for resetting to mid-range while keeping offensive momentum.
- Whiff bait: Dash back with Kill Rush (Backward) to make the opponent's poke whiff, then punish with Kill Switch Break or Chase on recovery.
- Reset spacing: When the opponent applies pressure, use Kill Rush (Backward) to escape and re-establish comfortable mid-range.
- Conditioning tool: Mixing Kill Rush (Backward) with Kill Rush (Forward) keeps the opponent unsure of your position and approach angle.
Rib Crusher
- Corner carry reversal: Use the back throw when your back is near the corner — throwing backward pushes the opponent into the corner instead.
- Tech-mix with forward throw: Alternating between forward and back throws makes it harder for the opponent to consistently tech in one direction.
- Back-tech note: Opponents can remove wake-up pressure with a back-tech, so this throw's main value is positional control rather than oki setup.
Psycho Uppercut
Psycho Uppercut is Ed's primary invincible reversal and anti-air. Choose the strength based on situation:
- 623LP: Main anti-air. Fastest startup; use this as the default anti-air whenever you see a jump.
- 623MP: Slightly more damage than LP version; useful in combos where you need a slightly slower but harder-hitting uppercut.
- 623HP: Highest damage but slowest; primarily used as a combo extender or in specific punish routes.
- 623PP: Full invincibility. Use on wake-up as an invincible reversal or as a high-damage combo ender.
In combos, 623LP and 623HP both appear depending on the route — 623LP is used in fast-confirm sequences while 623HP closes out juggle strings into higher damage.
Cobra Punch
- Combo extender: 6HP connects into Kill Switch Chase for an extended juggle sequence, particularly useful for corner carry.
- Forward reach: The slight forward movement makes 6HP useful for punishing whiffed moves at the edge of your normal range.
- After Psycho Flicker pull: At close range after the held Psycho Flicker pulls the opponent in, 6HP can serve as a high strike option in the strike/throw mixup.
Standing Heavy Kick
- Anti-air: HK's upward hitbox reliably stuffs jump-ins at mid-range. Use it as a complement to Psycho Uppercut (623LP) when the opponent is slightly farther away.
- Plus-on-block pressure: At +4 on block, HK gives Ed favorable frame advantage to continue with throw, light normals, or another HK.
- Combo ender: HK → HP → Kill Switch Chase → 623HP is a compact punish route. In corner, HK can start extended juggle sequences.
Standing Heavy Punch
- Punish Counter route: On Punish Counter HP launches for a crumple, allowing HP → 236HK → 214HP or HP → 236KK → 236HK → 214HP for maximum damage.
- Target combo: When used as the second hit of MP→HP, it feeds into 214HP for a reliable midscreen route with a safe-jump setup afterward.
- Anti-air (situational): At certain ranges HP can stuff jump-ins before they become active, though Psycho Uppercut (623P) is more reliable.
- Drive Impact punish: After a wall-bounce Drive Impact, HP is the preferred starter due to its high damage output.
Psycho Knuckle(Lv1)
- Charged poke: Psycho Knuckle Lv1 can be used as a slightly boosted heavy punch in situations where you do not have time to reach full Lv2 charge.
- Combo cancel: Like standard HP, Lv1 can cancel into special moves for combo extensions — use it the same way as a regular HP in most routes.
- Pressure tool: When conditioning the opponent with Psycho Flicker hold, mixing in a Lv1 Psycho Knuckle adds a different timing strike to the mix-up.
Psycho Knuckle(Lv2)
- Max-damage poke: When you have time to hold HP to full charge, Lv2 delivers the most damage of any Ed HP variant.
- Cancel into special: Lv2 can still cancel into 214HP or Kill Rush, making it a high-reward route when you confirm the hit.
- Mixed with Psycho Flicker hold: The habit of holding buttons for Psycho Flicker naturally facilitates building toward Lv2 HP during neutral — use this overlap in your gameplan.
Kill Rush (Forward)
Kill Rush (Forward) is Ed's forward-dashing special that leads into three follow-up attacks: Kill Switch Break (6P — uppercut), Kill Switch Chase (4P — retreating hook), or Kill Switch Stomp (6K — low kick). It is a core tool for extending combos, applying wake-up pressure, and creating left-right positioning mix-ups.
- Combo extension: In combos, 236KK → Kill Switch Chase (4P) → 214HP is a common midscreen route for carrying the opponent to the corner.
- Meaty on wake-up: After a knockdown, Kill Rush into Break or Chase can be timed as a meaty that beats most reversal options.
- Drive Impact counter: 236KK's startup is 25 frames, giving enough time to react to a Drive Impact and absorb it with the rush's armor — practice this to beat Drive Impact on reaction.
Standing Light Kick
- Blockstring filler: LK can be inserted between LP strings to vary the rhythm and make it harder for opponents to find a reversal window.
- Chain into LK→LK: Pressing LK repeatedly activates the Flicker Combination chain (2 or 3 hits), which can be used to tick-throw or end pressure safely.
- Hit confirm link: On hit at close range, LK can transition into a LP or 2LK to continue the combo.
Flicker Combination(3)
- Safe blockstring ender: Completing LK→LK→LK pushes the opponent back slightly, allowing Ed to reset to mid-range safely.
- Tick-throw alternative: Instead of completing the third hit, stop at two hits and grab — mixing completion vs. stopping keeps the opponent's defense unpredictable.
- Combo closer at close range: On hit, finishing the full chain leads into a small knockback that can be followed up with a dash-in meaty on wake-up.
Standing Light Punch
- Combo starter: LP → LP → 214MP is a safe, damage-efficient route from close range.
- Frame traps: LP's advantage on block lets you throw out LP again or walk up and grab to cover both options.
- Mashing counter: Because of its speed, LP beats most late reversal attempts. Use it to punish opponents who mash after blocking.
Face Buster
- Strike/throw mixup: After a held Psycho Flicker pull-in at +4, mix Face Buster with 2MK to keep the opponent guessing.
- Punish Counter throw: On a Punish Counter throw, the opponent cannot back-tech, so meaty pressure becomes available afterward.
- Back-tech note: Opponents can negate wake-up pressure by teching backward — be ready to adjust your pressure approach accordingly.
Standing Medium Kick
- Neutral poke: Use MK to control the mid-range space. Its range outclasses most opponents' standing normals at this distance.
- Whiff punish: Walk forward slightly and use MK to punish an opponent's whiffed normal before they can recover.
- Cancel into special: On hit, cancel into Light or Medium Psycho Flicker (236LK/MK) for extra damage, or into Psycho Blitz (214LP/MP) for a knockdown.
Hitman Combination(3)
- Full chain into special: MK→MK→HP → 214HP is a strong mid-range combo route that delivers good damage and a knockdown with safe-jump potential.
- Corner combo: In the corner, MK→MK→HP → 214HP can be extended further with SA3 for maximum damage.
- Hit-confirm opportunity: Each hit in the chain gives you time to confirm whether the string is hitting or being blocked before committing to the special cancel.
Standing Medium Punch
- Target combo route: MP→HP is the backbone of Ed's mid-screen combo tree. Confirm into 214HP for solid damage and a safe-jump setup.
- Drive Rush pressure: After a Drive Rush, MP is the go-to starter — the combo damage scales well and the hit confirm window is generous.
- Counter Hit punish: On Counter Hit, MP gives enough advantage to link into another MP or go straight into MP→HP → 214HP for big damage.
Body Blow Combination
- Core combo route: MP→HP → 214HP is Ed's standard midscreen combo. After a Drive Rush, it delivers strong damage and positioning advantages.
- Drive Impact punish: After a wall-bounce DI, MP→HP → 236HK → 623LP → 214MP converts the wall-bounce into maximum damage.
- Counter Hit confirm: On Counter Hit, MP has enough advantage to confirm the hit visually before completing the HP, giving time to cancel into 214HP safely.
- SA3 extension: MP→HP → 214HP → 236236P is possible at any point after 214HP, turning a standard combo into a round-ending sequence.