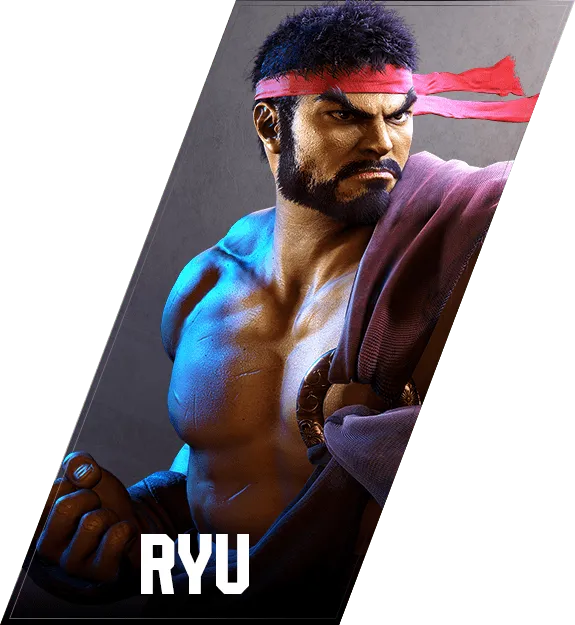

リュウ
Ryu — 角色使用
Crouching Medium Punch
Notes on how Ryu uses Crouching Medium Punch — combo routes, pressure, pokes — to be added.
Jumping Light Punch
Notes on how Ryu uses Jumping Light Punch — combo routes, pressure, pokes — to be added.
Jumping Medium Punch
Notes on how Ryu uses Jumping Medium Punch — combo routes, pressure, pokes — to be added.
Jumping Heavy Kick
Notes on how Ryu uses Jumping Heavy Kick — combo routes, pressure, pokes — to be added.
Jumping Light Kick
Notes on how Ryu uses Jumping Light Kick — combo routes, pressure, pokes — to be added.
Jumping Medium Kick
Notes on how Ryu uses Jumping Medium Kick — combo routes, pressure, pokes — to be added.
Aerial Tatsumaki Senpu-kyaku
Trajectory change
Used to nudge your jump arc and disrupt anti-air timing. The shift is small and there's no down hitbox, so don't overrate it — going for the cross-up hit is more reliable.
Cross-up
While the leg is reversed, a cross-up hitbox appears — usable from a tight short-jump for ambiguous oki. Confirm into SA1 for damage.
214KK
Stationary fast spin with 1.5× the grounded OD damage — primarily a combo piece.
- Combos from 6HK / JMP for big damage
- Reaches SA3 in the corner — kills
- May 2024 patch added a combo-target hitbox so opponents can no longer slip out
Pitfalls
- The trajectory shift is small; don't expect it to dodge dedicated anti-airs
- Recovery is worse than a normal jump — punished if read
(Denjin Charge) Hashogeki
Hashogeki in Denjin Charge state. Heavy (214HP) is +3 on block, enabling strong continued pressure. See the main Hashogeki (214P) page for full usage notes.
(Denjin Charge) OD Hashogeki
OD Hashogeki in Denjin Charge state. +4 on block provides strong continued pressure. Note the difference from the non-Denjin OD Hashogeki.
(電刃錬気)SA1 真空波動拳
Notes on how Ryu uses (Denjin Charge) SA1 Shinku Hadoken — combo routes, pressure, pokes — to be added.
(Denjin Charge) Hadoken
Hadoken in Denjin Charge state. At -1 on block it's far safer than the normal version and sees heavy use in neutral. See the main Hadoken (236P) page for full notes.
(Denjin Charge) OD Hadoken
OD Hadoken in Denjin Charge state. +2 on block enables pressure continuation.
SA2 真波掌撃【Lv1】
Notes on how Ryu uses SA2 Shin Hashogeki [Lv1] — combo routes, pressure, pokes — to be added.
SA2 真波掌撃【Lv2】
Notes on how Ryu uses SA2 Shin Hashogeki [Lv2] — combo routes, pressure, pokes — to be added.
SA2 真波掌撃【Lv3】
Notes on how Ryu uses SA2 Shin Hashogeki [Lv3] — combo routes, pressure, pokes — to be added.
Tatsumaki Senpu-kyaku
Strength selection
- L (214LK) — light-starter combos. Front-step into oki
- M (214MK) — combo carry, decent drive-gauge return
- H (214HK) — long travel, lands on the cross-up side. Useful for escaping the corner; oki is weak
- OD — stays in place, used for corner extensions; pulls real damage from light-starter combos
As a combo tool
- Mid-screen ender: 2LP × 2 → LK → 214LK for oki continuation
- Mid-range: 2MK → 236MK is standard, but 214MK works when you want carry
- Corner carry: MP → 2MP → 214MK
- Tip-range hits leave the opponent floating in front — confirm into SA1 or 623P
Fireball escape
Lower-body invincibility ducks Ryu mirrors and most casts' ground fireballs. Don't reach with it — -15 on block is round-changing.
Use it when:
- The opponent has just switched from anti-airing to checking jumps
- Light Hadokens are being thrown on autopilot
- A burned-out opponent is forced to throw a fireball
Corner escape
H Tatsumaki travels far enough to leave the corner. Risky if the opponent's oki is set, but viable when their plan isn't locked in.
Pitfalls
- Never raw. Combos and fireball reads only
- High-level players punish lazy Tatsumakis on sight; reduce frequency vs. stronger opposition
- Air Tatsumaki is a separate move with separate uses
Hashogeki
Notes on how Ryu uses Hasshoken — combo routes, pressure, whiff punishes — to be added.
Denjin Charge
When to charge
22P has no hitbox and 52F total — only safe windows allow it.
- After a knockdown (forward throw, 214LK, etc.)
- During the recovery of a long-range Hadoken
- Round start, when the gap is wide
- Before going Burnout, when the corner is yours to manage
No restock
Only one stock. You can't double up. Plan the consume-and-rebuild rhythm.
Signature route: drive-rush 2MK → Denjin H Hashogeki
- Hit: launcher into a heavy combo
- Block: +3 → keep your turn with strike / throw
- The strongest 2MK confirm in Ryu's kit
Corner damage routes
- 2MP → Denjin 214PP → HP → HK → HP → 4HP → 236HK → 623LP → SA3 (~6000 damage)
- Denjin 214PP → SA2 2-stage hold = SA3-tier reward
Saving the stock
Since May 2024, L / M Hadoken and Hashogeki revert to normal versions during Denjin without consuming the stock. You can throw fireballs while saving Denjin for the H / OD payoffs.
Pitfalls
- 52F is "eat one Hadoken / DI" worth of recovery. The window is non-negotiable
- Only one stock. Wasting it or dying before consuming it is a major round-loss
SA3 Shin Shoryuken
Notes on how Ryu uses SA3 Shin Shoryuken — combo routes, pressure, pokes — to be added.
SA1 Shinku Hadoken
Notes on how Ryu uses SA1 Shinku Hadoken — combo routes, pressure, pokes — to be added.
High Blade Kick
Strength selection
- L (236LK) — main 2LP confirm. 14F startup, -11 on block; corner late hit confirms into 623P
- M (236MK) — used in mid/heavy starters. 18F, -8 on block but tip range is up to -2; usable as a poke from outside punish range
- H (236HK) — exclusive follow-up after 4HP. 27F startup; tip-range block is nearly safe. Corner hit goes into 623LP, CH knocks down for free, SA1 confirms
- OD — wallbounces in the corner for a follow-up. May 2024 patch relaxed scaling and reduced startup so it links like the M version
Combos
- 2MK → 236MK: the 2MK confirm staple; max-input to beat DI
- 2MK → 236KK: damage-priority route from 2MK
- (J)HK → 2MK → 236MK: jump-in basic
- 4HP → 236HK: 4HP-only link, big reward when confirmed
- L for mid-screen knockdown, OD in the corner for the bounce extension
Pitfalls
- L (-11) and OD are full-punish on block — combos only
- Even M (-8) is punished by 8F-reach buttons; tip-range only
- H (27F startup) is jump / parry bait — combo-only
- SF5 carryover habit: LP starters do not confirm into 236LK in SF6
Hadoken
Strength selection
- L Hadoken (236LP) — slow startup, short recovery, slow projectile. Best for using the fireball as a shield while you walk forward and stack a "safe-jump fireball"
- M Hadoken (236MP) — middle ground; throw it in to disrupt the opponent's rhythm
- H Hadoken (236HP) — fast startup, fast projectile. Worse on block but harder to react to
- OD Hadoken (236PP) — 2 hits, fast, knockdown. Beats most other OD fireballs cleanly. Confirms into SA1 when you have meter
Safe fireball
A second Hadoken thrown so it leaves your hand right as the first one fades is a "safe fireball" — if the opponent jumps the first you have time to anti-air; if they wait, the second one hits. Mandatory Ryu pattern.
Denjin synergy
While 22P is stocked, H Hadoken becomes a 2-hit fast projectile with very small recovery — great for advancing and pressure. OD Hadoken becomes a 3-hit move that erases most other OD fireballs. After the May 2024 patch, L/M Hadoken throw a normal version while Denjin is active without consuming the stock, so you can save Denjin for the strong/OD versions.
Pitfalls
- Throwing 236P at close-to-mid range gets jumped or DI'd. OD Hadoken in particular costs 2 drive blocks if it whiffs
- Cancelling 2MK into 236P is relatively safe because the spacing pushes Ryu out
- May 2024 shrunk the forward hurtbox right before Hadoken's startup — the move is harder to whiff-punish than before
Low Spinning Sweep
Notes on how Ryu uses Low Spinning Sweep — combo routes, pressure, pokes — to be added.
Crouching Heavy Punch
Notes on how Ryu uses Crouching Heavy Punch — combo routes, pressure, pokes — to be added.
Crouching Light Kick
Notes on how Ryu uses Crouching Light Kick — combo routes, pressure, pokes — to be added.
Standing Light Punch
Notes on how Ryu uses Standing Light Punch — combo routes, pressure, pokes — to be added.
Crouching Medium Kick
Notes on how Ryu uses Crouching Medium Kick — combo routes, pressure, pokes — to be added.
Axe Kick
Notes on how Ryu uses Axe Kick — combo routes, pressure, pokes — to be added.
Short Uppercut
Notes on how Ryu uses Short Uppercut — combo routes, pressure, pokes — to be added.
Somersault Throw
Notes on how Ryu uses Somersault Throw — combo routes, pressure, pokes — to be added.
Shoryuken
Strength selection
- L (623LP) — 5F startup, longest anti-air invincibility. The default choice
- M (623MP) — 6F. Mid ground, used in combos
- H (623HP) — 7F, strong horizontal hitbox. Use against deeper jumps; combos into SA3 for the kill
- OD (623PP) — 6F, fully invincible. Reversal — but -40 on block
As an anti-air
- For straight-up or shallow jumps: L Shoryuken. Wait for the jump to drop in for max damage
- For mid-range jumps: H Shoryuken; the wider hitbox catches them
- For ambiguous crossups: 4HP or air-to-air JLP — Shoryuken can lose to axis shifts
- 623HP → SA3 is the lethal route — go for it whenever you have meter
As a combo ender
- The default mid-screen combo ender, usually H. Tight oki — most opponents go for mash or just-parry
- OD Shoryuken extends into oki even mid-screen, but quick-rise lets the opponent escape your shimmy
As a reversal
OD Shoryuken beats both strikes and throws thanks to full invincibility, ideal against opponents with heavy oki patterns. Don't telegraph it — once it's blocked, the round is essentially over.
Pitfalls
- Even L Shoryuken is -23 on block — most casts have an SA1 punish ready
- A whiffed Shoryuken loses you the round. Don't reach with it; if you don't know a jump is coming, use 4HP or stay grounded
Whirlwind Kick
Notes on how Ryu uses Whirlwind Kick — combo routes, pressure, pokes — to be added.
Solar Plexus Strike
Notes on how Ryu uses Solar Plexus Strike — combo routes, pressure, pokes — to be added.
Collarbone Breaker
Notes on how Ryu uses Collarbone Breaker — combo routes, pressure, pokes — to be added.
Standing Heavy Kick
Notes on how Ryu uses Standing Heavy Kick — combo routes, pressure, pokes — to be added.
Standing Heavy Punch
Notes on how Ryu uses Standing Heavy Punch — combo routes, pressure, pokes — to be added.
High Double Strike
Notes on how Ryu uses High Double Strike — combo routes, pressure, pokes — to be added.
Standing Light Kick
Notes on how Ryu uses Standing Light Kick — combo routes, pressure, pokes — to be added.
Shoulder Throw
Notes on how Ryu uses Shoulder Throw — combo routes, pressure, pokes — to be added.
Standing Medium Kick
Notes on how Ryu uses Standing Medium Kick — combo routes, pressure, pokes — to be added.
Standing Medium Punch
Notes on how Ryu uses Standing Medium Punch — combo routes, pressure, pokes — to be added.
Fuwa Triple Strike (3rd Hit)
Notes on how Ryu uses Fuwa Triple Strike (3rd Hit) — combo routes, pressure, pokes — to be added.
Fuwa Triple Strike (2nd Hit)
Notes on how Ryu uses Fuwa Triple Strike (2nd Hit) — combo routes, pressure, pokes — to be added.
CA Shin Shoryuken
Notes on how Ryu uses CA Shin Shoryuken — combo routes, pressure, pokes — to be added.